The provisioning task helps you with the following premigration preparations:
- Automap and provision shared workspaces by source workspace name.
- Provision shared workspaces that were mapped using the Map from File action.
- Resolve workspace naming conflicts.
- Apply permissions to target workspaces based on source permissions.
- Reprovision workspaces to refresh permissions on target workspaces.
In this topic:
Considerations
- After all source-shared workspaces are discovered, you can begin provisioning workspaces in the target tenant using a Workspace Provisioning task.
- During provisioning of the workspace in the target tenant, the license mode set to Pro license.
- Workspaces must be provisioned before their contents can be migrated.
- Verify that all associated accounts are matched or migrated before creating the provisioning task.
- When workspaces are provisioned, the service principal used by ODMPBI in the target tenant will be assigned to the workspace with the Admin role.
- If workspaces are to be merged, the Quest service principal or security group created during the setup process in the target tenant must be added to the target workspace with the Admin role before performing provisioning.
- The Power BI service requires at least one user account or security group with the Admin role to manage a workspace in the Power BI portal.
- If workspace access permissions are changed in the source environment after a workspace is provisioned, you must re-provision the workspace to refresh the permissions on the target workspace.
- Workspaces in the target tenant can take up to 2 hours to become available and for permissions updates to be fully processed in the target tenant after a workspace is provisioned.
Starting a Workspace Provisioning Task
- Log in to Quest On Demand and choose an organization if you have multiple organizations.
- From the navigation pane, click Migrate > Projects to open the My Projects list.
- Create a new project or open an existing project.
- Click Power BI from the project tiles, or click Open from the Power BI tile to open the Power BI migration workspace.
- Click the Workspaces tab and select one or more workspaces.
- From the Actions menu, click Provision. The New Workspace Provisioning Task wizard starts. Each step is described below:
- Provision Options
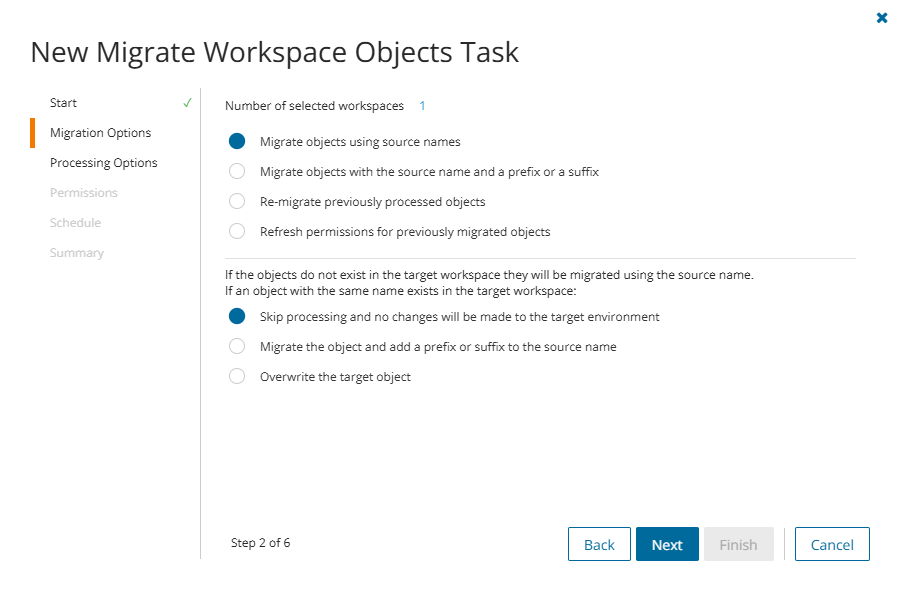
Choose from the following options for the processing that the task should complete
- Provision workspaces using source workspace name or Map from File – Select this option to preform auto-mapping of the selected workspaces by source name to provision the workspaces in target or to complete provisioning for workspaces that were manually mapped using the Map from file action.
If a source workspace name does not exist on target, a new workspace will be provisioned with the source name.
If a workspace has been mapped from file, the target workspace name provided will be used to provision a new workspace or merge with an existing workspace.
If a source workspace with the same name exists in the target environment, choose from the following options to determine how the task will manage collision handling to resolve naming conflicts:
- Skip processing, and no changes will be made to the target environment - select this option to prevent a mapping from being performed and skip any processing of permissions for the workspace.
- Merge with the existing workspace in the target environment - select this option to create a mapping to the target workspace and merge permissions if required.
- Provision a new workspace in the target environment with the source name and a prefix or suffix - select this option to create a new workspace name based on the text provided. If the new workspace name also already exists it will be skipped.
TIP: Use Map from file to provision the new workspace with custom name, or to create a custom mapping.
- Provision all workspaces with the source name and a prefix or suffix - select this option to rename all workspaces being processed and create new workspaces with the text provided. If the new workspace name already exists it will be skipped.
TIP: Use this option to bulk archive selected source workspaces into the target environment.
- Refresh permissions for previously provisioned workspaces - select this option to re-provision workspaces based on the previously mapped name. This will allow for refreshing permissions on the target workspace in the event of changes to the source workspace permissions. The settings for processing the permissions can be completed on the Permissions step. This option will not create new workspaces.
- Provision workspaces using source workspace name or Map from File – Select this option to preform auto-mapping of the selected workspaces by source name to provision the workspaces in target or to complete provisioning for workspaces that were manually mapped using the Map from file action.
- Permissions
Choose from the following options to determine how permissions are managed:
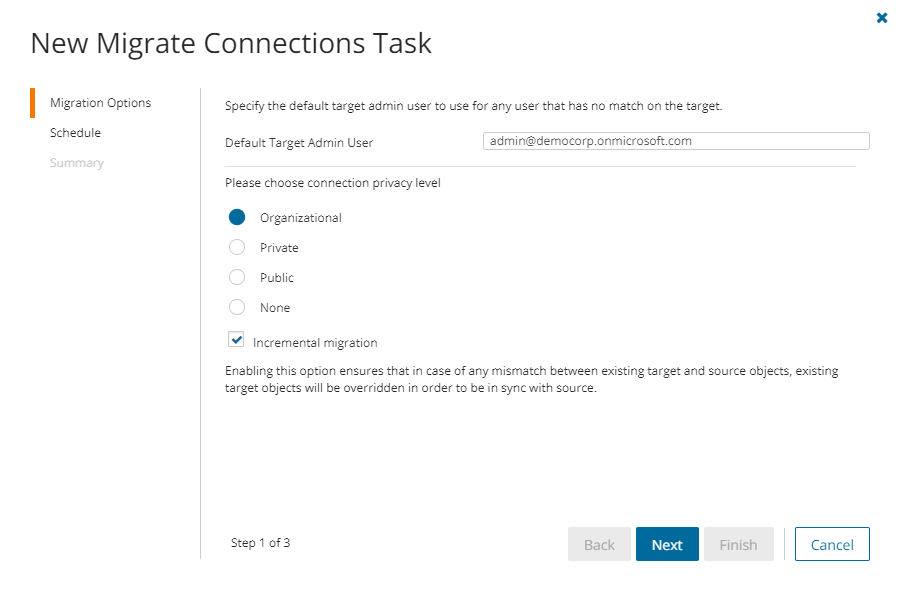
- Default Target Admin User - specify a user account in the target environment that will be set with the Admin role on provisioned workspaces. This account is used to ensure that management access to a workspace in the Power BI portal is not lost.
- Set Default Target Admin User as workspace Admin - select this option to apply the Default Target Admin User to provisioned workspaces. If this option is not selected then the Default Target Admin User will not be applied to workspaces and this may result in cases where a target workspace cannot be managed in the Power BI portal post provisioning.
Choose how the Admin account will be used:
- Set Always - select this option to always apply the Default Target Admin User permissions during provisioning.
- Set if no workspace Admin user is mapped - select this option to apply the Default Target Admin User only when there is no other account with the Admin role included in the account mapping.
- Set target workspace permissions - select this option to apply permissions from the source workspace to the target workspace using the account mappings. If this option is not selected the provisioning may still apply if the Default Target Admin User is selected.
Choose how target permissions are set:
- Add from source - source accounts and groups that are not in the target are added with the source roles. Existing target accounts and groups are not changed.
- Update from source - source accounts and groups that are not in the target are added with the source roles. Source accounts and groups that are already in the target are changed to the source roles. Target accounts and groups that are not in the source are not changed.
- Synchronize with source - target accounts and groups are set to the source accounts and groups roles. Target accounts and groups that do not exist in the source are removed.
- Reporting
- Generate AI summary - select this option to generate an AI summary of the task, as well as each object in the task.
NOTE: If this is the first time you have selected this option, the Quest Policies prompt appears. Read the Quest AI Terms of use and click Accept to proceed. This s a one-time acceptance prompt and your acceptance covers all migration tasks that support the AI migration assistant.
- Generate AI summary - select this option to generate an AI summary of the task, as well as each object in the task.
- Schedule
- Choose from one of three options to schedule the task. The scheduler will be activated after you complete the task wizard.
- Run now - task runs immediately.
- Run later - task must be started manually.
- Schedule - task will be started at a future date and time entered in the corresponding calendar field.
- Click Next.
- Choose from one of three options to schedule the task. The scheduler will be activated after you complete the task wizard.
- Summary
- Verify the task specifications as described below:
- Name - name of the task. The default name is Provision Workspaces. You can specify a custom name.
- Provisioning options - indicates the provisioning options selected.
- Permissions - indicates the permission options selected.
- Scheduled start - date and time when the task will start. Now indicates that the task will start immediately.
- Click Back to revise or review a previous step or click Finish to complete the task wizard and start the task as scheduled.
- Verify the task specifications as described below:
- When the task completes, the Workspace State column value of the selected workspaces in the Workspaces list changes to Provisioned, and the.Target Workspace column indicates the mapped Workspace in the target tenant (unless there is a custom mapping, in which case it should remain the same).