Introduction
Domain Rewrite or Email Rewrite (ERS) is a powerful feature of On Demand Migration. With this capability, end users can communicate from a common email domain from day one on both inbound and outbound mail so you can appear as a unified, cohesive brand. What is more, you get all of this without any downtime - so you won’t have critical gaps in communication.
This quick-start guide explains how to configure On Demand Migration Domain Rewrite service between two Microsoft 365 tenants.
In this chapter:
Requirements
Project Requirements
General
- Client is licensed for On Demand Migration Domain Rewrite
Microsoft Entra ID Application Account
- An account with Global Administrator Role is required for each Microsoft 365 tenant to grant permissions and establish connection when adding a Cloud Environment.
Microsoft Entra ID PowerShell Accounts
- Three (3) PowerShell accounts are automatically created to read and update objects in the cloud. To do this an OAuth token is used from the account used to add the Cloud Environment.
- At least one (1) E1 or above license must be available to be assigned to the PowerShell account for Domain Move/Domain Rewrite Projects.
- The accounts must be excluded from MFA requirements.
Additional Requirements for Hybrid Tenants
|

|
NOTE: A local Directory Sync agent is only required when working with Hybrid MailUsers (a mailuser object synced with a local active directory object). |
General
- One dedicated server for each On-Premise Active Directory to install the Directory Sync agent
- Permissions to download and install Directory Sync agent
Local Active Directory Account
- Agent installer will prompt for a domain account with permission to read and write on-premises Active Directory.
Hardware
The local agent must meet the following minimum hardware requirements:
- At least one (1) Windows Server 2016, 2019, 2022 or 2025.
- Additional Windows servers may be deployed; limit of 5.
- CPU: 4 Cores
- Memory: 4GB Free
- Disk: 40GB Free Disk Space excluding Operating System.
|
|
NOTE: Do not install local agents on AD domain controllers in a production environment. |
Software
The local agent must meet the following minimum software requirements:
- Windows Server 2016, 2019, 2022 or 2025.
- .NET 4.7.2. NOTE: .NET will automatically be installed if needed.
- TLS 1.2 or higher
Domain and Forest Functional Levels
Network
- Directory Sync web interface use TCP port 443 (HTTPS).
- Agent web connections use port 443 to Directory Sync host application.
- DCs use TCP ports 139, 389 (UDP), 445, and 3268.
On Demand Migration Project Setup
This topic describes how to set up the On Demand Migration Domain Rewrite Project.
Adding a Microsoft 365 tenant
Follow these steps to add each Microsoft 365 tenant for On Demand Migration. If there is an existing tenant from another project, it can be reused.
- Log in to Quest On Demand.
- Navigate to Tenants. The Office 365 Tenants page opens.
- Click Add Tenant. The Add Tenant page opens.
- Select Add Commerical or GCC Tenant. You are redirected to the Azure sign in page
- Log in with your Global Administrator account for the source tenant.
- Accept the requested Application Permissions
- Click Finish.
- Repeat steps 2 – 8 for the target tenant.
Setting up the Domain Rewrite Project
During project setup an Office 365 Global Administrator account is initially required to add each tenant to the project.
Follow these steps to setup the Domain Rewrite Project.
- Log in to Quest On Demand.
- Navigate to Migration.
- Select an existing migration project.
- Click Domain Rewrite from the Project Dashboard.

- Once the On Demand Migration Domain Rewrite module is loaded, click the Domain Rewrite icon in the main dash view.

- Click New Project to start the project setup wizard.
- Provide a name and description for the project and click Next.
- Click New to create a new environment or choose any existing environments from the list. Click Next once you have at least two environments selected.
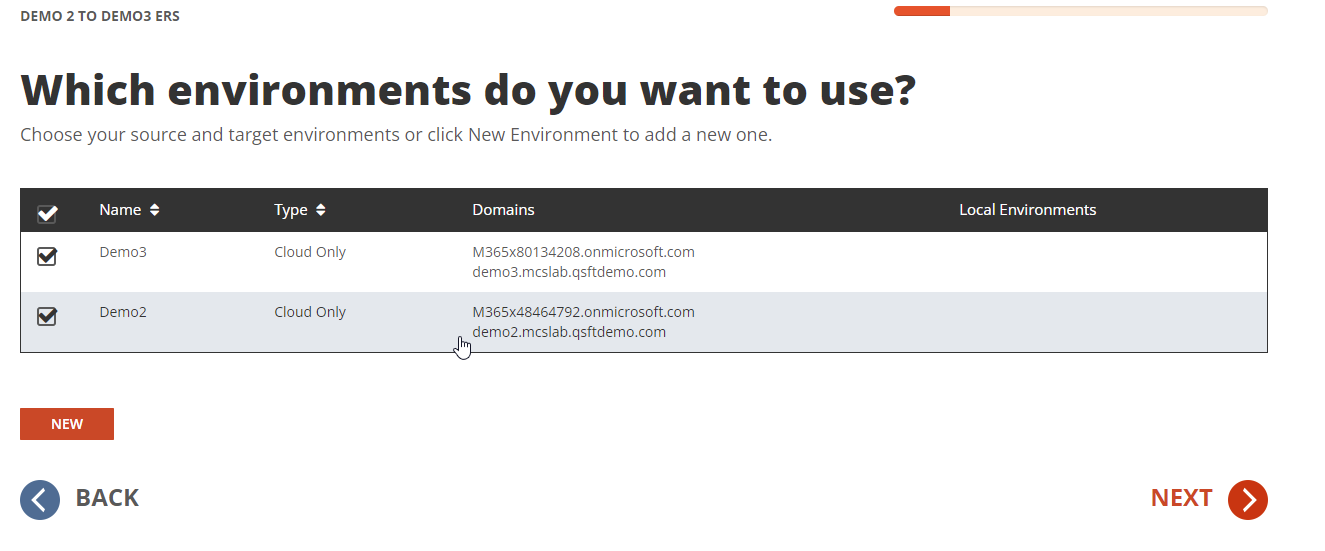
|
|
NOTE:When adding a new environment, On Demand will automatically detect if the tenant is Hybrid or Cloud Only. Hybrid Environments require additional configuration for each local Active Directory attached to the tenant. |
- If one or more of the environments you selected is connected to an On-Premises Active Directory, the screen shown below will appear. If you select the No- All Objects are Mailbox Enabled option, you will not be directed to download Directory Sync Agents. Click Next to proceed.

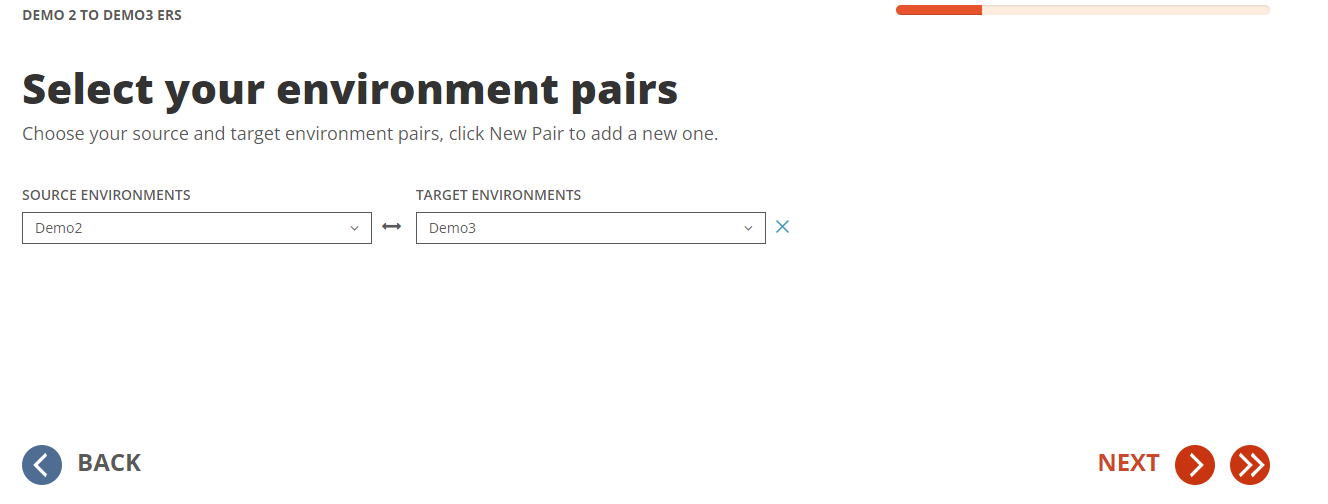
- Choose the source and target environments from the dropdown menu and click Next..
- Configure the domain mapping for your project and click Next.
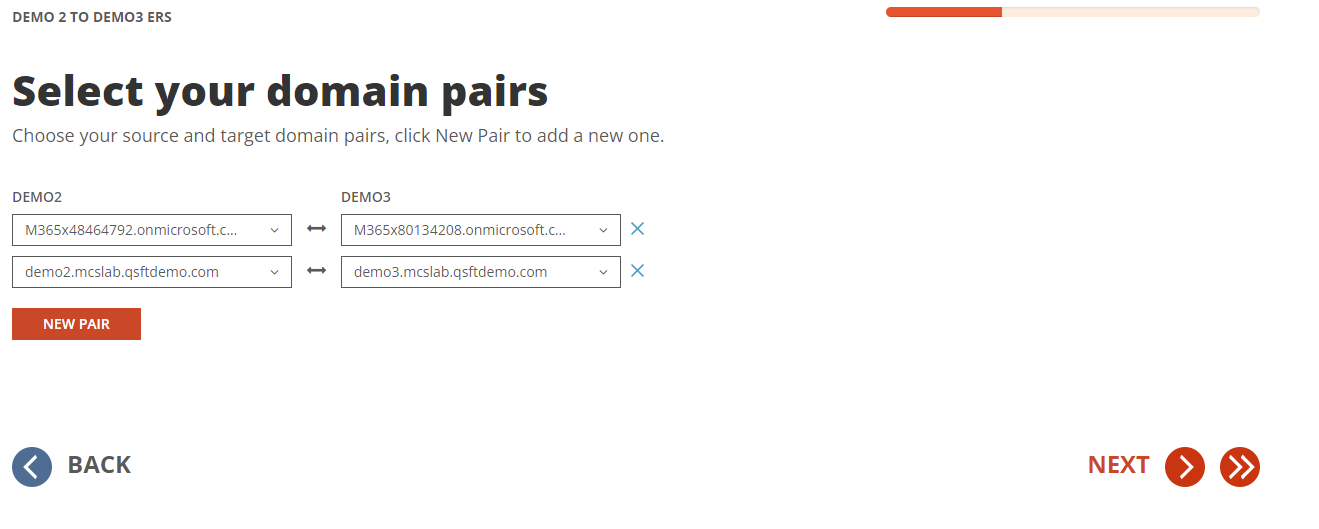
|
|
NOTE: Domain Mapping will be used to match objects and allows On Demand Migration Domain Rewrite to add the source domain to all matched target objects. |
- Configure the attributes to use to match users and groups. Once complete, click Next.
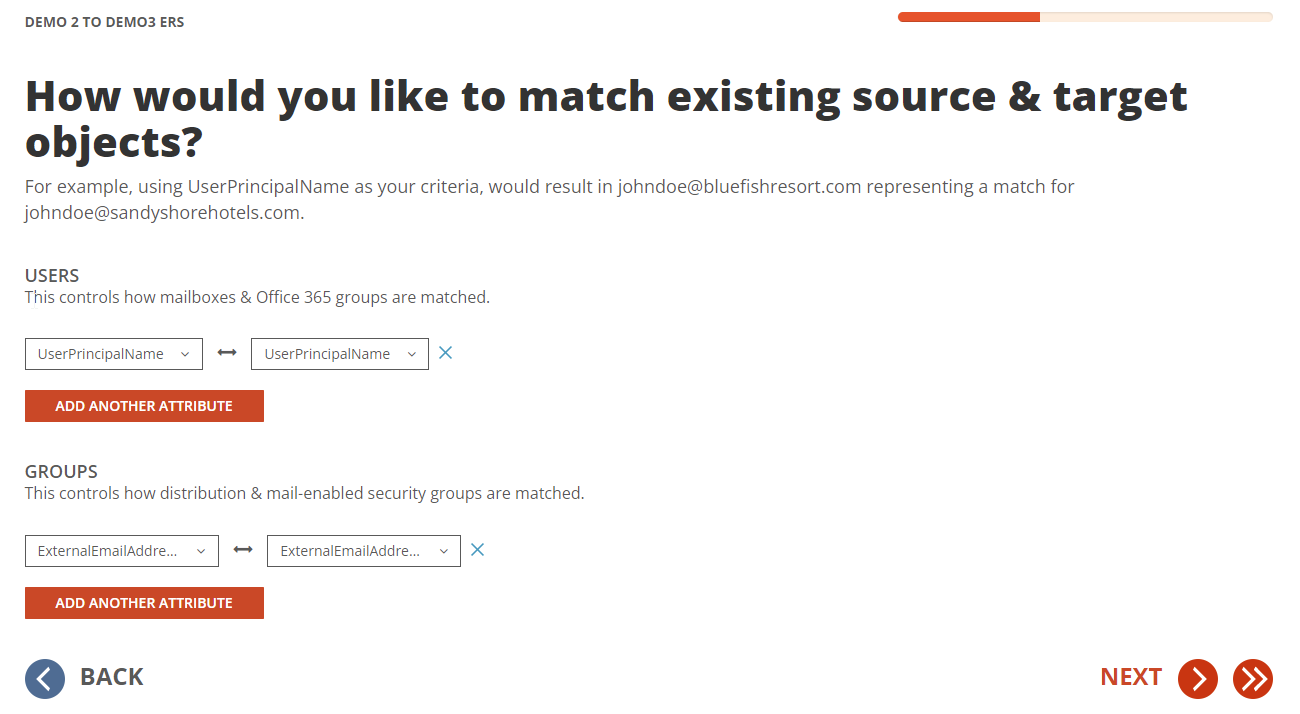
|
|
NOTE: Multiple attributes can be selected and On Demand Migration will evaluate each one until it finds a matching source and target object. If more than one attribute is selected, the first attribute that matches is used. |
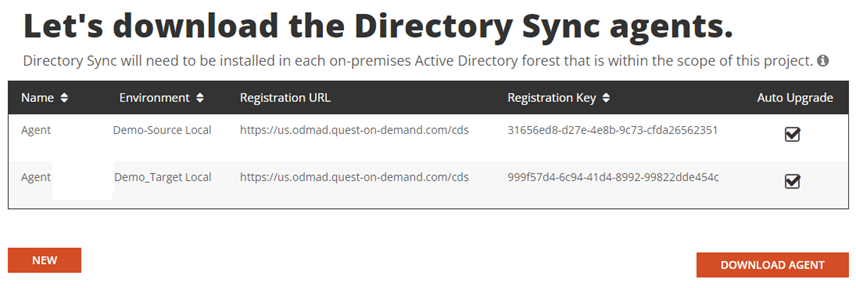
- If there are Hybrid Environments, download the Directory Sync agent and copy the Registration URL and Registration Keys for each environment. These will be used during the agent installation and configuration. This screen will not appear if you previously selected the No- All Objects are Mailbox Enabled option.
- Select Domain Rewrite Express Setup or Domain Rewrite Advanced Setup to continue with Domain Rewrite project configuration. Click Next to proceed..

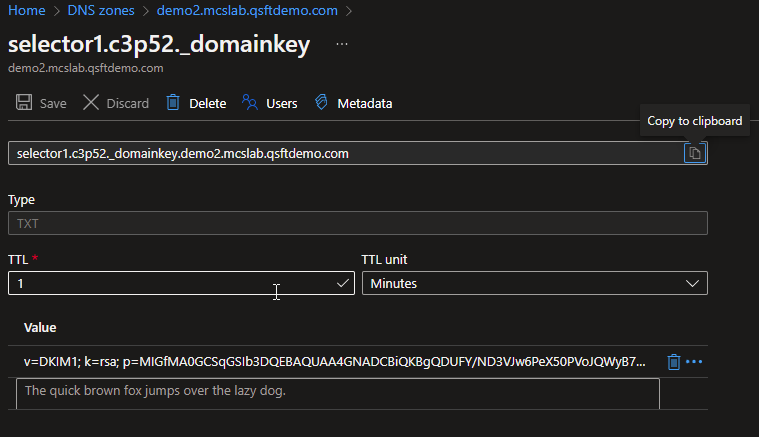
- When the Domain Rewrite Advanced Setup option is used, we need to configure the DKIM signature for your domain.

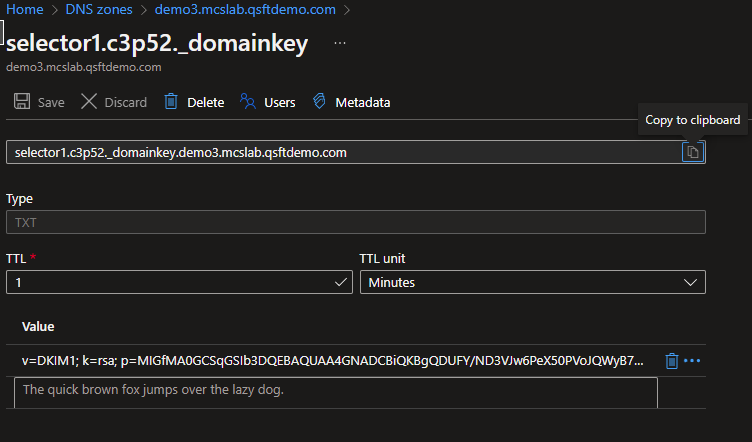
- Copy the DNS record into a notepad and create a TXT record for your domain. For this guide we will create the TXT record for each domain in Azure DNS Zone.
- Demo2.mcslab.qsftdemo.com
- Demo3.mcslab.qsftdemo.com
- On Demand Migration Domain Rewrite will validate the TXT record and update the DNS Publish Status. After the TXT Records are published, click Next to continue.

- Upload a SSL Certificate for each environment. On Demand Migration will ensure mail delivered during a domain rewrite is always encrypted, secure and private by using this SSL Certificate. Click Next once the certificates are uploaded.

|
|
NOTE: A single subject certificate with both private and public key must be used. |
- Review the project configuration settings and click Next.
- Enter an email address and click on Start Discovery to finish the project setup.
Validating Object Matches
This section provides a step-by-step guide on how to validate object matching.
- Log in to Quest On Demand.
- Navigate to Migration. Select your project and click Domain Rewrite.
- Select the Domain Rewrite project previously configured.
- From the Domain Rewrite Project dashboard, verify the Users, Groups and Domain Matching information:

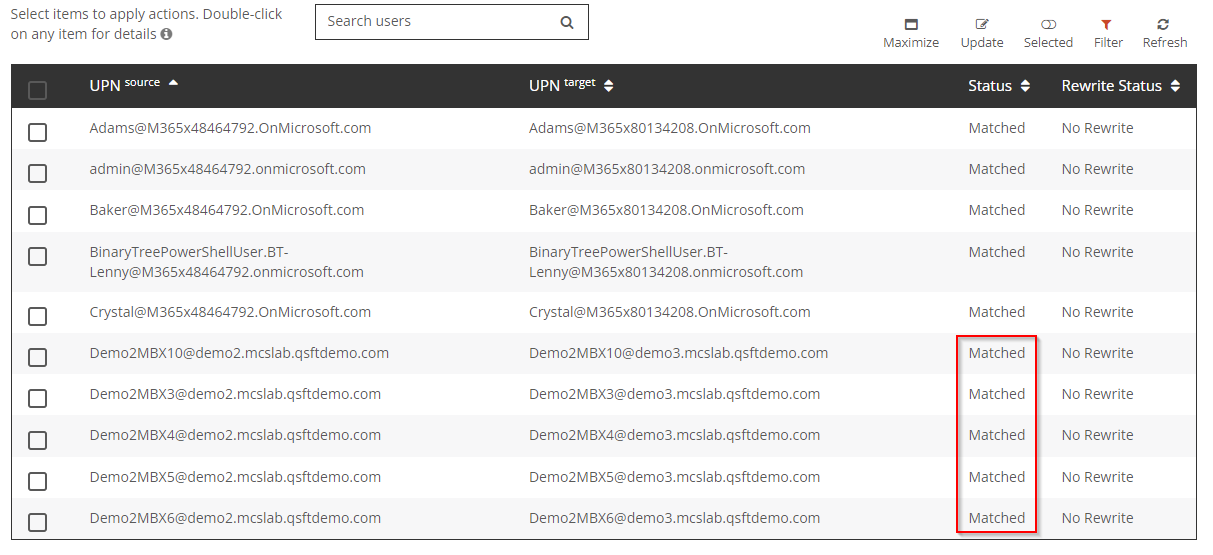
- Click on the total users link to see all Users, then click on Filter and select the Matched checkbox.
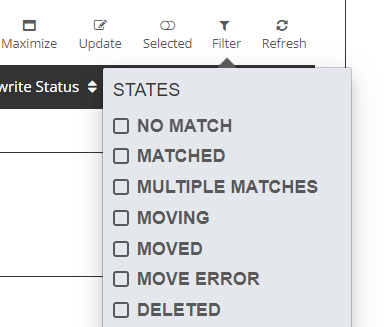
- Validate that the users are correctly matched, as shown below.
If the Domain Rewrite project is unable to automatically match the users by attributes, you can upload a user list to be used as a mapping file. This process will only update the users found in the file and will not impact any other users in your project.
Uploading a CSV for User Matching
- Click Update to open the CSV upload wizard.

- Click Download Example List.
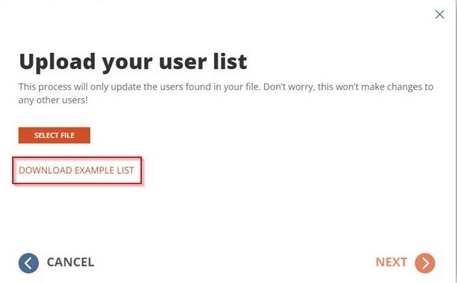
- Use this example file to build your mapping list.
- Populate the Source UPN and Target UPN columns with the desired mappings.
- You can leave the Wave column blank.
- The mapping list can contain a maximum of 1000 lines. You can create multiple mapping files and rerun the wizard to upload additional mappings.
- After building your list, save as a CSV file.
- Click Select File.
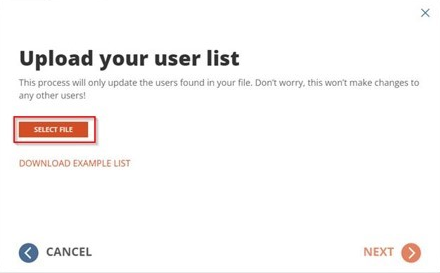
- Locate the CSV file and click Next.
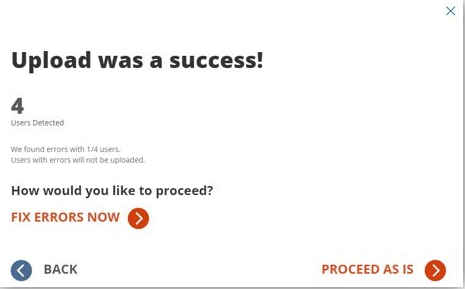
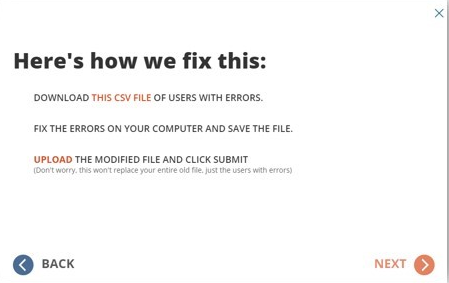
- If there are errors within the file, click Fix Errors Now to review the errors.
- Download the CSV file of users with errors.
- Examine the file and fix any errors found.
- Re-upload the modified file.
- If errors are still found, you can repeat this process as necessary.
- You can also click Proceed As Is to ignore the accounts with errors and map the remaining users.
- If there are no errors within the file, the upload is complete.
- Validate that the users are correctly matched.
Enable Rewrite
This section explains how to enable domain rewrite service for your users using On Demand Migration Domain Rewrite. Be sure to review the Frequently Asked Questions section.
In this chapter:
Enable Rewrite Source Address
- Log in to Quest On Demand.
- Navigate to Migration. Select your project and click Domain Rewrite.
- Select the Domain Rewrite project previously configured.
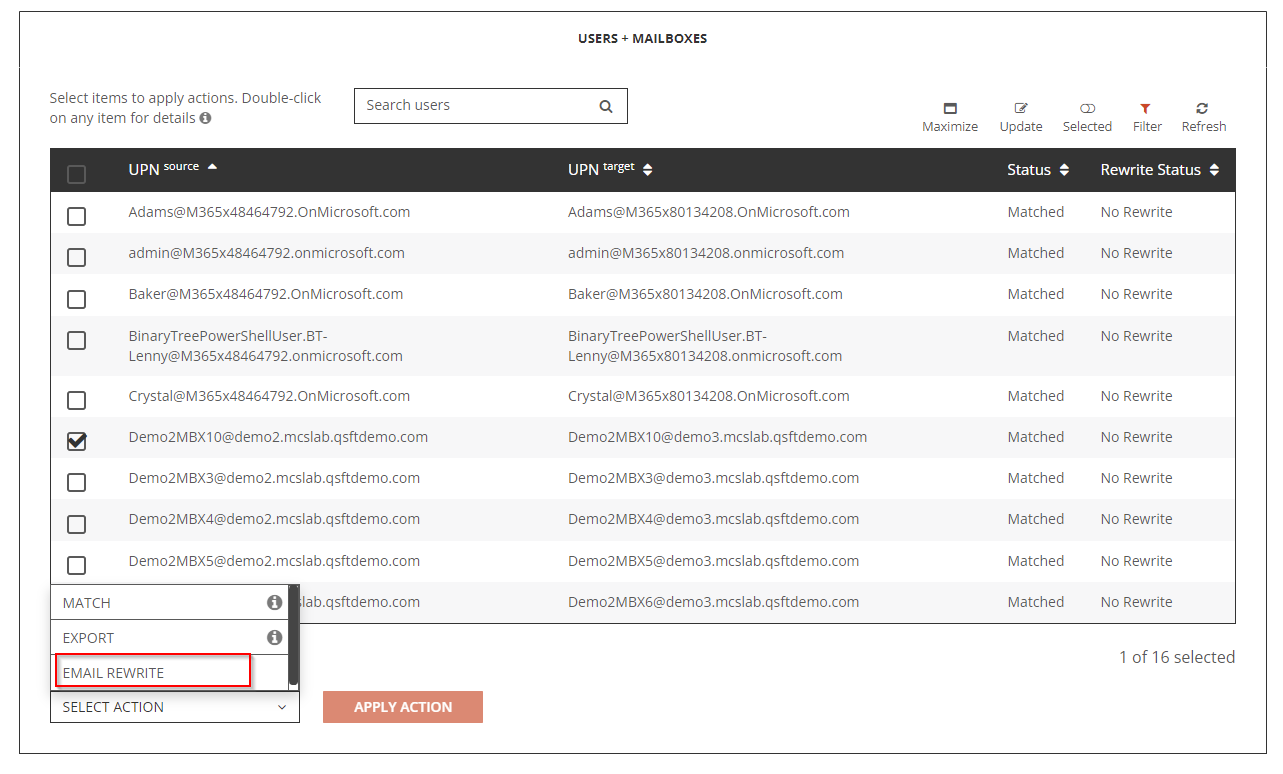
- Click on the Total Users link. Then select a matched user
- Select Email Rewrite from the action menu drop down and click Apply Action.

- Select Rewrite with Source Address option and click Submit.

- Allow the Email Rewrite Prepare job to finish. After the job is completed, the User Status should be set to Enabled Rewrite, and Rewrite Status should be set to Source Address.
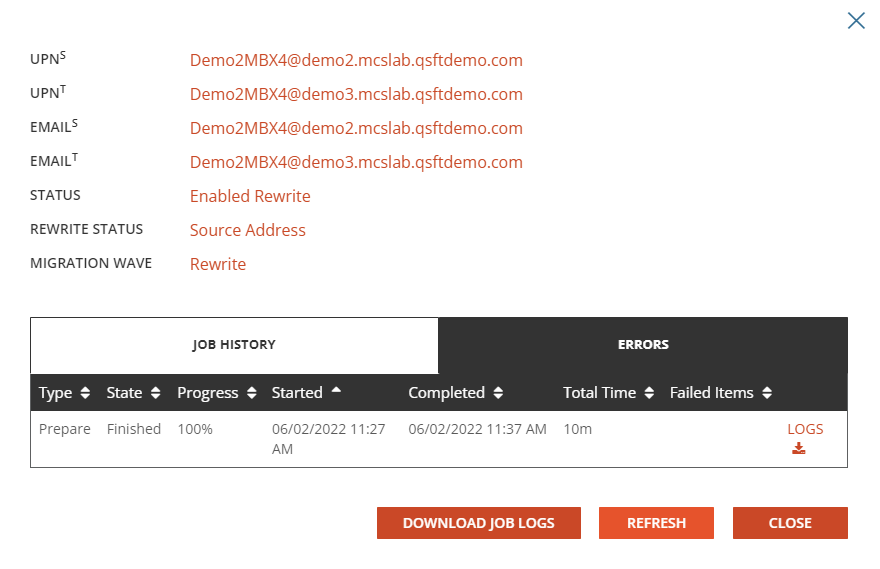
- Review the prepare job log and validate the users setting in Exchange Online.
- The Source tenant mailbox should have a forwarding rule configured and pointed to the target mailbox’s PrimarySMTPAddress

- The source tenant mailbox should be part of BT-InegrationPro-DayTwo group

Enable Rewrite Target Address
- Log in to Quest On Demand
- Navigate to Migration. Select your project and click Domain Rewrite.
- Select the Domain Rewrite project previously configured.
- Click the Total Users link. Then select a matched user
- Select Email Rewrite from action menu drop down and click Apply Action.
- Select Rewrite with Target Address option and click on Submit.

- Allow the Email Rewrite Prepare job to finish. After the job is completed, the User Status should be set to Enabled Rewrite, and Rewrite Status should be set to Target Address.
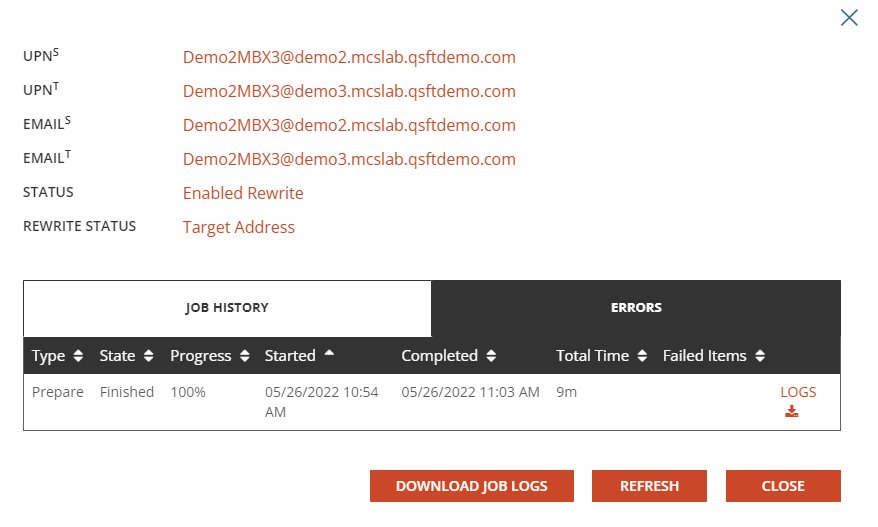
- Review the prepare job log and validate the users setting in Exchange Online.
- The target tenant mailbox should have a forwarding rule configured and pointed to the source mailbox’s PrimarySMTPAddress

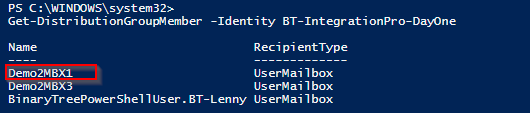
- The source tenant mailbox should be part of BT-InegrationPro-DayOne group
Validation
This section explains how to validate end users mail flow after On Demand Migration Domain Rewrite service has enabled. For the purpose of this guide, we have configured both Rewrite Target Address and Rewrite Source Address for our test users. Users with rewrite enabled will have their email address will be rewritten based on the rewrite mode as described below:
Rewrite with Target Address – Email sent by the user’s active mailbox in the source tenant will have the address rewritten for both outbound and inbound messages. Demo2MBX1@Demo2.MCSLab.qsftdemo.com is the source mailbox, all external recipients will see the email address rewritten as Demo2MBX1@Demo3.MCSLab.qsftdemo.com.
Rewrite with Source Address – Email sent by the user’s active mailbox in the target tenant will have the address rewritten for both outbound and inbound messages. Demo2MBX2@Demo3.MCSLab.qsftdemo.com is the target mailbox, all external recipients will see the email address rewritten as Demo2MBX1@Demo2.MCSLab.qsftdemo.com.
Be sure to review the Frequently Asked Questions section.
- Log in to Quest On Demand
- Navigate to Migration. Select your project and click Domain Rewrite.
- Select the Domain Rewrite project previously configured.
- Click the Total Users link.
