Features and Tools > Tools > Gallery
Toad Data Modeler allows you to reuse frequently used parts of your model, no matter if they are entities, single attributes, stored procedures or other objects. This can be done using Gallery where you can simply drag and drop items from your models and use them in your other models.
Some basic Gallery actions include:
- Creating a new Gallery
- Adding objects to a Gallery
- Inserting objects to a Model
Creating a new Gallery
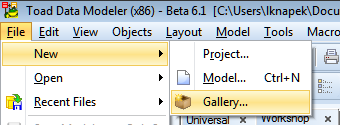
- Go to File Menu and select New | Gallery.
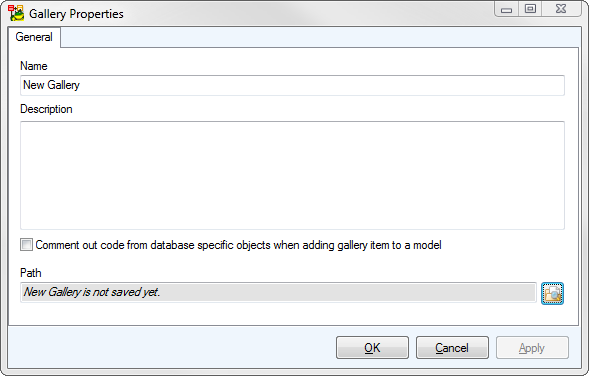
- Choose the Gallery Name, enter its Description and choose whether you want to comment out code of database specific objects (this option is explained in the Inserting objects... section).
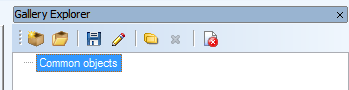
- Your Gallery will be opened in the Gallery Explorer.
Adding new objects to a Gallery
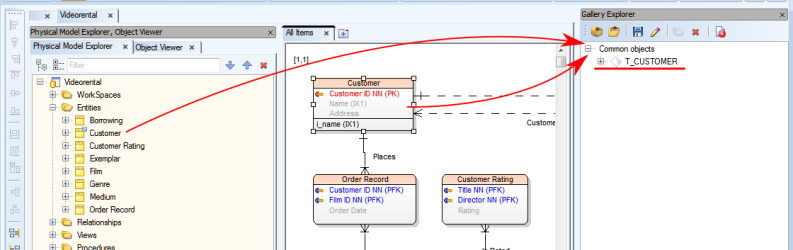
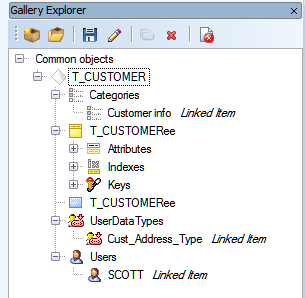
- To add a new object to a Gallery, simply drag it from Workspace or Model Explorer to and drop it on the Gallery name in Gallery Explorer.
- Your object is now part of the Gallery and you can view its properties by expanding it.
Inserting objects to a Model
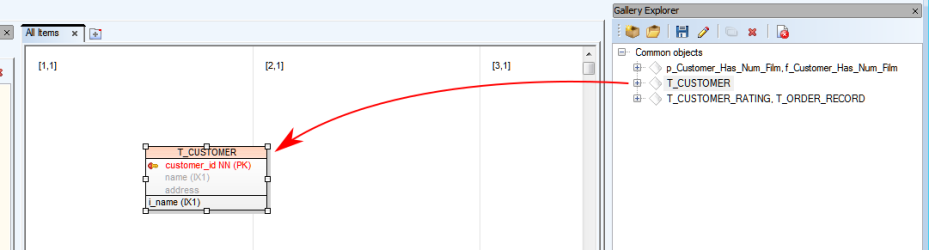
- If you have one or more objects stored in Gallery, you can insert them into a model by simply dragging them to workspace.
|

|
Note: If the model database of the object is different from the target model database (e.g. Entity created in Oracle 10g model dragged to SQL Server 2010 model), it will be converted. Note that database-specific properties (mainly SQL code) may be syntactically invalid in the target database. If you have enabled the Comment out code from database specific objects... option, the properties will be commented out and you can fix their syntax later. |
|
|
Note: You have to drag and drop the main node of the object in the Gallery to actually move the object, not any of its child nodes. |
Items in Gallery can be easily modified in a temporary model and the changes can be saved immediately.
- In Gallery Explorer, open your Gallery, right-click the item(s) you wish to modify and select Modify....
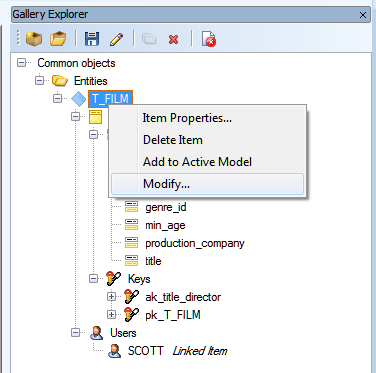
- The item(s) will be placed into a temporary model and you will be able to modify them. The exact way to modify the items varies depending on the number of objects and whether they are shortcuts or not:
- One object (not shortcut) - the Properties dialog of the objects will be opened right away.
Example - Entity added to a Gallery by dragging it from Model Explorer.
- One object (a shortcut) - the object will be shown on workspace, you can view and change its Properties.
Example - Entity added to a Gallery by dragging it from Workspace.
- Multiple objects (not shortcuts) - no Properties dialog or Workspace will be shown, you will have to open Properties by locating the object in Model Explorer.
Example - Two entities added to a Gallery at once by dragging them from Model Explorer.
- Multiple objects (shortcuts) - the objects will be shown on Workspace, you can view and change their Properties.
Example - Two entities added to a Gallery at once by dragging them from Model Explorer.
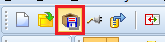
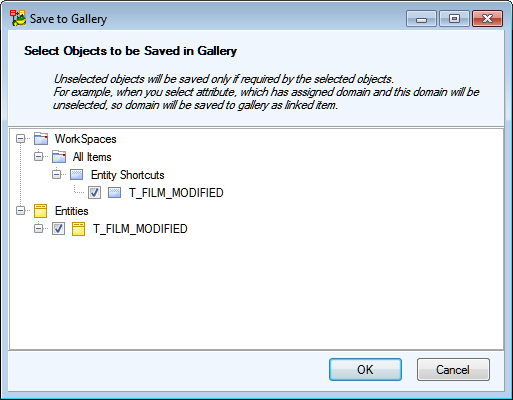
- One way or another, you should be able to modify the item(s) as you need. Once you're done, click the Save to Gallery button on File Toolbar.
- In the opened dialog, you can choose if you want to save the changes made to the modified item and its related items.
This windows is capable of displaying all of your Galleries and their objects and it also allows you to change their structure.

The Explorer toolbar contains several options:
| New Gallery |
Creates a new Gallery as described in Basic Actions. |
| Open Gallery |
Opens an existing Gallery file (.txgall file format) |
| Save Gallery |
Saves recent changes made to Gallery. |
| Properties |
Displays Gallery Properties - Name, Decription, Path. |
| New Folder |
Creates a new folder in the Gallery. |
| Delete Selected Item |
Deleted the selected object. |
| Close Gallery |
Closes (not deletes) the selected Gallery. |
Items in the Explorer also have the following unique right-click options:
| Save as (Gallery) |
Allows you to save Gallery as a .txgall file to the selected location. |
| Item properties (Item) |
Allows you to modify item properties (Name, Author, Descriptio) and view its objects. |
| Modify (Item) |
Allows you to modify the stored item in a separate model and synchronize the changes with the item in the Gallery. See Modifying Items for more information. |
Features and Tools > Tools > Model Verification
Toad Data Modeler allows you to verify your models. You can choose the items you want to verify, find out what errors and flaws your model contains and use quick fixes to resolve any issues.
To verify your model
- Select Model Menu | Verify Model... (also CTRL+F9).
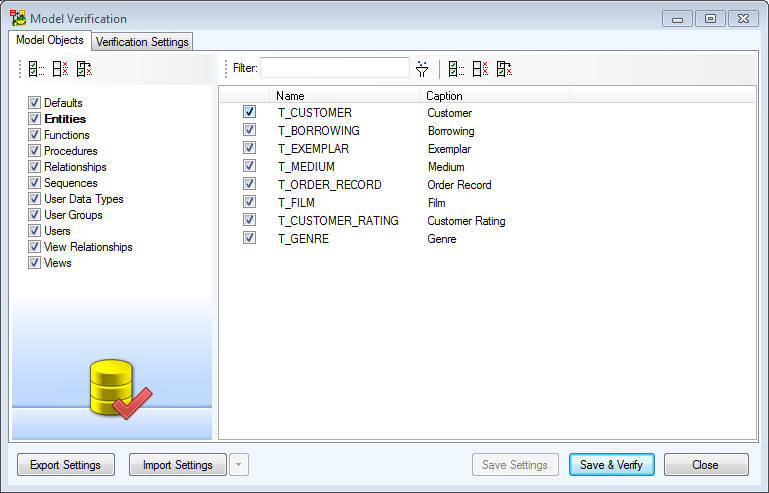
- On the Model Objects tab you can mark items for verification. Select either entire object group types or single objects.
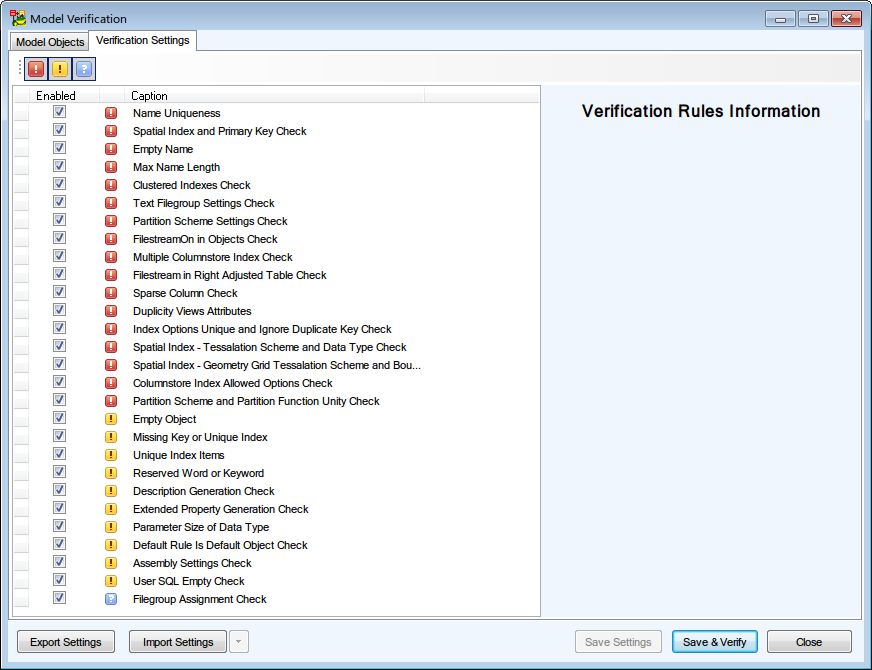
- On the Verification Settings tab select the rules that should be part of the verification. To save the settings, click Save & Verify.
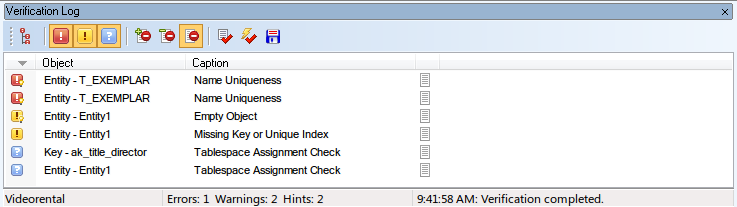
- The result of the Model Verification is shown in Verification Log, which is displayed automatically. To display the log manually, select Windows Menu | Verification Log. Objects that did not pass the verification are also marked by error/warning icons in Model Explorer.
Model Verification Form
Model Objects tab - lists all objects and object group types in your model. Checked object are those that will be verified.
Verification Settings tab - Here you can enable/disable rules that should be considered during verification. Use the buttons on the top of the form to check/uncheck all errors/warnings/hints at once.
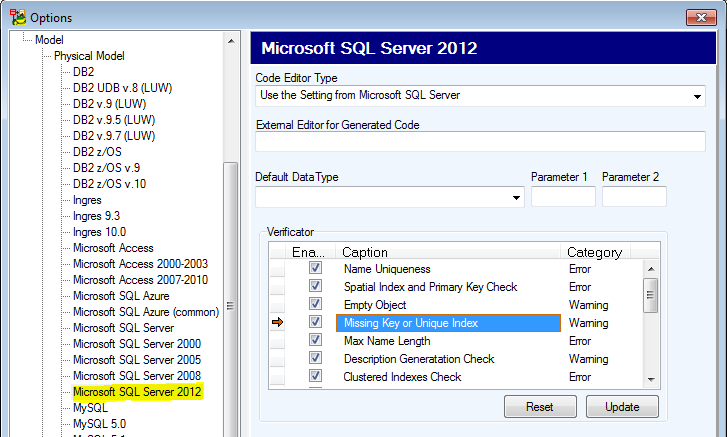
Rules are database dependent, the following screenshot shows rules for Microsoft SQL Server 2012.
Verification Log
Verify Model results are displayed in Verification Log.
Toad Data Modeleroffers Quick Fixes - recommended solutions for problems and issues found by Model Verification. Quick Fixes are accessible for problematic objects both in Verification Log and Physical Model Explorer, in right-click menu.
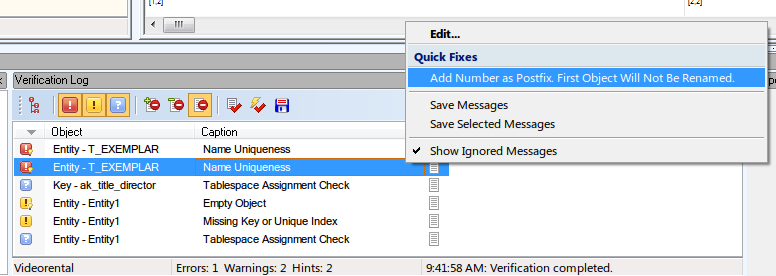
The Verification Log toolbar contains several buttons:
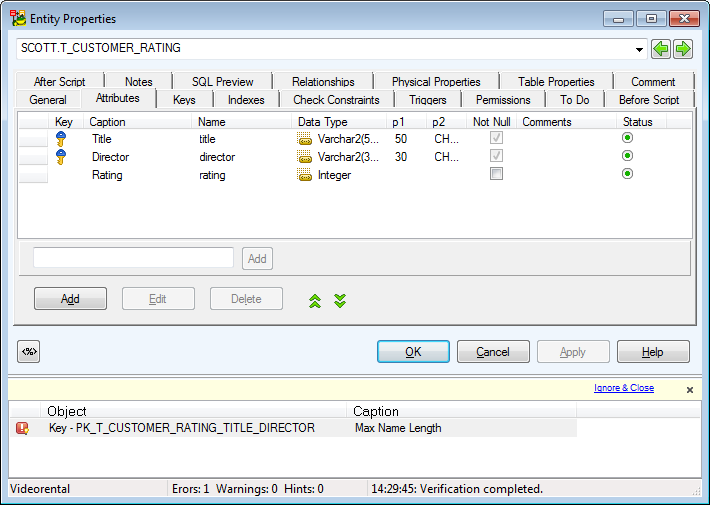
On Form Verification
Errors, warning and hints can be displayed directly in the Object Properties form, at the bottom. Every time you make changes to the object and confirm, the object is verified and all issues are displayed at the bottom, similar to the screenshot below. Quick Fixes are not available in this mode.
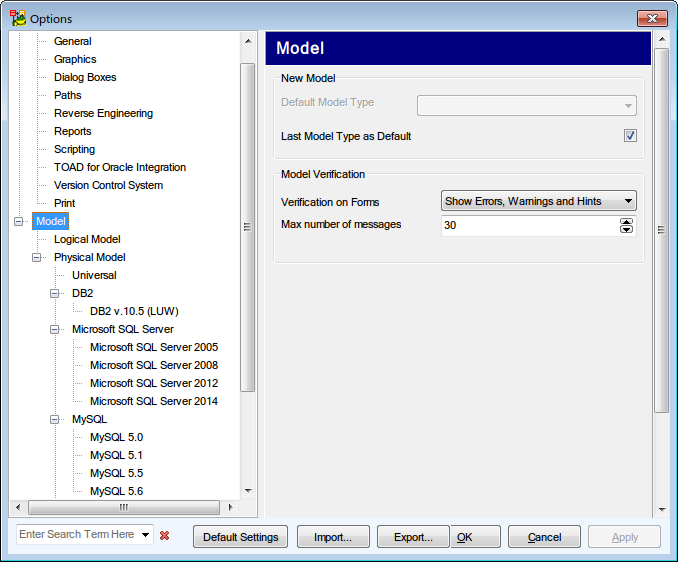
On Form Verification can be enabled/disabled in Settings Menu | Options | Model . You can also decide what kind of verification messages should be shown - errors/warning/hints.
Syntax Validity
SQL Preview tab now highlights errors in SQL script syntax.
- Check Syntax Validity to perform syntax checks in SQL Preview for the following objects:
- Procedure, Function, View, Materialized View
- User Data Type, Package (Oracle only)
- Options are available in Options | Model | Physical Model | Verification | SQL Syntax Options
- Syntax Validity check is supported for the following databases:
- IBM DB2 LUW, IBM DB2 z/OS, Microsoft Azure SQL Database, Microsoft SQL Server, MySQL, Oracle, PostgreSQL, SAP Anywhere, SAP ASE, SAP IQ, Teradata
Settings
Model Verification can be configured for each specific database. Go to Settings Menu | Options | Model | Physical Model | *Target Database*.
In the Verificator frame you can enable/disable verification rules or change their category, e.g. Empty Object can be shown as an error instead of warning.
Syntax validity check may be disabled in Settings | Options | Model | Physical Model | <database> | Syntax Validity checkbox