Entities
Toad Data Modeler allows you to design Entity Relationship Diagrams of specific database platforms, convert physical model from one database platform to another, create an ER Diagram directly from your database (Reverse Engineering feature), update physical models, generate DDL/SQL scripts and Change Scripts, create Dictionary Types, Views, Triggers, Functions, generate detailed documentation to your model (in HTML, RTF, PDF, XSLT formats) and much more.
This chapter describes features and functions related to Physical Data Modeling. Look around each section to get the information you need.
|

|
Note: See the sample physical model Videorental (Oracle 10g db) that is included in the installation package of Toad Data Modeler. Default location is: C:\Program Files (x86)\Quest Software\Toad Data Modeler7.3\Samples. |
Benefits of Physical Data Model
- Detailed definition of database structure, including database specific items, for example:
- Stored procedures
- Functions
- Triggers
- Views
- Materialized views
- Sequences (auto increments) etc.
- Possibility to synchronize local model with existing database.
- Possibility to specify logical names for objects (captions for tables, attributes and other objects).
- Detailed database specific information can be exported to HTML/RTF/PDF or XML/XHTML/CSV reports.
- Automatic generation of SQL code for selected objects (SQL code generation is not available in Logical and Universal Model)
- Automatic migration of PK attributes to child entities (Attributes don't migrate to child entities in Logical Model)
Create Entities
In Toad Data Modeler, there are several ways how to create entities - on the Workspace, via Model Explorer and in the Entities dialog (Model | Model Items | Entities). Create entities directly on the Workspace.
|
Scenario
Create entity Customer on the Workspace in your Videorental model. |
- Click
 on the toolbar (also CTRL+E) and then click anywhere on the Workspace.
- Double-click the entity to edit it.
- Define the entity caption and name
|
Caption |
Logical entity name - Customer. |
| Name |
Physical entity name - T_CUSTOMER. |
- Define other properties on tab General and other tabs (e.g. Notes, Comments etc.). To save the changes simultaneously and leave the form open, click Apply.
Edit Entities
To edit entities:
- Double-click the entity on the Workspace.
or
- Edit the entity in Model Explorer | Entities folder | double-click the selected entity (or right-click | Edit).
|
|
Note: You can also edit entities in the Entities dialog (Model Menu | Model Items |Entities | Edit). |
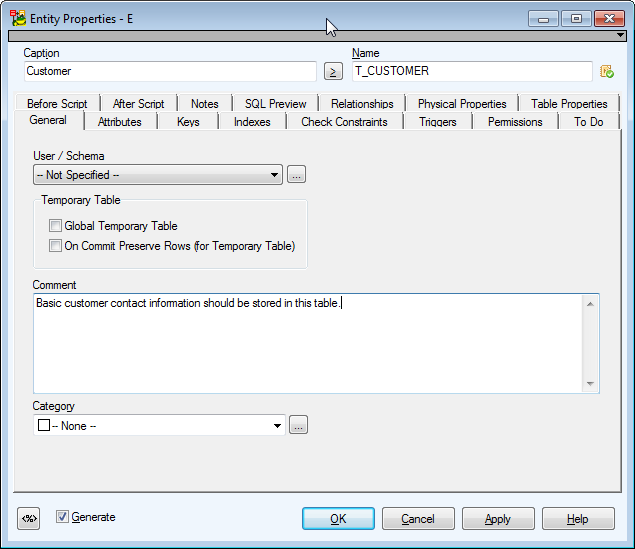
Example: The Entity Properties form (Oracle 10g db). Object navigator collapsed.
Example of tab Attributes, Object Navigator expanded.
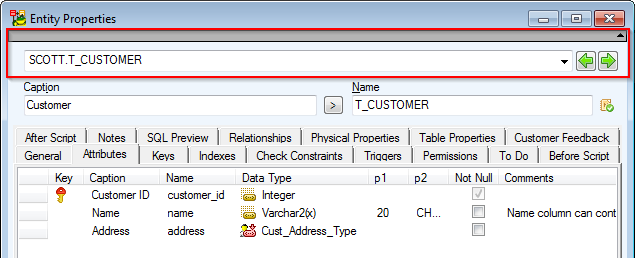
| Object Navigator Dropdown Menu |
All entities in your model are listed here. It allows you to edit entities quickly and comfortably from one place.
Tip: After you finish editing an entity, click Apply to confirm changes and select another entity from the Object Navigator box. |
 |
Buttons Previous and Next for quick navigation among entities. |
|
General Tab |
General properties of entity |
| Caption |
Logical name of entity |
|
Name |
Physical name of entity
About Naming Conventions
Tip: You can choose if you want to display objects physical names, logical names, or full names by selecting an option from dropdown menu on Display Toolbar.

|
|
Schema |
Schema selection box. Click the small button on the right to access the Schema dialog.
(User/Schema stands only for Oracle models.) |
|
Category |
Category selection box. To see a list of Categories of your model, click the small button on the right. |
|
Generate |
Select it to generate the entity in final SQL (DDL) script. (It is selected by default.)
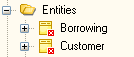
Note: Objects of your model that have the Generate checkbox disabled in their Properties dialogs are displayed in Model Explorer this way:
|
|
|
Note: Other options on the General tab vary depending on a target database. See the specific options for your database in the "Databases" chapter. | |
|
Attributes, Keys, Indexes, Check Constraints, Triggers, Permissions Tabs |
On these tabs, you can add, edit and delete particular items. More details on each of them can be found in appropriate topics that follow. |
|
To Do Tab |
On this tab, you can write some tasks on the selected entity.
To see all To Do tasks, select Model | To Do. |
|
Before Script Tab |
Whatever you write into the Before Script section, it will be generated before the Entity definition. |
|
After Script Tab |
Whatever you write into the After Script section, it will be generated after the Entity definition. |
|
Notes Tab |
Write notes on the entity on this tab. The text will display in a pop-up box when you point your mouse cursor at the entity name in ER diagram. |
|
SQL Preview Tab |
Click  at the bottom of this tab to see the part of SQL code for the entity. at the bottom of this tab to see the part of SQL code for the entity.
Select the WordWrap checkbox to wrap the code on this tab. |
| Relationships Tab |
Information on parent and child entities, relationships and key attributes.
Double-click the selected object to open the Properties dialog. |
|
Physical Properties Tab |
Storage characteristics of table can be defined on this tab. |
|
Table Properties Tab |
Other table characteristics can be defined here. |
|
Comment Tab |
Write comments on the entity on this tab.
Note: CTRL+A, CTRL+C, CTRL+X and CTRL+V functions are available on this tab. |
Buttons:
 - opens the Application Variables form
OK - confirms all changes and closes the form
Cancel - cancels the changes you have made and closes the form
Apply - confirms the changes (the form will remain opened for further edit)
Help - opens Help file
Copy Entities
In Toad Data Modeler there are several methods to copy entities. You can select from the following options.
|
|
TIP: If you find yourself copying objects too much, consider using the Gallery feature. See Gallery for more information. |
A. Drag&Drop techniques + CTRL on Workspace
Where to use: On a Workspace
Example:
- Click an entity on Workspace and hold the mouse button down.
- Press CTRL key.
- Drag the entity to another place.
- Release the mouse button and the key.
B. Copy&Paste functions: Edit | Copy/Paste (CTRL+C, CTRL+V)
Where to use:
- On a Workspace
- Between Workspaces
- Between Models
Example: Copying an entity to another Workspace
- Select an entity.
- Press CTRL+C. Activate the Workspace in which the entity copy will be created. It can be in your current model or in another model.
- Press CTRL+V
- A copy of the entity is created on the Workspace you selected.
C. In the Entities dialog: Drag&Drop techniques + CTRL
Where to use:
- In the Entities dialog itself (Model Menu | Model Items | Entities)
- Between the Entities dialog and a Workspace
- Between the Entities dialog and Model Explorer | Entities folder
- Between the Entities dialogs of two different models
Example: An entity in the Entities dialog of Model A needs to be copied to Model Explorer of Model B:
- Open the Entities dialog in Model A in Model Menu | Entities.
- Open Model Explorer in Model B.
- Select an entity in the Entities dialog of Model A, hold down CTRL key.
- Drag the entity over the Entities folder in Model Explorer and drop.
D. In Model Explorer: Drag&Drop techniques + CTRL
Where to use:
- In Model Explorer itself
- Between Model Explorer and a Workspace
- Between Model Explorer and the Entities dialog (in a different model as well)
- Between Model Explorer and Entities dialog of two different models
Example 1: Making a copy of an entity in Model Explorer.
- Unfold the Entities folder in the Model Explorer tree.
- Click an entity and hold the mouse button down.
- Press CTRL.
- Drag the entity to the Entities folder and drop.
A copy of the selected entity is listed in the Model Explorer tree and the entity appears on all the Workspaces of your model where the Auto Complete option is enabled.
Example 2: Copying an entity from Model Explorer to a Workspace.
- Unfold the Entities folder in the Model Explorer tree.
- Click an entity and hold the mouse button down.
- Press CTRL.
- Drag the entity to a Workspace.
Example 3: Creating an entity copy between Model Explorers of two models. The entity will be copied from Model A to Model B:
- Open Model Explorers in both models. You may want to undock at least one of the Model Explorer windows.
- Click an entity in Model Explorer A and hold the mouse button down.
- Press CTRL.
- Drag the entity to the Entities folder of the Model Explorer B an drop.
|
|
Note:
- A copied entity has the same properties as its source.
- In some cases, entities cannot be copied between models. It's because they contain specific properties, that do not exist in the target mode. For example, copying two entities from Microsoft SQL 2005 model to MySQL 5.1 model. Entity A has Partition Schema, Entity B has Fulltext Catalog. Since these features do not exist in MySQL 5.1, the entities will not be copied.
-
Even though it is possible to copy and paste objects to a different model of different database platform or version, it is encouraged to use Model Convert function, even for single objects. The copy-pasting method is faster, but more error-prone, while the Model Convert method is slower, but more robust. |
