In Message Explorer you can see hints, errors, warnings and other messages that appear during your work with Toad Data Modeler.
Message Explorer is by default docked at the bottom of the application window. However, you can hide or close it at any time.
To open Message Explorer again
Select Window | Message Explorer Log.
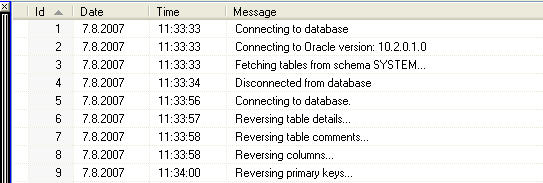
You can sort messages by IDs, date, time and message type, simply click on the appropriate column.
Message Explorer versus Log Area
Log area in appropriate forms/dialogs/wizard displays information only on the operation taking place in the particular form/dialog/wizard. (Show/Hide Log options are available.)
Message Explorer displays information about all ongoing operations.
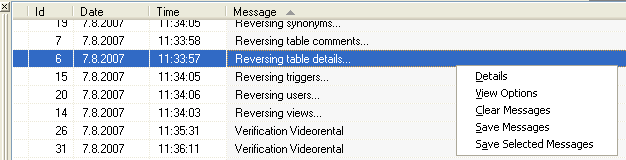
Message Explorer Right-Click Options
Right-click the selected message to see the following options:
|
Details |
Displays details on the selected message.
|

|
TIP: Double-click the selected message opens the details too. Use Next and Previous buttons for quick navigation among messages. | |
|
View Options |
Opens the Message Explorer Properties dialog where you can define:
- What information you want to see in the Message Explorer (Date, Time, Format, Type),
- Type of messages (Errors, Warnings, Information, Hints etc.),
- Path to save the Log.txt file on tab Message Saving.
Save Messages to File - If this checkbox is checked, the messages displayed in Message Explorer will be saved to the Log.txt file continuously.
Overwrite File - If this checkbox is checked, new messages overwrite old messages. If this checkbox is unchecked, new messages are listed after the older messages in the Log.txt file.
By default, the following path is set up in the Settings menu | Options | Paths | Message Explorer Log Path:
C:\Documents and Settings\%UserName%\My Documents\Toad Data Modeler\Log |
|
Clear Messages |
Clears the Message Explorer.
|
|
Note: Undo/Redo cannot be applied here. | |
|
Save Messages |
Opens the Save As dialog via which you can save all messages to LocalLog.txt file. |
|
Save Selected Messages |
Opens the Save As dialog via which you can save the selected messages to LocalLog.txt file. |
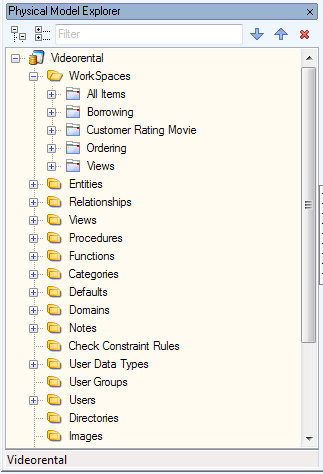
In Model Explorer, you can see all objects that exist in your model.
Model Explorer is by docked on the left side of the Application Window by default. You can always undock it and move it somewhere else or close it.
To display Model Explorer
Click  on the toolbar or go to Window Menu | Model Explorer.
The contents of Model Explorer depend on type of your model (Physical/Universal/Logical) and used database platform and version.
Example of Physical Model Explorer of Oragle 10g model:
|
|
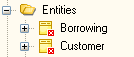
Note: Objects of your model that have the Generate checkbox disabled in their Properties dialogs are displayed in Model Explorer this way:
|
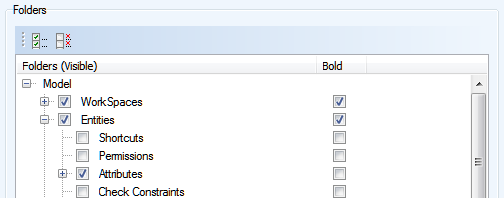
Model Explorer settings
You can access the settings by right-clicking in Model Explorer and selecting Settings.
In settings, you can change the background color of the Explorer or enable the Use Colors of Category to Draw option to color items in the Explorer according to their category.
You can also hide/show specific item categories or make them bold to make the important objects stand out.
Managing Items in Model Explorer
In Model Explorer, you can:
- View objects Properties dialog by double-clicking them
- Place object shortcuts on workspace (or even workspace of another model) using drag and drop
- Create a copy of the object in the Explorer or on workspace using CTRL + drag and drop
- Locate shortcuts of an object on workspace easily (using Find on Workspace context menu option)
Object Navigator Dropdown Menu, together with the modeless dialogs, can ease and speed up your work in Toad Data Modeler significantly.
Object Navigator Dropdown Menu:
- Is available in Object Properties dialogs and forms (entity, attribute, check constraint, view, function, users, user groups etc.).
- Allows you to select items for edit from one (the same) place.
|
Scenario
You need to edit several entities of your model. |
- Double-click ANY entity on the Workspace to edit it.
- Click the small black arrow on top right-hand corner.
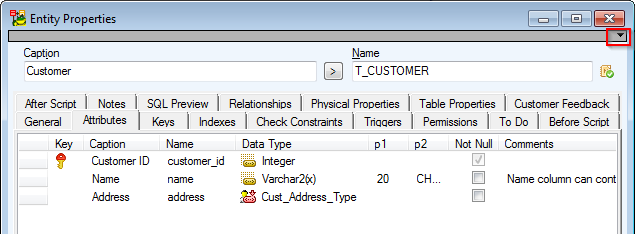
- The form navigator area appears on the form.
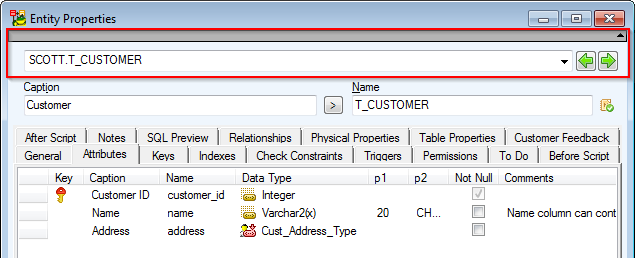
- From the Object Navigator Dropdown, select the entity you need to edit (Borrowing).
- Change its properties and confirm Apply. -> The changes will be saved and the Entity Properties form remains opened.
- Again, from the Object Navigator Dropdown, select another entity you need to edit (Customer). Confirm Apply to save the changes.
- Take the same steps until you edit all entities you need.
- For the last entity, you can confirm the changes OK to close the Entity Properties form.
Feel free to take advantage of this box when editing relationships, procedures, views, functions, users etc.
OTPs (Object Types and Properties) enable you to select objects and properties on various forms, define default OTPs selection and store and load them.
Example: See the Sync & Convert Wizard, the Select Object Types page, Detailed Settings button where you can define object types and properties for model compare/merge/conversion. If a particular object is selected (e.g. entities, relationships, functions etc.), it means you want to compare the object between the Left model and Right model. (All objects are selected by default). uncheck the checkboxes at particular objects if you do not want to compare them and therefore ignore the possible changes.
By default, only basic selection of objects and properties is available. Saving, loading and creating default OTPs are options for Experts.
Object Types and Properties are available in:
- Reverse Engineering Wizard and Model Update Wizard - What to Reverse page
- DDL Script Generation dialog - What to Generate tab
- HTML/RTF Report Wizard - What to Report page
- Sync & Convert Wizard - Select Object Types page
- Model Verification - What to Verify tab
Default (System) Selected OTPs versus User Selected OTPs
In Toad Data Modeler there are:
- Default (System) Selected OTPs
They are stored by default at:
C:\Program Files\Quest Software\Toad Data Modeler\Selected OTPs
They cannot be modified/overwritten.
They are stored by default at:
C:\Documents and Settings\user name\My Documents\Toad Data Modeler\Installation name \Selected OTPs
They are preserved during update of Toad Data Modeler.
To set/change the path for user OTPs, select Settings | Options | Paths | Advanced tab | Selected OTPs.
Define and Save User OTPs
See the differences between the following two dialogs (Expert Mode off versus Expert Mode on).
RE Wizard (Oracle 10g db), What to Reverse page, default OTPs (Expert Mode disabled):

What to Reverse page, OTPs options (Expert Mode enabled):
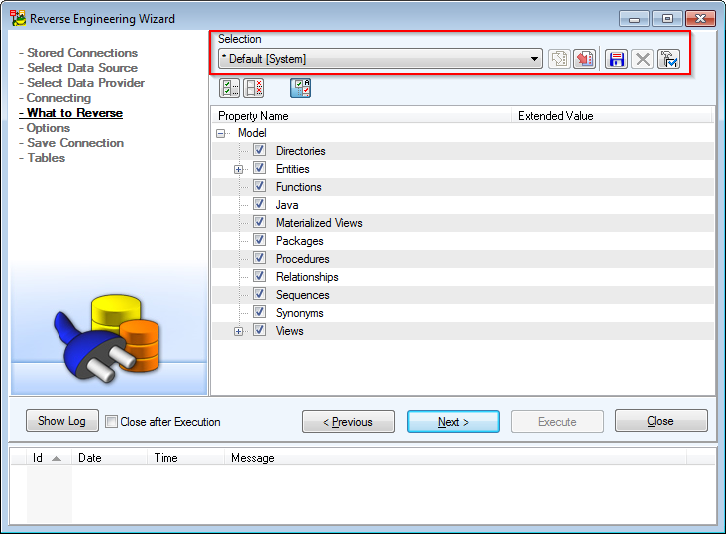
In this dialog, you can see options for managing OTPs:
|
|
Select an OTP. |
|

|
Saves the changed OTP settings to the OTP selected in the Selection box (either resaves the current OTP or overwrites another OTP). |
|

|
Loads OTP settings of the OTP selected in the Selection box. |
|

|
Saves the selection to a new OTP (similar to Save as).
Define a name of the new OTP and press OK.
After you click OK, the OTP will be saved to .txo file to particular database (Oracle 10g.txo in our example). |
|

|
Deletes the selected OTP.
Click Yes to delete the OTP from the .txo file of particular database (Oracle 10g.txo in our example). |
|

|
Sets the selected OTP as default. |
|
|
Note: The OTP options are the same also in other dialogs and wizards - e.g. DDL Script Generation dialog or Report Wizard etc. | |
Save User OTPs
Each database supported in Toad Data Modeler has its .txo file (Oracle 10g.txo, Microsoft SQL Server 2005.txo etc.).
Default (System) Selected OTPs are stored by default at: C:\Program Files\Quest Software\Toad Data Modeler\Selected OTPs.
As soon as you install Toad Data Modeler, the default .txo files will copy to the user section at: C:\Documents and Settings\user name\My Documents\Toad Data Modeler\Installation name\Selected OTPs. Here, you can store your user OTPs that will be preserved during update of Toad Data Modeler.
New OTPs, which you create, will be saved in .txo file of the particular database.
Example:
You create a new OTP in the DDL Script Generation dialog for your Oracle 10g model and save it. This OTP will be saved to Oracle 10g.txo. This OTP will be available in the Selection box in the DDL Script Generation dialog for all Oracle 10g models for which you need to generate SQL script. (OTPs are saved separately for every dialog, which means that OTPs defined in DDL Script Generation dialog will not be available in Model Verification dialog etc.)
If you want to save this OTP to a particular model, you have to click Save Settings. The OTP, including other settings defined in the DDL Script Generation dialog, will be saved within a model. Next time, when you open the DDL Script Generation for the model, the OTP will be selected automatically. If you didn't click Save Settings, you would have to select the OTP and load it again.
Available OTPs Dialog
To see a list of all OTPs available in your model
Select Expert Mode | Expert Mode Settings menu | Available OTPs.
This option is available for real experts interested in writing their own support for new database systems or for people who need to enhance existing support for the selected database system.
