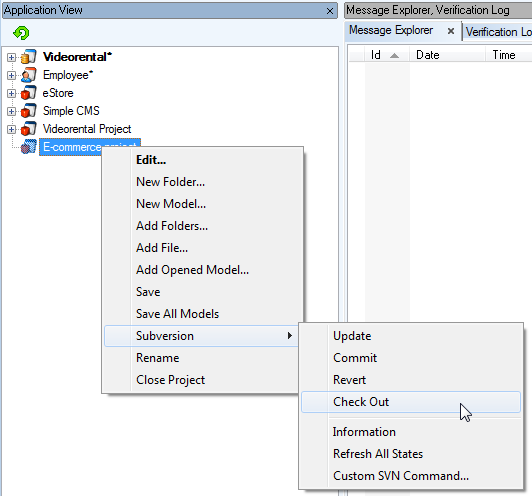
You can run Subversion actions from the Application View.
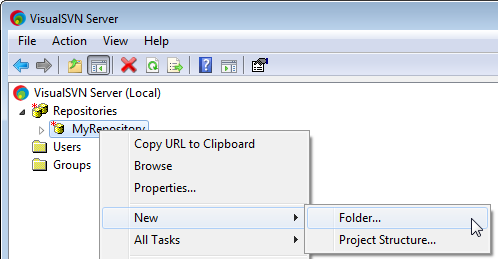
To add a new folder
- Right-click your project name and select New Folder. Create a new folder.
- Right-click the folder and select Subversion | Add.
- To commit changes right-click the folder again and select Subversion | Commit.
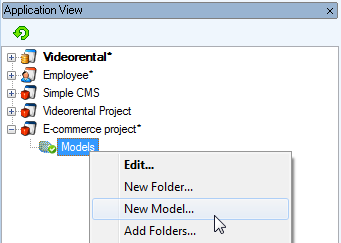
To add a new model to project
- Right-click the project name or folder name and select New Model.
- Right-click the model name and select Subversion | Add. Confirm it by Subversion | Commit.
Other Files in Project
You can add also *.doc, *.xls and other file formats to your projects (check them out from subversion etc.) Toad Data Modeler allows you to open them from the Application View.
To open an existing file
Right-click the file name in the Application View and select Open File.
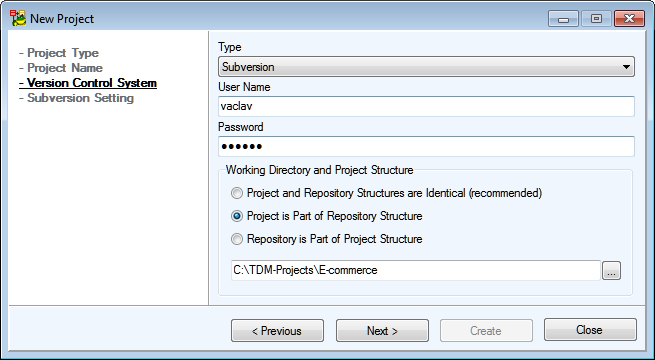
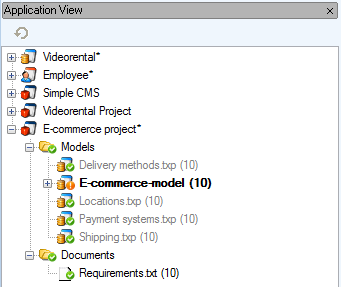
Sample User Defined Structure of Custom Project with Version Control System
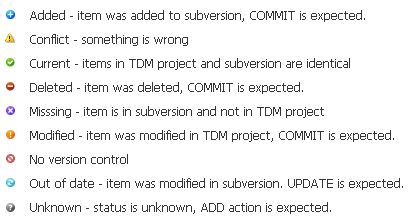
Legend
Direct Comparison
To compare any two revisions of the same model:
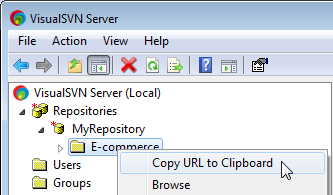
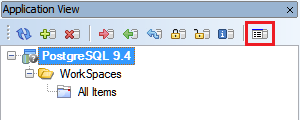
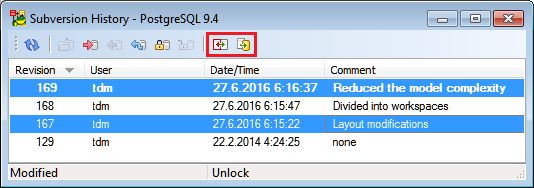
- In Application View, locate your Model tracked by SVN and open History Browser either from toolbar, or context menu (Subversion | History).
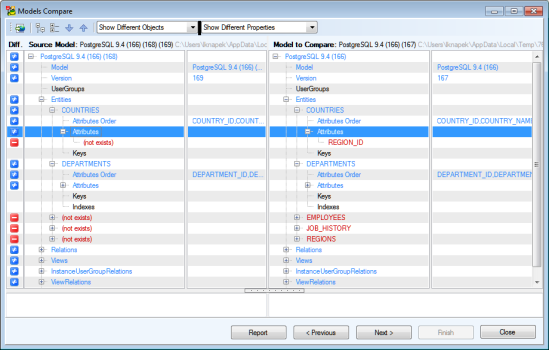
- In History Browser, select two of the available revisions and click either on Compare Revisions or Generate Change Script button on the toolbar.
- In the opened dialog, you can see the differences between the models.
- You can now choose an action depending on the button you have clicked on before:
- Compare Revisions - a comparison report can be generated by clicking the Report button.
- Generate Change Script - finish the comparison to generate a change script.
Features and Tools > Version Control > Introduction
Version Manager allows you to create projects, add models (logical models, physical models) and other files (e.g. text files, images etc.) to your projects, create versions and revisions etc.
Toad Data Modeler allows you to create unlimited number of projects.
|

|
Note: The version manager is meant to be used by single user only, multiple user collaboration is not supported. Please see Subversion section to learn how to set up multiple user collaboration environment. |
To open Version Manager
- Enable Expert Mode: select Settings | Options | General | select the Expert Mode checkbox.
- Click
 on the toolbar (or select Expert Mode | Version Manager).
Version Manager window is a place from where you can access all files stored in Version Manager.
|
|
TIP: You can open several instances of Version Manager, e.g. for each project. |
What Is a Project?
Project is a group of models and other files that logically match together although they are not of the same origin (physical data model, document file, image etc.).
Example: You have created a project for Company "X". This project contains various models (LER, PER models) and some other files (text files, images etc). The models are models of different databases and have a different number of versions/revisions. Nevertheless, all these models and files logically match together - all of them relate to Company "X".
As stated above, projects can contain models as well as other files of any type (e.g. any documentation to models, text files, images, other programs...) Nevertheless, Toad Data Modeler is not able to work directly with such files. It can only call appropriate programs or allows you to view them only (see the Show Version (only to read) option).
There are several ways how to create a project and add files to it:
- Create a new project from scratch (plus possibility to add several files to the project at one jump. - It is recommended when you store all files that you want to add to the new project in one directory.)
- Create a new project while adding an ER Diagram to the project. - It is recommended when you want to add a single Toad Data Modeler model to a new or already existing project.
- Add a single file to already existing project additionally (no matter if it is a model, text document, screenshot etc.).
- Summary - Add a model and file to already existing project.
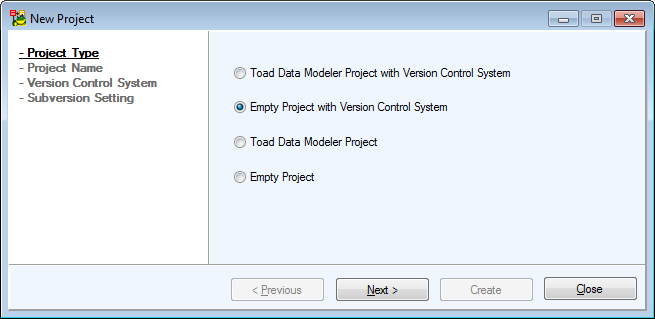
A. Create a New Project from Scratch
- Click on the toolbar.
- Right-click the Local Server item and select Add Project.
- Define properties of the project (see the following details).
|
General Tab |
Description |
|
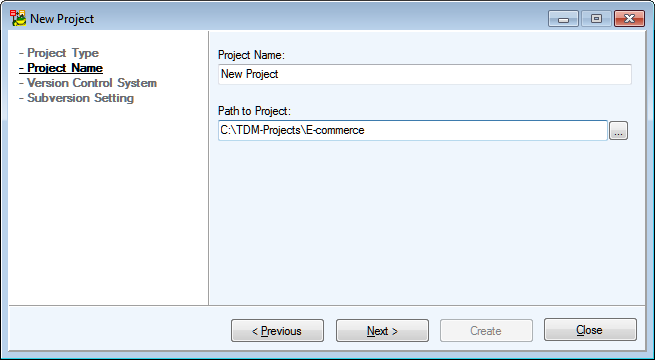
Name |
Define a project name.
The project name has to carry out conditions for file names set in Windows, e.g. question mark "?" cannot be contained.
The project name will become a directory name on a disk. See the path where it will be created in the Settings menu | Options | Version Manager. The default path can be:
C:\Documents and Settings\user\Application Data\Quest Software\Toad Data Modeler\Installation Name\VersionManager\Server\Project\Project_Name.
All files created in Version Manager will be saved here until you change the path.
|
|
Note: Information on versions (and their relations to other versions and revisions) are saved by default to another file. Possible path is: C:\Documents and Settings\userName\Application Data\Quest Software\Toad Data Modeler\Installation Name\VersionManager\Server\projects.xml
Again, you can change the path in the Settings menu. | |
|
Load Files in
Directory |
Uncheck (or not to select) this option to create a new project and let it be empty.
Select this option to enable the Directory box. Click the icon on the right to define a path to a directory with files that you want to add to the project. All files stored in the directory will be added to the project automatically. Sub-directories will be ignored. |
| Description Tab |
You can enter the project description here. |
- If you want to add a group of files to this project, follow the next steps 5 and 6.
You already need to have all the files stored in one directory.
- Select Load Files in Directory and click the small icon on the right. Find a directory where files that you want to add to the project are stored.
- Confirm OK to load all files stored in the directory to the project.
B. Create a New Project + Add an ER Diagram to the Project
- Create a new model or open an existing one.
- Click
 on the toolbar (or Expert Mode | Version Manager | Add to Version Manager) to open the New Version Location dialog.
- If no project exists on your local server, click Add Project
 . (And follow step 4.)
If the project where you want to add the model exists on your local server, simply select it and click OK to add the model to the project.
- The New Project dialog opens. Define a name and description of your project.
- Press OK to confirm and turn back to the New Version Location dialog.
- Select the new project and confirm OK to add the model to the project.
- The Check Outmessage displays and you are prompted to define a path where your file should be checked out
- Confirm OK. The file doesn't exist and therefore will be created.
- Click Yes. See the Version Manager now.
C. Add a Single File to Existing Project
- Click on the toolbar to open Version Manager.
- Right-click the selected project and click Add File to display a File browser.
- From the Files of Type box, select the appropriate type, find the file and confirm Open.
D. Summary - Add a Model and File to Existing Project
Model: Open the model and simply click on the toolbar. Select a project and confirm OK. (See B.)
Model or any other file: In Version Manager, right-click the selected project and click Add File, find the file and confirm Open. (See C.)