PDF Reports
Features and Tools > Reports > PDF Reports
PDF report generation is similar to RTF report generation.
To generate a RTF report:
-
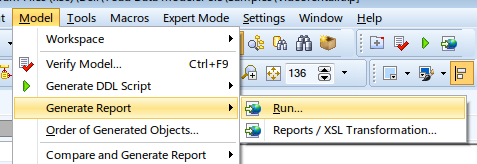
Click  on Model Toolbar (or go to Model Menu | Generate Report | Run).
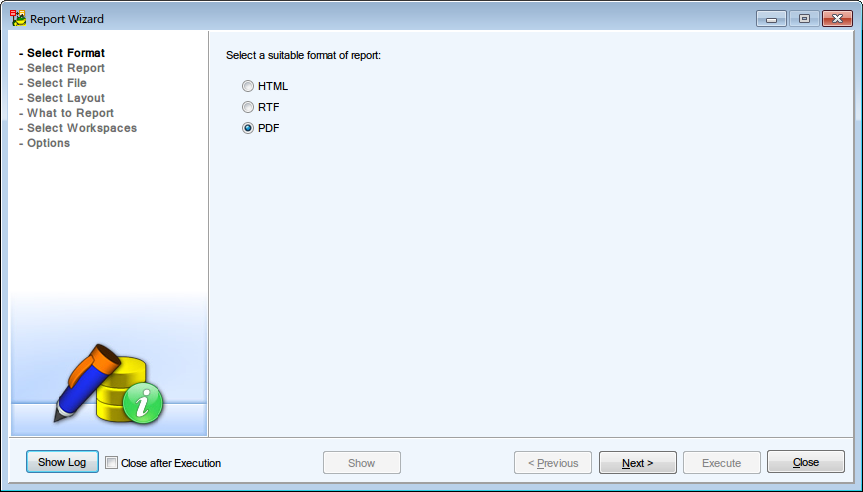
- In Select Format section, choose PDF format.
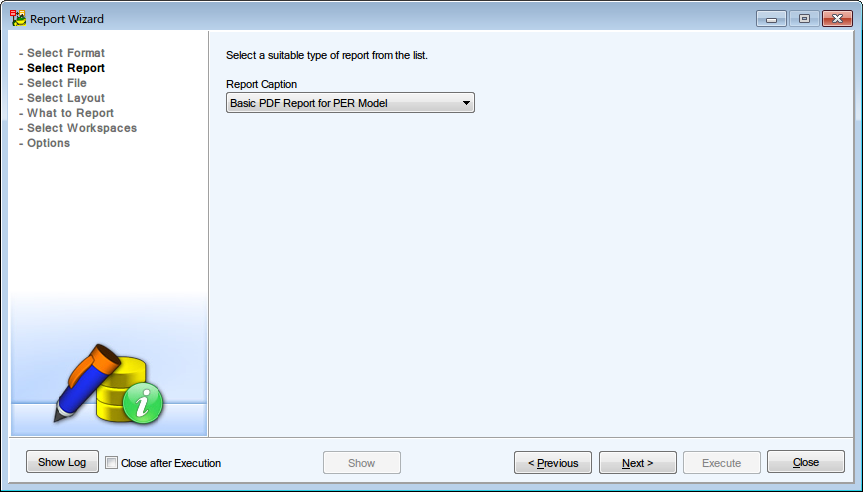
- In the next section, select the type of the PDF report.
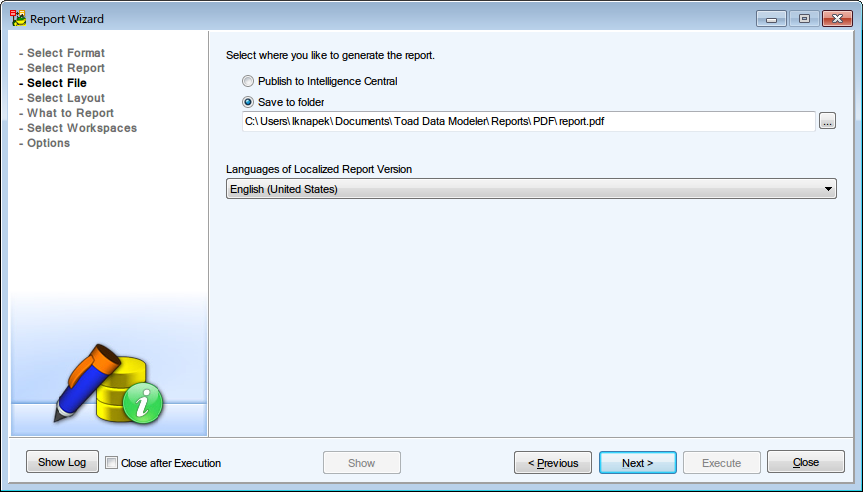
- In Select File section, select the report location. You can either save the report to a folder, or you can publish it to a Toad Intelligence Central (TIC) server (see Basic TIC Actions for more information).
|

|
Tip: You can generate localized reports. Download the appropriate language package from the community website and import it to Toad Data Modeler. See Dictionaries for more information. |
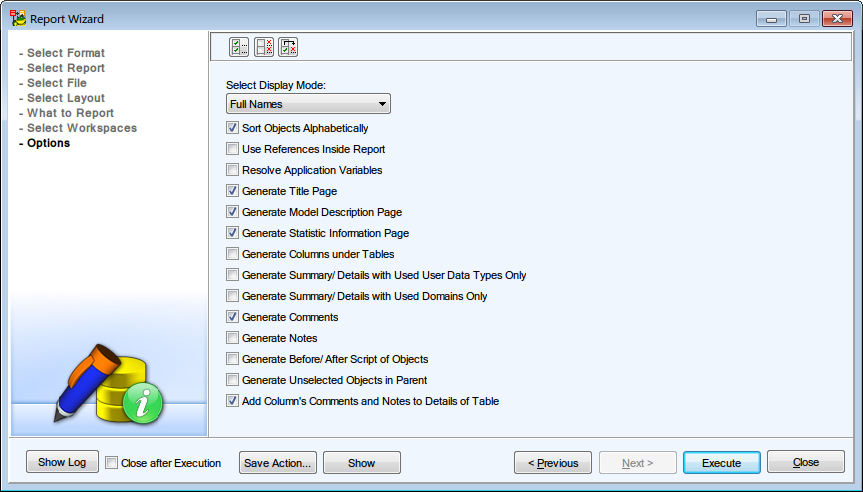
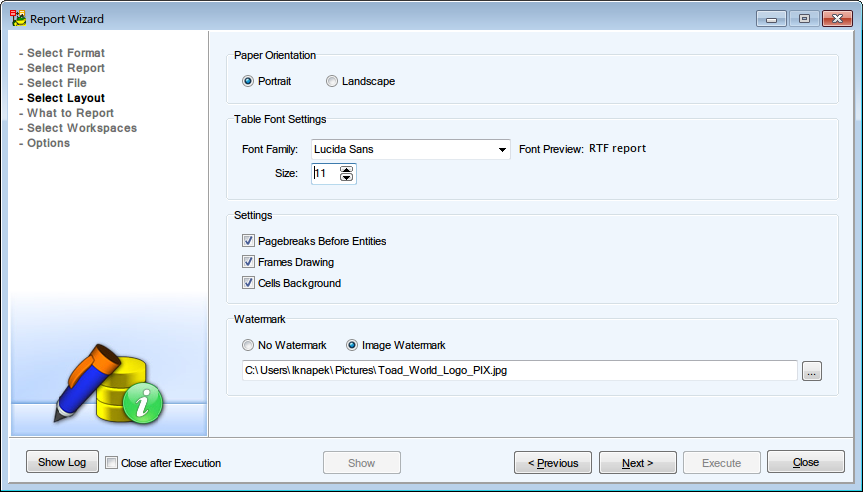
- The next section allows you to customize the look of your report. You can change the report Orientation, Font Settings and add Watermark.
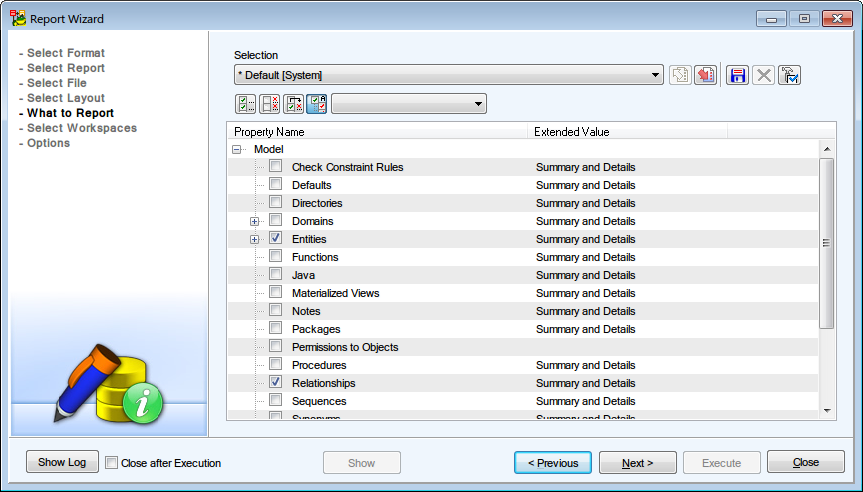
- The What to Report section allows you to select specific object types that should be included in the report.
- Select Workspaces section allows to you specify for which workspaces the report should be generated.
|
|
Note: The report will be generated for model objects based on the following rules:
- When you check a specific workspace, all of its objects and an image of the workspace will be included in the report.
- When you check Generate All Model Objects, all model objects will be included in the report.
- Both rules respect the selection made in What to Report section.
|

- The final section contains several options allowing you to further customize the generated report. Click on Execute to generate the report. Once the report is generated, you can view it by clicking on Show.
Reverse Engineering
Connections
Features and Tools > Reverse Engineering > Connections
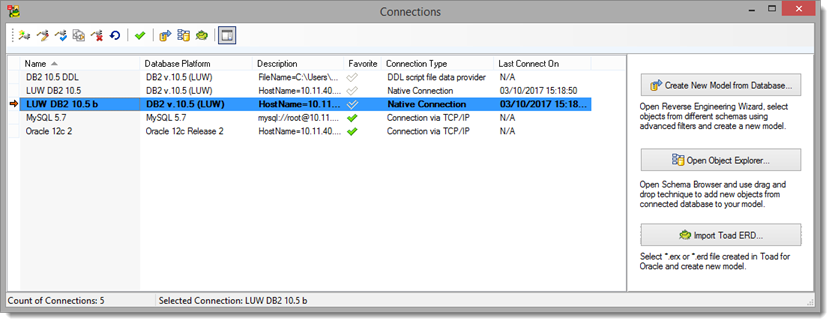
Connections displays all connections to databases and to DDL files. You can easily create and edit connections and also launch Reverse Engineering wizard or perform operations with models.
To manage connections
- Select File | Reverse Engineering | Connections.
| New Connection |
Create a new connection to a database or to a DDL script file. |
| Edit Connection |
Edit existing database or DDL file connection. |
| Test Connection |
Tests a connection. |
| Copy Connection |
Clones a connection. Creates a connection based on an existing one. |
| Delete Connection |
Deletes a connection. |
| Reload Connections |
Refreshes the list of connections. If you manually add a connection to Connections file this list needs to be refreshed. The path to Connections file is defined in Settings | Options | Reverse Engineering | Path to Connections. |
| Show Favorites Only |
Only displays your favorite connections. Double-click into Favorite column to mark a connection as favorite. |
| Create New Model from Database |
Launches Reverse Engineering wizard. |
| Open Object Explorer |
Launches Object Explorer to drag and drop objects into your model from the connection. |
| Import Toad ERD |
Creates a new model based on *.erx or *erd file from Toad. |
| Show Right Bar |
Displays a right-hand bar with extra buttons. |
To create a new database connection
- Click
 New Connection and define a new connection name.
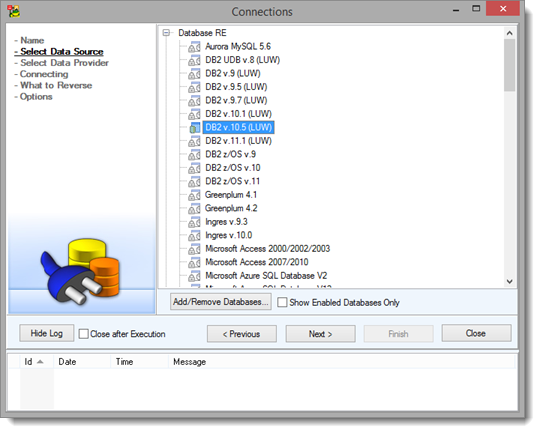
- Select data source. Select the desired type of database RE. See the Supported Databases for more info on Toad Data Modeler support for Reverse Engineering. Click Add/Remove Databases to enable or disable databases. Check Show Enabled Databases to only show your enabled database types.
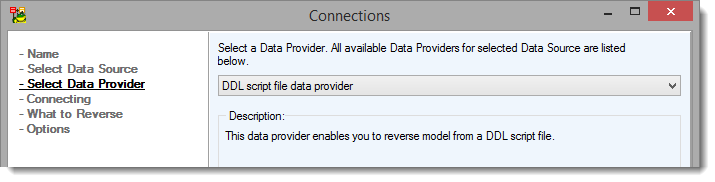
- Select the data provider for your connection to a database. See more information on the connection methods available for specific databases in Types of Connections by Databases.
- Enter your connection information or edit your connection string directly.
- Select what you want to perform Reverse Engineering with. Use Auto Check button to automatically select parent objects when any of their dependent objects are selected.
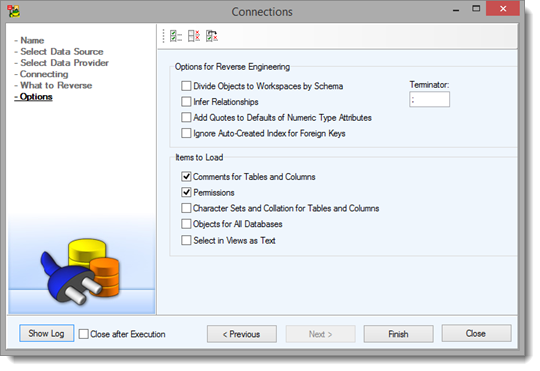
- In Options configure settings used for Reverse Engineering. See Help | Databases | {specific database} | Reverse Engineering for more information on available options. The following options for Reverse Engineering are common for more database types:
| Divide Objects to Workspaces by Schema |
The resulting model will have a workspace for each schema. |
| Infer Relationships |
Check to automatically generate relationships between entities in the resulting model. If unchecked you will be prompted during Reverse Engineering only when no relationships are found in the resulting model. Default: Unchecked. |
| Terminator |
Select the desired terminator for SQL statements. |
- Click Finish to save the new connection.
To create a new DDL file connection
- Click New Connection and define a new connection name.
- Select data source. Select the desired type of DDL Script RE. See the Supported Databases for more info on Toad Data Modeler support for Import from SQL files. Click Add/Remove Databases to enable or disable databases. Check Show Enabled Databases to only show your enabled database types.

- Select the data provider for your connection to a DDL script file.
- Click Open DDL Script File and select the file that you want to use for connecting. Enter the desired terminator for SQL statements. The DDL script is displayed after opening the file.
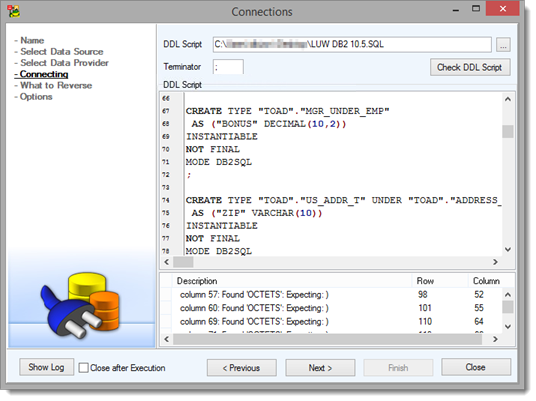
- Select what you want to perform Reverse Engineering with.
- In Options configure settings used for Reverse Engineering. See Help | Databases | {specific database} | Reverse Engineering for more information on available options. The following options for Reverse Engineering are common for more database types:
| Divide Objects to Workspaces by Schema |
The resulting model will have a workspace for each schema. |
| Infer Relationships |
Check to automatically generate relationships between entities in the resulting model. If unchecked you will be prompted during Reverse Engineering only when no relationships are found in the resulting model. Default: Unchecked. |
- Click Finish to save the new connection.
Reverse Engineering Wizard
Features and Tools > Reverse Engineering > Reverse Engineering Wizard
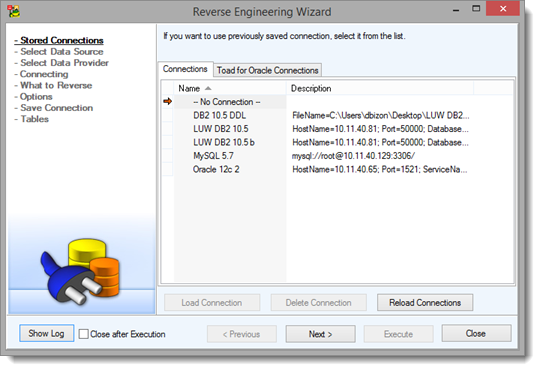
Reverse Engineering Wizard guides you through the process of creating a model from an existing database or a DDL file.
To create a model by Reverse Engineering
- Click File | Reverse Engineering | Reverse Engineering Wizard. Select one of your stored connections or select “No connection” to define a new source in the following steps of the wizard. You can also select one of the connections shared with Toad for Oracle or created during import of an ERD file from Toad for Oracle. Select a connection and click Load to proceed to the last step of the wizard or define a new connection. See Connections for more information on how to create a connection to a database or to a DDL file.
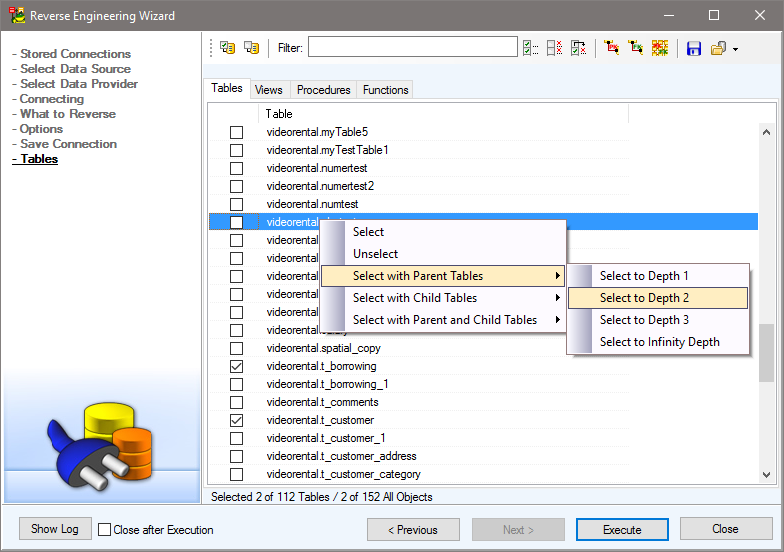
- Select the objects you want to include in your target model and click Execute to create a new model.
| Schema |
Select a specific schema you want to include in the target model, all tables or all selected tables. |
| Select All on All Tabs |
Selects all objects on all tabs. |
| Deselect All on All Tabs |
Deselects all objects on all tabs. |
| Filter |
Type to filter objects.
|
|
TIP: Use wildcards - example: "*user" or "?ser".
* - replaces unlimited number of characters
? - replaces any single character | |
| Select All |
Selects all object on the current tab. |
| Deselect All |
Deselects all object on the current tab. |
| Invert Selection |
Inverts selection on the current tab. |
| Select Parent Tables |
Selects all parent tables of the currently selected tables. |
| Select Child Tables |
Selects all child tables of the currently selected tables. |
| Select Parent and Child Tables |
Selects all child and all parent tables of the currently selected tables. |
| Export Selection |
Export selection as a *.wsxr file. |
| Import Selection |
Imports a selection from *.wsxr file. |
|
|
TIP: Select parent and child tables easily using the right-click menu. You can select child and/or parent tables up to 3 levels of depth or all levels (Infinity Depth). |