Chat now with support
Chat with Support

On Demand Migration for Email Current - User Guide

Introduction Preparing Migrations Test and Pilot Migrations Configuring and Running Migrations Post Migration Third Party Assessments and Certifications Glossary

Creating a Quest Account

Active Quest Account is required to access Quest On Demand Services.

To register a Quest Account

  1. Go to the Quest On Demand Services website: https://portal.ondemand.quest.com/

  2. Click Try or Subscribe next to the Quest On Demand Migration for Email service. The Create a New Account screen opens.
  3. Enter the company and user information required to set up your Quest Account. Follow the on-screen instructions.
  4. We create your account and send you a confirmation by email. Follow the instructions in the email to activate your email address.
  5. Then use this account to register for Quest On Demand Migration for Email.

Trial Subscription

Trial Subscription

Your 30-day free trial subscription begins on the date that you activate your trial subscription to an Quest On Demand Migration for Email service. It doesn’t begin on the date that you requested the trial.

To get and activate a trial subscription

  1. Go to the Quest On Demand Services website: https://portal.ondemand.quest.com/

  2. Click Try next to the Quest On Demand Migration for Email service. The Create a New Account screen opens.
  3. If you already have a Quest Account, click Sign In and enter your user name and password. Otherwise, you have to create a Quest Account.

  4. On the Try On Demand Migration for Email screen, you have to specify the nearest data center to maximize the service performance.
  5. Then, read and accept the terms and conditions of the Trial Agreement before continuing.

    Note: Your migrations are limited in the trial version of the ODME service. You can migrate only 25 messages, 5 contacts, 25 appointments, 5 tasks, 5 notes and 50 recoverable items per mailbox. Number of mailboxes is limited to 5.

  6. Click Open On Demand Migration for Email to activate your trial subscription.

License Subscription

Use this option if you already have a license or a coupon code to access the Quest On Demand Migration for Email Service.

To access the ODME service using a license key or coupon code

  1. Go to the Quest On Demand Services website: https://portal.ondemand.quest.com/
  2. Click Subscribe next to the Quest On Demand Migration for Email service. The Create a New Account screen opens.
  3. If you already have a Quest Account, click Sign In and enter your user name and password. Otherwise, you have to create a Quest Account.
  4. If you already have a license key or coupon code, select Yes under Choose a Plan and enter your key on the Subscription Options. Then press Continue.
  5. On the Activate Your Subscription screen, specify the nearest data center to maximize the service performance.
  6. Then, read and accept the terms and conditions of the Services Agreement.
  7. Press Activate Subscription.

Getting Started for New Users

This section provides basic instructions on how to use On Demand Migration for Email.

  1. Log in the ODME Portal. For more details about how to get the service subscription, refer Subscribing to the Service.
  2. The Dashboard screen opens. Here you can create a migration plan. For that, press the New Plan button at the bottom of the screen.
    You can also create a migration plan from a template if available. To do this, select a template from the drop-down list in the dialog box where you create the migration plan.
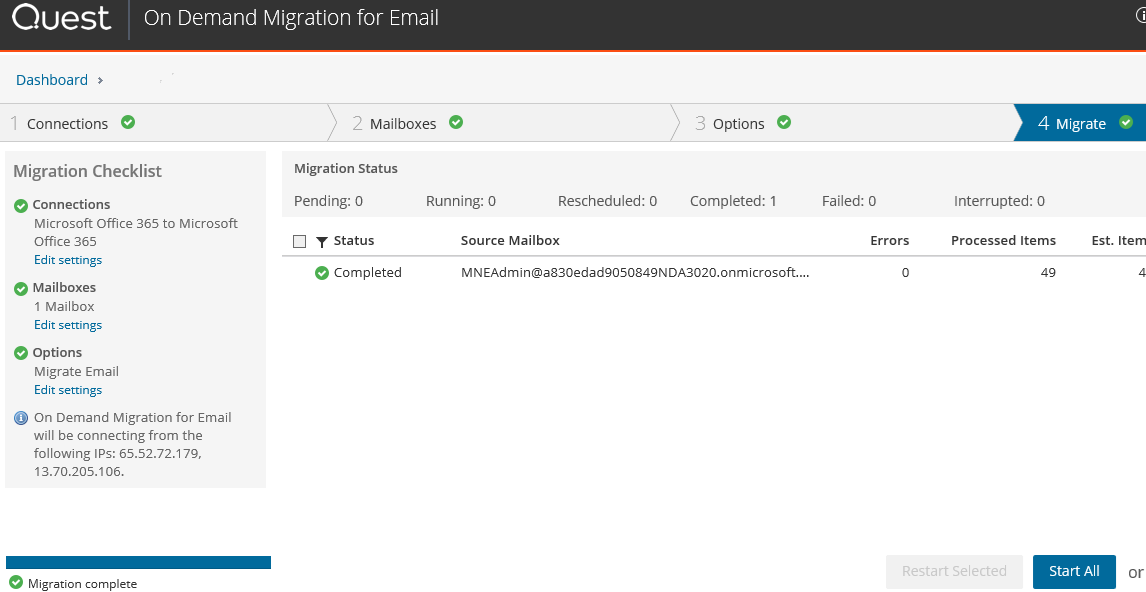
  3. Once an ODME Plan is created, there are four steps: Connections, Mailboxes, Options and Migrate:
  • Connections
    On the first step, you need to specify Source and Target details so that ODME can connect to the both endpoints. Some fields may be not editable if your plan was created from a template.


  • Mailboxes
    On the second step, you need to add the list of mailboxes that you are going to migrate. This can be done manually one by one or using a TSV file.


  • Options
    On the third step, decide whether you want to migrate from a primary mailbox or personal archives. To migrate from personal achieves, select the corresponding checkbox, and then select the items you want to migrate. Some fields may not be editable if your migration plan was created from a template.

    Note: Do not forget to select items for your migration (no matter if you migrate from a primary mailbox or personal archives). Otherwise, nothing will be migrated.


  • Migrate
    Finally, you need to run the migration for all added mailboxes or select mailboxes that you want to migrate.


To get more detailed information on the migration process, see the following sections:

Related Documents

The document was helpful.

Select Rating

I easily found the information I needed.

Select Rating