
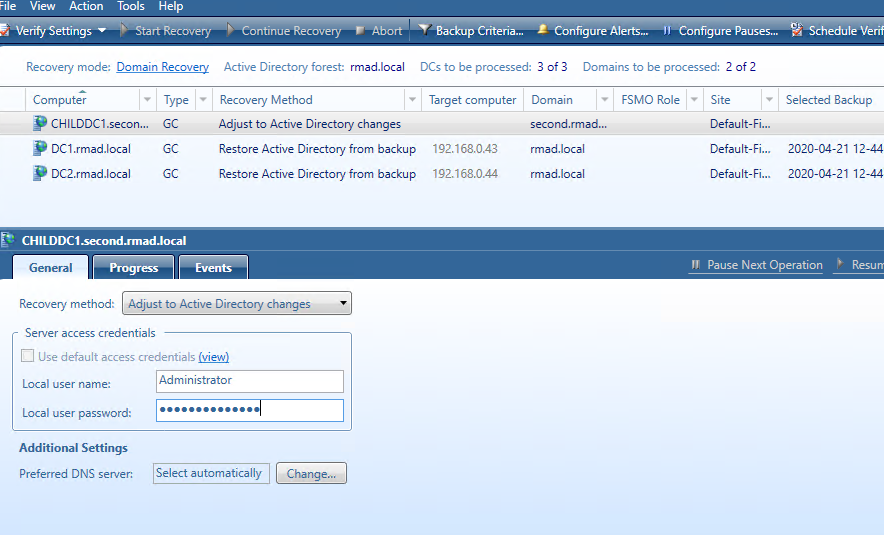
Adjust to Active Directory changes method
This recovery method is available and selected automatically when the domain controller is a Global Catalog server and belongs to the excluded domain, and either Rebuild GC, advertise normally or Rebuild GC, advertise fast is checked on the Global Catalog tab of the project settings. You can suppress any of the first two options using advanced settings.
How the Adjust to Active Directory changes method works:
-
The agent removes lingering objects from other recovered domains, if any, using the Repadmin tool.
-
If the previous step fails, the agent performs unhost and rehost of recovered domain partitions using the Repadmin tool.
-
Only if both previous steps fails, the agent rebuilds Global Catalog on this domain without attempts to remove lingering objects. In case of full reset of Global Catalog, the replication of Global Catalog data may require additional time.
For details about recovery method settings, see Domain controller recovery settings and progress.
Phased recovery
Recovery Manager for Active Directory supports phased recovery of the Active Directory forest. This scenario lets you perform the initial recovery during the first phase to make the forest function as soon as possible. The second phase can be postponed, so the full forest structure can be restored later.
-
Phase 1: Perform initial recovery
Perform restore of one or several domain controllers in each domain. -
Phase 2: Redeploy remaining DCs
Restore remaining domain controllers using the Install Active Directory recovery method.
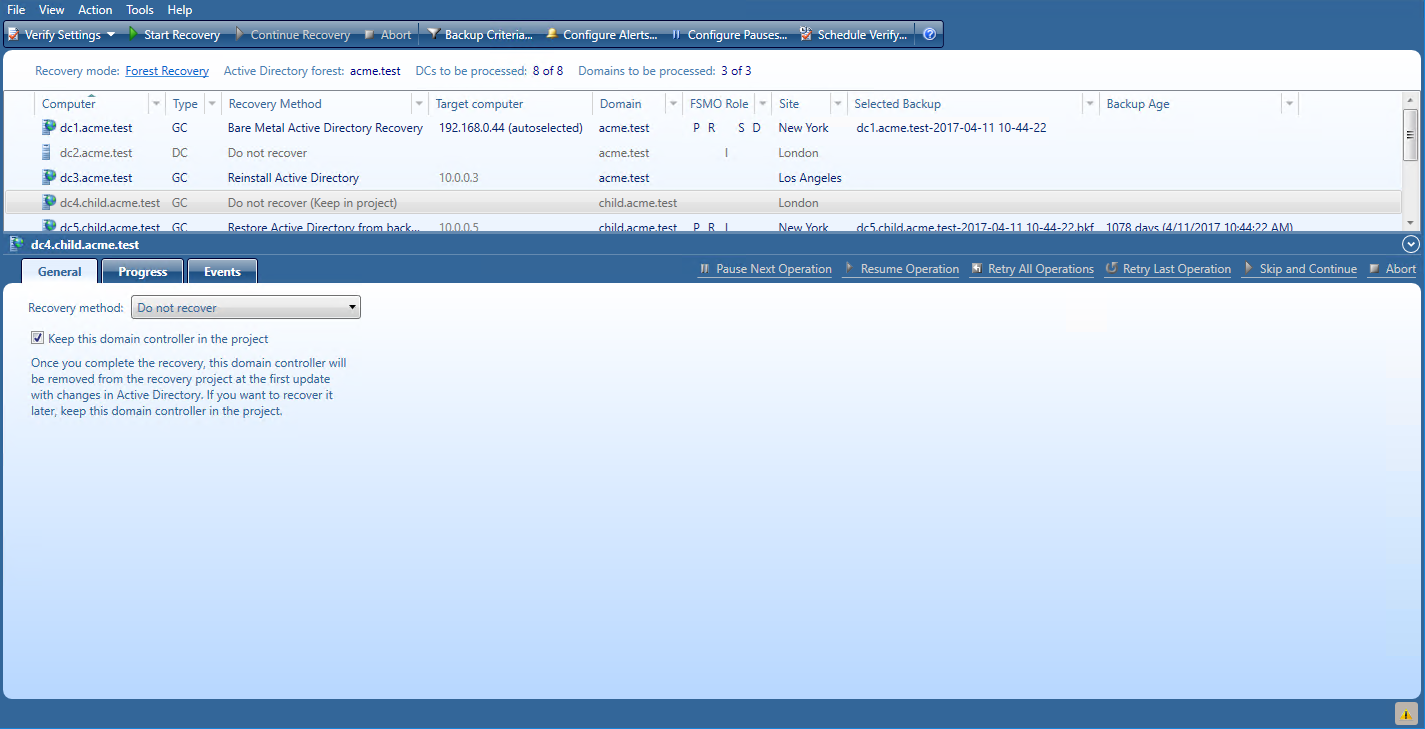
Phase 1
Restore the selected domain controllers using any appropriate recovery method. For domain controllers that you do not plan to restore in this phase, use the Do not recover method with the enabled Keep this domain controller in the project option that allows you to remain the domain controller in the project and restore it later. If the Keep this domain controller in the project option is not checked, the domain controller will be permanently removed from the recovery project after the project update.
To update the project, click Tools | Update Project with Changes in Active Directory on the menu bar and follow the steps of the wizard. If the Keep this domain controller in the project option was selected for the domain controller, this DC will have "Removed, but remained in the project" status after comparing the project with live Active Directory and will remain in the project after the project update.
Phase 2
To promote new domain controllers and re-promote/demote existing ones
-
Open your project with domain controllers that were restored from a backup before.
-
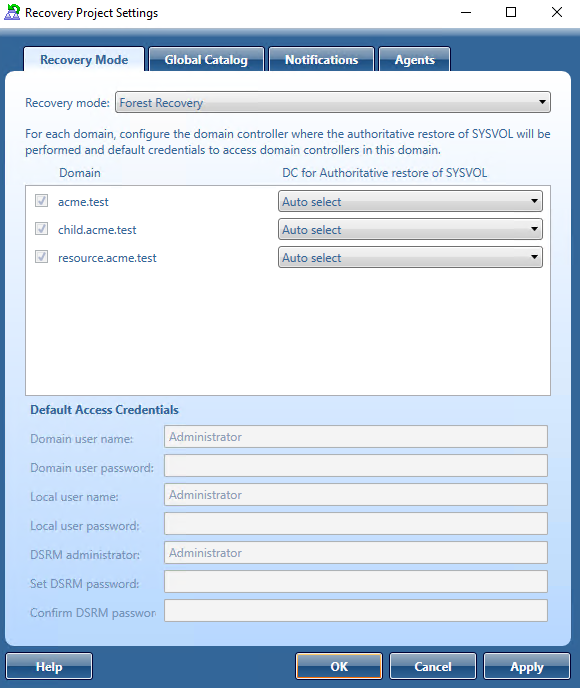
On the menu bar, click Tools | Recovery Project Settings.
-
Open the Recovery Mode tab.
-
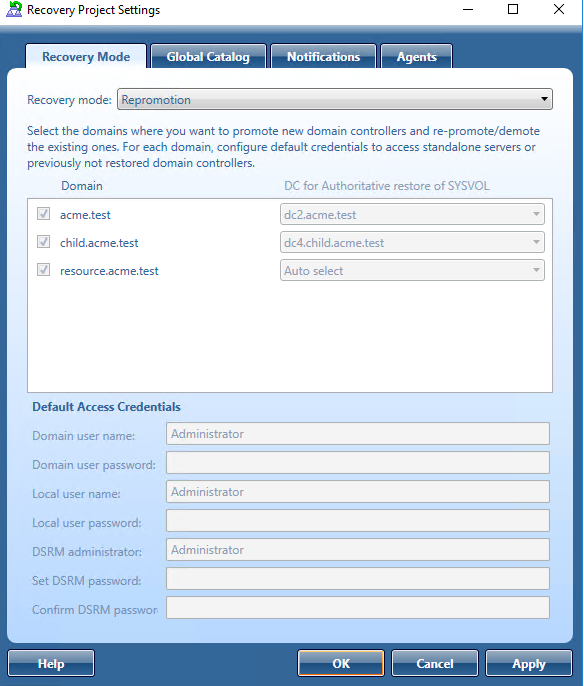
In the Recovery mode drop-down list, select Repromotion.
-
You cannot select domains for recovery. All domains are involved in recovery.
-
Optionally, you can specify default credentials to access domain controllers in the selected domains.
-
Now the Do nothing recovery mode is set for all running domain controllers that were recovered during Phase 1. This recovery mode does not perform any actions on the domain controller itself and does not remove it.
-
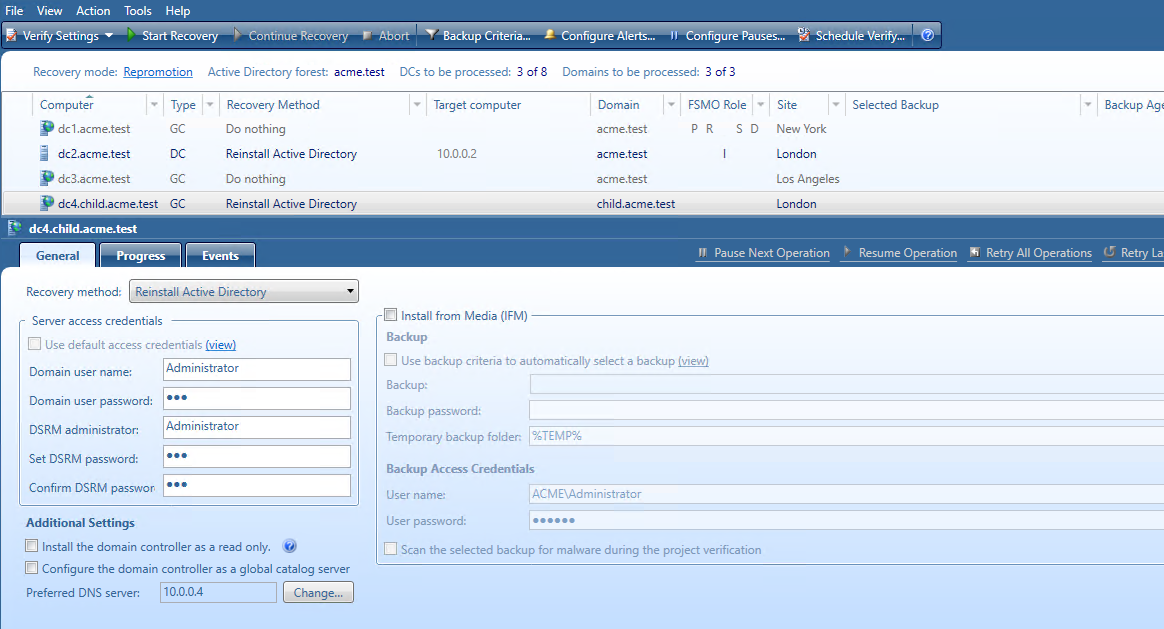
For domain controllers that were not restored during Phase 1, the Reinstall Active Directory recovery method is selected by default. Also, a user can use the Install from Media option or change Reinstall Active Directory to any other available recovery method.
-
Start the recovery process. The recovery process can be repeated many times - restore several not restored DCs, then restore the remaining DCs.
Managing Forest Recovery Agent
Recovery Manager for Active Directory employs a Forest Recovery Agent to recover domain controllers. For this reason, it is recommended that you install Forest Recovery Agent on each domain controller you want to recover with Recovery Manager for Active Directory.
| NOTE |
To install, delete or upgrade the Forest Recovery Agent, Recovery Manager for Active Directory uses the domain access credentials. For more details, refer Table 24 in the General tab section. |
Recovery Manager for Active Directory uses the Secure Remote Procedure Call (RPC) over Secure Sockets Layer (SSL) communication logic to establish secure connection between Forest Recovery Console and the Forest Recovery Agent based on the Microsoft Secure Channel (SChannel). The process of agent installation starts with generating the Console and Agent communication keys on the console side, then these keys are deployed to the agent host. After the keys are deployed, the both sides verify that each other has a valid key to provide the mutual authentication without using the domain access credentials.
If Forest Recovery Agent is not installed a domain controller in your recovery project, Recovery Manager for Active Directory attempts to automatically install the Forest Recovery Agent on that domain controller after you start the recovery operation on the project.
After you have upgraded the Forest Recovery Console to a new version, it is recommended that you manually upgrade the Forest Recovery Agent on each domain controller in your recovery projects to the version supplied with the new Forest Recovery Console. By doing so you ensure the Forest Recovery Console and the Forest Recovery Agent are fully compatible and can correctly communicate with each other after the upgrade.
In this section:
Installing or upgrading Forest Recovery Agent
| Note |
To install Forest Recovery Agent, the account under which Recovery Manager Console is running must be added to the Builtin\Administrators domain local group. |
To deploy the Forest Recovery Agent, you can use the following methods:
Automatic method
Automatically deploys and upgrades (if required) the Forest Recovery Agent during backup of domain controllers. If this method is used, all necessary communication keys will be deployed as well.
To automatically install the agent
-
In the Recovery Manager Console tree, expand the Computer Collections node to select the Computer Collection in which you want to automatically install or update the Forest Recovery Agent.
-
On the Action menu, click Properties.
-
In the Computer Collection Properties dialog box, open the Agent Settings tab, and then select the Ensure Forest Recovery agent is deployed check box.
-
Click OK.
When backing up the Computer Collection, Recovery Manager for Active Directory will verify that an up-to-date version of the Forest Recovery Agent is installed on each domain controller in the Collection.
Note that clearing the Ensure Forest Recovery Agent is deployed check box does not uninstall the Forest Recovery Agent. For instructions on how to uninstall the agent, see Uninstalling Forest Recovery Agent.
Manual method
Allows you to deploy the Forest Recovery Agent on multiple domain controllers from the Forest Recovery Console.
You can use this method to upgrade the Forest Recovery Agent on domain controllers after you have upgraded the Forest Recovery Console to a new version.
To install or upgrade the agent using Forest Recovery Console
-
Create or open a recovery project.
-
Use the List of Domain Controllers area to select the domain controllers on which you want to install or upgrade the agent. To select multiple domain controllers, hold down CTRL, and click the domain controllers you want to select.
-
On the menu bar, select Tools | Manage | Forest Recovery Agent or DCs.
-
In the dialog box that opens, click the Install Agent button to install or upgrade the Forest Recovery Agent on the domain controllers.
To install the agent manually and deploy communication keys for the agent
-
Copy RecoveryAgent64.exe from the Recovery Manager for Active Directory installation folder to the local folder on the target domain controller.
-
Run RecoveryAgent64.exe.
-
To establish a secure connection between the Forest Recovery Console and this instance of Forest Recovery Agent, you need to export communication keys (RecoveryAgent.pfx). To do this, you can use the Forest Recovery Console, as follows:
a. Open a Forest Recovery project.
b. Select Tools | Fault Tolerance on the menu bar.
c. Click Export secure communication keys… and specify the location of the communication key file. Use RecoveryAgent.pfx as a file name and 'RMAD' as a password (this password has nothing to do with security, it is a Windows 2003 limitation and we are going remove this setting soon).
d. Save this file to the Forest Recovery Agent installation folder on the target domain controller.