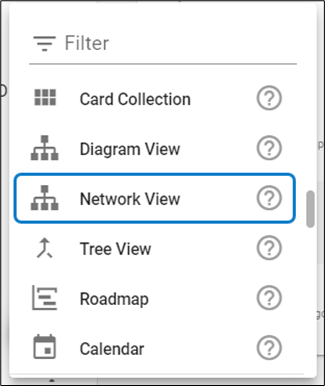
Chatee ahora con Soporte
Chat con el soporte

erwin Evolve 360 Current - User Guide

Kanban


Navigation: erwin Evolve 360 User Help Guide > Collections >

Kanban


Kanban

Kanban view helps to create and interact with data grouped by an attribute.

To create Kanban,

1.Click on All Views in the editor and then click on  icon placed at the bottom of the list of views.

2.Select Kanban from the list.

          3. To configure the view,

Click on Configuration on the toolbar or right-click on the view.

Select Data Source, either Element Type for a new one or Filter.

Set Limit of items to display.

Apply the Grouping Property, Properties of elements, and the available Properties as required.

Click Preview to see the result.


          4. By default, a Property is set with Name. To add the other one, click on Add Property from the right-side pane.

Select Element Type > Select Property.

Enable checkbox if you wish to have the property editable.

Click on Apply Changes.

          5. The preview of configured Kanban View is shown in the picture below.


List


Navigation: erwin Evolve 360 User Help Guide > Collections >

List


List

List view help to navigate to the data which is looking for. It displays the objects within the model and can be customized.

To create List View,

1.Click on All Views in the editor and then click on  icon placed at the bottom of the list of views.

2.Select List from the list.

          3. To configure the view,

Click on Configuration on the toolbar or right-click on the view.

Select Data Source, either Element Type for a new one or Filter.

Apply the Title Properties, Thumbnail Property and Tooltip Property as required.

Click Preview to see the result.


          4. To add the Properties, click on Configure on the toolbar or right-click on the view being in the Design Mode.

Click on + Add Property

By default, a property is set with Name. To edit click on the property or to add the other one, click on + Add Property from the right-side pane.

Select Element Type > Select Property.

Enable checkboxes if you wish.

Click on Apply Changes.

          5. The preview of configured List View is shown in the picture below.


Diagram View


Navigation: erwin Evolve 360 User Help Guide > Collections >

Diagram View


Diagram View

Diagrams are two types, Manual and Auto diagrams.

Manual Diagrams are integrated with Diagrammer, where you can create associations to the model and edit the diagrams manually. 

Auto Diagrams uses the same diagram types, but the diagrams are automatically drawn based on the data. They are dynamic, reads the data and generates the diagram through it.


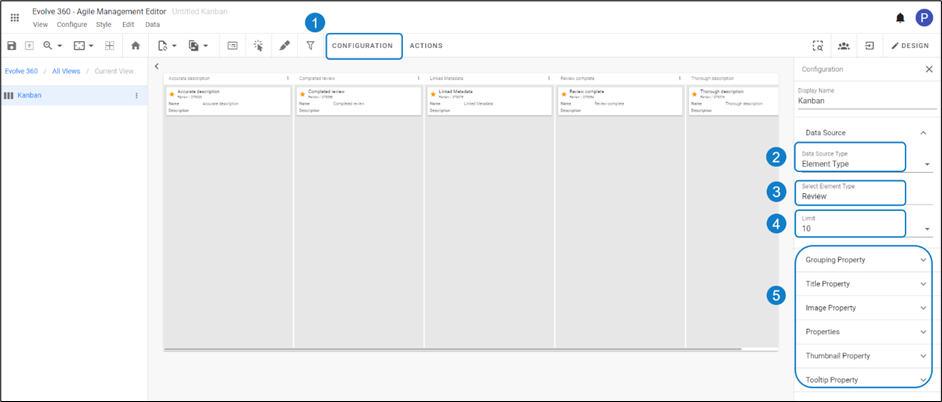
How to configure Manual Diagrams

Manual Diagrams works as Object Type View, which requires a context from the source.

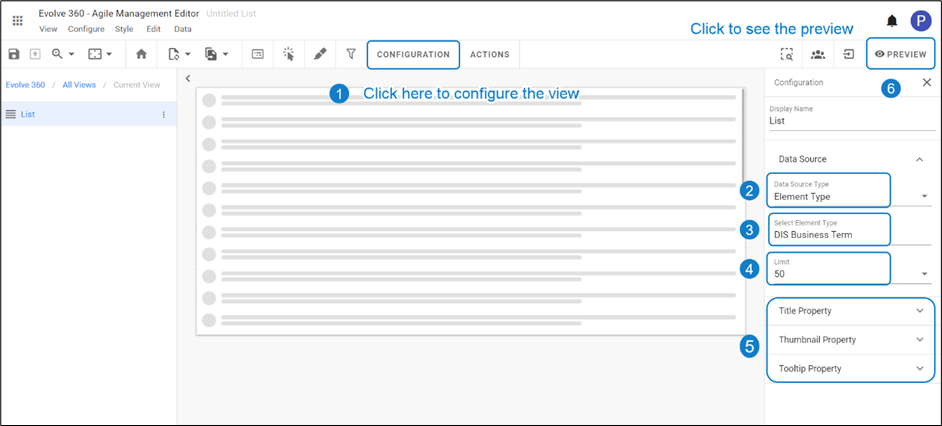
An example to configure Manual Diagram,

1.Click on All Views in the editor and then click on  icon placed at the bottom of the list of views.

2.For instance, choose a Column Layout with a List in the Column 1.

Select Data Source as Diagram.

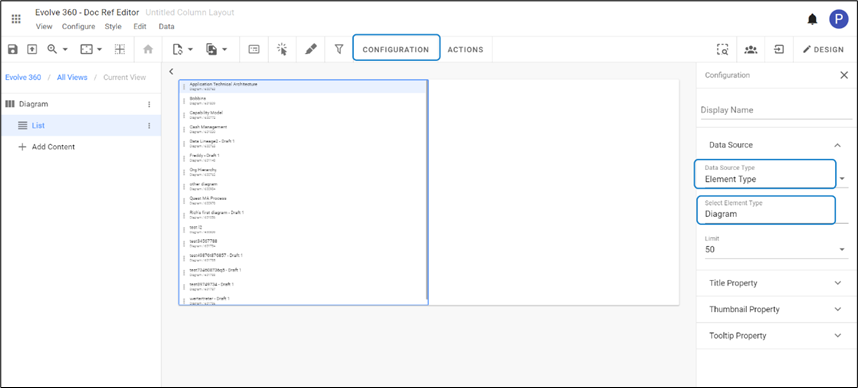
In column 2, select Object Type View

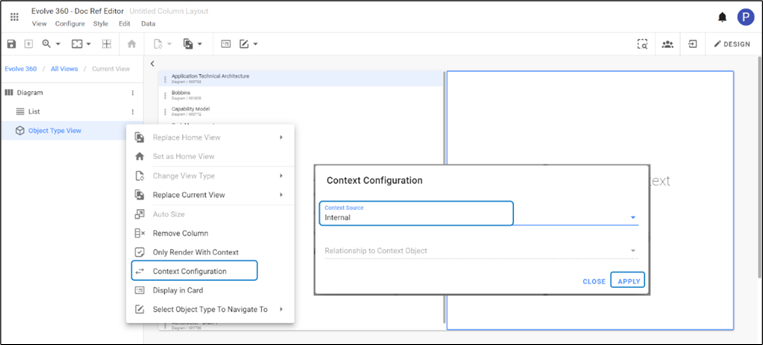
          3. To pass the context from the source,

Click on three dots against the Object Type View from the left side then select Context Configuration. Or go to the columns list and then click on column 2.

Select Context Source > Internal > Apply.

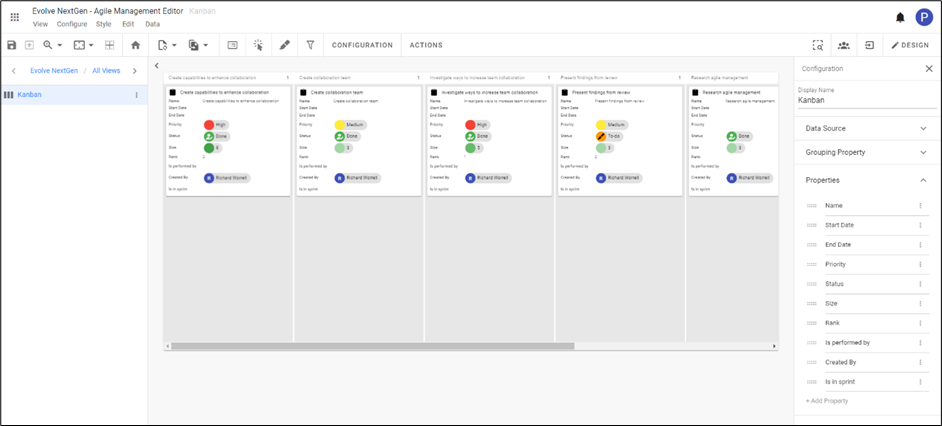
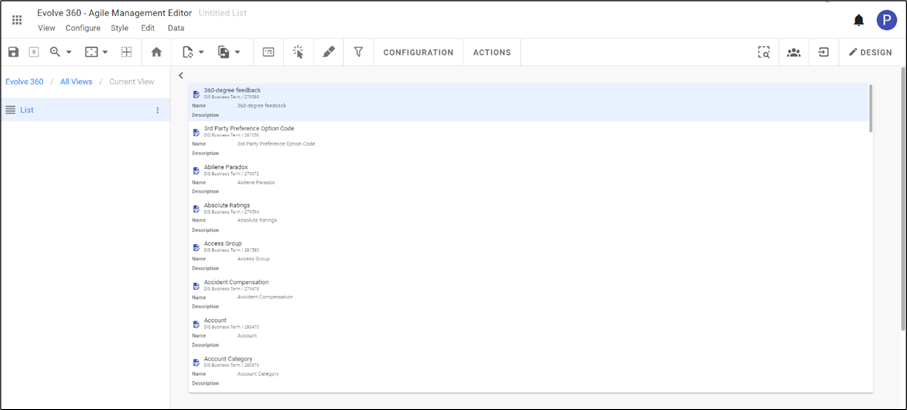
          4. The Diagrams from the source will appear as shown in the picture below.

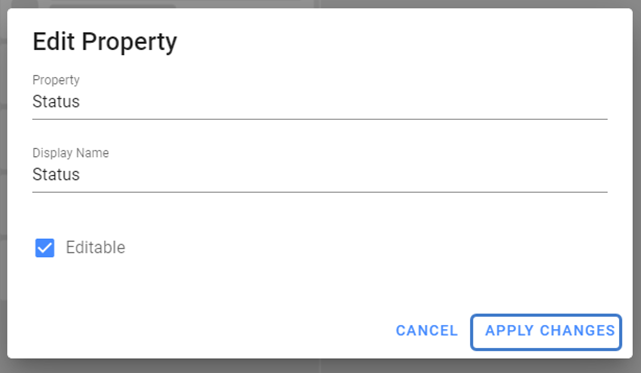
You can edit the diagrams to create association in the model. To edit, click on icon  from the top right corner.

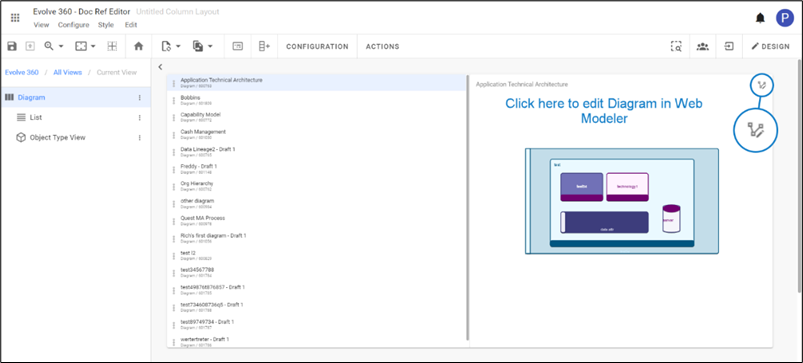
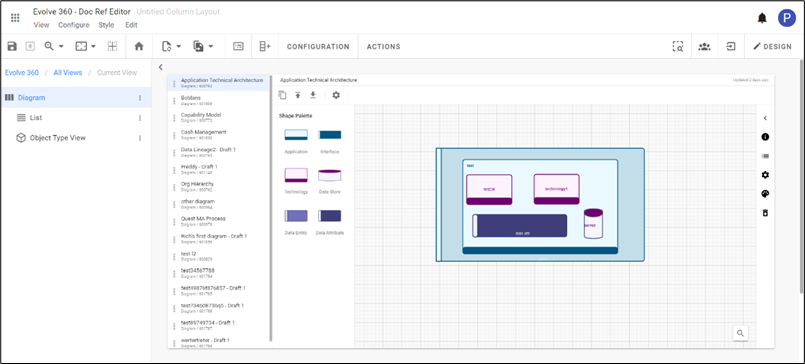
An editor called Diagrammer will be opened in the same space as shown in the picture below.

To know how to edit diagrams, see Diagramming


          5. To create a new diagram to the list.

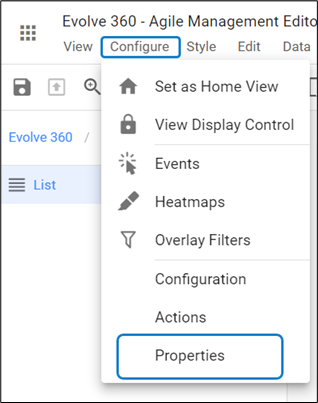
Go to Configure on toolbar, then select Actions.

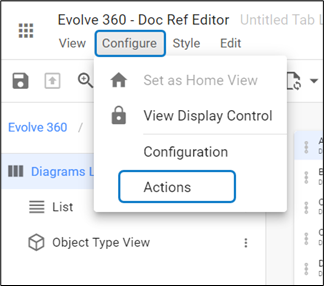
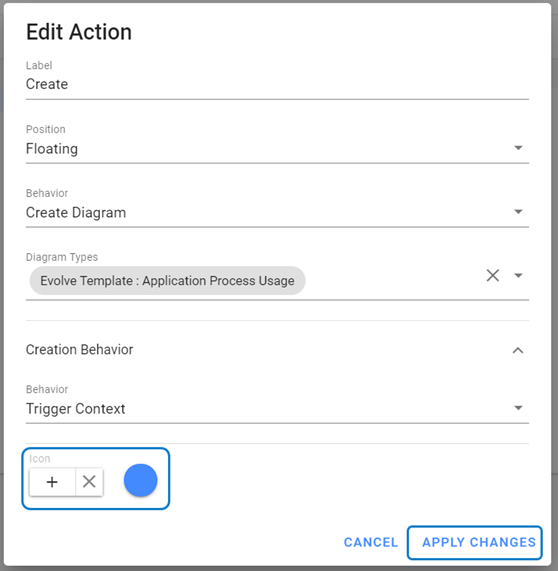
Click on +Add Action from the right-hand side. To edit, click on New Action created or click on three dots against it.

Enter Label > set Position > select Behavior of the action.

Choose Diagram Type and its Behavior

Select Icon and Color to the new action

Click on Apply Changes

Select Diagram Type is mandatory, such that you are defining a model by following that set of defined rules.


Make sure you select Create Diagram instead of Create for the behavior of the action.

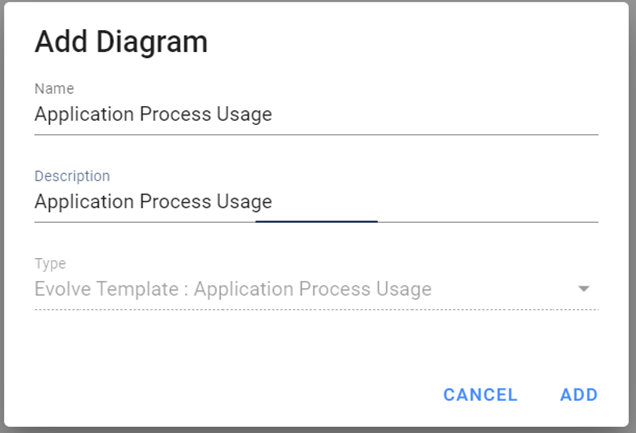
To add the new diagram to the list, click on  from the bottom of the column screen.

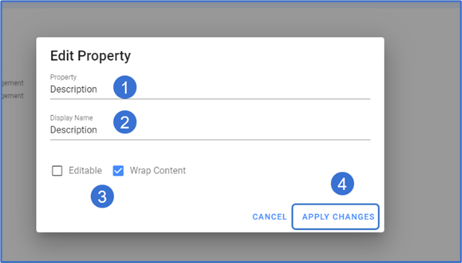
Enter Name and Description of the new diagram, then click on Add.


Make sure you select Create Diagram instead of Create for the behavior of the action.


Automated Diagrams

Automated Diagrams are the in-built diagram models, which reads the data from the source. These diagrams come along with the package or model.

Built in we have 3 layouts called Hierarchy, left to right & box in box.

These auto-diagrams require a diagram template and can be configured to make them look just right.


Network View


Navigation: erwin Evolve 360 User Help Guide > Collections >

Network View


Network View

Network View helps to show the relational data of the Object Type following the metamodel relationships.

Network View is typically applied when rendering the context from a single object instance.

An example for the Network View is shown below:

To create Network View,

1.Click on All Views in the editor and then click on  icon placed at the bottom of the list of views.

2.Select Network View from the list.

          3. To configure the view,

Click on Configuration on the toolbar or right-click on the view.

Select Data Source, either Element Type for a new one or Filter.

          4. To add the steps to the Network, click on Configuration of Network View.

Go to Network Steps > Add Step > Enter Label > Select Relationship Type > select Target Object Type > Add.

Ticking the Ignore check-box will still draw the step but will not return the results of that step.

To group the step, tick the check-box Group.


          5. A child step can be added further to the associated Objects.

To add the child step, click on three dots against the main step.

Select Add Child Step.

          6. A preview of the configured Network is shown in the picture below.

Make sure you know the relationships between the objects before configuring the Network View. To know the existing relations, go to Profile > Relationship Types.


Network View can also be configured as Object Type View, but it requires context to pass from source. To know, see Object Type View.


Documentos relacionados

The document was helpful.

Seleccionar calificación

I easily found the information I needed.

Seleccionar calificación