Chatee ahora con Soporte
Chat con el soporte

erwin Evolve 360 Current - User Guide

General Operations in Diagrammer


Navigation: erwin Evolve 360 User Help Guide > Diagramming >

General Operations in Diagrammer


General Operations in Diagrammer

Options that are generally available for any diagram in the canvas are:

1.Duplicate Draft

2.Publish Diagram

3.Download Diagram

Duplicate Draft:

To duplicate the working draft of the diagram, click on Duplicate Draft on the toolbar.

By doing this, a copy of the draft will be created, and you will be taken immediately to the draft diagram.

The draft diagram will be associated with the originally published diagram, and on publishing will replace the same published diagram.

To create a separate published diagram, you should duplicate the published diagram instead


Publish Diagram

To publish the diagram, click on Publish Diagram icon on the toolbar.

Before proceeding to Publish the diagram, make sure you don’t have any incomplete items in To-Do list. Once published, the draft diagram will be deleted, and the published diagram will be available in the application.

Download Diagram

To download the diagram in the form of an image to your machine, click on Download Diagram on the toolbar.

Diagram Settings

To apply the settings related to the diagram Grid, Animation and Guiding lines in the editor, click on Diagram Settings on the toolbar.

You will see a panel popped up on the right-side of the screen to work on settings.


Working with Connector Lines


Navigation: erwin Evolve 360 User Help Guide > Diagramming >

Working with Connector Lines


Working with Connector Lines

The lines which associate the two objects in the diagram are called Connector Lines.

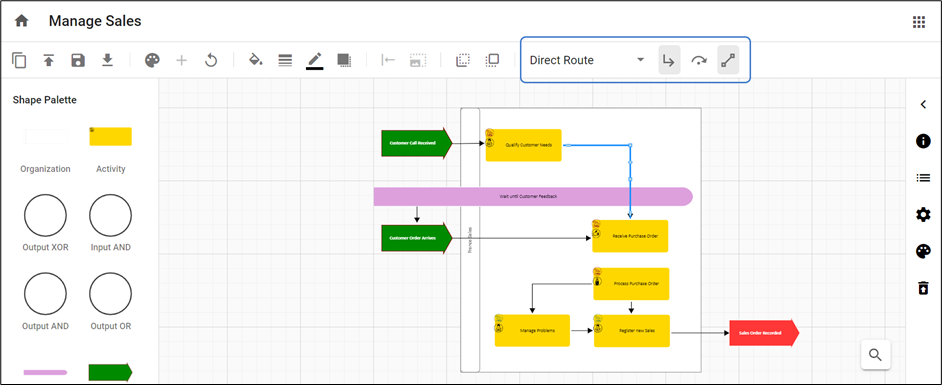
Double-click on the line, then the options for connector lines are shown on the toolbar.

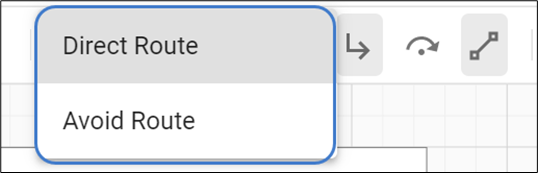
Lines can be applied in two ways:

1.Direct Route – connects the objects using the shortest path.

2.Avoid Route – connects the objects avoiding the other objects in the diagram structure.

Lines are of three types are available to connect the objects:

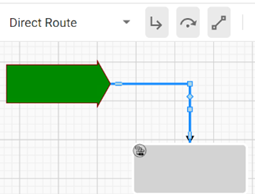
1.Orthogonal Lines – Orthogonal Lines are when the line appears with right angles in order to connect the two objects when it cannot be drawn horizontally or vertically.

This line is available only under Direct Route and will be disabled for Avoid Route.

Orthogonal Off

Orthogonal On


          2. Jump Lines – Jump Lines are when one connecting line passes over another, and it appears with an arc over it.

This button is used in conjunction with the orthogonal lines button. If an orthogonal line is off for a particular line, then the jump line button is disabled.

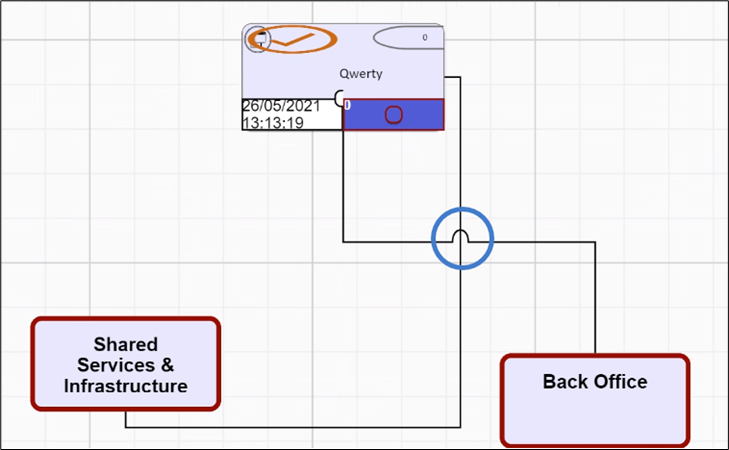
Jump is a property of an individual line, so if the lines cross and neither have the jump property then they look like straight lines passing through one another. Jump lines will be seen if both lines have jump property.

          3. Lock/Unlock Link Port – Link Ports can be Locked or Unlocked. To lock them, either press the button or move the connection point (port) of the line, around the shape. When you select a location to port the line to the shape, it will become locked. If you want the                     Diagrammer to automatically reposition the port, select the line, and press the unlock button, to release the lock.

Locking the link ports helps to keep the specific connection point when the shapes are moved around the canvas.


Administration


Navigation: erwin Evolve 360 User Help Guide >

Administration


Administration


Client and User Settings


Navigation: erwin Evolve 360 User Help Guide > Administration >

Client and User Settings


Client and User Settings

Client & Users helps to add new user, license management, and to register requests.

You need to have administrator rights to perform any action related to users.


To set the settings, go to profile icon on the top right corner, select Client & Users.


          1. To set the existing user with Administrator rights,

Go to Client > Administrator > Save

          2. Under License tab, you can view your available Licenses for the product. You can assign licenses to registered users by clicking on User in the table and to remove the license for the assigned user, click on cross against the user on selection.

          3. Registration Requests tab helps to register the new users.

Click on + symbol on top of the table, enter the Email address of the user and click on Save.

Soon after, user will receive a Registration Request email saying that an account has been created and asks to Activate Account.

          4. Users display the whole list of registered users with the license information.


Documentos relacionados

The document was helpful.

Seleccionar calificación

I easily found the information I needed.

Seleccionar calificación