Chatee ahora con Soporte
Chat con el soporte

erwin Evolve 360 Current - User Guide

Filters


Navigation: erwin Evolve 360 User Help Guide > To add Object Type View > Customization of View >

Filters


Filters

Filters are applied while configuring the view to display the data, which can be applied in two ways. The first is defining the new set of filters using Filter Criteria, and the other is applying the already defined filter using the Existing Filter.

Steps to apply Filter Criteria:

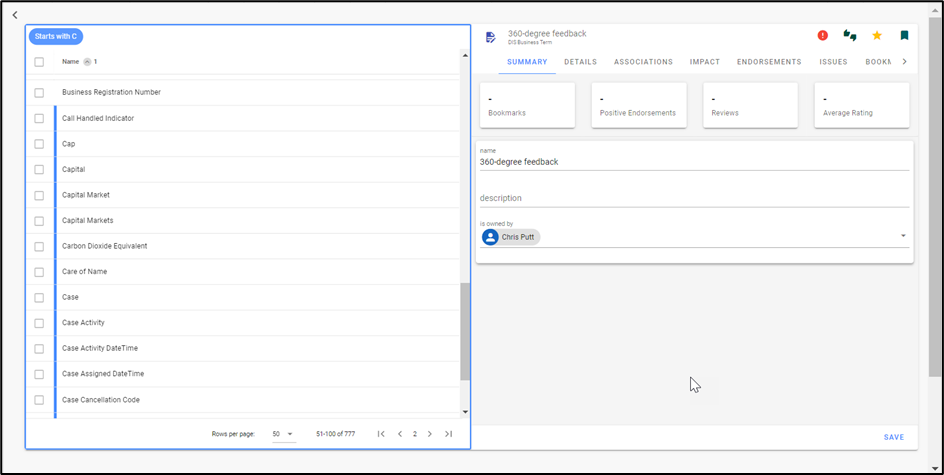
For instance, in a list view, Filter Criteria is applied to Data Source Type to extract the necessary list of items based on the Object Type's Properties.

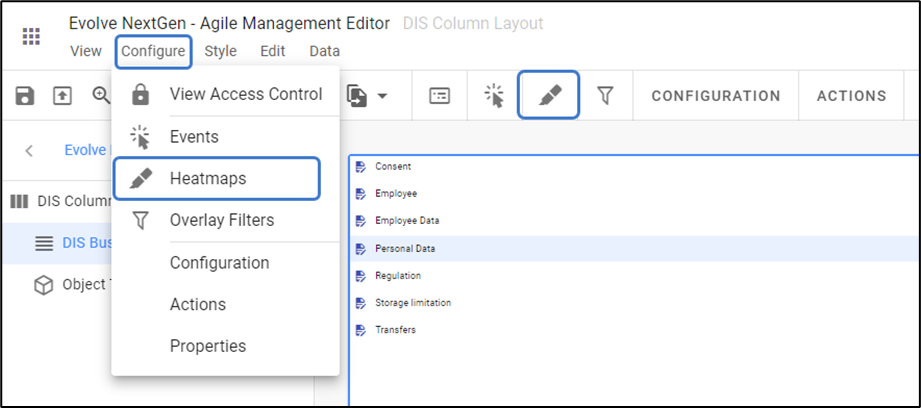
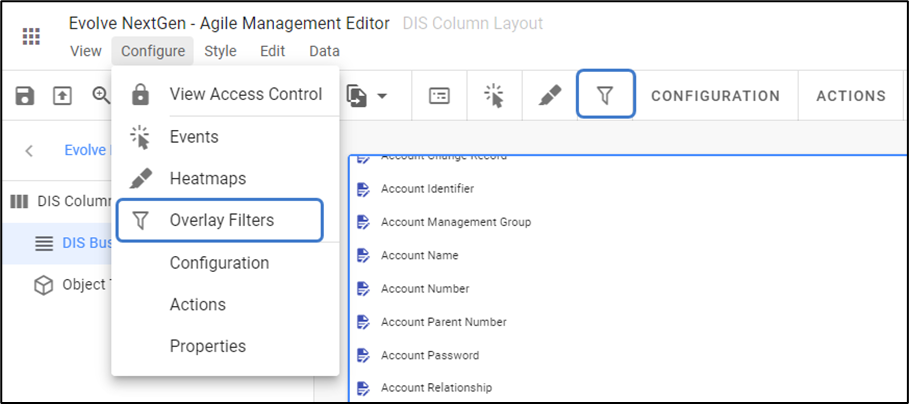
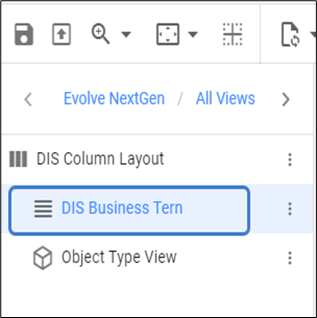
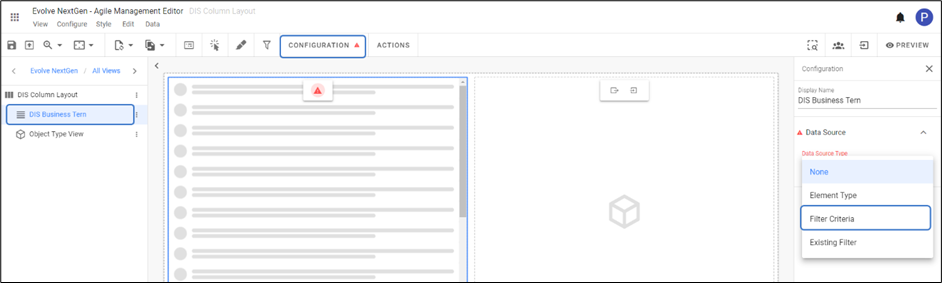
1.Click on view under the Layout, go to Configuration, which appears on the pane's right side.


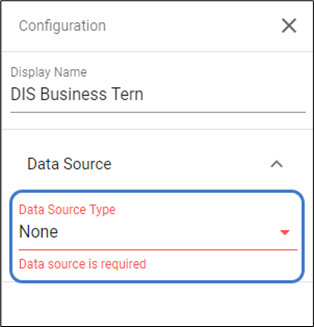
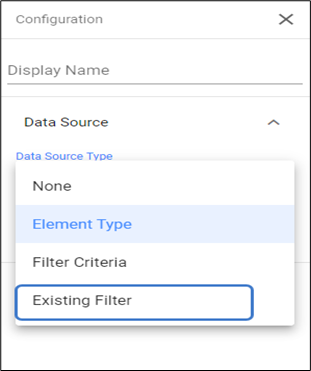
By default, Data Source Type will be None.

1.Select the Filter Criteria under the Data Source Type.

An option to edit will show up right after the selection.

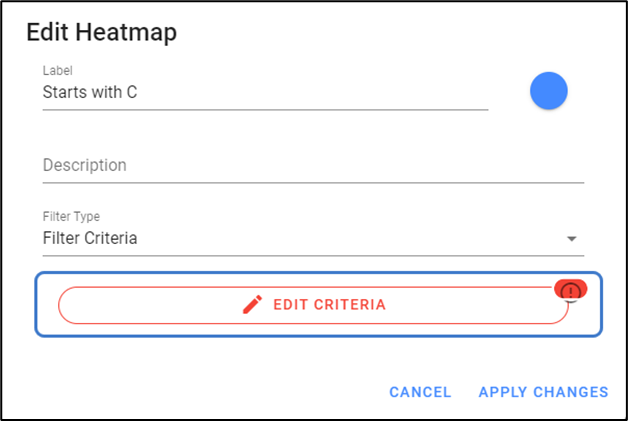
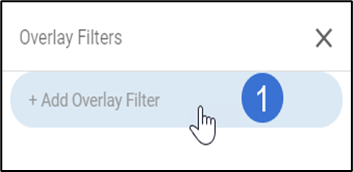
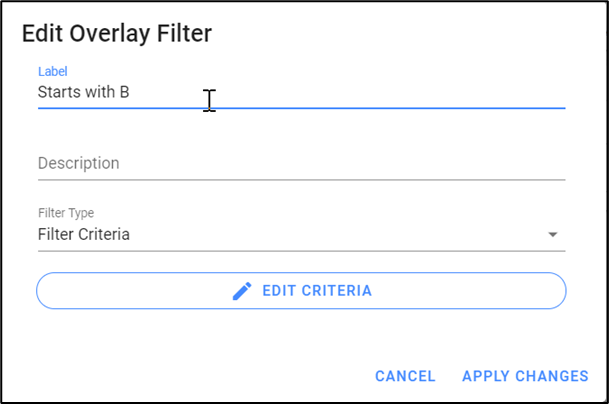
Click on Edit Criteria.

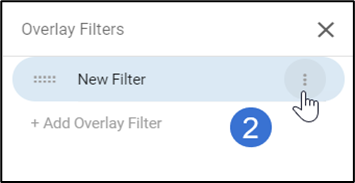
A dialog with the editor opens, choose the Object Type for a selected view and properties of that object.

Click on Apply Changes to save.

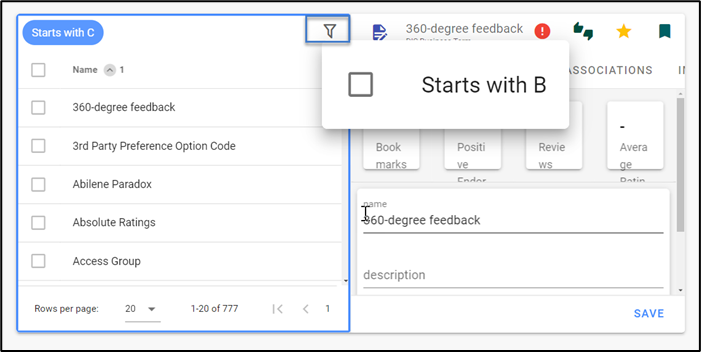
With Filter Criteria, multiple Object Types and Properties can be added or deleted by clicking on the  icon or  icon against the entry.


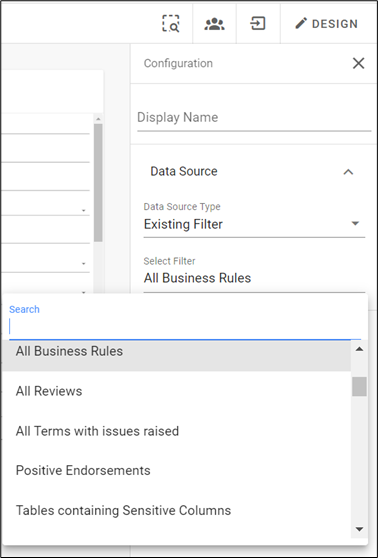
Steps to Apply Existing Filter:

1.          Click on view under the Layout, go to Configuration, which appears on the pane's right side.


          2. Select Existing Filter from the list. Choose the desired filter to apply in the view.


Events


Navigation: erwin Evolve 360 User Help Guide > To add Object Type View > Customization of View >

Events


Events

Events are the behavior controlling options for a View that renders the information from the source.

Events can be found under Configure tab or on the toolbar.

There are two types of behaviors for an Object Type.

          1. Trigger Context – is used to pass the Object Type selected to the other view.

E.g., In the below example, the Element Type defined passes the object and displays it in the Object Type View within the Layout.


          2. Open View – It opens the Object Type View in Window, Dialog, Panel and Tab. 

Dimensions of the View can also be customized by giving the Height and Width.


The Initial State of the View can be set in different ways, i.e., Floating over the screen, in Full Screen, Snapping to the left, right, top and bottom.


Heatmaps


Navigation: erwin Evolve 360 User Help Guide > To add Object Type View > Customization of View >

Heatmaps


Heatmaps

Heatmaps help to highlight the required information of the Element Type.

To add the Heatmaps, click on the  icon in the toolbar or find under the tab Configure.

A popup appears on the right side of the pane.

1.Click on Add Heatmap.

2.Click on three dots against the New Heatmap.


          3. Click on Edit, a dialog box appears.

Input the Label and choose Filter Criteria, then click on Edit Criteria.

Choose the Object Type and enter the properties of the object to display.


For instance, select Object Type as DIS Business Term and property as Name – Starts with C.

Then click on Apply Changes.

          4. Applied Heatmap appears as a breadcrumb over the top of the view by highlighting the information.


Overlay Filters


Navigation: erwin Evolve 360 User Help Guide > To add Object Type View > Customization of View >

Overlay Filters


Overlay Filters

Overlay Filters are applied to filter the data within the view of the Layout.

To apply the Overlay Filter, click on the  icon in the toolbar or find under the tab Configure.


A popup appears on the right side of the pane.

1.Click on Add Overlay Filter.

2.Click on three dots against the New Filter.


          3. Click on Edit, a dialog box appears.

Input the Label and choose Filter Criteria, then click on Edit Criteria.


Choose the Object Type and enter the properties of the object to display.


For instance, select Object Type as DIS Business Term and property as Name-Starts with B.

Then click on Apply Changes.

          4. Applied Filter appears on the top right of the view.

Select the required filter to see the data.


Documentos relacionados

The document was helpful.

Seleccionar calificación

I easily found the information I needed.

Seleccionar calificación