
Updating OneDrive Hyper Backup
Once a Backup exists, users can create updates by capturing a full or incremental snapshots of their OneDrive environment. Here are the basic guidelines for this process:
1.Select a OneDrive Backup project from the Backup Navigator panel.

2.From the Ribbon (or right-click menu for the selected backup) select the Update Backup option. This will generate the Update Backup Properties screen.
3.A user may select one of several options for the update:
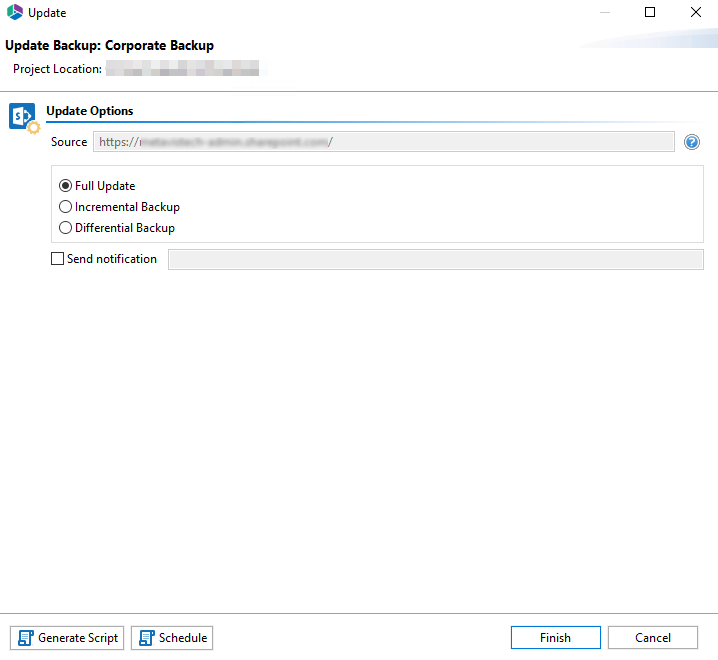
Full Update - this will create a full snapshot of your currently configured backup project.
Incremental Backup - this will capture only the changes in your backup project since the last update, regardless if that update was Full or Incremental. In this scenario a user could create a series of Backups containing data changes for a specific time period.
Differential Backup - this will capture all the changes in your backup project since the last full Backup, even if other incremental Backups have been created in the interim.
Send Notification - Enter a specific user email address. For two or more, separate each email address with a comma.
4.Press Finish to update the Backup now or choose the Schedule button to configure a Windows Task Scheduler task to schedule the update backup (See the Scheduling Backup Jobs section for more information).
Restoring OneDrive Hyper Backup
There are a variety of ways to perform a restore of a OneDrive backup, based on your specific needs. This section will review the various components of a backup which can be restored and the ways in which to do so.
Restoring a List from OneDrive Backup
The following are instructions for restoring a OneDrive List/Library from a specific backup:
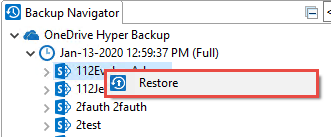
1.Navigate to the backup, You can access the Restore wizard by either right-clicking on the selected username and selecting the "Restore" option
Or you can access the Restore Wizard by selecting "To Original Location" in the Restore section of the Ribbon.

2.The Restore Backup wizard will now be generated. Enter the OneDrive Owner.

3.You can choose from the following configuration options:
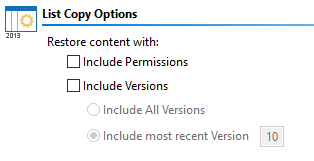
List Copy Options
Include Permissions - Select this option to copy the content permissions of the content within the list/library.
Include Versions - copy the version of the content included within the list/library. You can specify if you would like to include all versions of the content, or whether you would like to include the most recent number of specified versions of the content.
Advanced Options
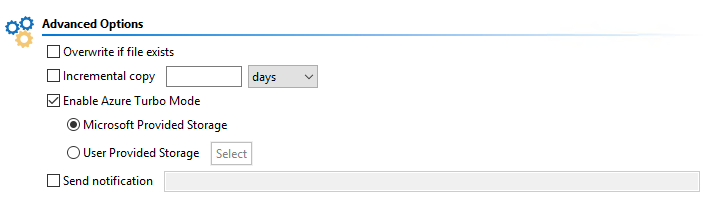
Overwrite if file exists - In a version library, selecting the "Overwrite if File Exists" option does not overwrite the files already in SharePoint. SharePoint will append these to the list as new versions.
Incremental Copy - Incremental or delta migrations are an important and powerful option for large or ongoing projects and migration validation. Once enabled this option will migrate new, modified or versioned content from the source to the destination, capturing changes made by users during the previous migration.
The value entered into the "Last" field will limit the amount of content examined to the time period specified, starting at present time.
To perform an incremental migration, enter the amount of time to include and select the appropriate time period in days, weeks or months. Incremental migration is designed to be used in scenarios where the destination is not being modifed.
To perform a delta migration, enter zero in the field and select days as the time period. Delta migration is designed to be used in scenarios where both the source and destination may be modified during the course of the migration. Please note that a delta migration compares dates between source and destination to determine which content to include, so it will take more time to process than an incremental migration.
|
|
NOTE: The Overwrite if File Exists parameter will be disabled if this option is selected. |

Enable Azure Turbo Mode - When enabled, this option utilizes Microsoft's SharePoint Online Migration API to increase the migration performance and throughput. A recommendation for optimal use of this API is larger sets of data; the more content, the better the throughput. Because this API uses Azure storage as a staging area for the migration, it requires that you provide an Azure storage location. The options are to either utilize Microsoft supplied storage or to provide your own Azure storage location. If you wish to use your own Azure account, you must provide both the Azure Account Name as well as the corresponding Access Key. If you cannot supply this information, please search our online Knowledge Base, User Manual, or contact Support for additional information before proceeding or consider using the Microsoft Supplied Storage option. For more information please see the Azure Turbo Mode section.
| Send Notifications - provide an email to which notifications will be sent regarding the progress of the Backup Restore. |
7.Once you have configured all of your settings, click Finish to complete the restore.
|
|
NOTE: By default the restore process will put all the content, metadata, site/list structure, permissions and other supported objects back into the original backup location. |
Restoring a List from a OneDrive Backup to a New Place
The following are instructions for restoring a OneDrive List/Library from a specific backup to a new place:
1.Navigate to the backup and select a list or library to restore.
2.You can access the Restore wizard by right-clicking on the selected site or list and selecting the "Restore to new place" option.

3.The Restore Backup wizard will now be generated. Enter the OneDrive Owner.
4.In the wizard provide the new site url for the new place where you would like to restore the list or library. Click Connect.

5.Enter account credentials for the site url provided above, and click Finish.
6.You can choose from the following configuration options:
List Copy Options
Include Permissions - Select this option to copy the content permissions of the content within the list/library.
Include Versions - copy the version of the content included within the list/library. You can specify if you would like to include all versions of the content, or whether you would like to include the most recent number of specified versions of the content.
Advanced Options
Overwrite if file exists - In a version library, selecting the "Overwrite if File Exists" option does not overwrite the files already in SharePoint. SharePoint will append these to the list as new versions.
Incremental Copy - Incremental or delta migrations are an important and powerful option for large or ongoing projects and migration validation. Once enabled this option will migrate new, modified or versioned content from the source to the destination, capturing changes made by users during the previous migration.
The value entered into the "Last" field will limit the amount of content examined to the time period specified, starting at present time.
To perform an incremental migration, enter the amount of time to include and select the appropriate time period in days, weeks or months. Incremental migration is designed to be used in scenarios where the destination is not being modifed.
To perform a delta migration, enter zero in the field and select days as the time period. Delta migration is designed to be used in scenarios where both the source and destination may be modified during the course of the migration. Please note that a delta migration compares dates between source and destination to determine which content to include, so it will take more time to process than an incremental migration.
|
|
NOTE: The Overwrite if File Exists parameter will be disabled if this option is selected. |
Enable Azure Turbo Mode - When enabled, this option utilizes Microsoft's SharePoint Online Migration API to increase the migration performance and throughput. A recommendation for optimal use of this API is larger sets of data; the more content, the better the throughput. Because this API uses Azure storage as a staging area for the migration, it requires that you provide an Azure storage location. The options are to either utilize Microsoft supplied storage or to provide your own Azure storage location. If you wish to use your own Azure account, you must provide both the Azure Account Name as well as the corresponding Access Key. If you cannot supply this information, please search our online Knowledge Base, User Manual, or contact Support for additional information before proceeding or consider using the Microsoft Supplied Storage option. For more information please see the Azure Turbo Mode section.
| Send Notifications - provide an email to which notifications will be sent regarding the progress of the Backup Restore. |
7.Once you have configured all of your settings, click Finish to complete the restore.
|
|
NOTE: By default the restore process will put all the content, metadata, site/list structure, permissions and other supported objects back into the original backup location. |