
Updating SharePoint Online Classic Backup
Once a Backup exists, users can create updates by capturing a full or incremental snapshots of their SharePoint environment. Here are the basic guidelines for this process:
1.Select a SharePoint Online Backup project from the Backup Navigator panel.
2.From the Ribbon (or right-click menu for the selected backup) select the Update Backup option. This will generate the Update Backup Properties screen.
3.A user may select one of several options for the update:
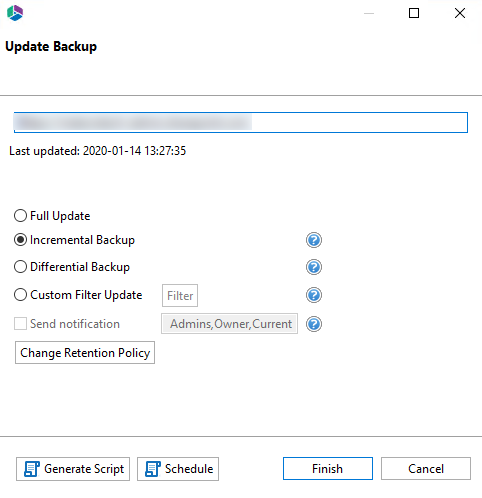
Full Update - this will create a full snapshot of your currently configured backup project.
Incremental Backup - this will capture only the changes in your backup project since the last update, regardless if that update was Full or Incremental. In this scenario a user could create a series of Backups containing data changes for a specific time period.
Differential Backup - this will capture all the changes in your backup project since the last full Backup, even if other incremental Backups have been created in the interim.
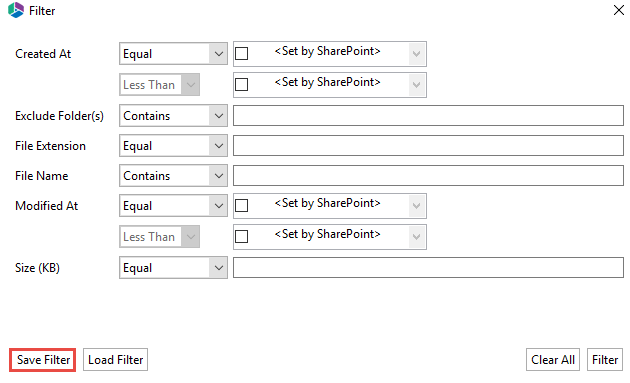
Custom Filter Update - Selecting this option will allow you to update the filter options for the backup. Filters allow the inclusion or exclusion of items by user defined criteria, such as date, size, file extension, file name, or file owner.
Please note that the Apply Filter functionality is only applied to selected containers (i.e. site, lists or folders). If you select specific content (documents or items) then those objects will be included with the operation regardless of the filter applied. If you want to selectively include content, please select the container that this content resides in and apply the filter or apply the filter against the container first, then select the remaining content.
For the File Extension and Exclude Folders parameters only, you can use "," to set more than 1 criteria. For example, use this format "png,docx,pptx" to include multiple file extensions.
"Size" filter should have a whole number without decimals. It recommended not to use operators "Equal" and "Not Equal" to avoid difficulties with accurate file size if it more than 1 MB.
Use "Save Filter" option to save filter settings to file and load it in different wizards or Profile Manager. Note that filter file and filter fields have to match. For example, set of fields in filter will be different if you copy file into two different libraries.
Send Notification - Enter a specific user email address. For two or more, separate each email address with a comma.
Change Retention Policy - selecting this button will open the retention policy properties window, allowing you to update the retention policy for the backup.
4.Press Finish to update the Backup now or choose the Schedule button to configure a Windows Task Scheduler task to schedule the update backup (See the Scheduling Backup Jobs section for more information).
Restoring SharePoint Online Classic Backup
There are a variety of ways to perform a restore of a Classic SharePoint backup, based on your specific needs. This section will review the various components of a backup which can be restored and the ways in which to do so.
Restore a Site from Specific Backup
The following are instructions for restoring a SharePoint site (in-place restore only) from a specific backup:
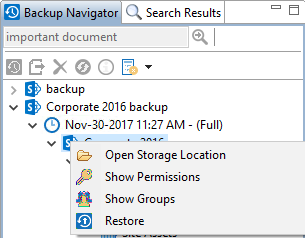
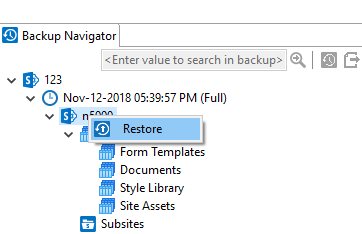
1.Navigate to the backup and select a site to restore.
2.You can access the Restore wizard by either right-clicking on the selected site or list and selecting the "Restore" option.
Or you can access the Restore Wizard by selecting "To Original Location" in the Restore section of the Ribbon.

3.When prompted, select "yes" that you do want to restore the backup to its original location. Then select whether you would like to send notification.
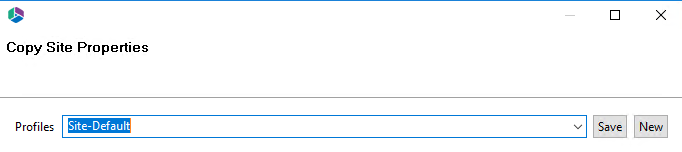
4.The Copy Site Properties wizard will now be generated.
5.In the wizard you can choose to create a new Profile or use the Site-Default profile.
6.You can choose from the following configuration options:
Site Collection options

|
|
NOTE: ·Site Collection options would be available only if site collection does not exist. Otherwise this section would not be available. ·Enter new site collection URL is not supported. |

Tenant Central Admin URL enter the Admin Portal URL for Office 365 where site collection must be restored
Site Collection Admin- enter user name (user@contoso.com) who would be site collection admin for restored site collection
Site Collection Quota - enter quota for restored site collection.
Site Copy Options
Copy Content Types -For existing sites, new content types will be copied with their inheritance preserved. For new sites, all content types will be copied.

|
|
NOTE: If source content types are inherited, then all types and dependencies will be created on the target site level. |
Copy Sub-Sites - Enable this option to include all sub-sites of the current site in this operation.
Copy Sub-Site Permissions - This option will copy source site permissions to the target site. If the source site permissions are inherited, then the target site permissions will also be set to inherited. If the source site permissions are unique, these unique permissions will be copied to the target site.
Deferred Group Copy - Selecting Deferred Group Copy will only copy Permissions Groups that are used within the site(s) you are copying. Selecting Copy Site Groups will copy all Groups across the entire site collection.
|
|
NOTE: ·Using Deferred Group Copy can be time consuming and result in slower migration performance. ·Copying Permissions Groups requires elevated privileges within SharePoint. |
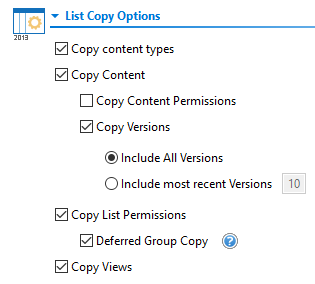
List Copy Options

|
|
NOTE: Restore would be with all lists, list settings, content types, columns and content |
Copy Lists and Libraries - copy list and libraries contained within the site backup.
Copy Content - copy the content contained within the site backup.
Copy Content Permissions - copy the permissions associated with the content within this list/library
Copy Versions - copy the version of the content included within the list/library. You can specify if you would like to include all versions of the content, or whether you would like to include the most recent number of specified versions of the content.
Copy List Permissions - select this option to copy the site permissions.
Copy Views - select this option if you would like to copy the number of views of the site.
Advanced Options
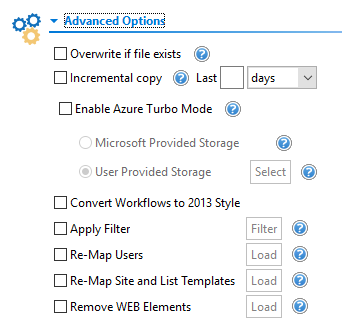
Overwrite if file exists - In a version library, selecting the "Overwrite if File Exists" option does not overwrite the files already in SharePoint. SharePoint will append these to the list as new versions.
Incremental Copy - Incremental or delta migrations are an important and powerful option for large or ongoing projects and migration validation. Once enabled this option will migrate new, modified or versioned content from the source to the destination, capturing changes made by users during the previous migration.
The value entered into the "Last" field will limit the amount of content examined to the time period specified, starting at present time.
To perform an incremental migration, enter the amount of time to include and select the appropriate time period in days, weeks or months. Incremental migration is designed to be used in scenarios where the destination is not being modified.
To perform a delta migration, enter zero in the field and select days as the time period. Delta migration is designed to be used in scenarios where both the source and destination may be modified during the course of the migration. Please note that a delta migration compares dates between source and destination to determine which content to include, so it will take more time to process than an incremental migration.
|
|
NOTE: The Overwrite if File Exists parameter will be disabled if this option is selected. |
| Enable Azure Turbo Mode - When enabled, this option utilizes Microsoft's SharePoint Online Migration API to increase the migration performance and throughput. A recommendation for optimal use of this API is larger sets of data; the more content, the better the throughput. Because this API uses Azure storage as a staging area for the migration, it requires that you provide an Azure storage location. The options are to either utilize Microsoft supplied storage or to provide your own Azure storage location. If you wish to use your own Azure account, you must provide both the Azure Account Name as well as the corresponding Access Key. If you cannot supply this information, please search our online Knowledge Base, User Manual, or contact Support for additional information before proceeding or consider using the Microsoft Supplied Storage option. For more information please see the Azure Turbo Mode section. Convert Workflows to 2013 Style - convert the workflows in the backup to the 2013 style. Apply Filter - Filters allow the inclusion or exclusion of items by user defined criteria, such as date, size, file extension, file name, or file owner. |
Please note that the Apply Filter functionality is only applied to selected containers (i.e. site, lists or folders). If you select specific content (documents or items) then those objects will be included with the operation regardless of the filter applied. If you want to selectively include content, please select the container that this content resides in and apply the filter or apply the filter against the container first, then select the remaining content.
For the File Extension and Exclude Folders parameters only, you can use "," to set more than 1 criteria. For example, use this format "png,docx,pptx" to include multiple file extensions.
"Size" filter should have a whole number without decimals. It recommended not to use operators "Equal" and "Not Equal" to avoid difficulties with accurate file size if it more than 1 MB.
Use "Save Filter" option to save filter settings to file and load it in different wizards or Profile Manager. Note that filter file and filter fields have to match. For example, set of fields in filter will be different if you copy file into two different libraries.
Re-Map Users - This option will allow you to map users between different domains or to change the user account in the target environment during copy.
Re-Map Site and List Templates - This feature allows for the re-mapping of list or site templates.
Remove WEB Elements - This option allows you to remove specified webparts and namespace references from all included pages during migration.
The webpart and namespace references to be removed should be defined in a CSV file and then loaded with this option.
7.Once you have configured all your settings, click Next for a summary of the restore, and then Finish.
|
|
NOTE: By default the restore process will put all the content, metadata, site/list structure, permissions and other supported objects back into the original backup location. |
Restore a List/Library from a Specific Backup
The following are instructions for restoring a SharePoint List/Library from a specific backup:
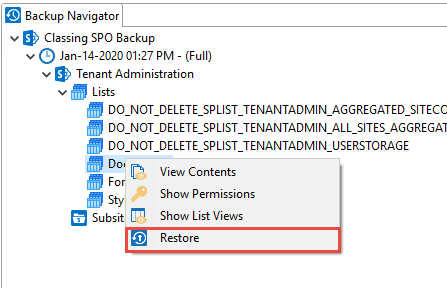
1.Navigate to the backup and select a list or library to restore.
2.You can access the Restore wizard by either right-clicking on the selected site or list and selecting the "Restore" option
Or you can access the Restore Wizard by selecting "To Original Location" in the Restore section of the Ribbon.
3.The Restore Backup wizard will now be generated.
4.You can choose from the following configuration options:
List Name and Properties - you can choose to change the list name and profile.
List Copy Options
Copy Content Types - restore the content types contained within the list backup.
Copy Content - restore the content within the list/library backup.
Copy Content Permissions - restore the permission settings of the content within the list/library backup.
Copy Versions - copy the version of the content included within the list/library. You can specify if you would like to include all versions of the content, or whether you would like to include the most recent number of specified versions of the content.

Copy List Permissions - select this option to copy the list/library permissions.
Copy Views Views - select this option if you would like to copy the number views of the list/library.
Advanced Options
![restore spo classic backup 7]](/pt-br/technical-documents/image/6880d28d-f140-4b8d-a81a-c4fc41d1d683)
Overwrite if file exists - In a version library, selecting the "Overwrite if File Exists" option does not overwrite the files already in SharePoint. SharePoint will append these to the list as new versions.
Incremental Copy - Incremental or delta migrations are an important and powerful option for large or ongoing projects and migration validation. Once enabled this option will migrate new, modified or versioned content from the source to the destination, capturing changes made by users during the previous migration.
The value entered into the "Last" field will limit the amount of content examined to the time period specified, starting at present time.
To perform an incremental migration, enter the amount of time to include and select the appropriate time period in days, weeks or months. Incremental migration is designed to be used in scenarios where the destination is not being modifed.
To perform a delta migration, enter zero in the field and select days as the time period. Delta migration is designed to be used in scenarios where both the source and destination may be modified during the course of the migration. Please note that a delta migration compares dates between source and destination to determine which content to include, so it will take more time to process than an incremental migration.
|
|
NOTE: The Overwrite if File Exists parameter will be disabled if this option is selected. |
Enable Azure Turbo Mode - When enabled, this option utilizes Microsoft's SharePoint Online Migration API to increase the migration performance and throughput. A recommendation for optimal use of this API is larger sets of data; the more content, the better the throughput. Because this API uses Azure storage as a staging area for the migration, it requires that you provide an Azure storage location. The options are to either utilize Microsoft supplied storage or to provide your own Azure storage location. If you wish to use your own Azure account, you must provide both the Azure Account Name as well as the corresponding Access Key. If you cannot supply this information, please search our online Knowledge Base, User Manual, or contact Support for additional information before proceeding or consider using the Microsoft Supplied Storage option. For more information please see the Azure Turbo Mode section.
Apply Filter - Filters allow the inclusion or exclusion of items by user defined criteria, such as date, size, file extension, file name, or file owner.
Please note that the Apply Filter functionality is only applied to selected containers (i.e. site, lists or folders). If you select specific content (documents or items) then those objects will be included with the operation regardless of the filter applied. If you want to selectively include content, please select the container that this content resides in and apply the filter or apply the filter against the container first, then select the remaining content.
For the File Extension and Exclude Folders parameters only, you can use "," to set more than 1 criteria. For example, use this format "png,docx,pptx" to include multiple file extensions.
"Size" filter should have a whole number without decimals. It recommended not to use operators "Equal" and "Not Equal" to avoid difficulties with accurate file size if it more than 1 MB.
Use "Save Filter" option to save filter settings to file and load it in different wizards or Profile Manager. Note that filter file and filter fields have to match. For example, set of fields in filter will be different if you copy file into two different libraries.
Re-Map Users - This option will allow you to map users between different domains or to change the user account in the target environment during copy.
Re-Map Site and List Templates - This feature allows for the re-mapping of list or site templates.
Remove WEB Elements - This option allows you to remove specified webparts and namespace references from all included pages during migration.
The webpart and namespace references to be removed should be defined in a CSV file and then loaded with this option.
7.Once you have configured all of your settings, click Finish to complete the restore.
|
|
NOTE: By default the restore process will put all the content, metadata, site/list structure, permissions and other supported objects back into the original backup location. |