
Creating a Support Ticket
Occasionally a situation occurs where the product is functioning improperly or you have a recommendation for a new feature or optimization. User environments come in all shapes and sizes, and it is nearly impossible for us to test every possible scenario. Thus we rely on our customers to submit this type of feedback to us. In some cases we can quickly provide instructions or workarounds. For others we follow an agile development model where product updates are released on a weekly basis with fixes and enhancements.
To submit a support case do the following:
1.Inside of Essentials, navigate to the Help tab and select the Support button.

2.You will be redirected to our online support portal. On this webpage, select the "Contact Support" option.

3.From this window you can access our knowledge base, technical documentation, and more.
4.In order to submit a support request to our Support Request System, you will be required to log in. Once you have logged in, you can see a list of your technical support requests. Select "View All Technical Support Requests"
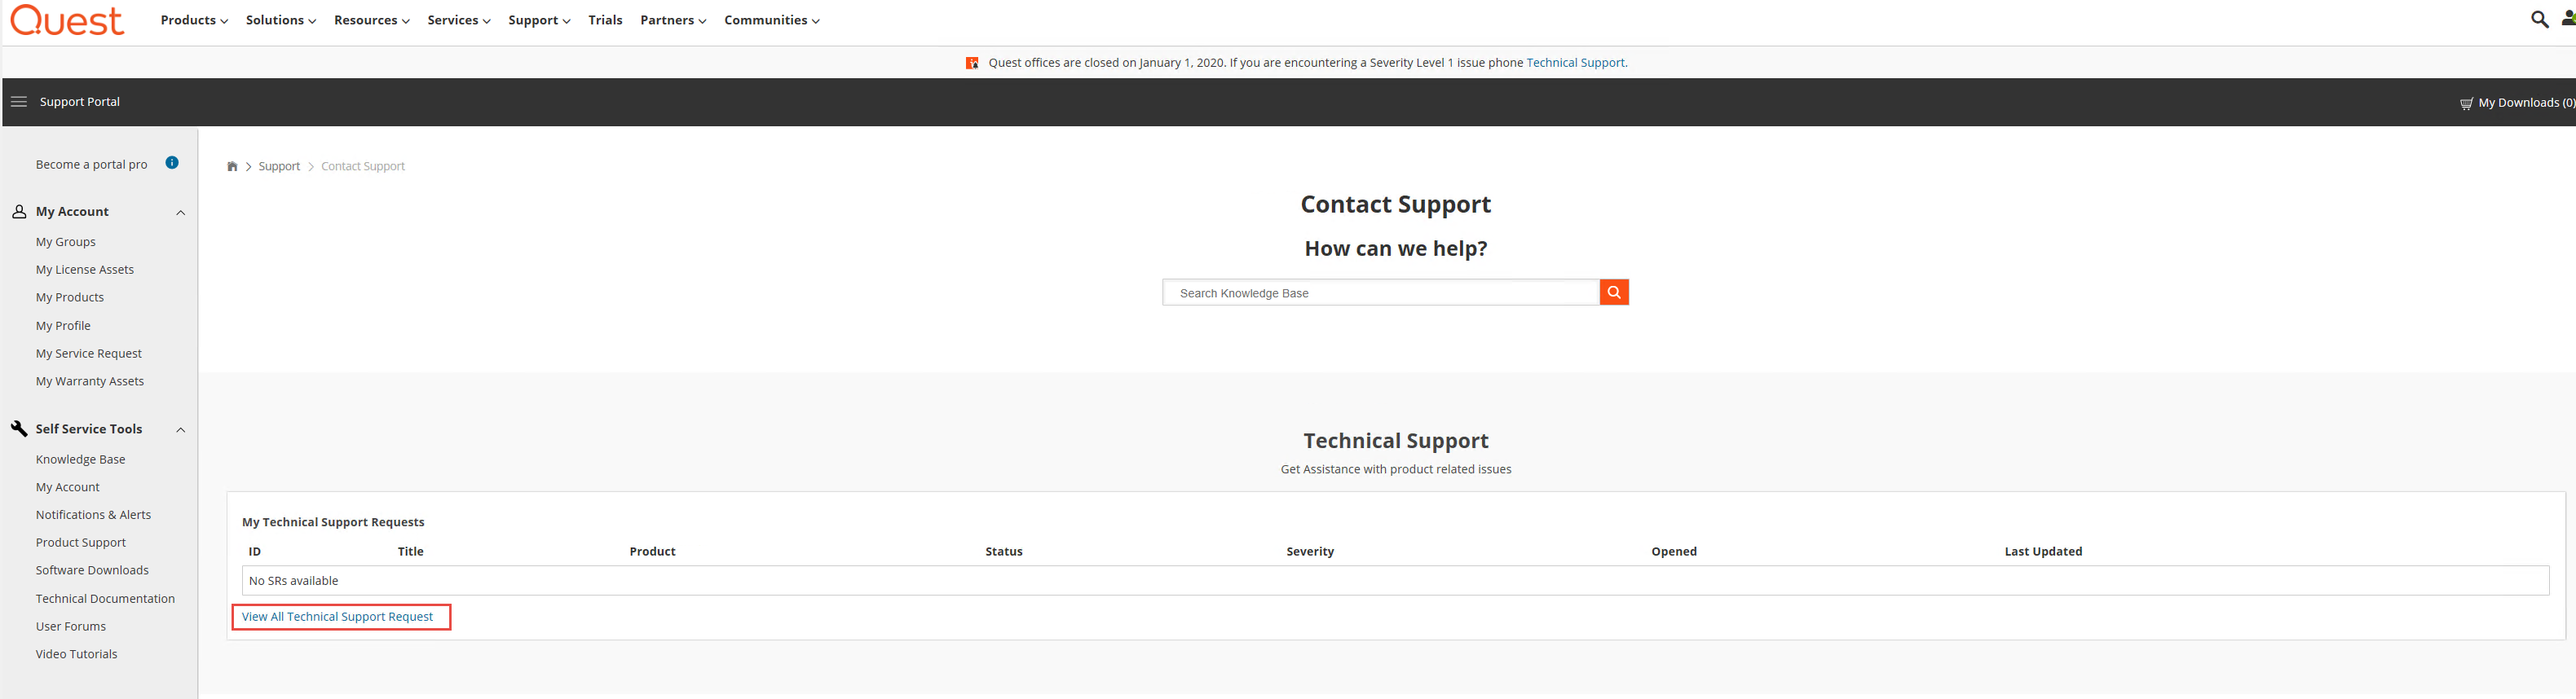
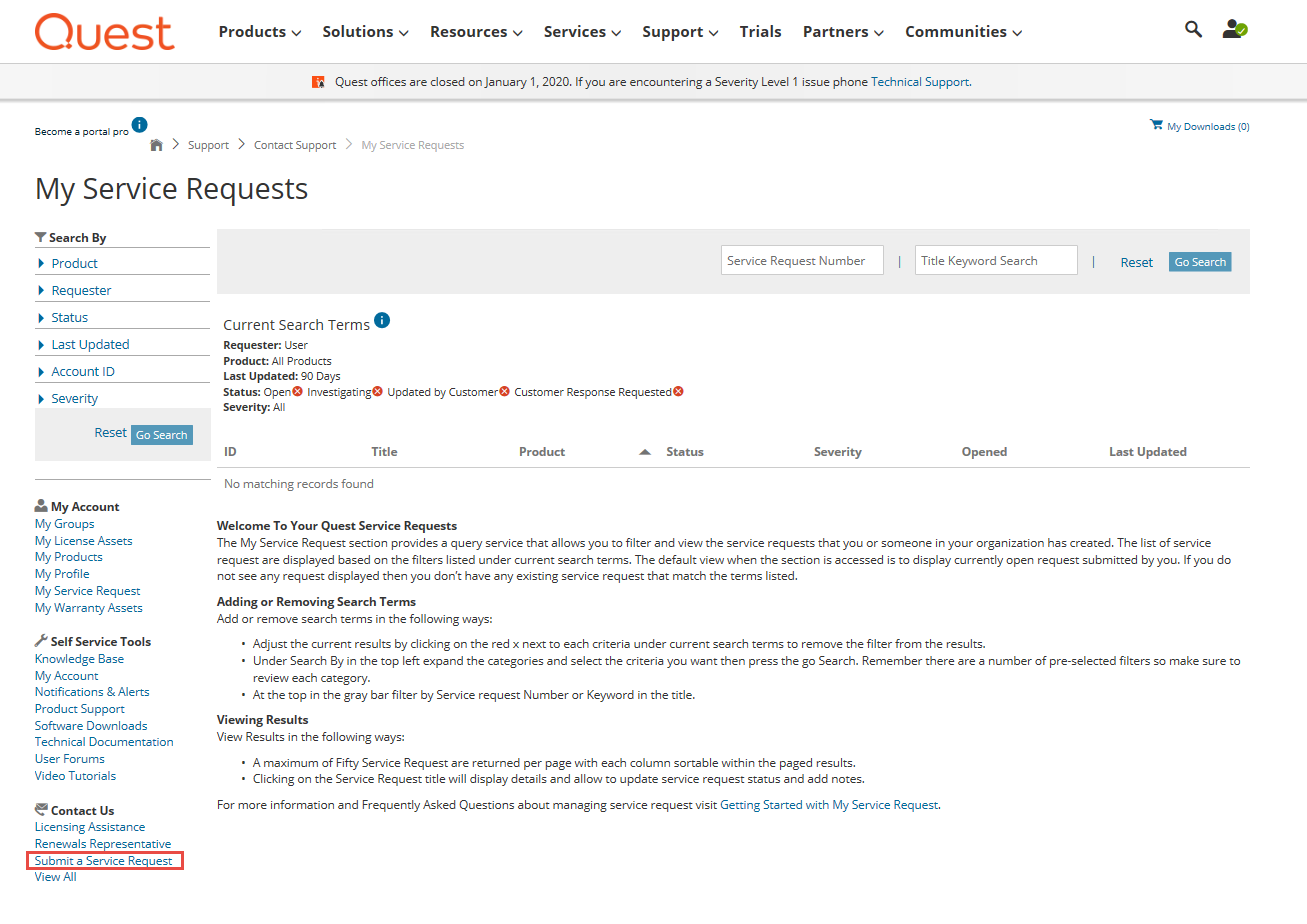
5.On the My Service Requests page, select the "Submit a Service Request" option from the left hand pane.
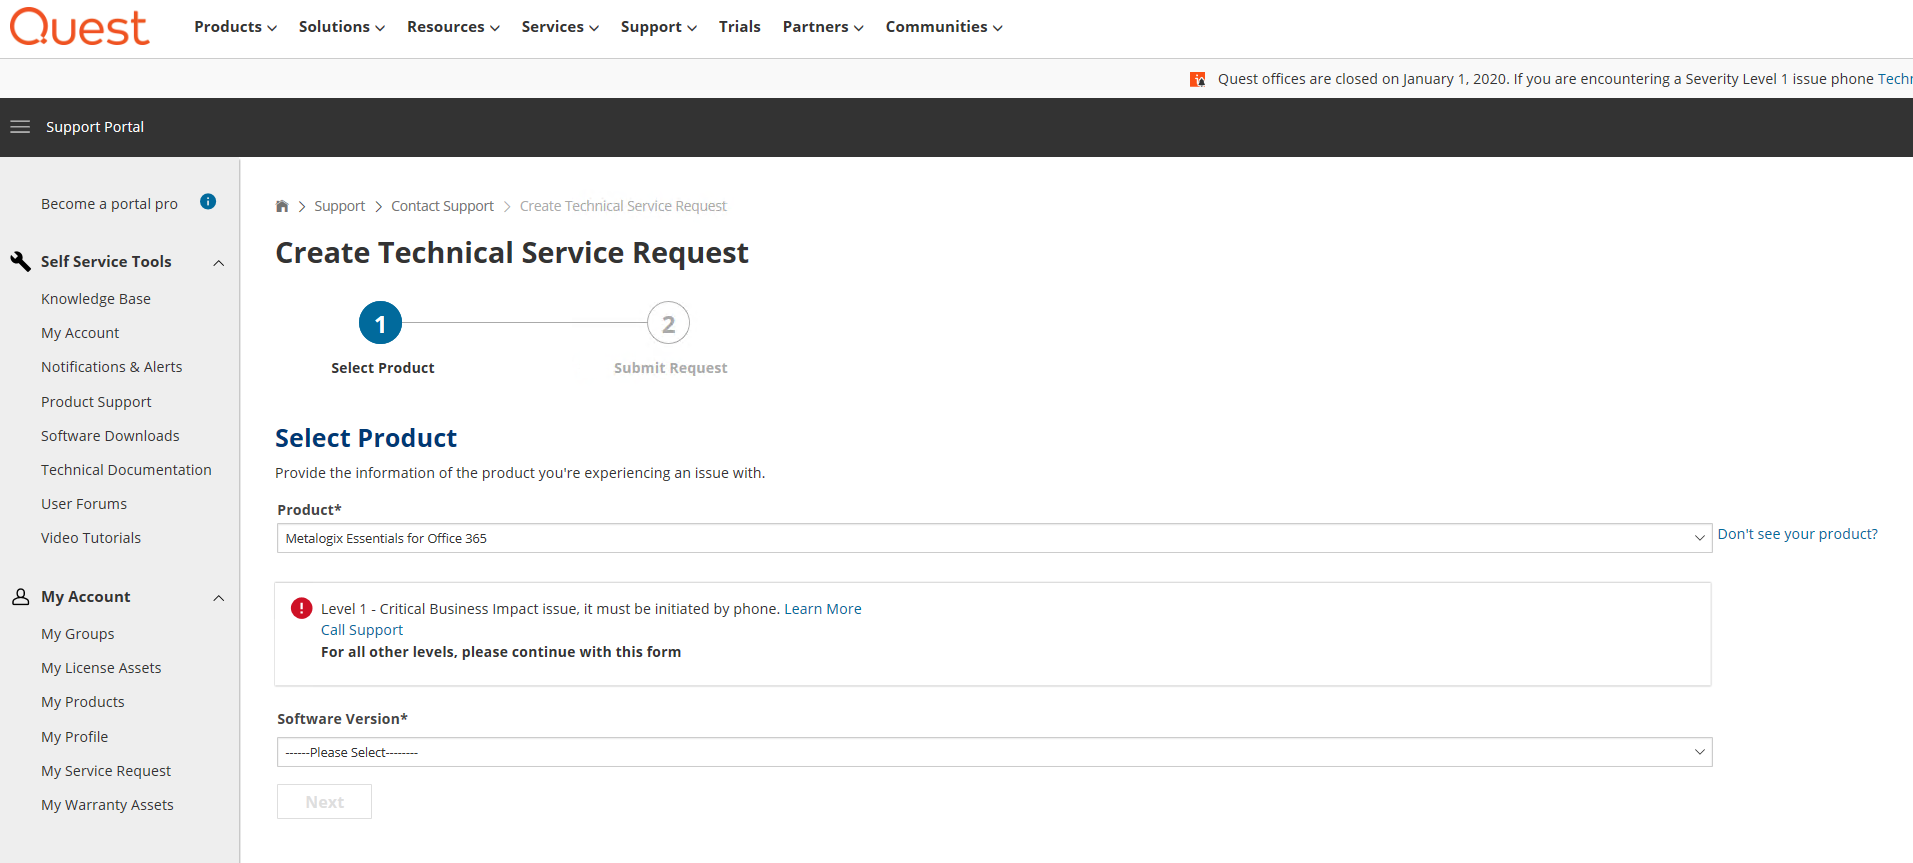
6.On the request form, select Metalogix Essentials for Office 365 as the product, and then select the version of the product and notification/alert that pertains to your issue. Click Next.
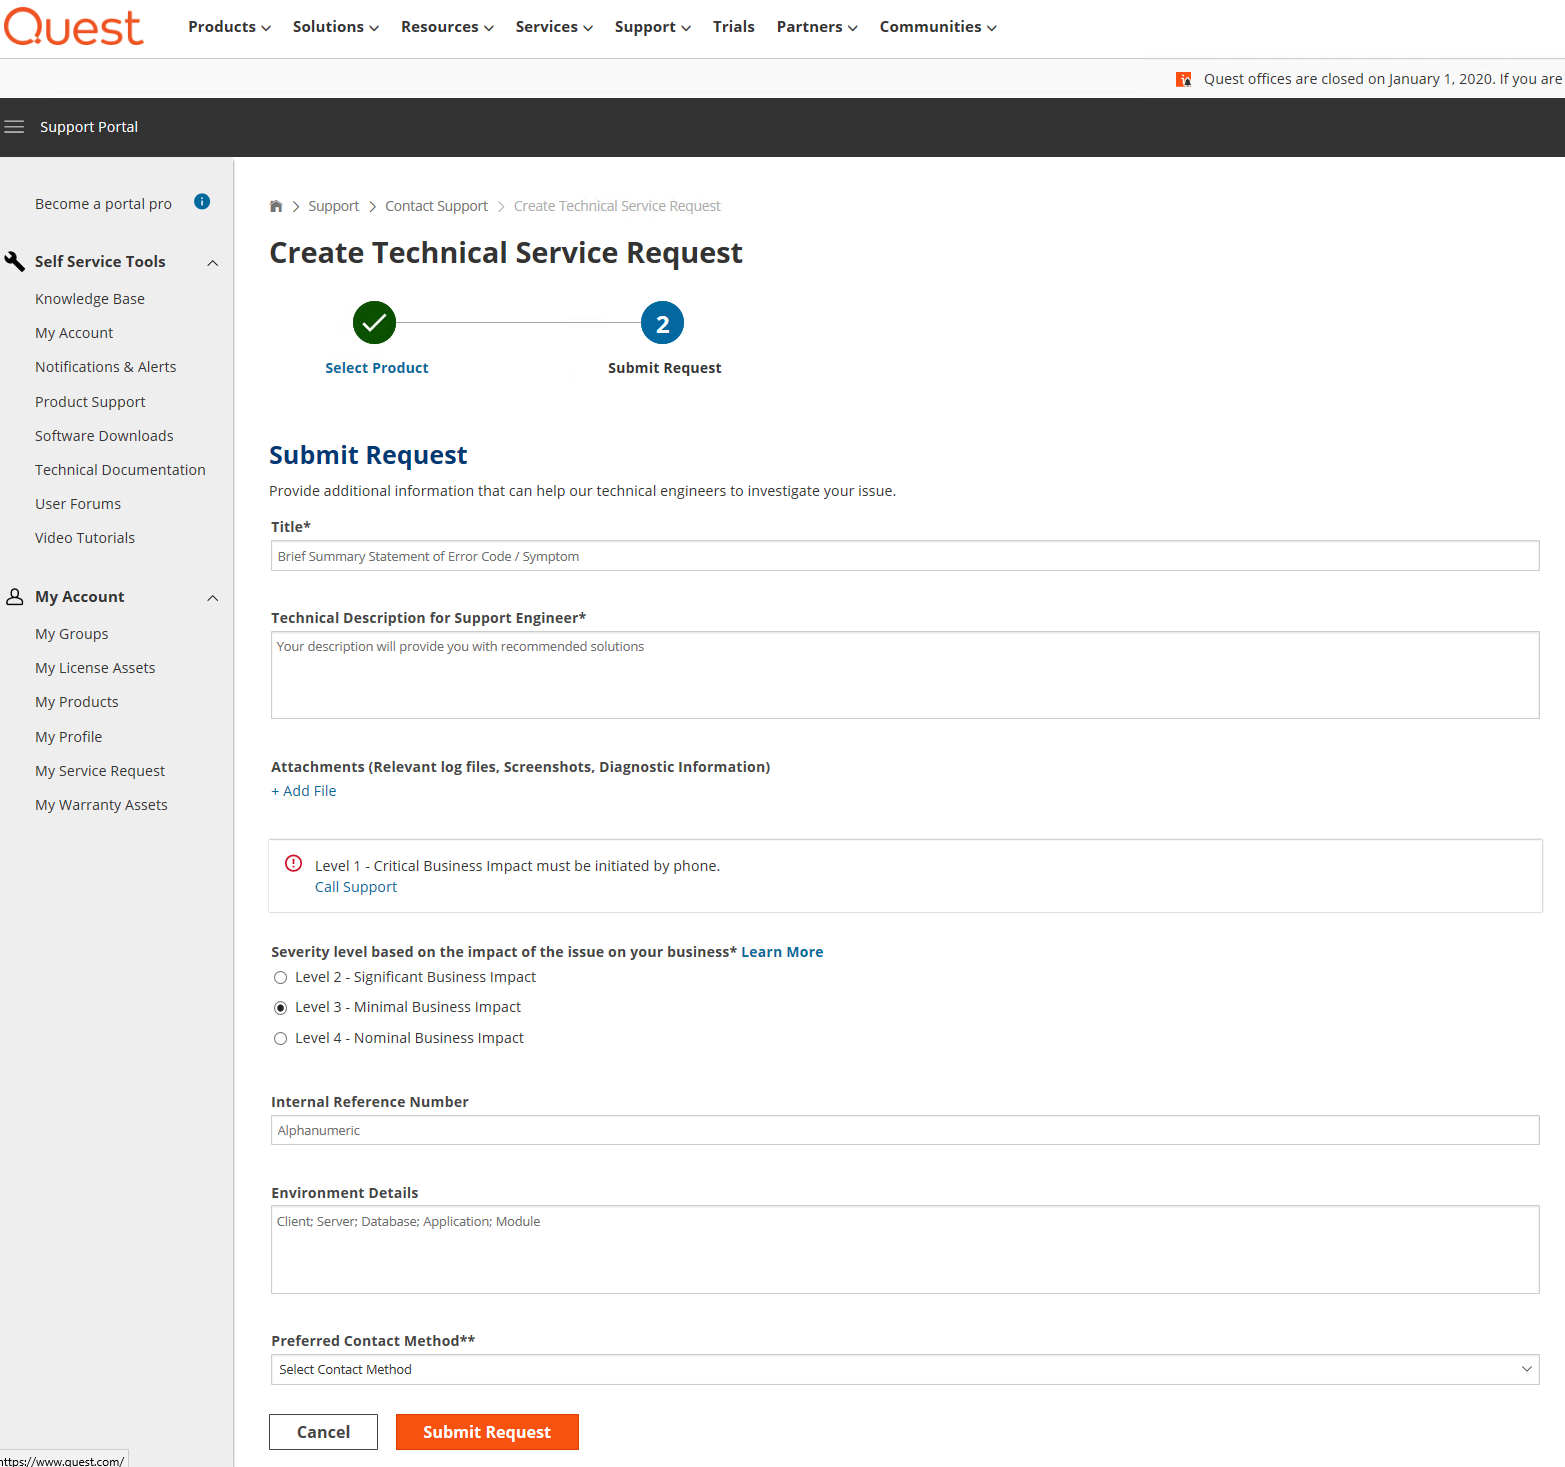
7.Fill out the form, being sure to attach the appropriate Collateral to help support diagnose and solve the problem. Once you have completed the form, select Submit Request.
8.You should receive a confirmation email from the support system, followed by an actual response from one of our support engineers in your preferred contact method.
Collateral to Send to Support
Good collateral is essential in pinpointing issues and providing resolutions or workarounds. Here are some example of information provided to us by customers:
Screenshots - it is almost always easier to diagnose issues and collect information using pictures. Please try to send several screenshots with relevant data along with other logs.
System Log Files and Post migration XML Logs -
Post migration XML Logs - are generated with most operations and are displayed in the Log Viewer. All (or specific) items in the log can be selected and saved on your computer for later use.
System logs are generated behind the scenes and contain internal information that is intended for our engineering team. Besides standard system logging, there is also Debug Mode logging which collects significantly more information. To save all these logs at one time got to the Help tab within Essentials, select Log Manager, and then select Save logs.

|
|
NOTE: When sending logs to us, these logs may contain sensitive information like URLs, file names, user accounts and connection passwords (encrypted by default). If necessary, review all logs before sending them with your support ticket. |

Debug Mode
Selecting Debug Mode from the help tab will set Metalogix Essentials to work in debug mode. This mode will set the product to perform extended logging, collecting more details of processes within the application logs in an effort to detect potential issues.

|
|
NOTE: ·Do not enable Debug Mode without consulting with the Support team. ·Do not run lengthy operations like copying sites under Debug Mode. This will collect a large amount of information that will not be useful. Instead try to narrow down the scope to a few items and perform the operation for these under Debug Mode. ·Remember to disable Debug Mode after the necessary information has been collected |
Log Manager
Selecting Log Manager from the help tab provides a drop down list of functions you can perform with regards to logs.
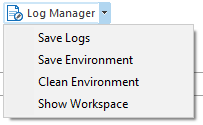
·Save Logs - selecting this option will allow you to save your logs to a specified location on your machine, allowing you to access them at a later date, in the state that they are currently in.
·Save Environment - selecting this option will allow you to save your environment to a specified location on your machine, allowing you to access it at a later date, in the same state as it currently is in.
·Clean Environment - selecting this option will clean out your current logs in your Essentials environment.
·Show Workspace - selecting this option will open the file manager, displaying where all the components of your connections have been saved on your machine.