Prior to Evolve 2018, diagram hierarchy navigation was performed purely through the diagram drill downs, and an in-page bread crumb trail. This trail was only integrated into the page, and could cause a little confusion with regards to the outer page content. Since the 2018 release a new diagram navigation has been added, that offers a much more visual experience.
As with Smart Crumbs, the Diagram Navigator feature is always enabled, and available to all users.
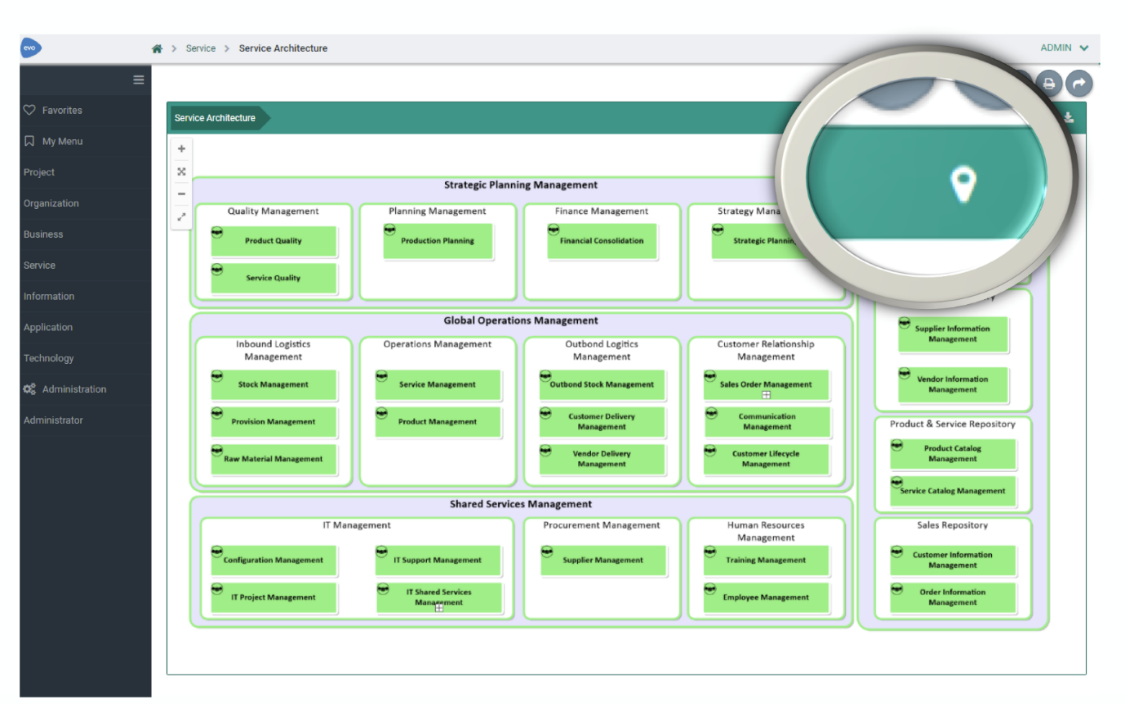
You will see this new feature as a simple icon above any diagram in your site. See below:
When viewing a diagram, pressing the new icon will launch the Diagram Navigator
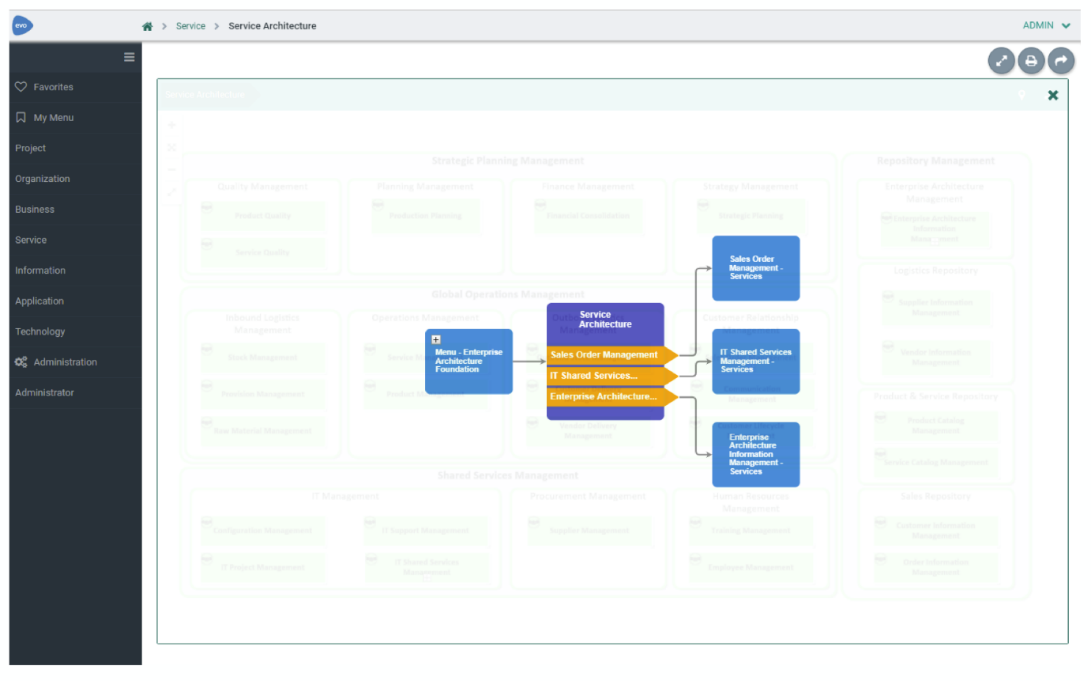
The navigator will show the current diagram at the centre, with arrow-nodes representing each shape on the diagram, that drills down to child diagrams.
Selecting one of these arrow-nodes will highlight the single/multiple child diagrams that 'explode' from this shape.
Selecting the child diagram shapes, will display a diagram preview at the top left of the Navigator
Double-clicking on a child shape will drill down and re-center the Navigator around that diagram.
Clicking on the "open" icon on any of the diagram shapes, will open the diagram fully.
|
|
Both Smart crumbs and Diagram navigator are available, provided you are running version 2018 or above. |
Related Topics
Workflow Explained
Overview
Evolve includes a built-in Workflow capability which provides three useful processes:
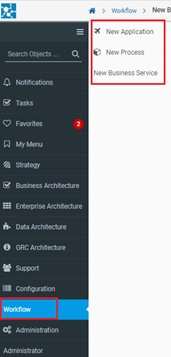
1.A new Separate module for Workflow execution – new module, workflow is added to the Erwin Evolve site, where you can create new applications, process, and business services..
2.A review and approval process for data changes - meaning that when users create objects, delete objects or edit any data in Evolve, those changes are not submitted to the repository until they have been approved.
3.An object validation request process - where users can request for an object to be validated by a nominated set of users, and when all users approve the data, properties are set on the object to record the validation.
4.A review process for Site pages - where you can share a page with a Role and every user in the Role must confirm they have reviewed the content.
Each of these processes are supported by Task and Notification mechanisms. Tasks are created for every workflow that's initiated and users are alerted to them with notifications in the Site menu when they log in, prompting them to take action.
In addition, users of your Site can Follow objects governed by workflows so they are notified of any workflow-related activity affecting those objects.
Workflow can be configured to use SMTP, which enables alerts to be sent to users via email when Tasks are created and completed. The emails, which are customizable, include details of the Task and the latest activity, as well as direct links back to your Site for users to follow.
What do you want to do?
Set up the Review and Approval Workflow
Set up the Object Validation Workflow
Set up the Review Page Workflow
Review and approve, or reject, data changes
Confirm you have reviewed an Object Page
See who has reviewed a page you shared
Enable Workflow for your Evolve Server
Before you can use the Workflow feature you must configure your server to use it.
When you enable Workflow, it is at the server level - so any Sites you have can use it once it is enabled.
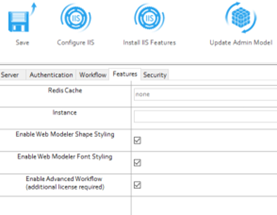
To enable Workflow
1.Start Evolve Designer.
2.On the Evolve Designer Models launcher dialog, click the Configure Evolve Server button.
The Evolve Server Configuration dialog opens.
3.Under Workflow, select the Enable Workflow check box.
4.Under Features, select the Enable Advance Workflow check box.
|
|
Ensure that you have Advanced Workflow license and System Manager as a Power Level to view the Administration menu. |
5.Click Save.
6.Click Configure IIS and perform full deployment.