
The ability for On Demand service principals to access and operate with tenant assets requires explicit permissions. The Tenant Administrator grants these permissions through consents. Multi-factor authentication (MFA) is supported for tenant administrators when granting consents.
When a tenant is added, the initial Core - Basic permission set is granted consent to the On Demand service principal. Additional consents are required to work with different features of On Demand Migration
While consents allow Quest On Demand Migration to access tenant assets that are exposed to the application, you can selectively restrict access to specific assets in your tenant and allow access to the other assets in the environment. Granting selective access requires additional configuration in your tenant as described below.
In this topic:
- Restricting access scope
- Granting Consents
- Consents for initial tenant setup
- Consents for Sensitivity Labels
- Consents for Account Migration
- Consents for Mailbox Migration
- Consents for Public Folder Migration
- Consents for OneDrive Migration
- Consents for Teams and M365 groups Migration
- Consents for SharePoint Migration
- Consents for Power BI Migration
- Verifying Service Principals
Restricting access scope
You can use the following resource-scoped access control methods in your tenant:
Role Based Access Control for Exchange Online
RBAC for Applications in Exchange Online allows admins to grant permissions to Quest On Demand Migration for Mailboxes which migrates data in Exchange Online. Exchange Online RBAC permissions must be set up in the tenant for Exchange Web Services (EWS) to ensure that Quest On Demand Migration for Mailboxes can migrate mailbox data for users within the scope of the RBAC configuration. See the Knowledge Base for more details or contact Quest Technical Support for assistance.
Sites.Selected permission for specific SharePoint Online site collections
You can enhance the security of SharePoint Online (SPO), by ensuring that On Demand Migration for SharePoint has access only to specific SharePoint sites, preventing unnecessary exposure to other sites in the environment. To achieve selected access, you must configure the Sites.Selected permission which is part of the permissions model for controlling access to specific SharePoint sites or site collections.
This permission can also be used to restrict On Demand Migration for Teams for migrating Teams and M365 Groups within the scope of the specific SharePoint sites that are exposed to the application.
Here’s a breakdown of what Sites.Selected means:
Purpose: The Sites.Selected permission is used primarily in the context of Microsoft Graph API or Azure AD permissions, where you want to restrict access to only specific SharePoint sites. It is part of the delegated or application permissions model, which allows a service or app to interact with SharePoint on behalf of the user (in delegated permissions) or as itself (in application permissions).
What it does: This permission gives an application or user the ability to access only selected SharePoint sites, instead of granting broader access to all sites in the tenant. This is more granular compared to other permissions like Sites.FullControl.All, Sites.Read.All, or Sites.Manage.All, which grant broader access.
Key Permissions in Comparison:
- Sites.FullControl.All: This allows full control of all SharePoint sites across the tenant.
- Sites.Read.All: This provides read access to all sites in the tenant.
- Sites.Selected: Access is restricted to a specific set of sites (only the ones specified).
|
|
NOTE: When implemented, Site.Selected replaces the Sites.FullControl.All and Sites.Read.All permissions. |

Example Scenarios:
- Admin-level control: An administrator can use Sites.Selected to configure apps that need specific access to particular sites for functions like document management, workflow integration, or customized solutions.
- Granular control: You could use it for limiting access to a few department-specific sites or a small set of collaborative sites, instead of granting Quest On Demand access to the entire SharePoint Online environment.
How it's implemented: The Sites.Selected permission, is typically granted during the registration of an Azure AD app, or when configuring API permissions to interact with SharePoint via Graph API. It requires specifying the sites the app will have access to, and this can be done by defining a list of URLs or site identifiers. This permission requires implementation through the Azure portal, PowerShell scripts and Graph explorer. See the Knowledge Base for more details or contact Quest Technical Support for assistance with this implementation.
Granting Consents
- Click Tenants from the navigation pane.
- Select a tenant and click Edit Consents from the tenant tile.
- Click Grant Consent or Regrant Consent for the permissions type.
- Log in as the tenant administrator of the source or target tenant. Then click Accept in the Microsoft consents dialog.
This section lists the minimum consents and roles required by the various On Demand Migration service principals for managing tenants, Microsoft 365 objects and other migration services.
|
|
NOTE: The following permission sets are legacy and not available for new Quest® On Demand Migration subscribers. If you already use them, they should be replaced with either the corresponding Minimal or Full permission sets.
|
For more details about the permissions granted through consents for each service principal, see the On Demand Migration Permissions Reference Guide.
Consents for initial tenant setup
| Task | Minimum consents and permissions |
|---|---|
| Add and configure tenants, and grant consent |
Core-Basic consent from both Source and Target tenant administrator accounts. Global Administrator role from both source and target tenant administrator accounts. |
Each tenant that is added is granted consent to the initial Core - Basic permission set to the On Demand service principal. Additional consents are required to work with different features of On Demand Migration.
Consents for Sensitivity Label migration
| Task | Minimum consents and permissions |
|---|---|
| All tasks |
AIP protected content migration - Read consent from Source tenant administrator accounts. AIP protected content migration - Write consent from Target tenant administrator accounts. |
Consents for Account migration
| Task | Minimum consents and permissions |
|---|---|
| All tasks including discover and migrate accounts |
Migration - Basic - Minimal consent from Source tenant administrator accounts. Migration - Basic - Full consent from Target tenant administrator accounts. |
| Migrate hybrid accounts |
Global Administrator role for both Source and Target tenant administrator accounts. |
| Migrate Guest Users |
Guest Inviter role for both Source and Target tenant administrator accounts. |
Consents for Mailbox migration
| Task | Minimum consents and permissions |
|---|---|
| All tasks |
Migration - Basic - Minimal consent from Source tenant administrator accounts. Migration - Basic - Full consent from Target tenant administrator accounts. |
| Migrate mailboxes |
Migration - Mailbox Migration - Minimal consent from Source tenant administrator accounts or Migration - Mailbox Migration - Custom RBAC with additional consentsfrom Source tenant administrator accounts. and Migration - Mailbox Migration - Full consent from Target tenant administrator accounts or Migration - Mailbox Migration - Custom RBAC with additional consents from Target tenant administrator accounts. |
Consents forr Public Folder migration
| Task | Minimum consents and permissions | ||
|---|---|---|---|
| All tasks |
Migration - Basic - Minimal consent from Source tenant administrator accounts. Migration - Basic - Full consent from Target tenant administrator accounts. | ||
| Migrate Public Folders |
Migration - Mailbox Migration - Minimal consent from Source tenant administrator accounts. Migration - Mailbox Migration - Full consent from Target tenant administrator accounts. Owner permission for the root Public Folder of the target tenant must also be granted to the target tenant administrator account.
|
Consents for OneDrive migration
| Task | Minimum consents and permissions | ||
|---|---|---|---|
| All tasks |
Migration - Basic - Minimal consent from Source tenant administrator accounts. Migration - Basic - Full consent from Target tenant administrator accounts. | ||
| Migrate OneDrive |
Migration - OneDrive - Minimal consent from Source tenant administrator accounts. Migration - OneDrive - Full consent from Target tenant administrator accounts. | ||
| Provision OneDrive | SharePoint Administrator role for provisioning OneDrive on the target tenant.
|
Consents for SharePoint migration
| Task | Minimum consents and permissions |
|---|---|
| All tasks |
Migration - Basic - Minimal consent from Source tenant administrator accounts. Migration - Basic - Full consent from Target tenant administrator accounts. |
| Migrate SharePoint |
Migration - SharePoint - Minimal consent from Source tenant administrator accounts. Migration - SharePoint - Full consent from Target tenant administrator accounts. |
Consents for Teams migration
| Task | Minimum consents and permissions |
|---|---|
| All tasks |
Migration - Basic - Minimal consent from Source tenant administrator accounts. Migration - Basic - Full consent from Target tenant administrator accounts. |
| Migrate Teams and Microsoft 365 Groups with Teams functionality |
Migration - Mailbox Migration - Minimal for the Source tenant Migration - Mailbox Migration - Full for the Target tenant Migration - SharePoint - Minimal for the Source tenant Migration - SharePoint - Full for the Target tenant. Migration - Teams - Minimal for the Source tenant Migration - Teams - Full for the Target tenant. Global Administrator Entra ID role or both the Teams Administrator and Exchange Administrator Entra ID roles for Source and Target tenant administrator accounts. In addition to these roles, the tenant administrator account that grants the consents to the Migration -Teams service also requires the following:
|
Consents for Power BI migration
| Task | Minimum consents and permissions |
|---|---|
| All tasks |
Migration - Basic - Minimal consent from Source tenant administrator accounts. Migration - Basic - Full consent from Target tenant administrator accounts. |
| View Power BI |
Migration - Power BI consent from Source and Target tenant administrator accounts. Global Administrator role from both source and target tenant administrator accounts. |
| Migrate Power BI | Additional manual setup is required for both source and target tenants through the Azure portal. The steps required to grant additional permissions are described below. |
Granting additional permissions for the source and target tenants
This is a two-part process as described below:
Part 1: Azure Portal Security Group Setup
In this part, a new security group is created in Microsoft Entra ID for each source and target tenant, to associate the service principal of the Quest On Demand - Migration - Power BI enterprise application. Additional permissions can be then be granted to the service principal to access and operate on Power BI objects.
- Login to https://portal.azure.com with your tenant credentials.
- Open the Microsoft Entra ID service page.
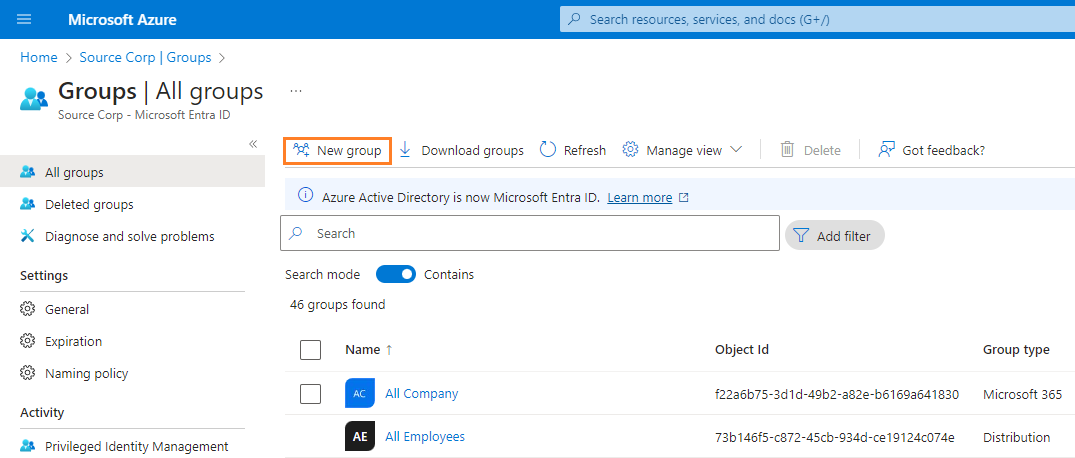
- Click Manage > Groups from the navigation panel. Then click New Group.
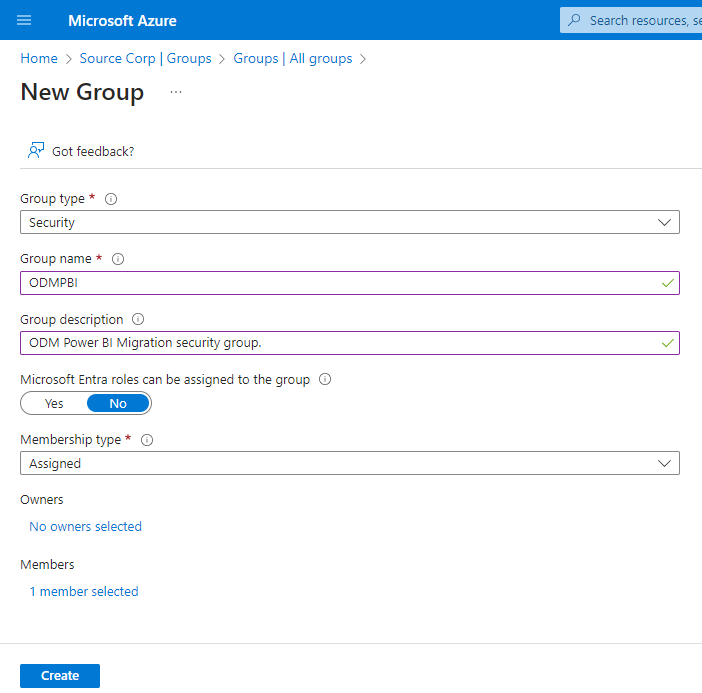
- In the New Group page, setup the group as described below:
- Group type = Security
- Group name = name of the group. For example, ODMPBI
- Group description = short description about the group. For example, ODM Power BI Migration.
- Under Members, click No members selected
- In the Add members list that opens, search and select Quest On Demand - Migration - Power BI. Then click Select at the bottom of the page.
- Click Create. The group is created with the Quest On Demand - Migration - Power BI service principal as a member.
- Follow all the above steps to create a security group in both source and target tenants.
In this part, the security group created in each tenant is configured to allow the service principals to use Power BI APIs and create and use Power BI profiles.
- Log into the Power BI service portal at https://app.powerbi.com with your tenant credentials.
- Click the Settings icon in the top bar and then click Admin portal.
- From the navigation panel, click Tenant settings.
- Scroll down to the Developer Settings section.
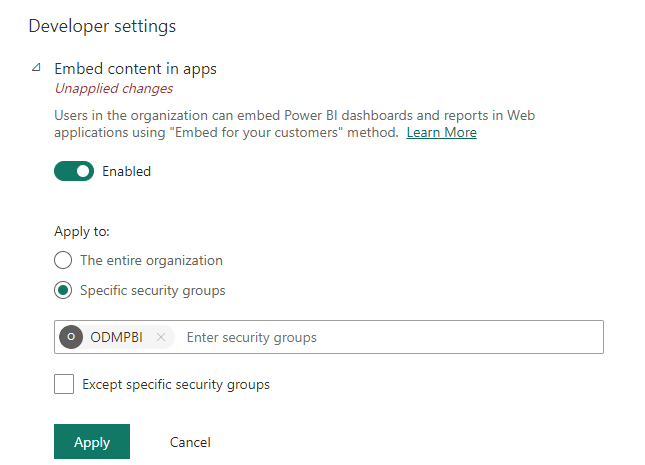
- Expand the Embed content in apps option.
- Set the slider to Enabled.
- For the Apply to option, select Specific security groups, and specify the group name created in Part 1 above. For example, enter ODMPBI.
- Click Apply to save the changes.
- Under Developer Settings, expand following options. Then enable each option and repeat the above steps to associate the security group:
- Service principals can create workspaces, connections, and deployment pipelines
- Service principals can call Fabric public APIs
- Allow service principals to create and use profiles
- Expand the Embed content in apps option.
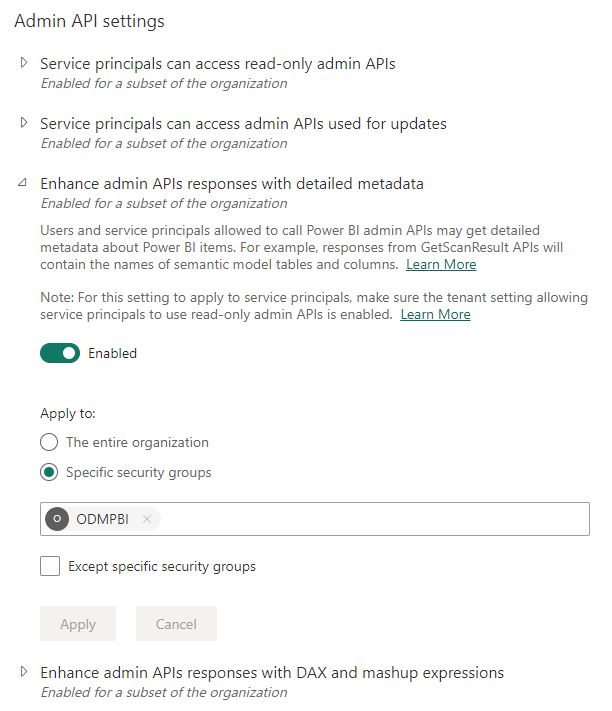
- Scroll down to the Admin API settings section.
- Expand following options. Then enable each option and repeat the above steps to associate the security group:
- Service principals can access read-only admin APIs
- Enhance admin APIs responses with detailed metadata
- Enhance admin APIs responses with DAX and mashup expressions
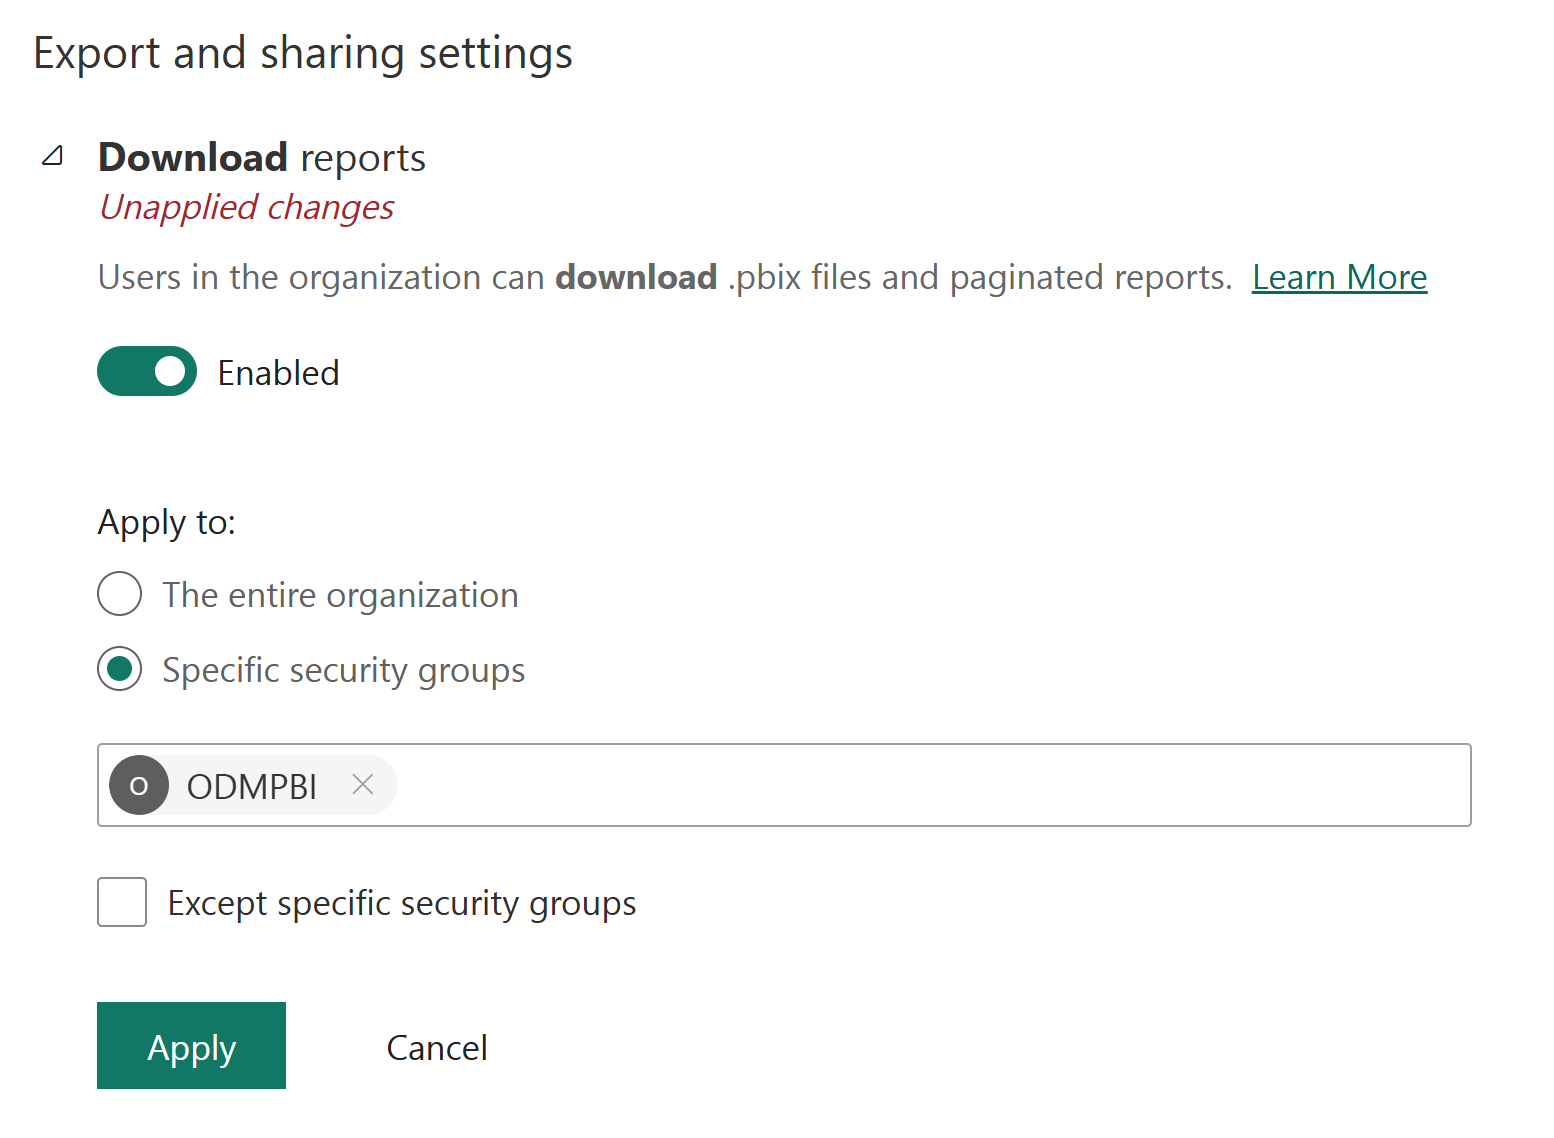
- For the source tenant, expand Export and sharing settings and verify the Download reports option is Enabled and the option is either set to The entire organization or Specific security groups with the group name created in Part 1 above.
- For the target tenant expand Workspace settings and verify the Create workspaces option is Enabled and the option is either set to The entire organization or Specific security groups with the group name created in Part 1 above.

To migrate Power BI data, the security group must also be granted explicit rights in all tenant Power BI objects like Connections, Gateways and Workspaces.
For Connections and Standard Gateways
- Click the Settings icon in the top bar and then click Manage connections and gateways.
- Under Manage connections and gateways, select each On-premises gateway and give Admin rights to the group, created in Part 1.
- Repeat the above steps for source and target tenant.
|
|
NOTE: The Service Principal in the source tenant must be assigned the Admin permission. |
- Open the Workspace and click Manage Access.
- In the Add people page that opens, add the security group created in part 1 and assign the Admin role to the group.

|
|
NOTE: The Service Principal in the source tenant must be assigned the Owner/Admin permission. |
Verifying Service Principals
When you have granted the consents, you can verify that the service principals were successfully created in the tenant. You must verify both source and target tenants.
- Log in to Microsoft Entra Admin Center with the credential of a tenant administrator.
- Go to Entra ID > Enterprise Apps from the navigation panel. Then click All applications. Filter the list if necessary and verify the list of Quest On Demand service principals. Your list depends on the subscriptions and consents that you have granted, and may differ from the image below.
