Assessment
The On Demand Migration account service analyzes your domain structure and tracks potential problems, misconfiguration, and risks that might adversely affect the migration. Switch to Assessment view to see the summary reports about the discovered data.
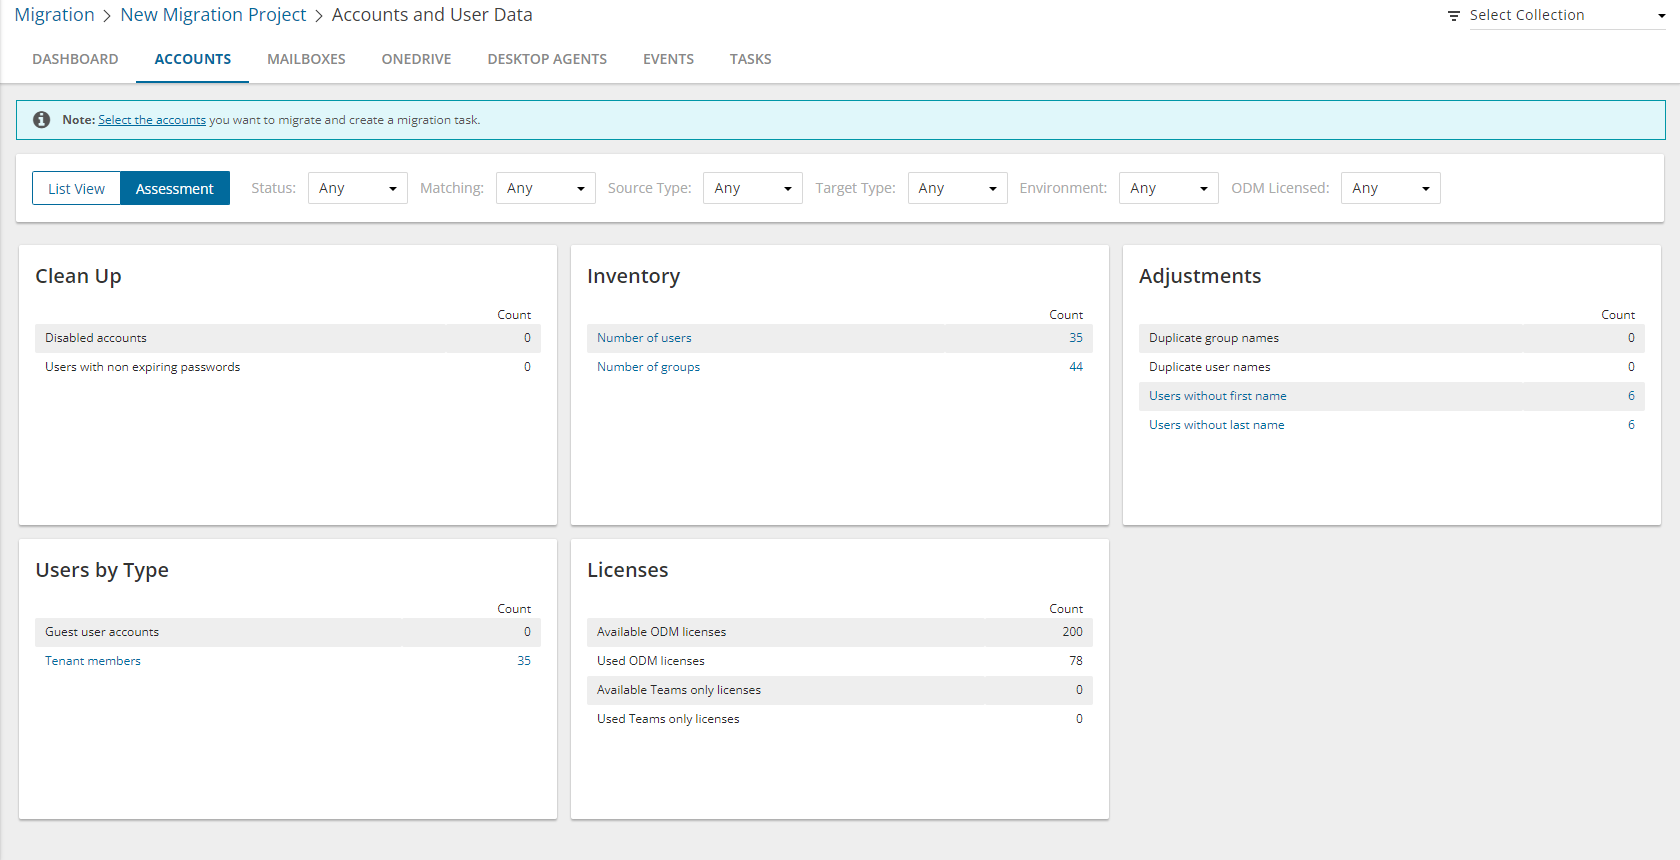
The following reports are available for Accounts:
- Clean Up
- Disabled accounts
- Users with non expiring passwords
- Adjustments
- Duplicate group names
- Duplicate user names
- Users without first name
- Users without last name
- Inventory
- Number of users
- Number of groups
- User by Type
- External Accounts
- Tenant members
- Licenses
- Available ODM licenses
- Used ODM licenses
- Available Teams only licenses
- Used Teams only licenses
Migrating Accounts
|

|
Caution: Don’t start a migration before the discovery task is finished. Running a matching task is recommended. |
In this topic:
Considerations for Guest User Migration
|

|
TIP: Guest user accounts have a specific icon  to distinguish them from other domain members. to distinguish them from other domain members. |
On Demand migration can process all guest user types supported by Microsoft. Before adding a guest user account to the migration task, consider the following:
- Guest user account cannot be migrated if an original account for this guest user is already in the target tenant. The guest user account should be matched but not migrated.
- Guest user account cannot be migrated in case a guest user account of the same original account is already in the target tenant. To update the target guest user account properties create a matching task to pair these guest user accounts and then migrate the source guest user account again
- Guest user account cannot be migrated in case the invitation procedure in source domain is not finished yet. In case acceptance procedure was skipped (this case is deprecated now, but such guest users still exist), and the acceptance status is empty, guest user can be migrated successfully.
- A regular source user mapped to a target guest user during migration, will be converted to a regular user. If the target guest user was created in an on-premise environment, you must manually convert the target guest user to a regular user.
Preferred Data Location
For multi-geo enabled tenants, each account could be assigned a Preferred Data Location (PDL) property in Azure Active Directory. During account migration the property is migrated from source to target tenant. If the preferred data location is set in the source account then the same setting can be migrated to the target. If the preferred data location is absent in the source tenant then it will either not be set on the target or it will use the default location of the target tenant. This applies only for general tenant to multi-geo tenant and multi-geo tenant to multi-geo tenant migrations.
Starting an Account Migration Task
- Log in to Quest On Demand and choose an organization if you have multiple organizations.
- From the navigation pane, click Migrate > Projects to open the My Projects list.
- Create a new project or open an existing project.
- Click the Accounts tile, or click Open from the Accounts tile to open the Accounts and User Data migration workspace.
- Click the Accounts tab and select List View if not already selected.
- Select the accounts you want to migrate. If you are planning to migrate Microsoft 365 Groups including content, see Microsoft 365 Groups Migration.
- Click Migrate from the Actions menu. The New Account Migration Task wizard starts. Each step is described below:
- Start
- Task Name - You can specify a custom task name. The default name is Account Migration Task.
- Click Next.
- Custom Target Domain

- Configure the options as described below:
- Custom target domain name - select the domain you want to use for the UPN and primary SMTP address of accounts created during the migration process.
|
|
NOTE: Accounts that already exist in the target tenant will not have their current UPN or primary SMTP email address modified. |
- Set target PDL - choose how the Preferred Data Location (PDL) will be assigned to target accounts created in multi-geo tenants. This applies only for general tenant to multi-geo tenant and multi-geo tenant to multi-geo tenant migrations. The Microsoft 365 multi-geo feature must be available and enabled in the target tenant, otherwise this option is ignored.
- Migrate PDL value from source account - assign the same PDL value as the corresponding source account, or use the default location specified in the target tenant.
- Select PDL value to assign - assign a specific PDL value to target accounts. Choose a PDL from the Location dropdown. See Microsoft 365 Multi-Geo availability for location codes.
- Click Next.
- Custom Source Domain
- Custom source domain for routing - select the custom source domain name for forwarding mail from the target account. If the domain is omitted, the primary SMTP address of the source tenant will be used as the forwarding address for the mail enabled user created by this task. Optionally, you can select the custom SMTP domain here that will be used as the forwarding address.
- Click Next.
- Migration Settings
- Synchronize x500 Addresses - select this option to ensure that x500 addresses are migrated from source to target tenant. This option is enabled by default because x500 addresses are used internally by Microsoft to ensure that Outlook, calendar and other mail components work smoothly after a migration and must be migrated.
In some cases it may not be possible to migrate x500 addresses, and enabling this option could result in errors or warnings from the migration service. You can uncheck this option and try again.
|
|
Caution: If you uncheck this option, x500 addresses will not be migrated. You must migrate the x500 addresses manually and ensure they are migrated. |
- Click Next.
- Guest Users
- Send invitation email - select this option to send an invitation email to migrated guest users. Guest users can either accept the invitation or authenticate with Microsoft to access secured applications. If this option is not selected, guest users must authenticate with Microsoft to access secured applications.
This option is used when guest users are migrated. For all other account types, this option is ignored.
- Click Next.
- Notification
- Send notification email once the task is completed - select this option to send a notification email when a discovery task completes.
- Only in a case of failure - select this option to send the email if the discovery task fails to complete successfully.
- Recipients - enter the email address of the recipients of this email. You can specify multiple recipient email addresses separated by semicolon.
- Click Next.
- Schedule
- Choose from one of three options to schedule the task. The scheduler will be activated only after you complete the task wizard.
- Run now - task runs immediately.
- Run later - task must be started manually.
- Schedule - task will be started at a future date and time entered in the corresponding calendar field.
- Click Next.
- Reporting
- Generate AI summary - select this option to generate an AI summary of the task, as well as each object in the task.
|
|
NOTE: If this is the first time you have selected this option, the Quest Policies prompt appears. Read the Quest AI Terms of use and click Accept to proceed. This s a one-time acceptance prompt and your acceptance covers all migration tasks that support the AI migration assistant. |
- Summary
- Verify the task specifications as described below:
- Name - name of the task. You can specify a custom name. Default name is Account Migration Task.
- Source tenant - name of the source tenant in this project.
- Target tenant - name of the target tenant in this project.
- Custom target domain name - domain name of your target tenant.
- Custom domain for forwarding - custom source domain or primary SMTP address of the source tenant used as the forwarding address for the mail enabled user created by this task.
- Scheduled start - date and time when the task will start. Now indicates that the task will start immediately.
- Click Back to revise or review a previous step or click Finish to complete the task wizard and start the task as scheduled.
You can track its progress in the Tasks tab, view the summary on the Dashboard or monitor alerts and notifications in the Events tab. When accounts are matched successfully, the Status changes from New to Completed.
|
|
IMPORTANT: The account migration service does not synchronize end-user passwords as part of the data migration process. The migration administrator will need to reset or synchronize end-user passwords from the source tenant to the target tenant using native Microsoft 365 tools or third-party Single Sign On tools. |
Reviewing the Account Migration Task

- Open the Tasks tab.
- Select the account discovery task that you want to review.
- In the task detail pane that opens, the information presented is as described below:
- Type - Type of the task. The type is Migration.
- Created - Date and time when the task was created.
- Modified - Date and time when the task was last updated.
- Status - State of the task.
- Last Operation - The action that was most recently performed in this task.
- Schedule - Date and time when the task started. Now indicates that the task started immediately after the task was created.
- Accounts (number) - The number of accounts that were selected for matching and the number of accounts passing through the various states from Migrating to Migrated.
- Events (number) - Number indicates the count of events that the task encountered. The icon values indicate the type of the events and the event count for each type.
-
- View AI Summary - This link is available if you opted for the AI feature in the organization you created (see Organizations and Regions), and the task is a migration task that supports the AI migration assistant and you selected the Generate AI summary option in the Reporting step of the migration wizard. Click this link after the task has completed, to view the AI-generated migration summary.
|
|
NOTE: The View AI Summary link may take a while to appear depending on the volume of tasks and objects being migrated. If this is the first time you have selected this option, the Quest Policies prompt appears. Read the Quest AI Terms of use and click Accept to proceed. This s a one-time acceptance prompt and your acceptance covers all migration tasks that support the AI migration assistant. |
- Copy Diagnostics - click this link to copy relevant task properties that you can paste in a text file and use it to troubleshoot the task if necessary.
Reviewing the Account Migration Task Events
- Open the Tasks tab.
- Select the account discovery task for which you want to review the events.
- In the task detail pane that opens, click Events (number). The Events tab opens with a filtered list of events for the selected task.
- Select an event that you want to review. In the event detail pane that opens, the information presented is as described below:
- Object - name of the account object if applicable.
- Task - name of the task.
- Time - date and time when the event occurred.
- Category - type of task. For account migration tasks, the category is Migrate.
- Summary - a descriptive statement about the event.
Migrating Group Membership
You can migrate group members with the Group Membership Migration Task for Distribution Groups, Security Groups, and Mail-Enabled Security Groups. Teams and M365 groups are not supported by Group Membership Migration Task.
- Membership is migrated for all group members that have been matched.
- Unmatched members will be skipped.
- Matched accounts in the target tenant are appended to the target group.
- Existing group members in the target tenant are not removed.
Starting the Group Membership Migration Task
- Log in to Quest On Demand and choose an organization if you have multiple organizations.
- From the navigation pane, click Migrate > Projects to open the My Projects list.
- Create a new project or open an existing project.
- Click the Accounts tile, or click Open from the Accounts tile to open the Accounts and User Data migration workspace.
- Select the Accounts tab and select List View if not already selected.
- Select Distribution Groups, Security Groups, and Mail-Enabled Security Groups from the list.
- From the actions toolbar, click More > Migrate Group Membership. The New Migrate Group Membership Task wizard starts. Each step is described below:
- Description
- Read the description to understand the implications of group membership migration.
- Click Next.
- Notification
- Send notification email once the task is completed - select this option to send a notification email when a discovery task completes.
- Only in a case of failure - select this option to send the email if the discovery task fails to complete successfully.
- Recipients - enter the email address of the recipients of this email. You can specify multiple recipient email addresses separated by semicolon.
- Schedule
- Choose from one of three options to schedule the task. The scheduler will be activated only after you complete the task wizard.
- Run now - task runs immediately.
- Run later - task must be started manually.
- Schedule - task will be started at a future date and time entered in the corresponding calendar field.
- Click Next.
- Summary
- Verify the task specifications as described below:
- Name - name of the task. You can specify a custom name. Default name is Group Membership Migration Task.
- Source tenant - name of the source tenant in this project.
- Target tenant - name of the target tenant in this project.
- Scheduled start - date and time when the task will start. Now indicates that the task will start immediately.
- Click Back to revise or review a previous step or click Finish to complete the task wizard and start the task as scheduled.
Reviewing the Group Membership Migration Task
You can track a task's progress from the Tasks tab, view the summary on the Dashboard or monitor alerts and notifications in Events.
You can track the migration state from the Account State column in the Accounts list view. The column values during and after a task is run are as follows:
| Migrating |
Migration of this object has started.
- For each source member object (user or group), the matched target account is added to the matched target group
- If the matched target account is already a member in the group, the member will not ne processed.
|
| Migrated |
Migration is complete and successful. Matches were found for all source group members and the target members were added to the target group. |
| Migrated with Issues |
Migration has completed with errors. At least one member was migrated, but not all. Possible reasons:
- Source member did not matched a target account. Runthe Account Matching Task or Account Mapping Task for this member, or ignore if the member is not in scope.
- Source member was matched to a target account, but an error occurred when trying to add the member to the target group. The member that failed is listed in the task event. Review error details.
|
| Migration failed |
Migration of members did not succeed. Possible reasons:
- Source group did not match a target group. Run the Account Matching Task or Account Mapping Task, or perform a standard Account migration.
- Selected object was a User, Team, or M365 Group. Group Membership migration is not supported for these objects.
- An error occurred that prevented migrating any members to the matched target group. Review error details.
|
| Migration stopped |
Migration canceled by the user. |
Domain Coexistence
Mergers and acquisitions are often accompanied by the unification of brands and corporate identities, including the consolidation of email addresses. However, the transition from source to target tenant might take considerable time. On Demand Migration offers domain coexistence services to close this gap, allowing your employees to send mail from new addresses and access cross-tenant data before the migration is finished. The following services are currently available on the account migration dashboard:
- Address Rewrite Service seamlessly changes the source users' email flow as if they're already fully migrated to the target tenant. Outgoing email addresses are replaced with the recipient's email address in the target tenant, while all incoming mail is automatically redirected to the source mailbox. Address rewriting can be started once the account is matched or migrated, giving you time to prepare and migrate mailboxes. The Address Rewrite Service requires additional licensing.
- Calendar Sharing allows users from the source and target tenants to see each other's free or busy information.
