Congratulations! The migration is complete.
If you have created a temporary Migration Manager account for the migration as described in the Consents and Permissions topic, it is time to remove it because this account has elevated permissions and could pose security risks.
Removing the temporary account from Teams
The temporary Migration Manager account added to all source and target teams respectively as members or owners, can be removed. To remove the temporary Migration Manager account from the teams and groups use the following script:
- Remove-Migration-Account-From-Teams
This script can be downloaded here: https://support.quest.com/on-demand-migration/kb/320327
|

|
IMPORTANT: To run this script, a user account with the Global Administratorrole is required for the source tenant. For example, you can use the Tenant Administrator account.
Although the Remove-TeamUser command used in the script runs successfully, the Teams application does not reflect the update immediately. The Teams application may need to be open for up to an hour before changes are reflected. |
You can use the On Demand Migration PowerShell API to interact with objects in your On Demand Migration environment. The PowerShell cmdlets allow you to perform tasks, such as account discovery, mail migration, OneDrive migration, task and event management in a PowerShell scripting environment.
The ODM API is available for install or download from the PowerShell Gallery.
|
|
NOTE: Usage of the PowerShell Gallery requires the PowerShellGet module to be installed on your computer. The module is normally installed with operating system, but may need an upgrade to the latest version. For more information, see How to Install PowerShellGet. |
In this topic:
On Demand User Role Requirements
User must have the Migration Administrator role to access and run any of the On Demand Migration PowerShell commands. On Demand ships with this role. See the On Demand Global Settings Current User Guide for more information about setting up roles.
Deploying the ODM PowerShell API Module
The ODM PowerShell API module must be installed or download from the PowerShell Gallery.
Searching in PowerShell gallery
Find-Module OdmApi -Repository PSGallery |
Installing the module from the PowerShell gallery
Install-Module OdmApi -Repository PSGallery |
Downloading the module from the PowerShell gallery (without installing it)
Save-Module OdmApi -Repository PSGallery -Path "C:\temp" |
Connecting to the ODM service
Before you can use the ODM PowerShell cmdlets to interact with your ODM environment, you must connect and authenticate your access to your ODM host. The credentials you use must be granted a role with sufficient privileges to work with the On Demand Migration services.
Connecting to the ODM service - Interactive mode
The Microsoft Account Authentication Workflow requires user interaction for the initial authentication with Microsoft. When Microsoft Account authentication is used all authentication is handled via Microsoft and the user’s Microsoft Entra ID. This type of authentication supports MFA and is fully controlled by the user’s Microsoft Entra ID Conditional Access Policies. Any password and lockout policies are also managed directly by the customer through their Microsoft Entra ID.
- Run the following command to connect to your ODM Service. The default region is US.
To connect to a specific region like Europe, run the command Connect-OdmService -Region EU. The region value can be set in the OdmApi.psm1 file by editing this line: [string]$Region = 'us'. For example to set default region to Europe replace the line to [string]$Region = 'EU'.
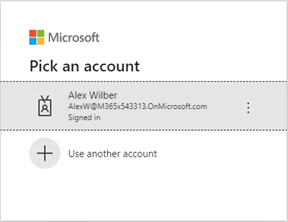
- This command will redirect the user to the Microsoft Authentication workflow to authentication against the user’s Azure Active Directory. In the authentication dialog, enter the credentials of the On Demand account (not the tenant account)
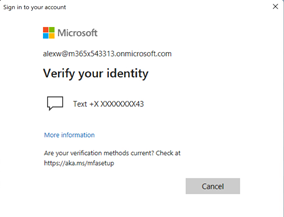
If MFA is enforced, users will see an additional window
Connecting to the ODM service - Unattended (or Headless) mode
The Microsoft Account Authentication Workflow requires user interaction for the initial authentication with Microsoft. This type of authentication doe not supports MFA. It is used primary for work or school accounts. The Tenant ID is required.
Connect-OdmService -Username "admin@democorp.com" -Password "P@ssword!" -TenantId "81f2b32e-c198-44fd-99d4-109665c16f34" |
Example: Selecting the organization and migration project
Step 1: Get the organization id
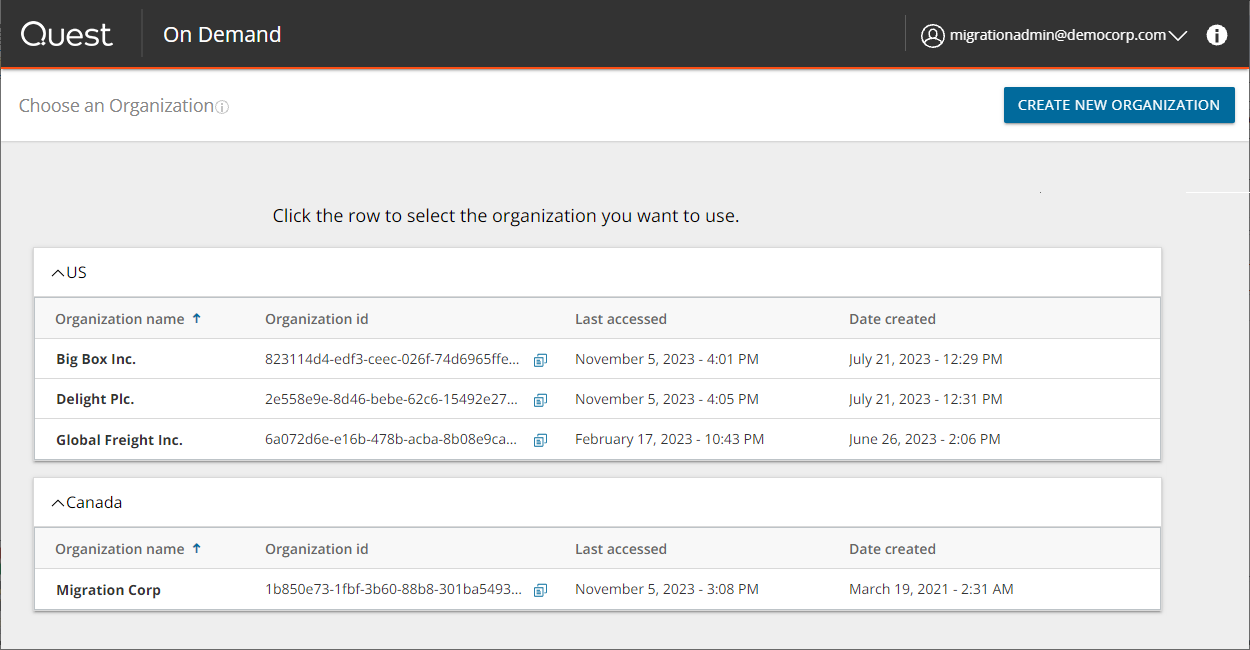
- Log in to Quest On Demand.
- From the Choose an organization page, note the organization id.
- or, if you have already selected an organization -
- Click the logged in user name from the top right corner of the page.
- Click the Organization Name from the drop-down to open the Edit Organization page. Then make a note of the organization id.
Step 2: Connect to the organization
In your PowerShell session console, enter the command:
Select-OdmOrganization -OrganizationId '6a079d6e-e98a-475b-acba-8b08e9caa430' |
Step 3: Select a migration project
Once connected to the Organisation, we need to connect to the Project, the project GUID is required, this is obtained from the ODM GUI or running the command Get-ODMProject which will list all past and present projects associated with the ODM organization, an example of this command is below:
Name : New Migration Project |
Description : Migrate Sales division assets |
SourceTenantDefaultDomainName : sourcecorp.onmicrosoft.com |
TargetTenantDefaultDomainName : targetcorp.onmicrosoft.com |
Id : Elf813YBfQYAK6Q42Kun |
Step 4: Connect to your project
Identify the project Id and connect to the project using the following command.
Select-OdmProject 'Elf813YBfQYAK6Q42Kun' |
Getting Help
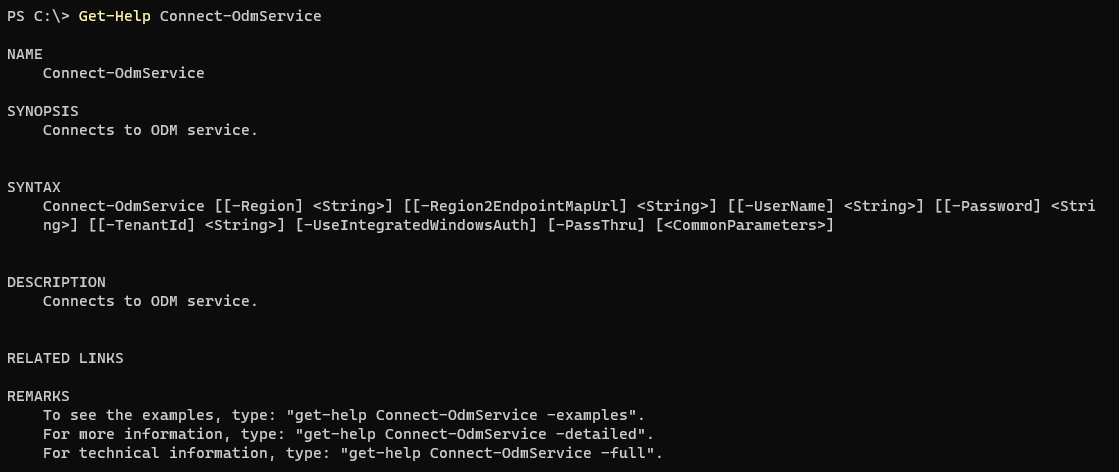
OdmApi module supports online help via Get-Help command. Any command syntax and examples of usage can be displayed by the Get-Help command.
Examples:
Get-Help Connect-OdmService |
Get-Help Connect-OdmService -Examples |
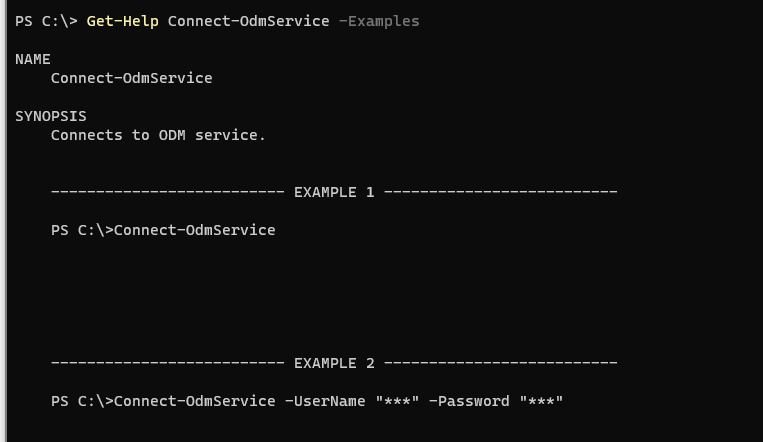
Get-Help Connect-OdmService -Full |

Queuing automates migration task orchestration and simplifies migration planning. Queuing allows migration operators to submit migration tasks for any number of objects at once.
- Removes the need to create multiple migration tasks that would have to be submitted and monitored separately
- Maximizes how many concurrent migrations can be processed in parallel
- Reduces the stress of organizing your migration around capacity constraints
- Frees up time to focus on other project tasks
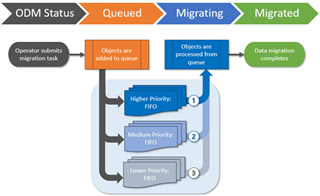
How does queuing work?
When you submit a migration task, On Demand Migration places all objects to be migrated into a queue for that asset, confirms available capacity, and then intelligently selects objects from the queue by processing objects with the highest priority first, using a first-in-first-out approach within that priority.
How do I assign priorities?
When submitting a migration task, you have the option to assign priority levels in the Schedule step of the migration wizard, to help control which objects will be processed from the asset task queue first.
How does first-in-first-out (FIFO) work?
When you submit a new migration task, objects are placed at the end of the asset queue for their assigned priority, meaning that tasks previously submitted with the same priority will be processed first.
As On Demand Migration completes a migration job, it will immediately start processing the next available job by selecting objects from the beginning of the highest priority queue.
This respects the FIFO approach while still ensuring that higher priority tasks are always processed before those with lower priorities.
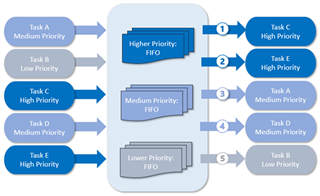
What is an example scenario?
Let’s imagine that a migration operator submits five OneDrive migration tasks throughout the day, with a mixture of priorities, in the order of Task A, Task B, Task C, Task D, and Task E.
If there is available capacity to process all the objects when each task is submitted, the migrations states of all tasks will immediately switch to Migrating and all five tasks will process concurrently with no queue management required.
However, if the available capacity for OneDrive migrations is at its maximum limit when the tasks are submitted, On Demand Migration will place the objects in the OneDrive queue and then process the tasks in order of priority and FIFO as capacity becomes available.
|
|
NOTE: Every On Demand Migration project has its own migration queue and does not compete with asset queues in other projects. |
What determines available capacity?
On Demand Migration uses Microsoft APIs to perform migration tasks and must abide by the API limits that Microsoft enforces in each tenant. These limits are in place to ensure that migration activities do not impact your daily business operations. On Demand Migration operates within the available capacity for your source and target tenants.
How do I know which objects are queued?
When you submit a migration task for an asset that is processing at maximum capacity, the newly queued objects will display the migration state Queued in the list view and object detail pane.
You can sort and filter the list view by migration state to view all queued objects.
