Replace Child Latencies
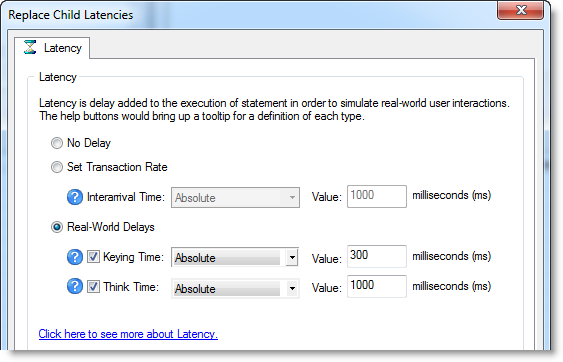
Latency is delay added to the execution of a transaction to control how fast transactions are submitted to the system-under-test. You can use the Replace child latencies dialog to quickly modify latency for all the direct children of a test. For example, when an Oracle trace file is imported, the latencies are automatically set to replay the transactions at their original rate, but changing these to a set value can replay the transactions in a shorter period of time.
To replace child latencies at the test level
- Use one to the following methods to open the Replace Child Latencies dialog:
-
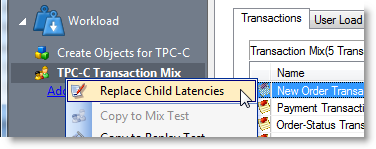
In the New/Edit Job Wizard, right-click a test and select Replace Child Latencies.
-
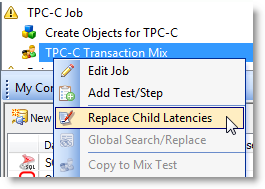
In the Jobs View pane, right-click a test and select Replace Child Latencies.
-
In the Replace Child Latencies dialog, modify latency options. See Specify Latency for more information.
- Click OK to save your changes and close the dialog. The changes are applied to all the child transactions of the transaction mix. The changes are not inherited by the grandchild transactions. For example, if the transaction mix contains a user scenario, the latency values for the individual transactions in the user scenario remain unchanged. To change the latency values for transactions in the user scenario, right-click the user scenario and select Replace Child Latencies.
To replace child latencies at the User Scenario level
- In the New/Edit Job wizard, select a transaction mix step and open the Transactions tab.
-
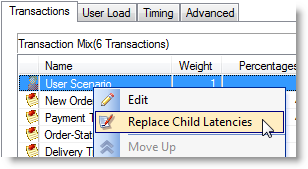
In the Transactions tab, right-click the user scenario and select Replace Child Latencies.
- In the Replace Child Latencies dialog, modify latency options. See Specify Latency for more information.
Use Global Search and Replace
Global Search and Replace allows you to search for and replace text from the selected item and all of its children.
To use Global Search/Replace
- In the Jobs View, right-click a test you wish to search and replace.
- Select Global Search/Replace. The Global Search and Replace dialog displays.
- Enter the desired parameter in Find What.
- Enter the desired parameter in Replace With.
- Check Match Case or Match Whole word if desired.
- Click Replace.
Create an ODBC Trace File
To create an ODBC trace file
- Click the Start button from the Windows taskbar.
- Select Settings | Control Panel. The Control Panel window displays.
- Double-click on Administrative Tools. The Administrative Tools window displays.
- Launch Data Source (ODBC). The ODBC Data Source Administrator window displays.
- Click the Tracing tab.
- Click the Start Tracing Now button. The Start Tracing Now button changes to Stop Tracing Now button.
- Run the ODBC transactions to be traced.
- When the transactions complete, click on the Stop Tracing Now button.
- Click OK.
Schedule a Job
Benchmark Factory allows you to schedule a job to run at a future time. Scheduling allows you to set predetermined dates, recurrences, daily frequencies, and durations of jobs.
Note: When using the recurring option, use Ready Job in place of Run Job.
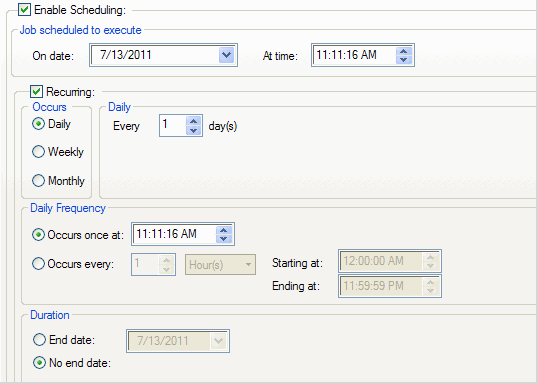
To schedule a job
- In the New/Edit Job Wizard, select a test under Workload.
- Select the Job Setup tab.
- Select the Schedule tab.
- Select the Enable Scheduling checkbox.
- To run the job once, select a date and time to execute the job.
- To run the job on a recurring basis, select a start date and time, and select the Recurring check box.
- Then specify a frequency.
- To run the job multiple times per daily, specify options under Daily Frequency.
- Select an end date, or select the No end date checkbox.
- Click Save/Close to save your options and close the wizard.
