
Copy Alerts
The Alerts Collector must be installed and running on your source SharePoint server. The software will extract all alerts from the selected Web Applications or Site Collections into a CSV file.
|
|
NOTE: · In order to copy alerts, additional software called Alerts Collector is required. If you need this software, please open a support ticket using the Contact Support button located in the application's Help tab. ·Hosted or Office 365 source environments are not supported. |

Collecting Alerts
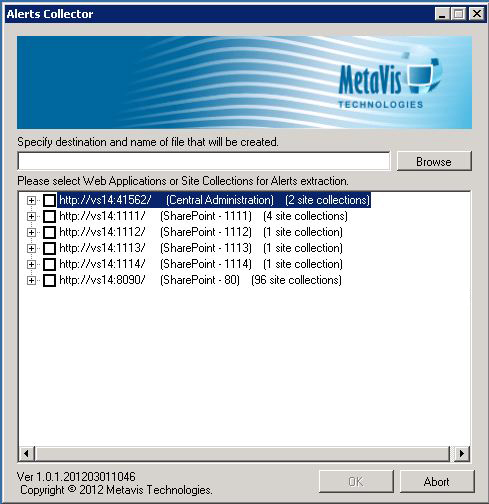
1.Download and run the Alerts Collector Application. It may take a few minutes to retrieve your farm structure.
2.A window will appear requesting to specify a CSV file name and destination.
3.Select the Web Applications or Site Collections of the Alerts to be extracted.
4.Once satisfied with your selections, click OK and upon completion a 'Success' window will appear. Select OK and the application will close.
The CSV file that is generated must be accessible to the migration software. If your application is installed in a different location, copying the file to that location is advisable.
Orphaned Users Copy
Essentials allows users to migrate orphaned users from a source to a target.
|
|
NOTE: You can also display orphaned users and manage them individually from the Security Manager tab. |
In order to migrate orphaned users see the following steps:
1.Navigate to the Migrator tab in Essentials.
2.Select Orphaned Users Copy within the Advanced section of the header.

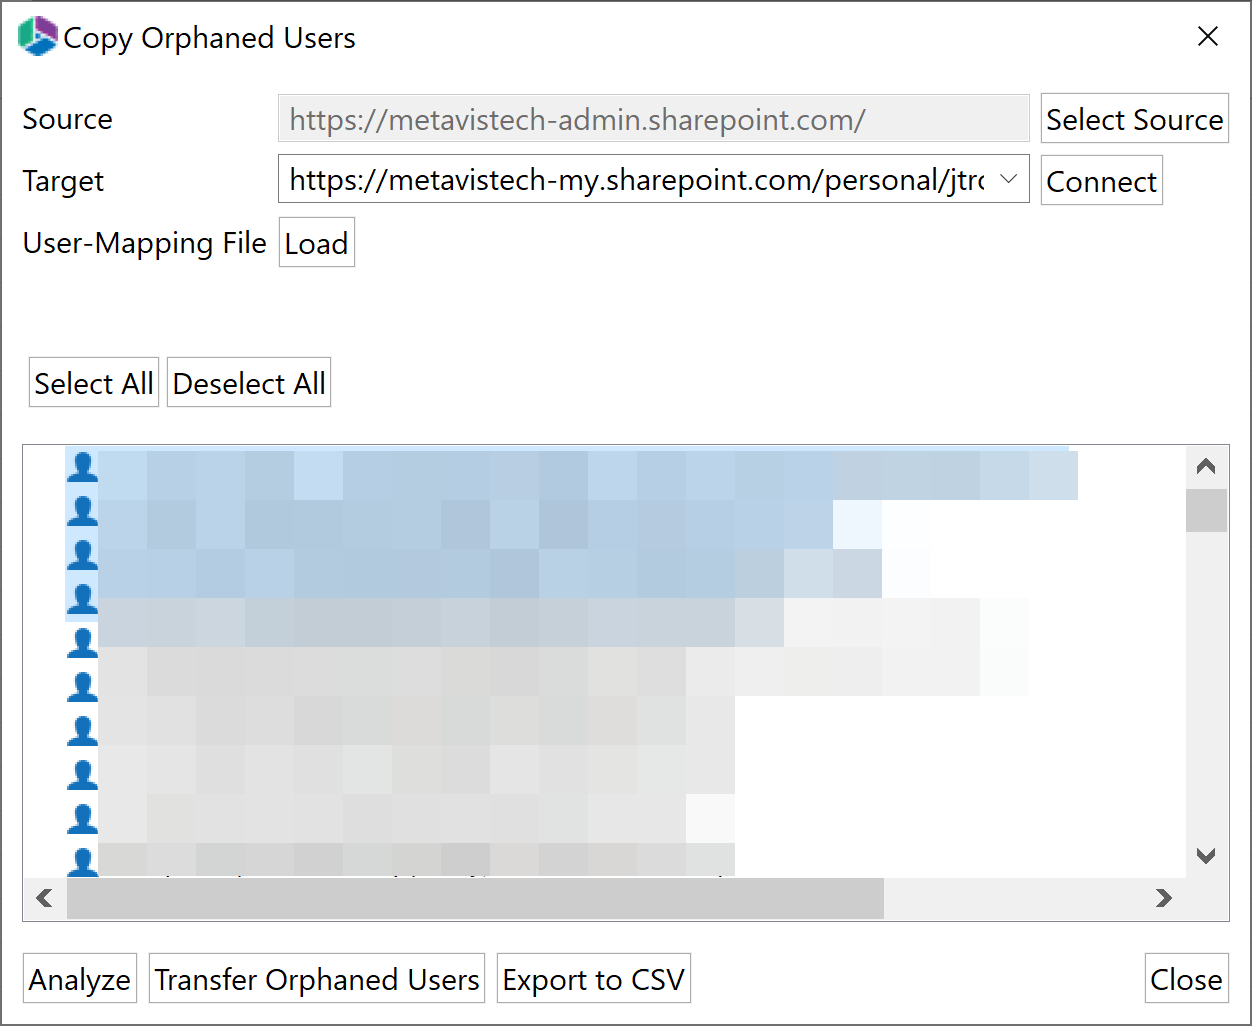
3.In the Copy Orphaned Users wizard, select your source by clicking Select Source.

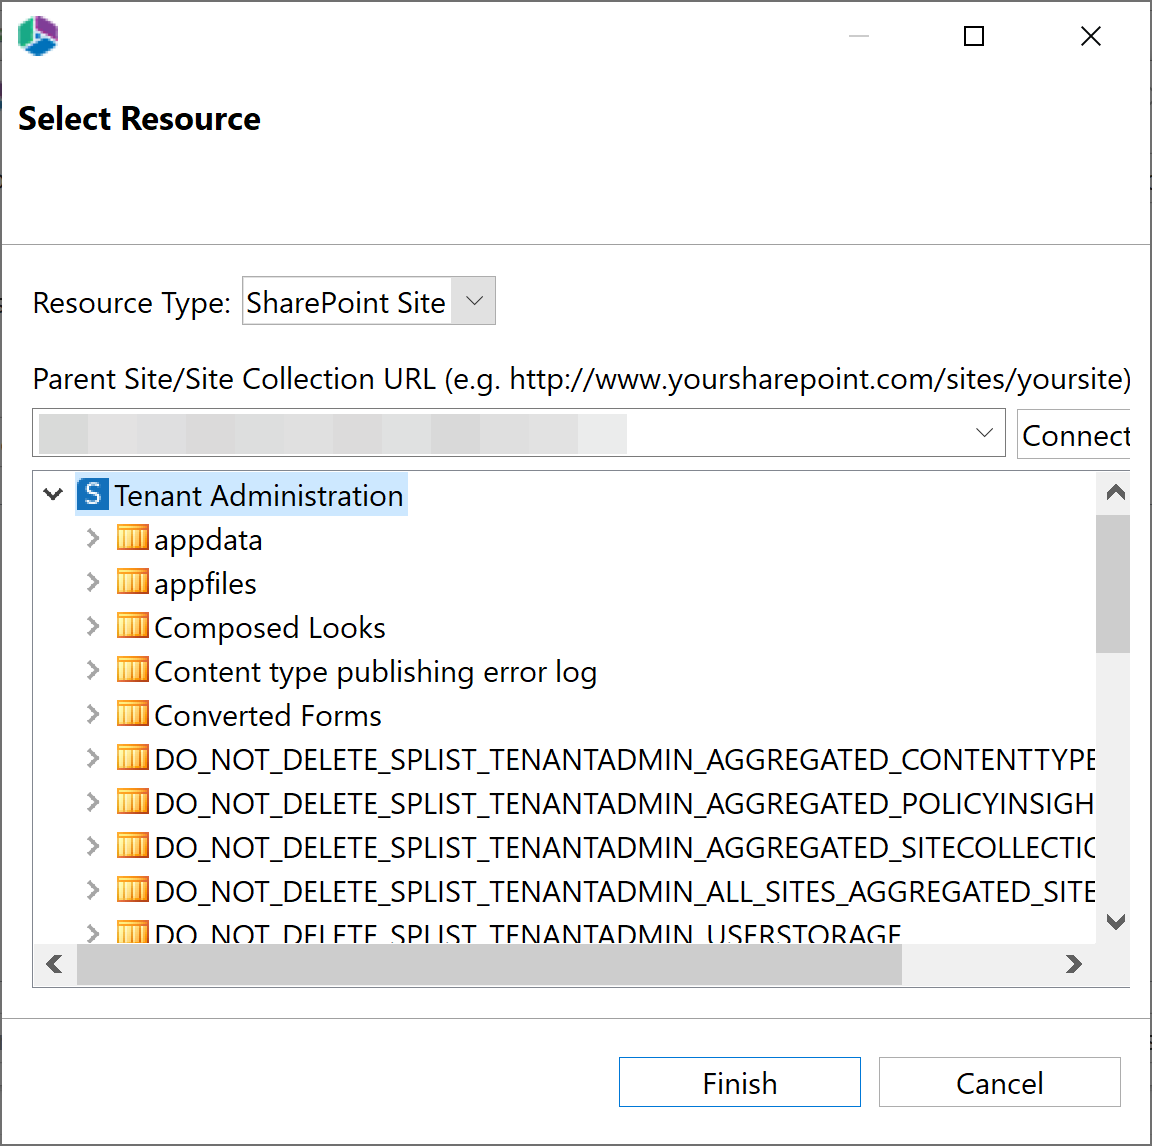
4.In the Select Resource window, use the drop down menu to select a parent site/site collection URL. Click Connect and input your credentials if prompted. This will populate the list below with your available sites. Select one for your source and click Finish.
5.Select a target from the drop down list in the Copy Orphaned Users wizard, and click Connect. Enter your credentials if prompted.
6.Load a User Mapping file, by selecting the load button, if you need to map specific users to alternate accounts.
7.Select Analyze to begin the scan for orphaned users.
8.Once the analysis is complete, select the users you would like to manage. Then select whether you would like to transfer these orphaned users, or whether you would like to export the list to a CSV for your records.
In-Place Tagging of SharePoint Items
SharePoint uses three primary methods for categorizing content. The hierarchy of sites, lists and folders (which is similar to how file systems store files in folders), metadata (via content types and fields), and AutoTagging to tag or classify content for find-ability and filtering. The application has been designed to categorize content in bulk by leveraging one or all of these methods.
This section will walk you through the process of intelligently tagging content. Please refer to the section titled, Copy, Move, and Tag SharePoint, for additional information on moving or copying content into specific sites, lists, and folders.
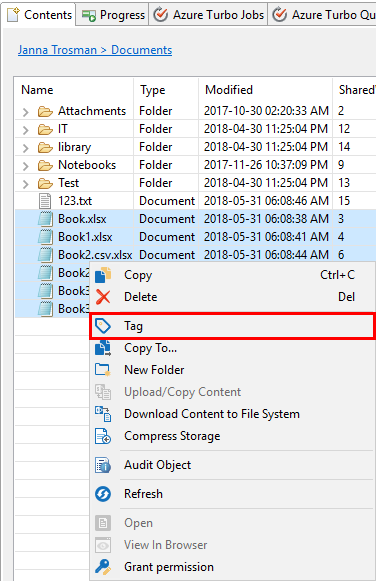
1.Locate a list or library, containing the content you wish to classify, in the Navigator pane. Double-click on the list to load its contents into the Contents pane.
If the site containing your items or documents is not available in the Navigator pane, follow the instructions for Connecting to SharePoint in order to load it.

2.From the list of files located in the Contents pane, select all the files for tagging. Hold down the CTRL key to select multiple individual files or SHFT key to select multiple consecutive items.
3.Right-click on any of the selected files, and select the Tag option from the drop down menu. This will initiate the tagging wizard.
4.Update the field values to the desired settings. Refer to the sections on the Classification Properties Screen and the Field Value Selection Screen for additional information on your options.
5.Once the tagging selections are made, press the Next button located at the bottom of the window. A summary screen will be generated asking you to confirm the operation. Press Finish to initiate the tagging. The application will complete the tagging process and provide a notification window.
|
|
NOTE: ·For the Migrator version of this wizard, users may select the "Create CSV File for Uploading, Tagging and Copying Files", which will create a CSV file that may be edited and used for tagging at a later time (see Copy and Tag SharePoint Items Using CSV). ·For Migrator version of this wizard, in the event any errors are thrown, you may reprocess any failed items after resolving the underlying issues. ·For lists with Content Approval enabled, an Approval Status field will be displayed. This field can be used to bulk approve/reject selected content. |