Follow these steps to migrate the sIDHistory from the staging forest to intra-forest target domain.
-
Launch the Directory Sync Pro web portal.
-
Select the sIDHistory Profile and click on Manage.
-
Click on Synchronization.
-
Select the PUSHPULL and click on Run Sync.
-
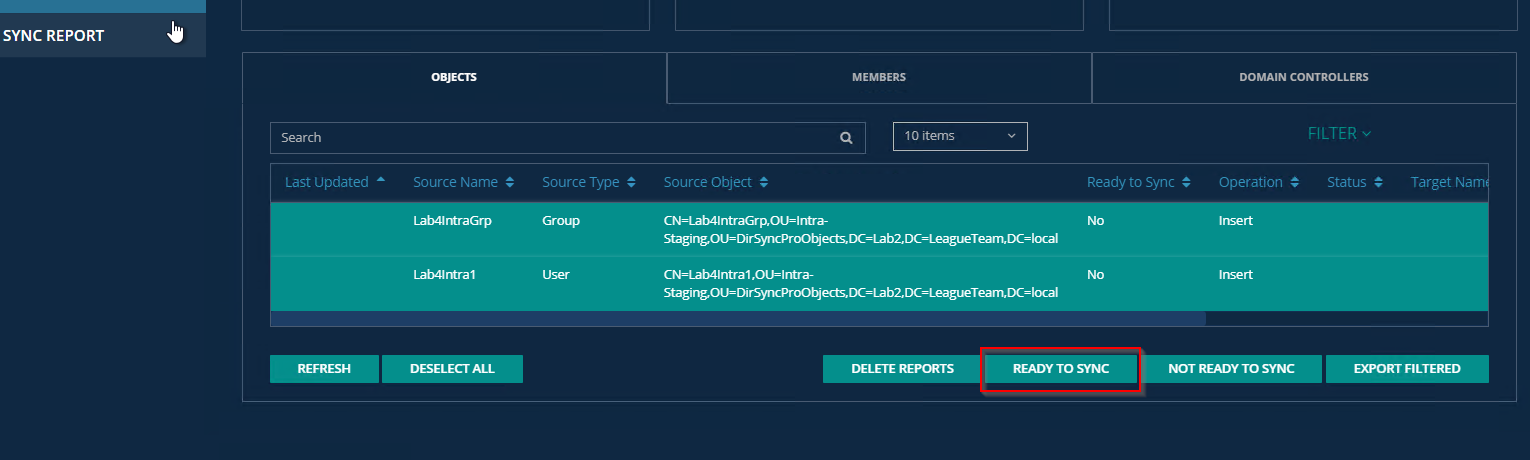
Click on the Sync Report after the sync is completed.
-
Select the objects in-scope for the sIDHistory migration and click on Ready to Sync.
-
Verify the object’s Ready to Sync flag are set to Yes.

-
Click on Synchronization.
-
Select the PUSHPULL and click on Run Sync.
-
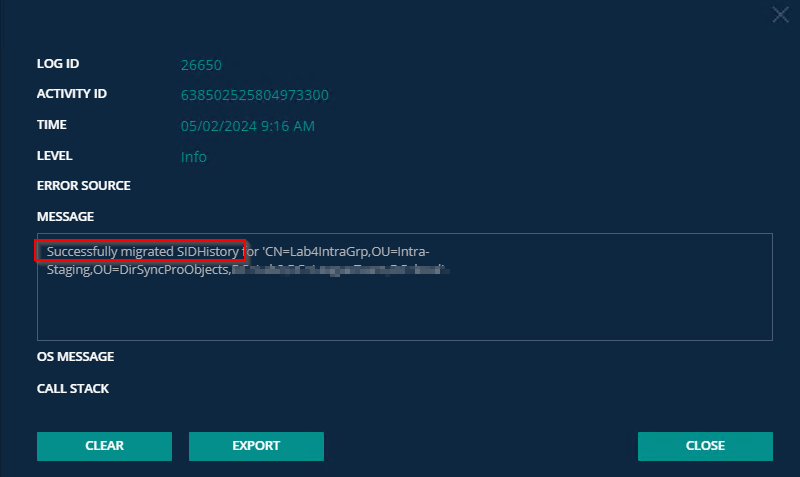
Click on Logs and Reports and click on Sync Logs to review the log.
-
Verify the profile was synced successfully and there should be no errors. Some of the examples of logging we expect to see are listed below.
-
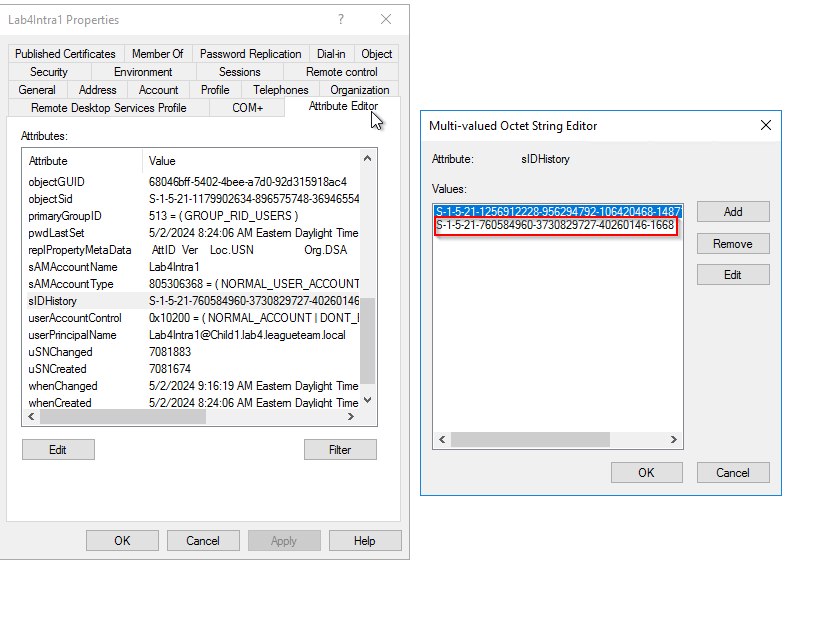
Verify the objects are created as expected in the target child domain via the Domain Controller. sIDHistory should be migrated to these objects from their source domain to the staging forest.
Question: How do I promote the staging forest; is there an automated method?
Refer to the below high-level steps to configure the staging forest. Assuming you have a fresh installation of Windows Server 2019 with the default Server installation. This server is intended to be the first domain controller in a new Active Directory forest used as the staging forest. Prior to attempting to promote this server to a domain controller, complete the following configuration:
-
Install all the available Windows Updates.
-
Configure the system time zone.
-
Configure the computer name.
-
Configure a static IP address.
-
Install the Active Domain Service Feature using below PowerShell Command.
Install-WindowsFeature -Name AD-Domain-Services
-
Configure the Safe Mode Admin Password.
$Password = Read-Host -Prompt 'Enter SafeMode Admin Password' -AsSecureString
-
Install and configure the domain.
Install-ADDSForest -CreateDnsDelegation:$false -DatabasePath C:\Windows\NTDS -DomainMode WinThreshold -DomainName staging.local -DomainNetbiosName staging -ForestMode WinThreshold -InstallDns:$true -LogPath C:\Windows\NTDS -NoRebootOnCompletion:$true -SafeModeAdministratorPassword $Password -SysvolPath C:\Windows\SYSVOL -Force:$true
Question: Why do we need to disable Group Membership Syncing for the Staging Profile and sIDHistory Profile?
Group Membership Syncing is time consuming as it needs to read every member in the group. For the purpose of sIDHistory Migration, Group membership is not required, and we can save time by disabling the group membership syncing option.
Question: Can I setup the sync profile to sync sIDHistory automatically to the target based on my user migration schedule?
Yes, you may configure the Staging and sIDHistory profile to process only objects that were migrated using an LDAP filter. Assuming you have migrated your users, you may update your source objects with ‘Migrated’ value in one of the AD attributes (ExtenstionAttribute1), the Staging and sIDHistory profiles can be configured to only process objects with ‘Migrated’ stamped in ExtensionAttribute1.
Question: After I migrate the sIDHistory, should I do anything to my source objects; will there be a problem if the sID exists in both objects in the same forest?
You need to delete the source objects that are migrated after sIDHistory are copied.
Question: Can I pre-stage my objects in the staging forest before my user cutover events?
Yes, you may pre-stage your users and groups from the source domain in the staging forest ahead of your migration cutover event.
Quest creates software solutions that make the benefits of new technology real in an increasingly complex IT landscape. From database and systems management, to Active Directory and Office 365 management, and cyber security resilience, Quest helps customers solve their next IT challenge now. Around the globe, more than 130,000 companies and 95% of the Fortune 500 count on Quest to deliver proactive management and monitoring for the next enterprise initiative, find the next solution for complex Microsoft challenges and stay ahead of the next threat. Quest Software. Where next meets now. For more information, visit www.quest.com.
Technical support resources
Technical support is available to Quest customers with a valid maintenance contract and customers who have trial versions. You can access the Quest Support Portal at https://support.quest.com.
The Support Portal provides self-help tools you can use to solve problems quickly and independently, 24 hours a day, 365 days a year. The Support Portal enables you to:
-
Submit and manage a Service Request
-
View Knowledge Base articles
-
Sign up for product notifications
-
Download software and technical documentation
-
View how-to-videos
-
Engage in community discussions
-
Chat with support engineers online
-
View services to assist you with your product.
