Productivity pack contains three macros.
- Add Entities
- Add Attribute to Selected or All Entities
- Copy Attribute to All Entities
Add Entities
Select Macros | Productivity | Add Entities to run the macro.
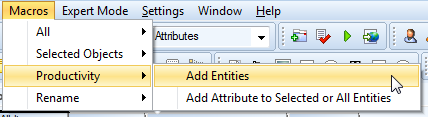
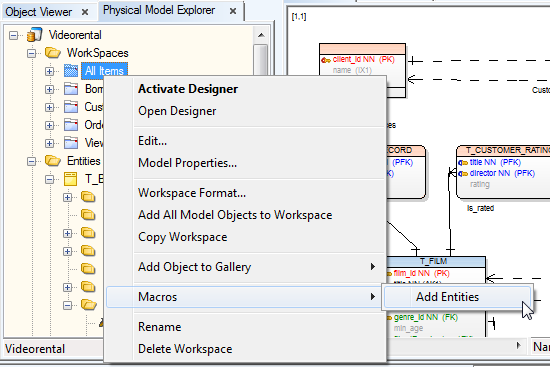
The same macro can be executed from Workspace.
New dialog opens. Specify entity captions, one per line.
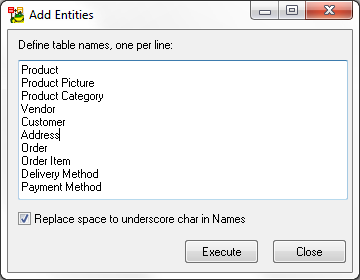
Click Execute to create the new tables.
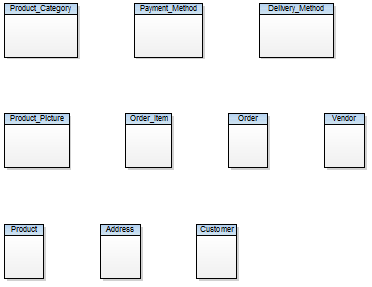
The tables will be added to your model.
In case your workspace option Autocomplete is activated the entities will appear also on our workspace.
Add Attribute to Selected or All Entities
Select Macros | Productivity | Add Attribute to Selected or All Entities to run the macro.
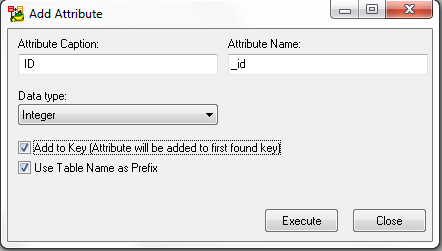
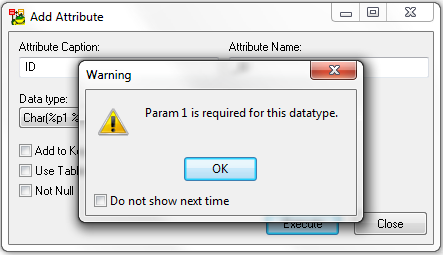
New dialog opens. Specify caption, name, data type and other options.
Tip: If you want to use table caption/name as prefix, type a "space" as the first character in Attribute Caption field and an underscore as the first character to Attribute Name field.

Note that if you select the Add to Key checkbox, the Not Null checkbox disappears.
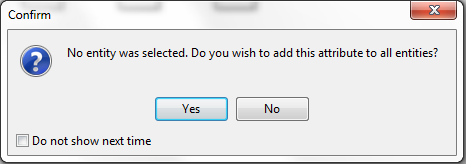
In case you selected an entity, the attribute will be added to the selected entity. Otherwise the following dialog opens.
Click Yes to add attribute to all entities.
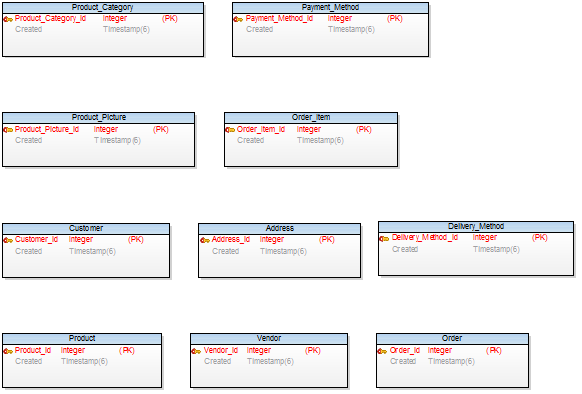
Result:

Verification: There is some basic verification of the required items.
Notes:
- If you run the macro on entities with identically named attributes, the attribute will not be added to the entity more than once.
- If you specify Varchar(%p1 %p2) as the data type, you need to know whether the second parameter is BYTE or CHAR. There is no verification for parameter values.
Copy Attribute to All Entities
Select an attribute in physical Model Explorer, right-click and select Macros | Copy Attribute to All Entities.

It is possible to run the macro also from Object Viewer.

Result:
|

|
Note: The attribute will be added only to the entities which don't have an identically named attribute. |
Sources
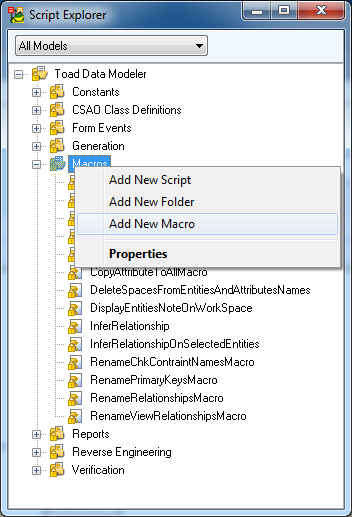
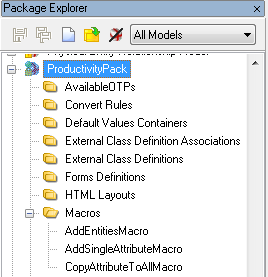
You can find them in Package Explorer in section Productivity Pack | Macros.
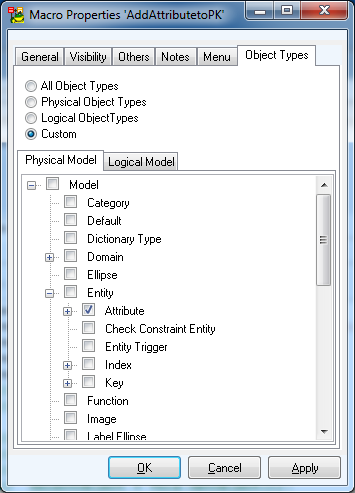
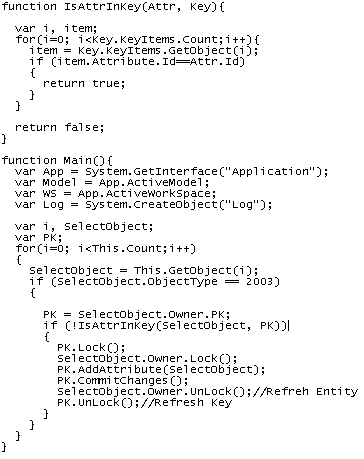
Right-click any macro and select Edit Source Code to see JavaScript code.
Rename Objects Pack contains the following macros:
- Rename Primary Keys
- Rename Relationships
- Rename Check Constraint Names
- Rename View Relationships

Rename Primary Keys
This macro renames primary keys to PK_<tablename>.
When you create a new entity, its primary key is named Key1.
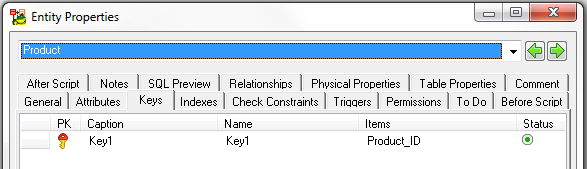
When you execute the macro, the key name and caption changes.

Notes:
- If you select an entity, the macro will modify the primary key name and caption of the selected entity only.
- If you need to change the prefix or if you want to use suffix, create a new macro and modify its JavaScript code accordingly.
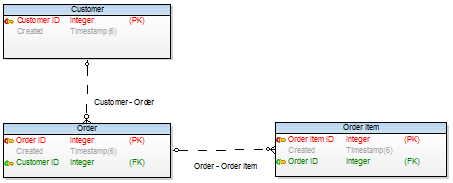
Rename Relationships
This macro renames relationship captions and names and modifies them to:
New caption: <parenttablecaption> - <childtablecaption>
New name: <parenttablename>_<childtablename>
By default, relationships are named as Relationship1, Relationship2 etc. When you execute the macro, the following result is achieved:
Notes:
- If you select a relationship, the macro will modify only the selected relationship, otherwise you will be asked if you want to run the macro on all relationships.
- If multiple relationships exist between two entities, a random number will be added at the end of the relationship name.
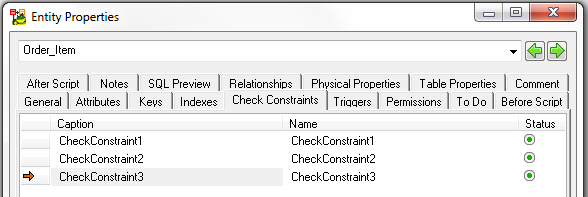
Rename Check Constraint Names
This macro renames Table and Column check constraint names and captions.
By default, Toad Data Modeler names check constraints as CheckConstraint1,2,3 etc.
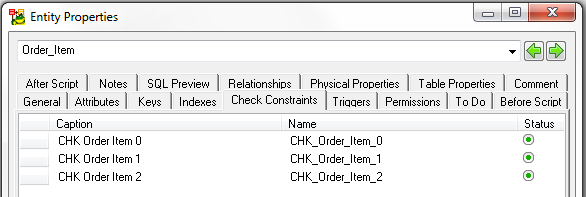
After you execute the macro, check constraints will be renamed to CHK_<tablename>_<index> and CHK_<columnname>_<index>.
Notes:
- If you select an entity, the macro will modify check constraint names and captions of the entity and its attributes.
- If you need to change the prefix or if you want to use suffix, create a new macro and modify its JavaScript code accordingly.
Rename View Relationships
This macro works similarly to the Rename Relationships macro.
New caption: <object1caption> - <object2caption>
New name: <object1name>_<object2name>
The macro renames existing View relationships.
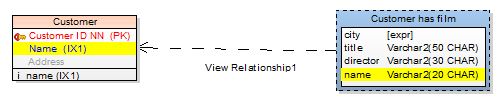
Result:

|
|
Note:
- If you select a View relationship, the macro will modify only the selected View relationship, otherwise you will be asked if you want to run the macro on all View relationships.
|
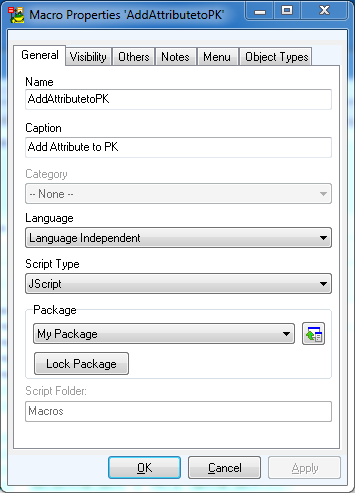
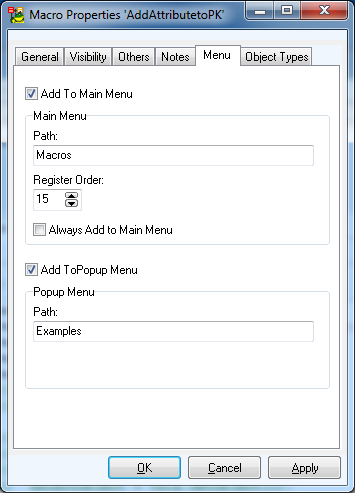
Toad Data Modeler allows you to create a macro in Package Explorer or Script Explorer and modify its properties to display the macro either in main menu or pop-up menu (of specific object or on the Workspace etc.).
Older versions allowed you to define such macros via a script written in Script Editor. To execute the script directly, you simply selected the macro in the appropriate menu.
Toad Data Modeler version 3.5 is bringing some improvements for using macros - visual components for macros (User Forms). So, now when you select a macro, a user form can display.
User Forms - Brief Information:
- You can create and use user forms to interact with Toad Data Modeler during script and macro execution. You can enter input parameters or see some output information.
- Function Main only creates and displays the user form. Other functionalities must be implemented/added via form events or its controls. So, a form is not a dialog.
Create a Form
To create a form, use the object System that is registered in every script.
The method you need is called CreateForm and has four optional parameters:
Example:
var form = System.CreateForm(‘FormName’, ‘Form Caption’, 200, 150);
- First Parameter – Name of form (it mustn’t contain spaces and other invalid/not permitted characters).
- Second Parameter – Caption that will be displayed in the heading of the form.
- Third Parameter – Width of the form.
- Fourth Parameter – Height of the form.
Functions of Form
AddControl(ControlName: widestring, ControlType: Integer): IDispatch;
- ControlName – Name under which the control is accessible.
- ControlType – Number of control type that should be created.
See the following table:
| - 1 |
- Edit Box |
| - 2 |
- Check Box |
| - 3 |
- Memo |
| - 4 |
- Panel |
| - 5 |
- Label |
| - 6 |
- Group Box |
| - 7 |
- Radio Button |
| - 8 |
- Combo Box |
| - 9 |
- List Box |
| - 10 |
- Button |
This function adds control on the form.
ShowModal()
This function displays the form.
Procedures of Form
AddUserVariable(AName: widestring, DefaultValue)
- AName – Name under which a variable is accessible in events of forms.
- DefaultValue – Default value. It can be of types integer, widestring or boolean.
This procedure adds a variable on the form. The variable is then accessible in events via calling the Instance.VariableName. The variable is accessible across events. If you change a content of the variable in one event, the changed status will be accessible in another event.
RegisterObject(AName: widestring, AObject: IDispatch)
- AName – Name of object via which it will be accessible in events.
- Aobject – Object that is registered.
Use this procedure to register objects in events.
Properties of Form
Caption – Heading of the form.
CloseAfterExecute – True – When you click Execute, the code will be executed and the form closes. False – The form will not close after execution. Default: False.
ExecuteMethodName – Name of method that should be executed when you press the Execute button.
ExecuteScriptName – Name of script for calling out the method when you click the Execute button.
|
|
Note: If you don’t want to use the button Execute, do not set up the properties ExecuteMethodName and ExecuteScriptName. The button will not be visible on the form then. |
EVENTS
To assign events, assign the component of particular event to properties of names NameEventScriptName, NameEventMethodName with reference to particular service method.
Example:
Button.OnClickScriptName = ‘MyScript’;
Button.OnClickMethodName = ‘DoOnClick’;
CONTROL
Control is an ancestor from which all controls, including the form, inherit.
Properties of Control
Align – Alignment of control. Possible values to use:
0 - No alignment
1 - Alignment - Top
2 - Alignment - Bottom
3 - Alignment - Left
4 - Alignment - Right
5 - Alignment – All client
AnchorTop, AnchorBottom, AnchorLeft, AnchorRight – Determines the position of control. Default place – top left-hand corner.
Parent – Control on which a control is placed. Default position of all controls is on the form and this property is not set up.
Note: Description of value Align 0..5:
alNone - The control remains where it was placed. This is the default value.
alTop - The control moves to the top of its parent and resizes to fill the width of its parent. The height of the control is not affected.
alBottom - The control moves to the bottom of its parent and resizes to fill the width of its parent. The height of the control is not affected.
alLeft - The control moves to the left side of its parent and resizes to fill the height of its parent. The width of the control is not affected.
alRight - The control moves to the right side of its parent and resizes to fill the height of its parent. The width of the control is not affected.
alClient - The control resizes to fill the client area of its parent. If another control already occupies part of the client area, the control resizes to fit within the remaining client area.
Button
Event
OnClick – Occurs when you click the button.
Checkbox
Event
OnClick – Occurs when the check in checkbox is changed.
Combobox
Event
OnSelect - Occurs when combo box is selected.
Edit
Event
OnChangeText – Occurs when text in edit box is changed.
Memo
Event
OnChangeText – Occurs when text in memo is changed.
Radio Button
Event
OnClick – Occurs when the button is selected.
For more properties, please read the Reference Guide (Expert Mode main menu, Expert Mode has to be enabled.). See objects: UserButton, IUserCheckBox, IUserComboBox, UserControl, UserEdit, UserFormBasic, UserForm, UserGroupBox, IUserLabel, UserListBox, UserMemo, IUserPanel, UserRadioButton, UserStrings.