Creating New Objects
In this topic you can find information about how to create new objects via scripting.
Creating a New Entity
function main()
{
var app = System.GetInterface('Application');
var Model = app.Models.GetObject(0);
Model.Lock();
var Entity = Model.CreateNewObject( 2002 ); // 2002 is object type of PEREntity
Entity.Name = 'Customer';
Model.UnLock();
Model.RefreshModel();
}
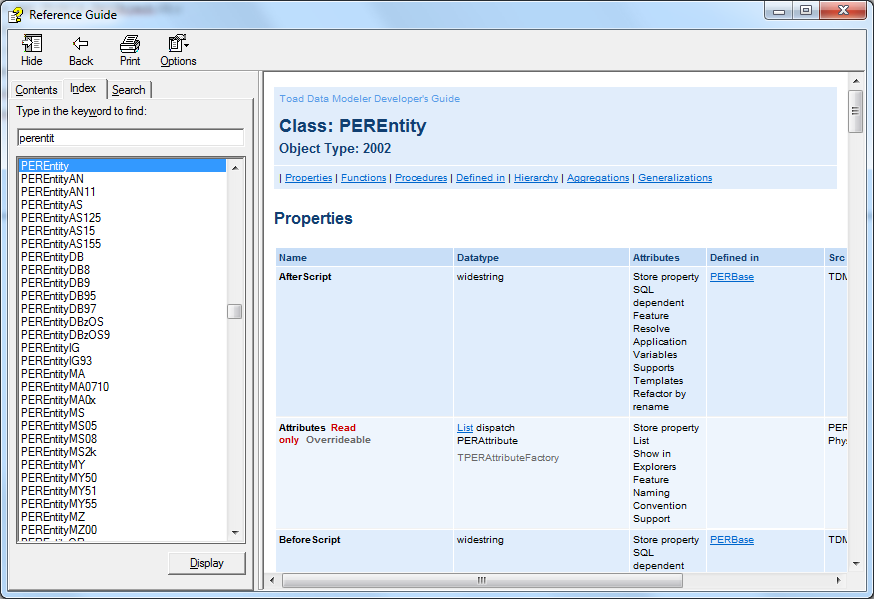
More information about the Entity object can be found in the Reference Guide (in Expert Mode main menu, Expert Mode has to be enabled first). See PEREntity class or PEREntityOR (for Oracle) class etc.
Creating a New Index
function main()
{
var app = System.GetInterface("Application");
var Model = app.Models.GetObject(0); // gets first model in application
Model.Lock();
var Entity = Model.Entities.GetObject(0); // gets first entity in model
Attribute = Entity.Attributes.GetObject(0); // gets first attribute in entity
var Index = Entity.CreateNewObject( 2012 ); // 2012 is object type of PERIndex
Index.Name = "IXName";
var IndexItem = Index.CreateNewObject ( 2013 ); //2013 is object type of PERIndexItem
IndexItem.Attribute = Attribute;
Model.UnLock();
Model.RefreshModel();
}
Creating a New Domain
function main()
{
var app = System.GetInterface('Application');
var Model = app.Models.GetObject(0);
var Domain;
var DataType_Number = Model.ModelDef.DataTypes.GetObjectById("{3A22E4F9-EE24-4A39-835D-62C3EF76CAA4}"); // Number(x,y);
Model.Lock();
Domain = Model.CreateNewObject( 2006 ); // 2006 is object type of PERDomain
Domain.Name = 'MyDomain';
Domain.SetLinkedObject("DataType", DataType_Number);
Domain.DataTypeParam1 = "10";
Domain.DataTypeParam2 = "2";
Model.UnLock();
}
Modify Form
Back to our Oracle 10 physical model.
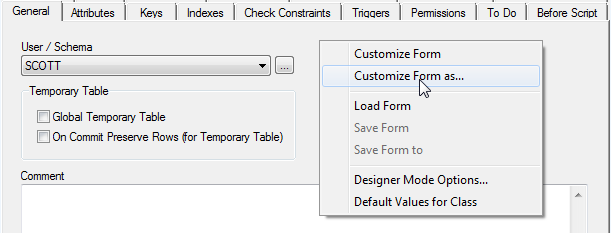
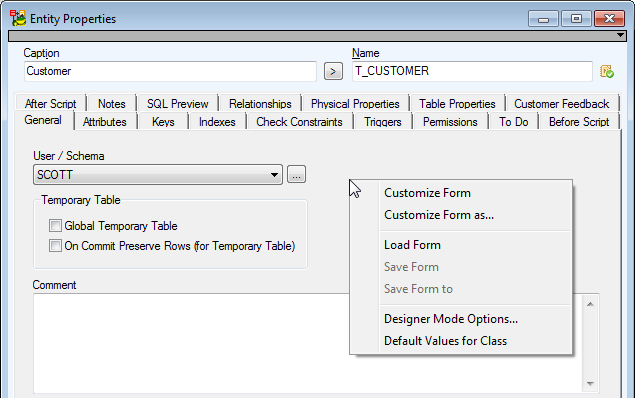
Edit an entity to open standard Entity Properties form.
Right-click the form and select Customize Form as...
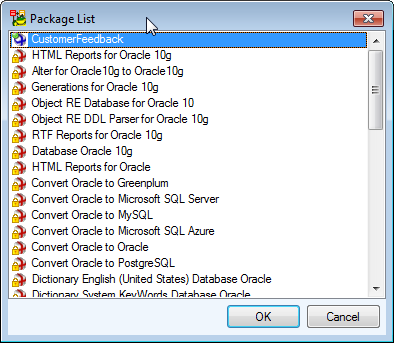
Select a package you want to store modifications in.
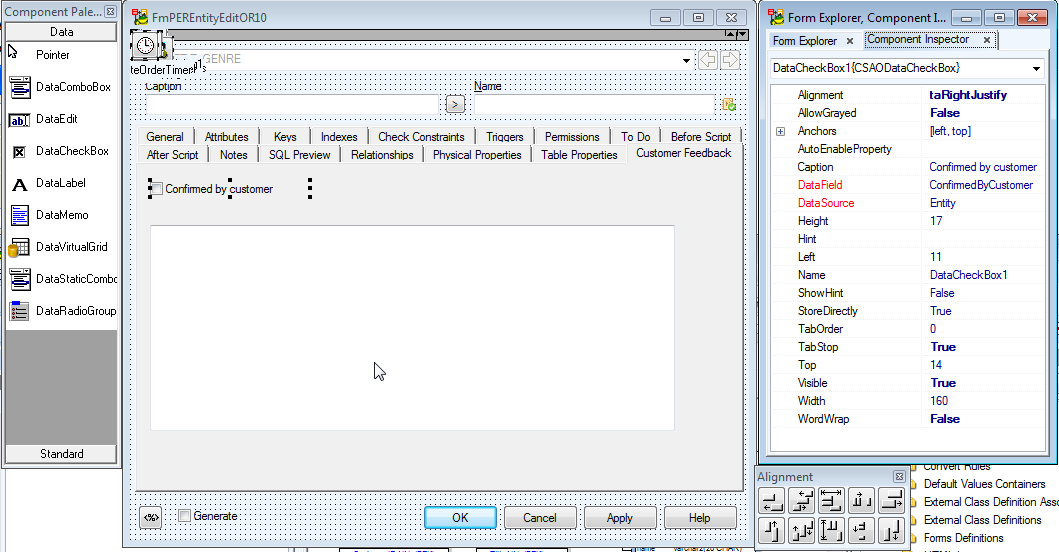
The following forms and palettes will appear. Note that the Entity Properties form has dotted grid now.
In the Form Explorer, see that the form name is FmPEREntityEdit. We will need this information later.
To add a new tab to the Entity form, right-click any tab in the form and select New Page.
Define Caption for the new tab in Component Inspector.
Then select DataCheckBox item from the Component Palette.
And add a new checkbox to the CustomerFeedback tab.
Select the Entity item from DataSource field in the Component Inspector.
Then select ConfirmedByCustomer item from DataField.
Select DataMemo from Component Palette and add new text field (datamemo) item to the Customer Feedback tab.
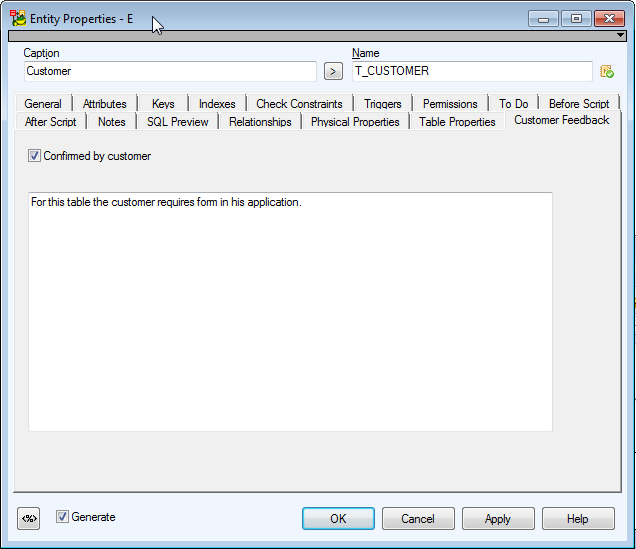
Result:
Close the Entity Properties form by clicking the red X button at top of the form. Component Inspector, Component palette, Form Explorer will disappear.
Then right-click the form and select Save Form to CustomerFeedback.
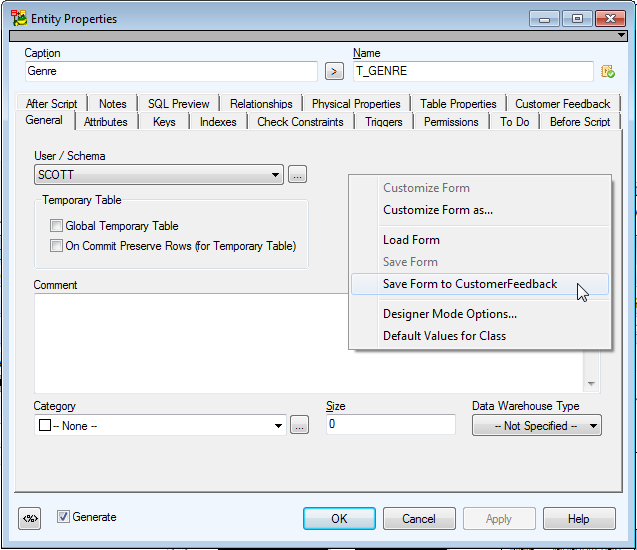
New items are in the form.
For more information, see Set Default Values.
Set Default Values
How to Define Default Values
If you need to change the default value for new items, do the following:
Right-click the form (Entity Properties form in our example) and select Default Values for Class.
We want the Confirmed by customer checkbox to be selected by default for new entities.
Select property name and click the Default Value column. Then press F2 to edit the value.
Select where the definition will be stored. In our example, we need to store it into the CustomerFeedback package.
Click the dialog to confirm your selection in combo box and then confirm OK.
Done.
For more information, see Add Events.
Add Events
The following events are available in Toad Data Modeler scripting:
- OnCreate
- OnCheck
- OnChange
- OnClick
- OnClickSilent
- OnClose
Let's add OnCheck event to the checkbox on the Customer Feedback tab of the Entity Properties dialog. When the checkbox is selected, the text box with Notes from Customer will be visible. When the checkbox is unchecked, the text box will disappear.
In Package Explorer, select the Script folder under the CustomerFeedback package. Right-click it and select AddScript.
Set the script name to FmPEREntityEdit. - This is the name of the form we want to write the script for. See the "Modifying a Form" topic to find out where the form name is defined.
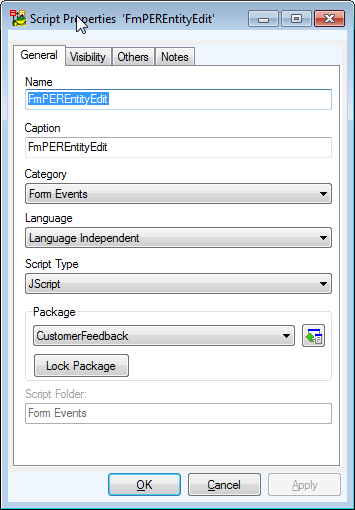
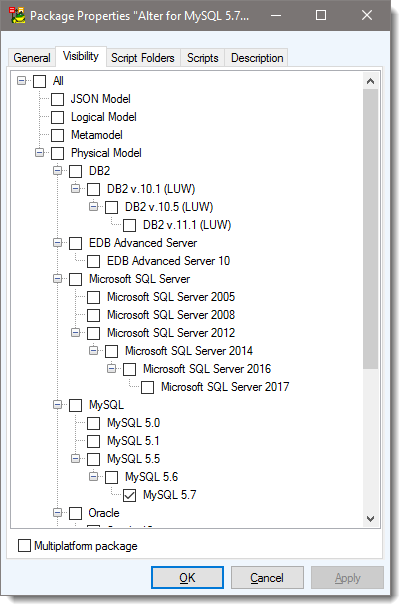
Set visibility to Oracle 10g only.
Close the window, right-click the script again and select Edit Source Code.
Add there the event function.
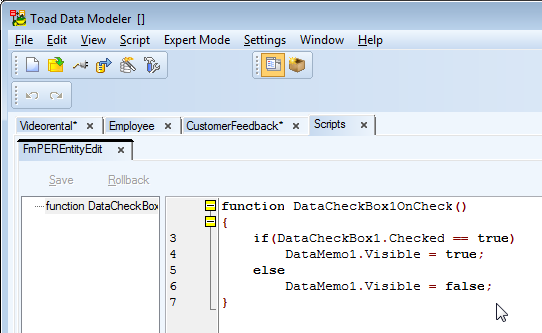
Code:
function DataCheckBox1OnCheck()
{
if(DataCheckBox1.Checked == true)
DataMemo1.Visible = true;
else
DataMemo1.Visible = false;
}
Explanation of items in bold.
DataCheckBox1OnCheck()
- DataCheckBox1 - name of item that has been added to the Entity form.
- OnCheck - name of event.
DatacheckBox1 and DataMemo1
- Both are names of items that were added to the Entity form. Modify Form
Press Commit to confirm the script.
Result:
When the checkbox is unchecked, the text area is hidden.

If you select the checkbox, the text area will display.
For more information, see Access Property Values via Scripting Window.
