Simple Model Conversion
Features and Tools > Model Actions > Model Conversion > Simple Model Conversion
This feature allows you to convert your logical models to physical models and your physical models to models of another database system very quickly.
|
Scenario
You want to convert your Oracle 10g model to Microsoft SQL Server 2005. |
- Open your Oracle 10g model.
- Select File | Synchronization | Simple Model Conversion.
- Define the settings in the Conversion dialog.
|
To Database |
Select a target database system - Microsoft SQL Server 2005. |
|
New Model Name |
Define a name for the converted model. |
|
More>> |
Click this button to see and modify Object Types and Properties for the conversion. No modification is necessary. Object Types and Properties - OTPs |
|
Close after Conversion |
Select it to close the Conversion dialog after the process is finished. |
|
Convert |
Executes the process of conversion. |
|
Close |
Closes the Conversion dialog. |
- Click Convert.
Compare Models, Generate Change Report
Features and Tools > Model Actions > Compare Models, Generate Change Report
Toad Data Modeler allows you to view differences between two models and for physical models you can generate change reports in HTML, RTF and PDF formats. Change reports are not available in logical models.
You can compare your models and generate the change report via the Model Actions.
How to Compare Models and Generate Change Reports

- Click on Compare and Generate Report | Run in Model Menu or Run Compare and Generate Report Action in Model Actions.
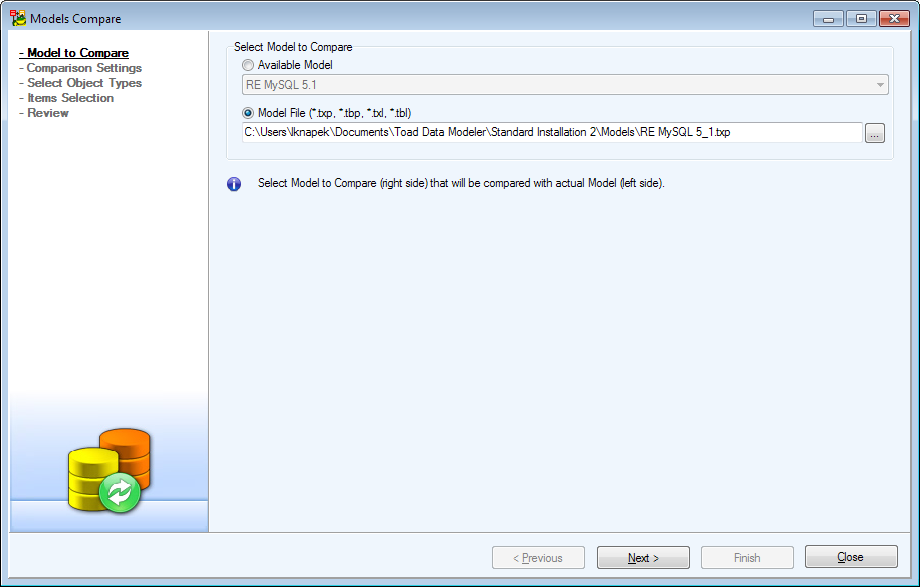
- Select another model for comparison. It can be either a model opened in Toad Data Modeler or a model loaded from Model File.
|

|
Note: The selected model has to be of the same database platform and version. You cannot compare DB2 10.5 and MySQL 5.1 models, or MySQL 5.1 and MySQL 5.5 models. |
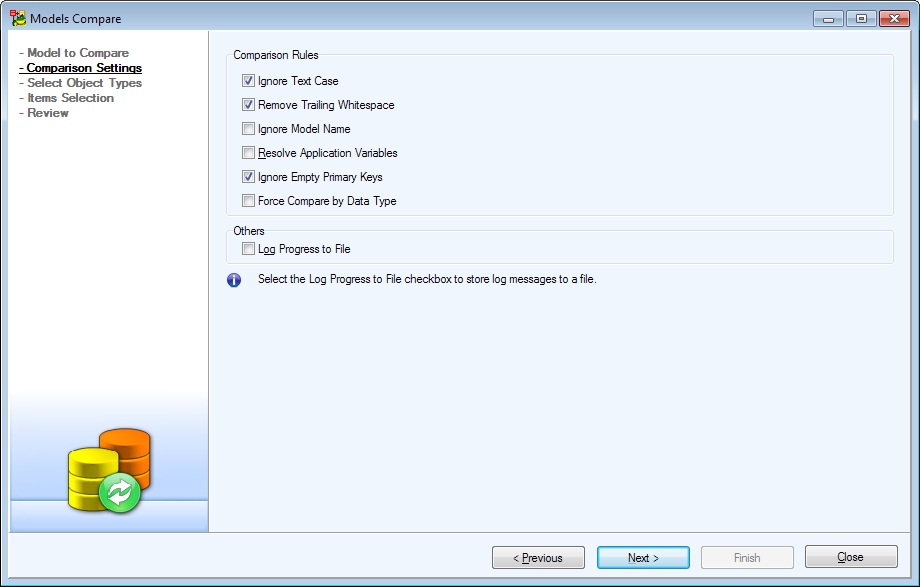
- Check Resolve Application Variables to resolve variables during generation including variables in names
- The next dialog presents you with a couple of setting related to Model Comparison. When you're done editing the options, click on Next.
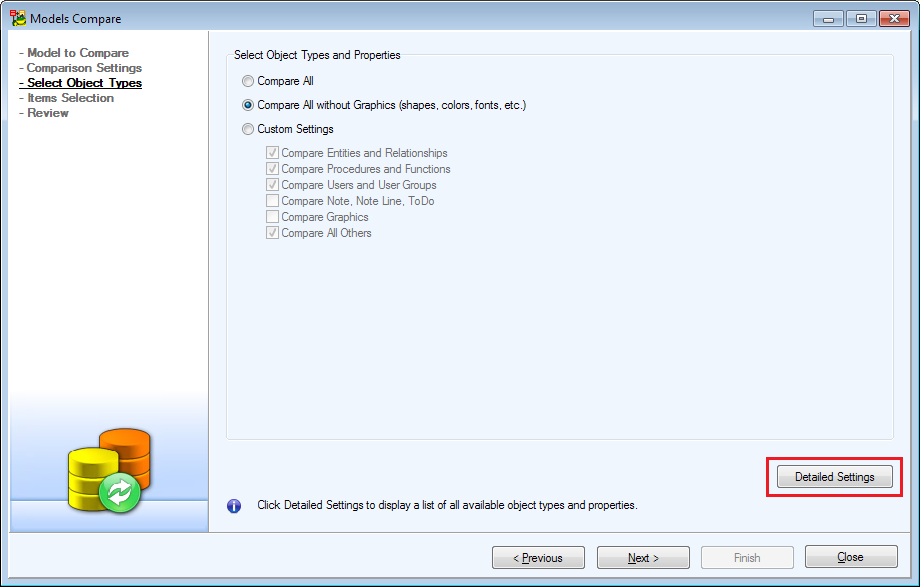
- Now you have to choose what types of objects will be included in the comparison. If you wish to select objects in more detail, click on Detailed Settings.
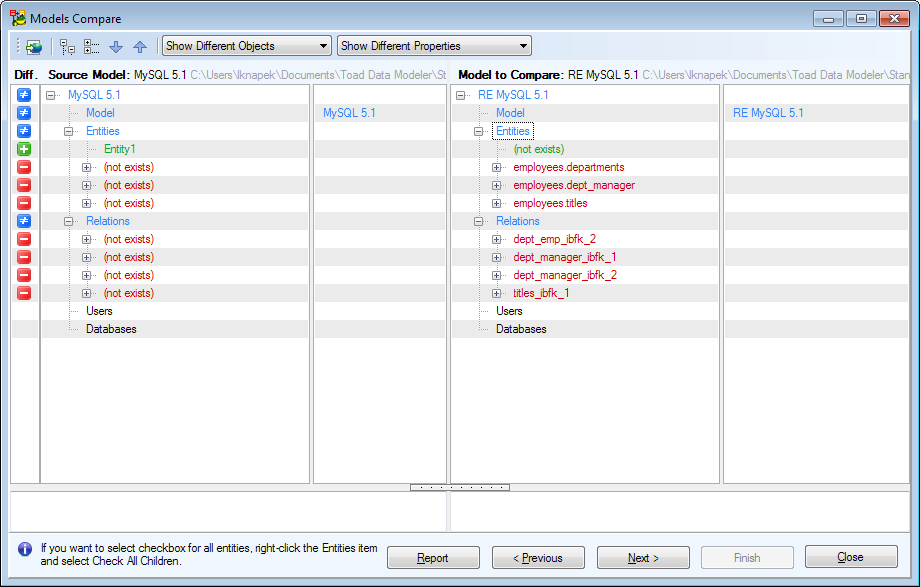
- You are now presented with Compare Tree dialog displaying all differences between the two given models. Now you have the option to generate a report by clicking on Report button.
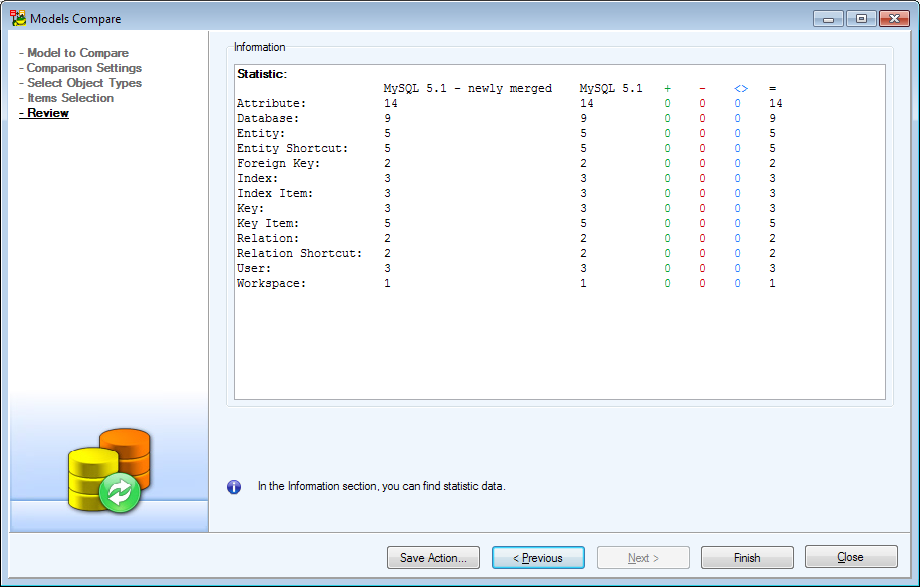
- Check the Review screen which shows you the final statistics and close Model Compare by clicking the Finish button.
|

|
TIP:If you plan to do this action again in the future, you might want to click the Save Action button to save this Action Definition. See Model Actions for more information. |
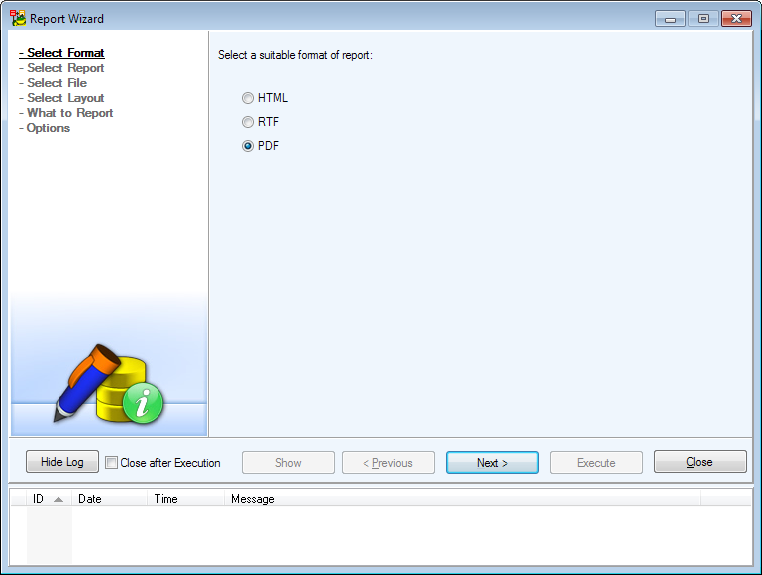
- Select Format of the generated report.
- There are two options available during the entire process of generating a report. Hide Log hides the bottom part of the dialogs which otherwise displays information related to the generation. Checking Close after Execution closes the dialog window after you're done creating your report.
Generating HTML Reports

- After you select HTML from previous dialog and click on Next, you have the option to change Report Caption and Language of the report.
|

|
nOTE: You can generate Reports in many languages provided that you have the appropriate Dictionaries installed. For more information see Dictionaries. |
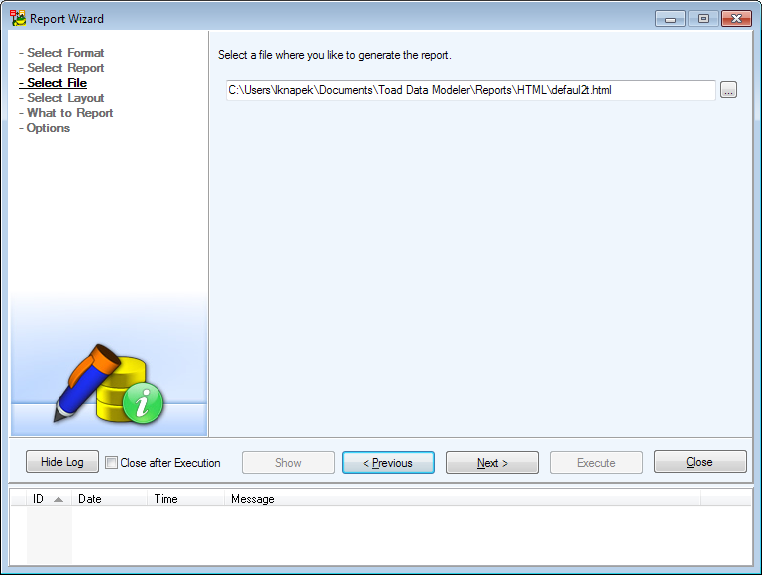
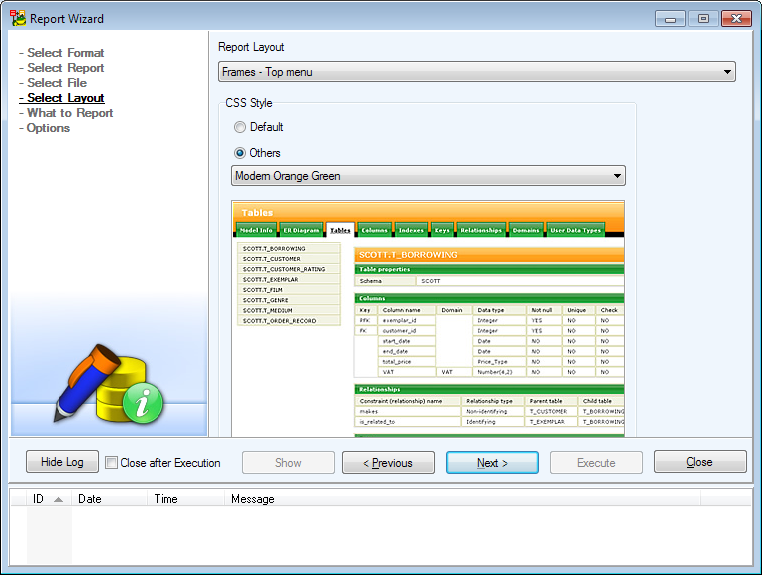
- In this dialog there are several options for customizing the look of the report.
|
Report Layout |
- Frameless (for Internet Explorer 7 and FireFox 2 users. Reports with Frameless layout is not displayed in older browsers correctly.)
- Frames - Top menu
- Frames - Left menu
|

|
Note: For large models, Frames - top menu or Frames - left menu options are recommended. (Frameless report layout is not recommended as it uses Java script that goes through all objects, which takes too much time if your model is large.) | |
|
CSS Style |
Available styles for HTML report:
- Default
- Others (select the most convenient for you)
|
|

|
TIP:You can also create your own report styles using CSS. To integrate a custom style into Toad Data Modeler, you have to create a .txs file referencing the style resources and save it to Style folder. |
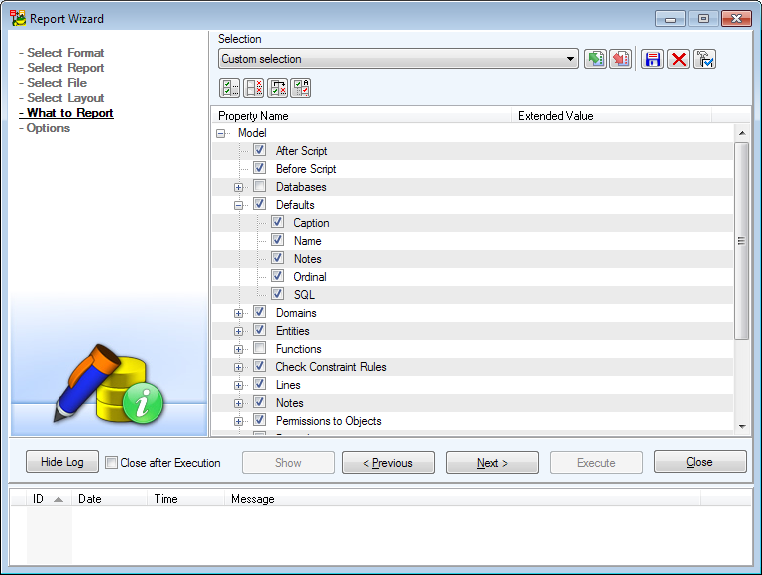
- Now is the time for you to decide what kind of information should the generated report contain. If you want to get a complete report, check all boxes. For easier management use buttons located on the top.
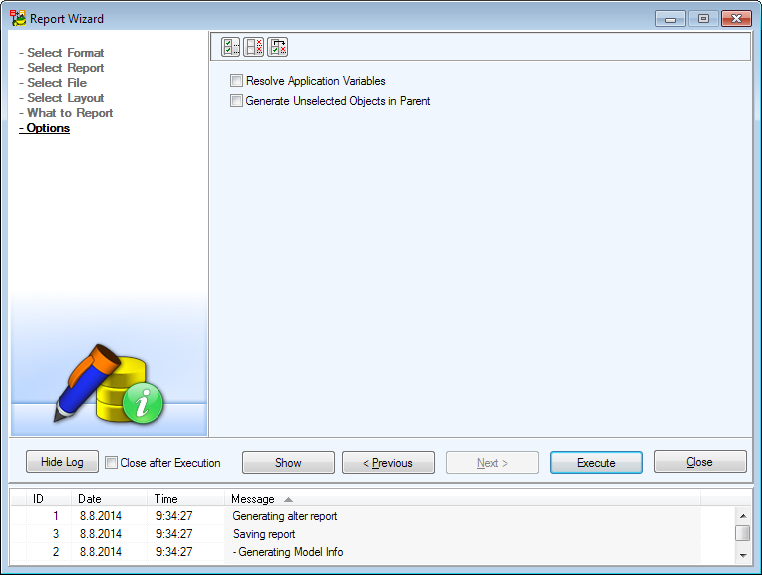
- The final dialog where you can set a few last options.
- Click on Execute to generate the report. A dialog window will inform you when the process is done.
Generating RTF and PDF Reports
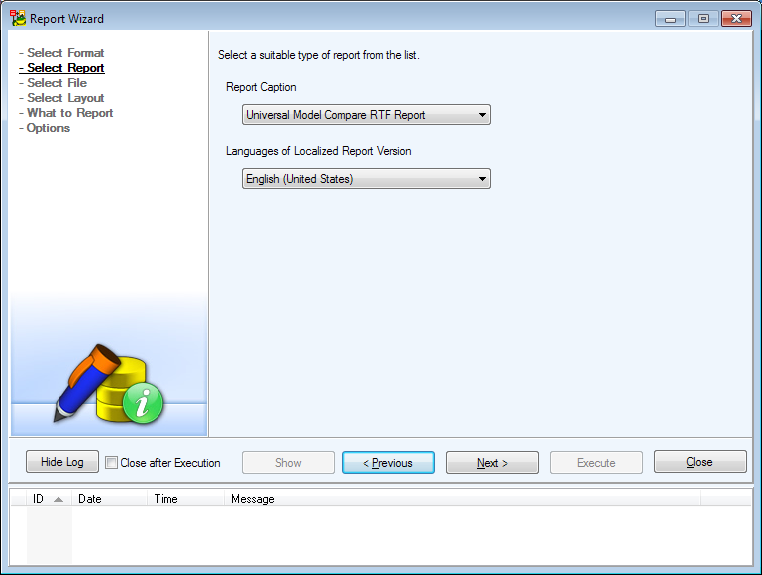
- On this dialog you are able to change the report caption and its language.
|

|
nOTE: You can generate Reports in many languages provided that you have the appropriate Dictionaries installed. For more information see Dictionaries. |
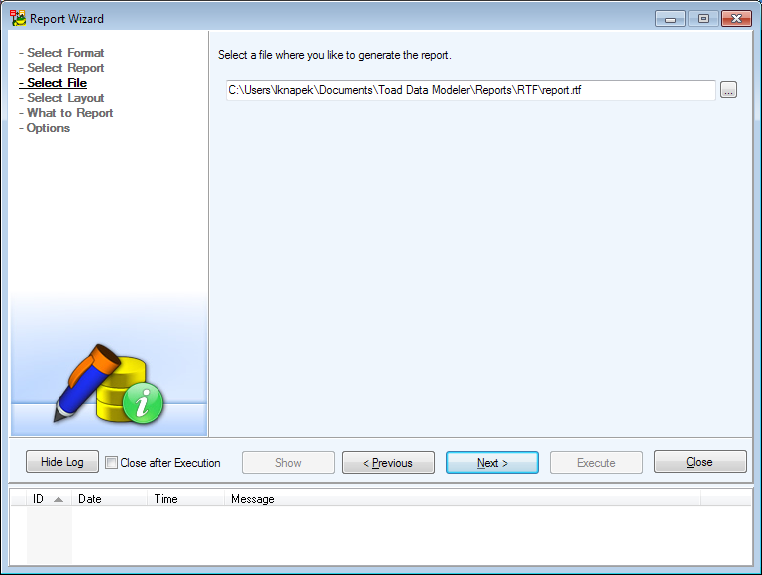
- You are able to define your own path where the generated report will be saved, if you need to.
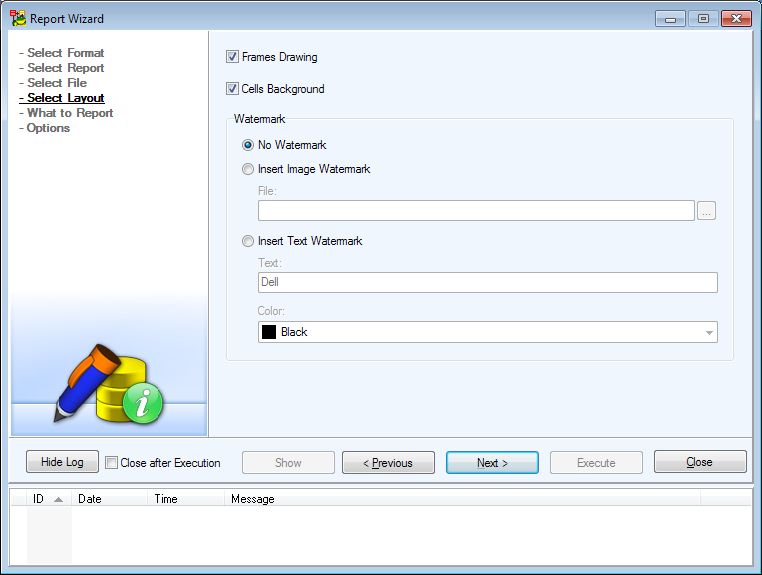
- A few options regarding the report look are available here. Also note the option to insert text or image watermark.

- Now is the time for you to decide what kind of information should the generated report contain. If you want to get a complete report, check all boxes. For easier management use buttons located on the top.
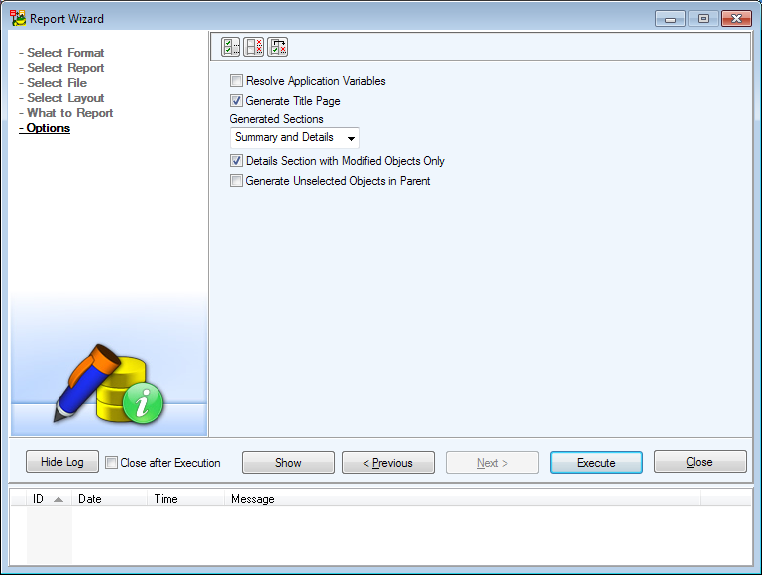
- A few final options are available here. For example, you can decide between generating Summary only, Details only, or both.
- Click on Execute to generate the report. A dialog window will inform you when the process is done.
What to Report Dialog Buttons
|
Selection Menu |
Allows you to save time by loading saved selection.
For example, you may decide that you only want your report to cover Entities, some properties of Relationships and After Scripts. Selecting these items every time you generate a report would be frustrating. That's why you have the option to check these items once and then save the selection and load it every time you generate another report. |
|
Save Selection |
Saves the current selection. If a selection is chosen in the Selection Menu, it will be rewritten. |
|
Load Selection |
Load the selection chosen in the Selection Menu. |
|
Save as New |
Saves the current selection as a new selection. You will be prompted to enter a name. |
| Delete |
Deletes the selection chosen in the Selection Menu. |
| Set as Default |
Sets the selection chosen in the Selection Menu as default. Such selection is marked by an asterisk in Selection Menu. |
| Select All |
Selects all items. |
| Deselect All |
Deselects all items. |
| Inverse Selection |
Inverts the selection. |
| Auto Check |
On: Checking/Unchecking an item will also check all its sub-items.
Off: Checking/Unchecking an item will not check its sub-items. |
Compare Tree Overview
Compare Tree Icons

Difference between Source model and Compared model.
Right-click an item to see the following options:
| Expand All Children |
Expands all sub-items of the selected item. |
| Collapse All Children |
Collapses all sub-items of the selected item. |
Model Update
Features and Tools > Model Actions > Model Update
Toad Data Modeler allows you to update models to synchronize changes between your database and your model.
Example: You loaded the database structure of your database to Toad Data Modeler (Reverse Engineering). - Model A was created. Then you made some changes in your database and now you want to update the Model A. For this purpose, you can use the Model Update feature.
Model Update includes operations such as Connections, Model Comparison and Model Merge
To update your model
- Open the model that you want to update.

- Click the button on the Menu Toolbar or Select Model | Update Model from Database to open the Model Update Wizard
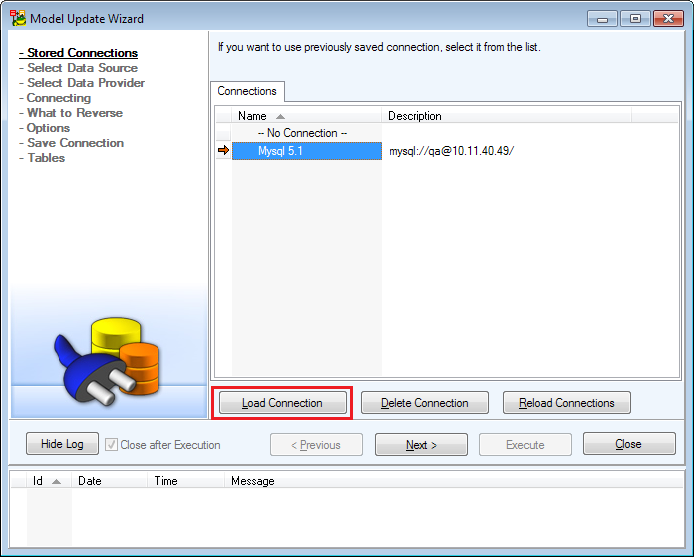
|

|
Note: You might be prompted to enter a password to connect to the database. This can be changed by checking Save Password checkbox in specific Connection settings. |
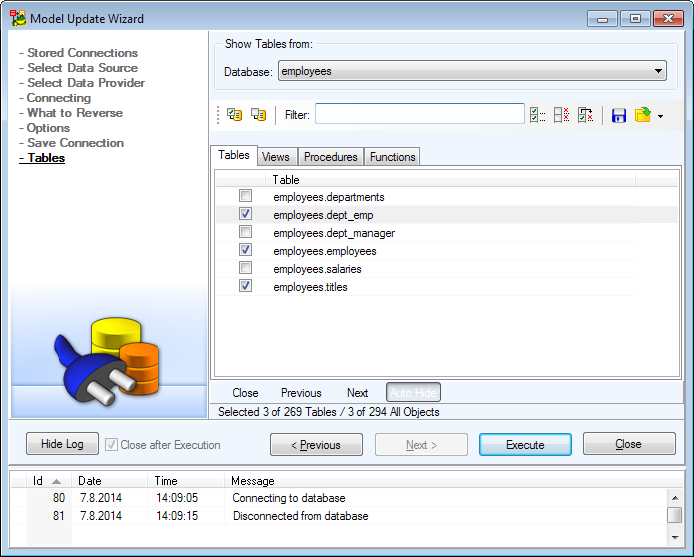
- Select the objects you want to update in your model. You can use the Filter and Select All/Deselect All/Invert Selection buttons for easier object management. Also note that you can Export or Import your selection to or from a file. After you're done selecting, click on Execute button.
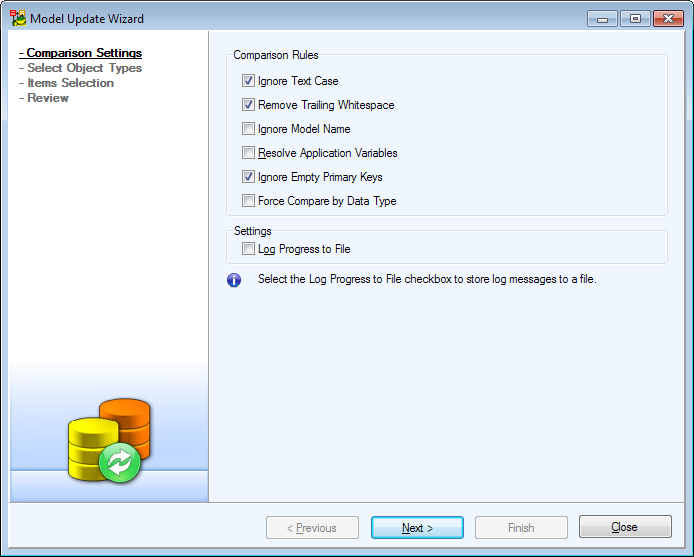
- Before Toad Data Modeler compares your model with the database, you need to go through some settings related to comparison.
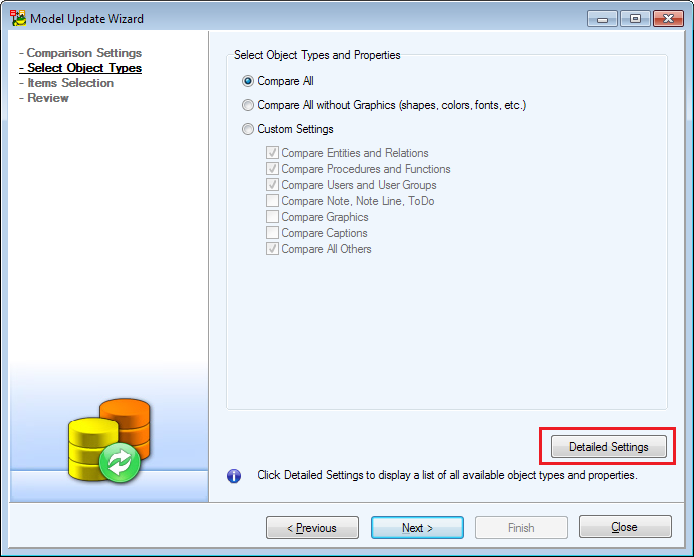
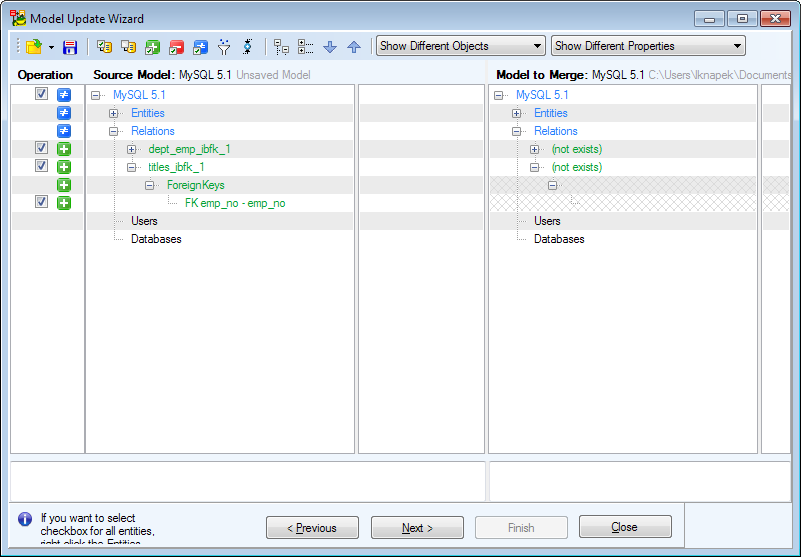
- You are now able to see the Compare Tree. It displays all differences between your current model and the database. The Model Update changes the model on the right (your model) so it matches the model on the left (the database). Check the changes you would like to execute and proceed to the next dialog.
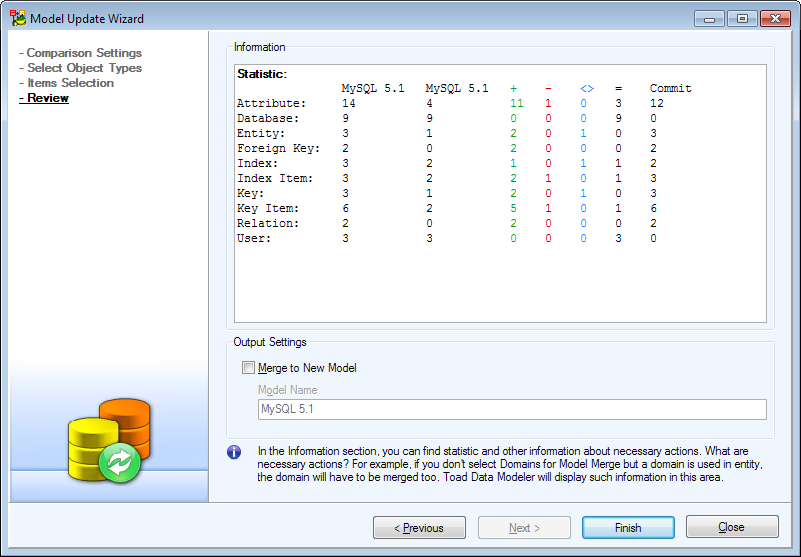
- The last dialog shows you the review of the Model Comparison. An option to Merge Model is available in case you don't want to only update your model. This option creates a new model which will appear in your Application View after finishing the update. Click on Finish and after a short while your Model will be updated.
Compare Tree Overview
Compare Tree Icons

Difference between Source model and the updated model.

This object exists in Source model but does not exist in the updated model.

This object is missing in Source model but exists in the updated model.
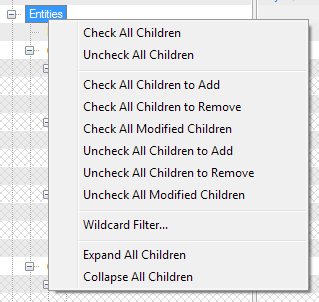
Right-click an item to see the following options:
Synchronization
Features and Tools > Model Actions > Synchronization
Toad Data Modelerhelps you with synchronization tasks and allows you to:
- Generate SQL scripts representing changes made to your model
- Transfer changes made in your database to your existing physical models
- Keep your model and your database synchronized and up-to-date during the development process
Database and Model Synchronization
Situation A - Generation of Change Scripts
You have made changes in your physical ER diagram in Toad Data Modeler and now you need to apply the changes to your database.
Solution: Compare the models and generate Alter Script in Toad Data Modeler. Then use a third party software to connect to your database and execute the generated script. All your changes are now reflected in database. (Note: Change Script generation is not supported for all databases, for further information see Supported Databases.)
Situation B - Model Update
You or someone else made changes to your existing database (development version of database) and you need to transfer the changes to your model.
Solution: Use the Model Update or Model Merge features to update your physical model.
Physical Model and Logical Model Synchronization
You have created a Logical model in Toad Data Modeler and need to convert the logical model to physical model for the selected database system.
Solution: Use the Model Convert or Simple Model Conversion feature for logical (LER) to physical (PER) model conversion.
|

|
Note: If you make changes in your LER model and need to update the existing PER model, perform the LER to PER conversion again and then compare the two PER models. |
Limitations
There are many factors that affect synchronization features in Toad Data Modeler. For example:
- Data types can be defined through logical types that do not exist in physically existing databases, such as Domains, Dictionary Types etc.Toad Data Modeler has to correctly resolve the data types when comparing attribute (table column) properties.
- Objects must be paired by specific rules, for example in your Oracle Database model, schema assignment is not required, but in your database, schema is always present.
- There can be application variables defined in your models, for example <%ParentTableName%> and the application variables must be resolved during the comparison as well.
In result, the synchronization of your model and your database is more complicated than comparison of two physically existing databases. From technical point of view, the comparison is based on more complicated algorithm that requires more resources.
Recommendations
- Use the synchronization features on models of small to average size. If you work with large models, try to split the model to smaller parts (separate models), if possible.
- Use specialized software for comparing and synchronizing two large physically existing databases. You could theoretically reverse engineer both databases, create two models, compare them and try to generate change scripts, but due to limitations mentioned above the process would require more resources and take more time. Other products, that do not work with models, but rather with databases (e.g. Toad for Oracle, Toad for SQL Server, etc.), can offer better performance and additional benefits - like comparison of physical properties and data. Toad Data Modeler is a tool primarily used to create a visual representation of database structure and it should be used during database development. It is not an alternative or competitive tool for specialized schema comparison.
Model Size Limitations
- Toad Data Modeler doesn't have fixed limitations based on number of objects. You can work with models that contain hundreds, or thousands of tables. Please note that large number of objects in a model may hinder performance significantly, depending on your computer specifications. Number of other items in your model (stored procedures, functions, sequences etc.) affects the performance as well. Other factors include:
- Type of task - you can model large database structure, generate complex SQL scripts or detailed reports, but synchronization tasks might reach the application limits sooner than generation of SQL scripts, for example.
- Number of running processes on your machine.
- Limited access to Microsoft Scripting Engine (standard part of operating system, however in some situations access can be monitored by antiviral software etc.)


 . Details are available in Verification Log.


 items) to generate the CREATE statement.
 items) to generate the DROP statement.
 items) to generate the ALTER statement.