Move Entities
In Toad Data Modeler there are several methods to move entities. You can select from the following options.
To move entities on a Workspace, use
or
|

|
TIP:
- Select Settings | Options | Graphics | Move Objects by (mm/10) to set the size of a step to move (in tenths of millimeters).
- Select an entity, press SHIFT, hold it down and use the keyboard arrows to change size of the entity box.
|
To move multiple entities at once
- Make multiple selection of entities (see Select Objects for more information).
- Point your mouse cursor at any of the selected entities, click and hold the mouse button down.
- Drag the objects to the required position and drop. All selected entities will be moved there, including their relationships.
To move entities to another Workspace or another model, select from the following options:
- Cut&Paste functions: Edit | Cut/Paste, or via shortcuts CTRL+X, CTRL+V
- Drag&Drop techniques between the Entities dialogs of two different models
- Drag&Drop techniques between the Entities dialog and Model Explorer
- Drag&Drop techniques in or from Model Explorer
- Drag&Drop techniques between Entities dialog/Model Explorer and Workspace
Example: Moving an entity from Model A to Model B using Model Explorer:
Method 1: Moving an entity between Model Explorers of the two models.
- Open Model Explorers in both models. You may want to undock at least one of the Model Explorer windows.
- Select an entity in Model Explorer A and hold the mouse button down.
- Drag the entity to the Entities folder in the Model Explorer B and drop.
Version B: Moving an entity from Model Explorer A directly to a Workspace of Model B.
- Undock the Model Explorer A if it's docked, and click the Workspace tab of Model B in the Application Window.
- Select an entity in Model Explorer A and hold the mouse button down.
- Drag the entity to a Workspace of Model B and drop.
Entity Right-Click Options
Right-click the selected entity on the Workspace to see the following options:

|
Format |
Opens the Object Format dialog for the selected entity. |
|
Add into Workspace |
Opens the Workspaces dialog where you can select a Workspace to add the entity to. |
|
Add into New Workspace |
Creates a new Workspace and adds the entity to it. |
|
Remove from Workspace |
Removes the selected shortcut from particular Workspace. |
|
Delete Object |
Deletes selected entity from model. |
| Arrange |
Arranges the entity in another layer.
Arrange Objects in Layers |
| Copy Object Layout to |
Copies the layout of the selected object to another Workspace |
| Add Object to Gallery |
Adds objects to selected Gallery. |
|
Recalculate Size |
Adjusts the entity size to the length of its columns. |
|
Align Self Relationship |
Aligns self relationship. |
|
Edit |
Opens the Entity Properties form. |
| Add |
Creates a new object (Attribute, Key or Index) in the selected entity. |
| Change Script |
Contains one option that allows you to compare selected entity with any other entity in another model or database and generate Change Script. |
| Edit Attribute... |
Opens Attribute Properties form (the item is active if attribute is selected) |
| Select |
|
| Select Parent Objects |
Selects parent objects of the selected entity on Workspace. |
| Select Child Objects |
Selects child objects of the selected entity on Workspace. |
| Select Parent and Child Objects |
Selects parent and child objects of the selected entity on Workspace.
|
|
TIP: Use these options for next multiple copy, move, format change etc. | |
| Fill |
|
|
Fill Parent Objects |
Displays shortcuts of parent objects of the selected entity on Workspace. |
|
Fill Child Objects |
Displays shortcuts of child objects of the selected entity on Workspace. |
|
Fill Parent and Child Objects |
Displays shortcuts of parent and child objects of the selected entity on Workspace. |
| Add to Category |
Adds object to selected category. |
| Macros |
Shows available macros for the selected entity. |
Attributes
Toad Data Modeler allows you to design Entity Relationship Diagrams of specific database platforms, convert physical model from one database platform to another, create an ER Diagram directly from your database (Reverse Engineering feature), update physical models, generate DDL/SQL scripts and Change Scripts, create Dictionary Types, Views, Triggers, Functions, generate detailed documentation to your model (in HTML, RTF, PDF, XSLT formats) and much more.
This chapter describes features and functions related to Physical Data Modeling. Look around each section to get the information you need.
|
|
Note: See the sample physical model Videorental (Oracle 10g db) that is included in the installation package of Toad Data Modeler. Default location is: C:\Program Files (x86)\Quest Software\Toad Data Modeler7.3\Samples. |
Benefits of Physical Data Model
- Detailed definition of database structure, including database specific items, for example:
- Stored procedures
- Functions
- Triggers
- Views
- Materialized views
- Sequences (auto increments) etc.
- Possibility to synchronize local model with existing database.
- Possibility to specify logical names for objects (captions for tables, attributes and other objects).
- Detailed database specific information can be exported to HTML/RTF/PDF or XML/XHTML/CSV reports.
- Automatic generation of SQL code for selected objects (SQL code generation is not available in Logical and Universal Model)
- Automatic migration of PK attributes to child entities (Attributes don't migrate to child entities in Logical Model)
Create Attributes
You can create attributes in:
- Entity right-click menu on Workspace
- Entity Properties dialog
- Attribute Properties dialog
- Model Explorer
To create an attribute on the Workspace
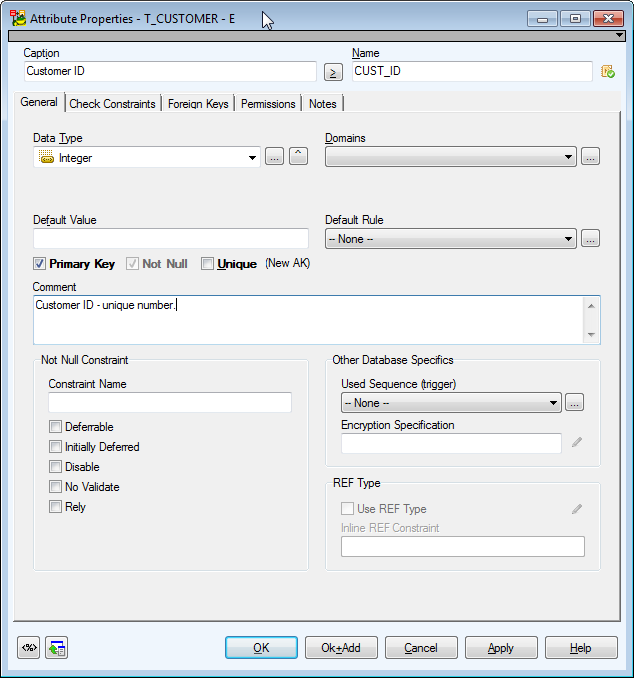
Right-click an entity on the Workspace and select Add | Attribute. The Attribute Properties dialog opens.
|
|
Note: Select the Primary Key (Unique) checkbox to set the attribute as PK or unique attribute. |
To create an attribute in the Entity Properties form
- Double-click an entity on Workspace.
- In the Entity Properties form, switch to the Attributes tab and click Add.

Entity Properties attribute columns
|
Key |
Graphical representation of keys of a particular attribute |
|
Caption |
Logical attribute name |
| Name |
Physical attribute name |
|
Data Type |
Data Type of an attribute
|
|
TIP: You can set a default data type for newly created attributes. See Settings Menu | Options | Physical Model | *database platform and version* | Default Data Type combo-box. (The selected data type will be also applied to Dictionary Types and Domains.) | |
|
p1 |
Parameter 1. Only some of the available data types have this parameter. Defines properties of the selected data type, e.g. length in case of the Char data type. |
|
p2 |
Parameter 2. Only some of the available data types have two parameters. E.g. the Decimal data type has two parameters, which define precision and scale. |
|
Not Null |
When checked, the attribute cannot be empty. |
|
Comments |
Comments or descriptions related to the attribute |
|
Status |
Shows status of attributes in grid. Status of Items in Grids |
Buttons:
 - opens the Application Variables form
Smaller Add button- adds new attributes quickly, just enter attribute name and then click Add.
Bigger Add button - adds an attribute
Edit - opens Attribute Properties of the selected entity
Delete - deletes the selected attribute
 - moves the selected attribute up or down in the list
To create another attribute in the Attribute Properties form
Click OK+Add.
To create an attribute in Model Explorer
Unfold the Entities folder | Unfold the specific entity folder | Right-click the Attributes folder | Add Attribute.
