Features and Tools > Print
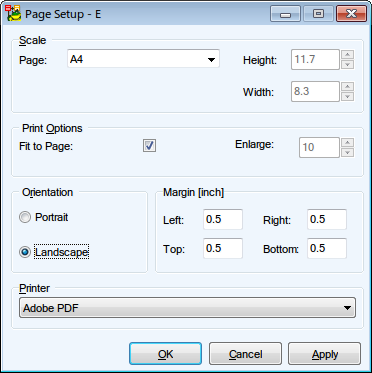
- Select File | Page Setup.
- Select page size, margins, orientation etc.
To define the page size on your own, select Custom from the Page box. Define Height and Width on the right.
|

|
Note:
- The measure unit can be set in Settings | Options | General | Select Unit of Length - inches or millimeters.
- Page Format settings are saved with a model.
|
|
Fit to Page |
Select this option to print the entire model on one page. This option is model-dependent. |
|
Enlarge |
Select a scale of your model for print. |
|
Portrait/Landscape |
The option selected in the Page Format dialog will be automatically set in the Printer Properties dialog. You can set a different orientation for every model, the option is model-dependent. |
| Printer |
Select your printer.
Then in the Page box you can see formats that the selected printer supports (enabled items) and other formats (disabled items). (This feature should solve problem with printing on plotters.) |
Click  on the toolbar (or select File | Preview).
|

|
Switch between pages. |
|

|
Displays current page number/total number of pages. |
|
|
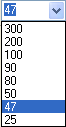
Sets Scale percentage. |
|

|
Opens the Print Setup dialog. |
|

|
Displays/hides all pages on the left side of the dialog. |
|

|
Exits the dialog. |
Toad Data Modeler allows you to print ER diagram of your model to a PDF file, which is especially useful step in order to print the diagram to a plotter.
Printing to PDF is similar to printing to printer:
- Go to File Menu | Page Setup and configure printing properties such as your document size, orientation, margins...
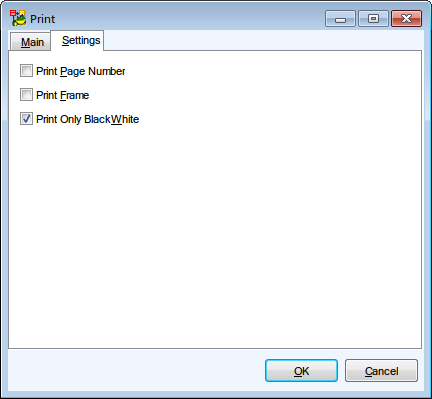
- Once you're done configuring, go to File Menu | Print. There are also several options available on Settings tab.
- Click OK to print the PDF document. Some PDF printers display an additional configuration dialog in order to print the PDF.
|
|
Note: Most PDF printers work with parameters set in the Page Setup dialog. However, some PDF printers allow you to customize page size and other settings right before actually printing the document (e.g. Adobe PDF Printer or PDF Factory).
Generally, you should not configure a property in the PDF printer itself if the property can be configured via Page Setup. The exception to this rule are settings that are not available in Page Setup, such as Image Compression and Downsampling in Adobe PDF Printer. These settings should not impact the configuration set in Page Setup. |
PDF Printing Limitations
There are several situations, where you may not be able to print the PDF file at all, or the result may not look as intended. Usually, this is not limitation of TDM itself rather than a limitation of some component TDM uses.
Windows PDF size limitation
Toad Data Modeler uses Windows GDI (graphics device interface) to print PDF files. The GDI has 129 inches (about 3200 millimeters) limitation, meaning neither height or width may exceed the limit. If any size of the PDF exceeds 129 inches, you will receive a warning message when you try to print the PDF.
If you print the document anyway, its page size will be reverted to A4 (which is default).
PDF printers size limitation
PDF printers which allow you to customize print properties right before printing the actual document (Adobe PDF Printer, PDF Factory) seem to have one limitation in common. If you configure the page size in the PDF printer properties (which is not recommended, see the note above), the height and width should not add up to more than 129 inches (about 3200 millimeters). If the width+height is more than 129 inches, one of the two things will happen:
- You confirm the Print dialog, but nothing happens afterwards (Adobe PDF Printer).
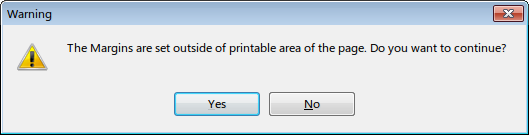
- You confirm the Print dialog and get "The Margins are set outside..." error (PDF Factory).
Printers using properties set in Page Setup seem to handle larger sizes well (e.g. PDF Creator, Bullzip PDF Printer, Nitro PDF).
Printing to Plotter
When printing to plotter, it is recommended to print PDF of your model ER diagram first. Toad Data Modeler supports variety of common plotter paper size formats, but you may find yourself in a situation where you need to print diagram larger than 129 inches, but you keep running into various limitations (mentioned in chapter above).
To print such a diagram, follow these steps:
- Know your plotter paper size. In our case, let's say the desired size is 150 to 75 inches.
- Calculate the paper size height to width ratio (e.g. 150/75 = 2).
- Create a PDF file with the same ratio as your desired paper size. Make sure it does not exceed any limitation (e.g. 100x50, 50x25). Also make sure that the model looks good enough when printed (Does the model fit on the 50x25 paper size? Or should you rather print 100x50 PDF?).
- Print the PDF file to your plotter. The PDF file should be upscaled (e.g. 100x50 should be multiplied by 1.5 -> 150x50). It may be necessary to configure the upscaling in your plotter settings. Since the diagram image has been vectorized when it was printed to PDF, it can be upscaled at no quality cost.
- The result should come out as a sharp, clear, well readable diagram of your model.

on the toolbar (or select File | Print).