- Select a relationship type - click the appropriate relationship icon on the toolbar:
 Identifying relationship (also CTRL+R)
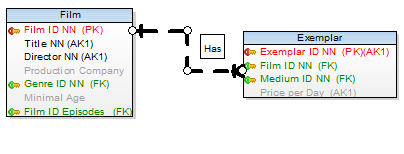
 Non-identifying relationship
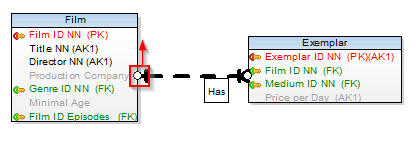
 M:N relationship
- Move your mouse cursor over the work area. (The cursor changes its appearance.)
- Click the first entity (parent) and then the target entity (child).
|

|
TIP: Hide relationship names:
- Right-click the Workspace and select Workspace Format.
- In the Workspace Format dialog | General tab, select Hide Line Captions checkbox.
|
To create self-relationship for non-identifying relationship
- Click the Non-identifying relationship icon on the toolbar .
- Move your mouse cursor over the work area.
- Double-click the selected entity on the Workspace.
|
|
TIP: Before you create a self-relationship, select Settings | Options | Physical Model | Self Relation Attribute Name/Caption and define a name for propagated attributes there (e.g. via prefix, suffix, application variable.) |
To add multiple relationships
- Press SHIFT and click the Relationship icon. See the blue frame in the icon now.

- Create as many relationships in you model as you need.
- Right-click the work area (or click the Relationship icon again) to turn this function off.
Double-click the relationship on the Workspace.
or
Edit the relationship in Model Explorer | Relationships folder | double-click the selected relationship (or right-click | Edit).
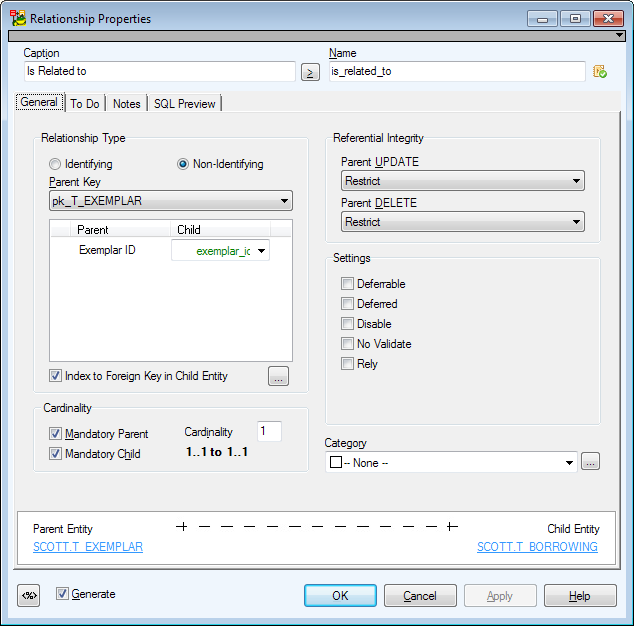
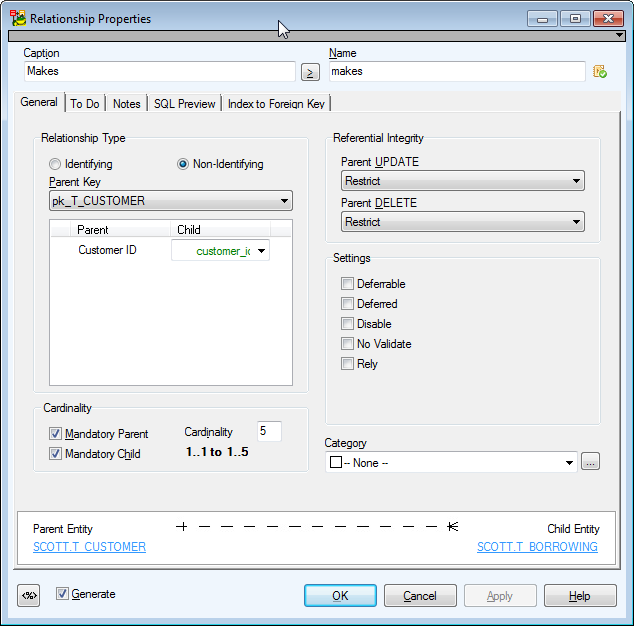
Example: The Relationship Properties dialog (Oracle 10g db)
|
|
TIP: When you point your mouse cursor at a relationship line, parent and child attributes are highlighted on the Workspace. You can set the color at: Settings | Options | Graphics | Colors area | Highlight Color. |
|
Caption |
Logical name of relationship |
| Name |
Physical name of relationship
About Naming Conventions |
|
General Tab |
Description |
|
Relationship Type |
Select this option to set the relationship as identifying or non-identifying. There are also several setting related to Parent and Child entities. The last checkbox gives you the option to create Index to Foreign Key in Child Entity. |
|
Parent Key |
Linking Method selection box. Available options: primary key, alternate key, unique item.
Select Parent Key for Relationship |
|
Referential Integrity |
Referential Integrity |
|
Cardinality Area |
Cardinality settings definition.
Toad Data Modelerallows you to set up synchronization of NotNull and Mandatory Parent.
Synchronization of Not Null and Mandatory Parent |
|
Settings |
Database dependent options (Oracle in our example). |
|
Parent Entity Name and Child Entity Name |
Names of entities that the relationship connects. Click the buttons next to these boxes to open the Entity Properties form of appropriate entities. |
|
To Do Tab |
On this tab, you can write some tasks on the selected relationship.
Note: To see all To Do tasks, select Model | To Do. |
|
Notes Tab |
Tab for notes on particular relationship. The text will display in a pop-up box when you point your mouse cursor at the relationship name in ER diagram. |
|
SQL Preview Tab |
Click  at the bottom of this tab to see the part of SQL code for the relationship. at the bottom of this tab to see the part of SQL code for the relationship.
Select the WordWrap checkbox to wrap the code on this tab.
Tip: To select this option by default, select Settings | Options | Physical Model | General tab | Word Wrap for SQL Preview. |
Buttons:
 - opens the Application Variables form
OK - confirms all changes and closes the form
Cancel - cancels the changes you have made, and closes the form
Apply - confirms the changes (The form will remain opened for further edit.)
Help - opens the Help file
To define integrity rules of a relationship related to changing, adding or deleting a record inside parent or child entity
Set values in Referential Integrity group box.
|
Parent Update |
An event when the primary key of the record is going to be changed inside the parent entity. The rules are:
None
No rule.
Restrict
If the primary key is changed inside the parent entity record, and inside the child entity there are records allocated to the original parent record primary key, the change will not be made and database will report an error.
Cascade
If the primary key is changed inside the parent entity record, and inside the child entity there are records allocated to the original parent record primary key, the database will change appropriate foreign keys inside the child entity.
Set NULL
If the primary key is changed inside the parent entity record, and inside the child entity there are records allocated to original parent record primary key, the database will set appropriate foreign keys inside the child entity to NULL.
Set Default
If the primary key is changed inside the parent entity record, and inside the child entity there are records allocated to the original parent record primary key, the database will set appropriate foreign keys inside the child entity to a default value. |
|
Parent Delete |
An event when a record inside the parent entity is being deleted. The rules are:
None
No rule.
Restrict
If a record inside the parent entity is being deleted, and inside the child entity there are records allocated to parent entity, the command won't be executed.
Cascade
In case of record deletion inside the parent entity, the records inside the child entity will be deleted as well.
Set NULL
In case of record deletion inside the parent entity, the foreign keys inside the child entity will be set to NULL.
Set Default
In case of record deletion inside the parent entity, the foreign keys inside the child entity will be set to a default value. |
|
|
TIP: Define default values for referential integrity type. Default Values |
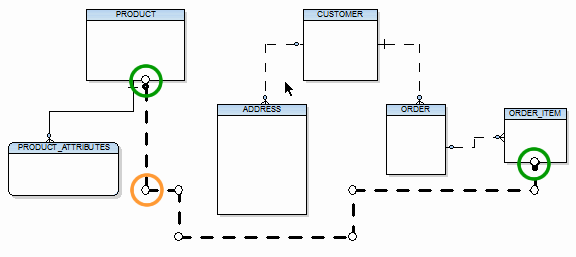
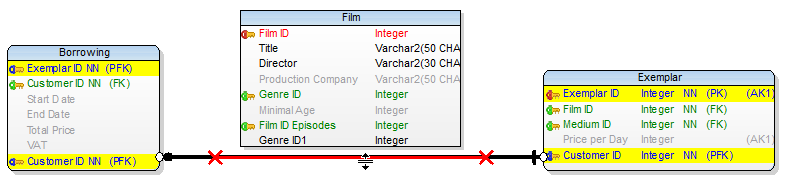
Relationship lines consist of:
- Lines
- Solid lines represent identifying relationships.
- Dashed lines represent non-identifying relationships.
- Anchor Points - End points directly connected to entity boxes. You can alter them as you need.
- Handle Points - Other points that can be added on relationship lines via CTRL key. Handle points allow you to select a part of relationship line to move or delete.
Move Lines, Handle Points and Anchor Points
To move part of line, handle point or anchor point
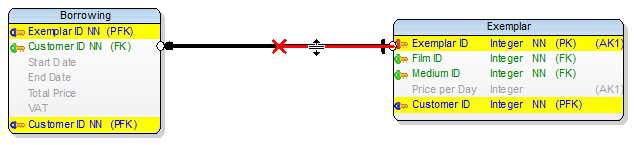
- Select a relationship line.
- Place mouse cursor over the line or point.
- Use drag and drop technique to change position of the line or point.
To move single anchor point and break a line
- Select a relationship line.
- Place mouse cursor over the anchor point.
- Use drag and drop technique to change position of the break point.
Column to Column Alignment
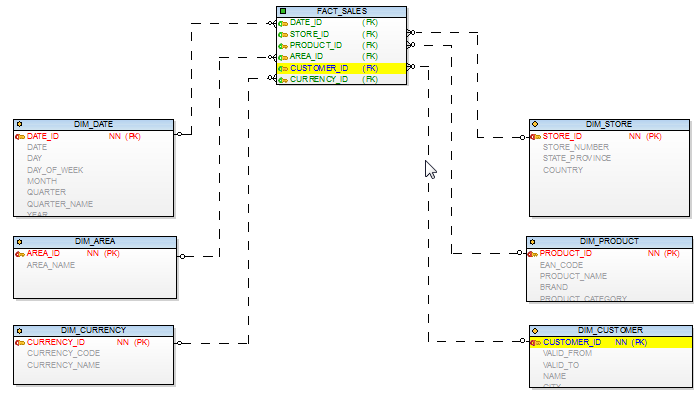
Lines can be rearranged manually and self-explanatory links from parent to child entities can be displayed in ER diagram.
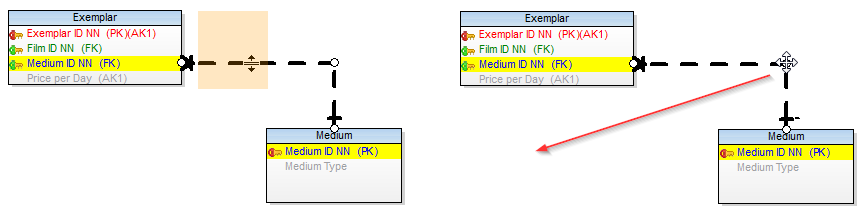
Add Handle Points
To add handle point to a relationship line and break horizontal line:
- Click the selected relationship line.
- Press CTRL and click the line. Red cross icon will show up. Release CTRL key.
- Move your mouse cursor left or right and then move the highlighted part of the line up or down.
Result:
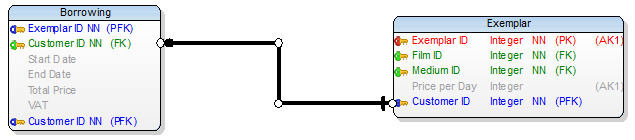
To break horizontal line using two handle points:
- Click the selected relationship line.
- Press CTRL and click the line. New red cross icon will show up.
- Do the same for the second position.
- Move your mouse cursor between the two handle points and then move the highlighted part of the line up or down.
Result:

Add Horizontal or Vertical Lines Only
To create horizontally or vertically straight lines
(Entities are beside or below each other.)
- Click the identifying or non-identifying relationship icon on the toolbar.
- Click parent entity and press and hold SHIFT key. Wherever you move your mouse cursor, only horizontal or vertical straight lines are offered.
- Move your mouse cursor to the desired position (over child entity)
- Click the target entity and release SHIFT key.
|
|
TIP: Using this method (via SHIFT key), you can lead the relationship as you need. E. g. you want to go around some entities in a particular way. If you just click the parent and child entity, the relationship will be created automatically and you will have to do some improvements later. To create your own track for the relationship:
- Click the identifying or non-identifying relationship icon on the toolbar.
- Click parent entity and press and hold SHIFT key. Wherever you move your mouse cursor, only horizontal or vertical straight lines are offered.
- Move your mouse cursor where you need to lead the line. Click the WS where you need to break it (still holding the SHIFT key). Make as many break points as you need.
- Finally, click the target entity and release SHIFT key.
|
Move, Hide, Find Relationship Names
To move the name of relationship on the Workspace
Right-click the selected relationship in particular place and select Move Caption Here, Move Caption to Parent or Move Caption to Child.
To hide relationship names on the Workspace
Click  Hide Captions on the toolbar.
(Also right-click the Workspace | Workspace Format | General tab | select Hide Line Captions.)
To find the relationship line by its name on the Workspace
Click the relationship name (caption). The appropriate relationship line will be highlighted on the Workspace.
To find the relationship name (caption) by its line on the Workspace
Click the relationship line, its name (caption) will be highlighted in a frame.
Multiple Selection/Move of Relationships
Relationships are moved together with selected group of entities. (Select Objects
To edit the selected relationships and change their format at one jump, use SHIFT for multiple selection. Then right-click any selected relationship and select Edit or Format.
