
OAuth and Claims
By Default, the Essentials tool uses Classic Office365 Authentication. After your credentials have been provided (claims or direct), Essentials uses the generated cookies in various requests. This method of work is similar to the one used when logging into a browser with credentials - it works well for small activities but does not work well when performing bulk operations, as Office365 is throttled a lot in this scenario.
OAuth authentication uses bear tokens when working with SharePoint. This token is generated by the App, which was added to the tenant. This form of performing allows Essentials to avoid throttling during bulk migrations.
Work with OAuth and Claims
Once you have performed the steps in the previous topic, to set up OAuth, continue with the following steps to set up OAuth with Claims:
1.Navigate to the Drives tab and open a migration wizard (in this example we use the OneDrive to OneDrive migration wizard).

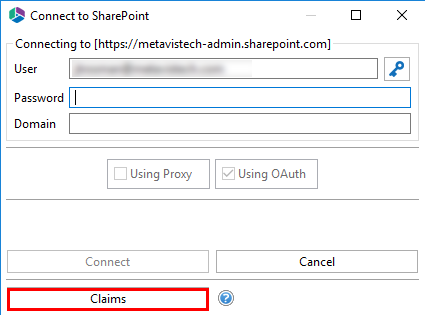
2.In the wizard, provide a URL for the source and click Connect. Within the Connect to SharePoint window enter your credentials and click Connect.

3.Provide a URL for the target, and click Connect
4.Within the Connect to SharePoint window, click Claims.
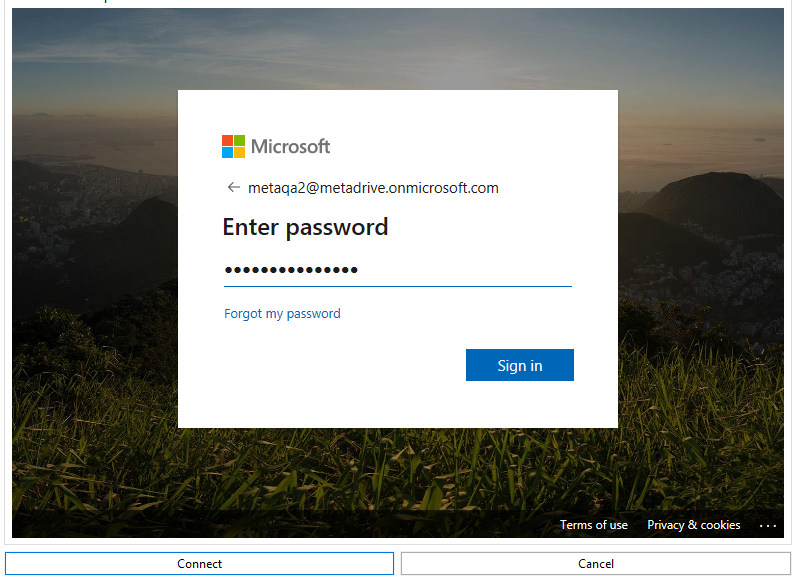
5.In the window that opens, login to the tenant.
6.Consent to the permissions and click Accept.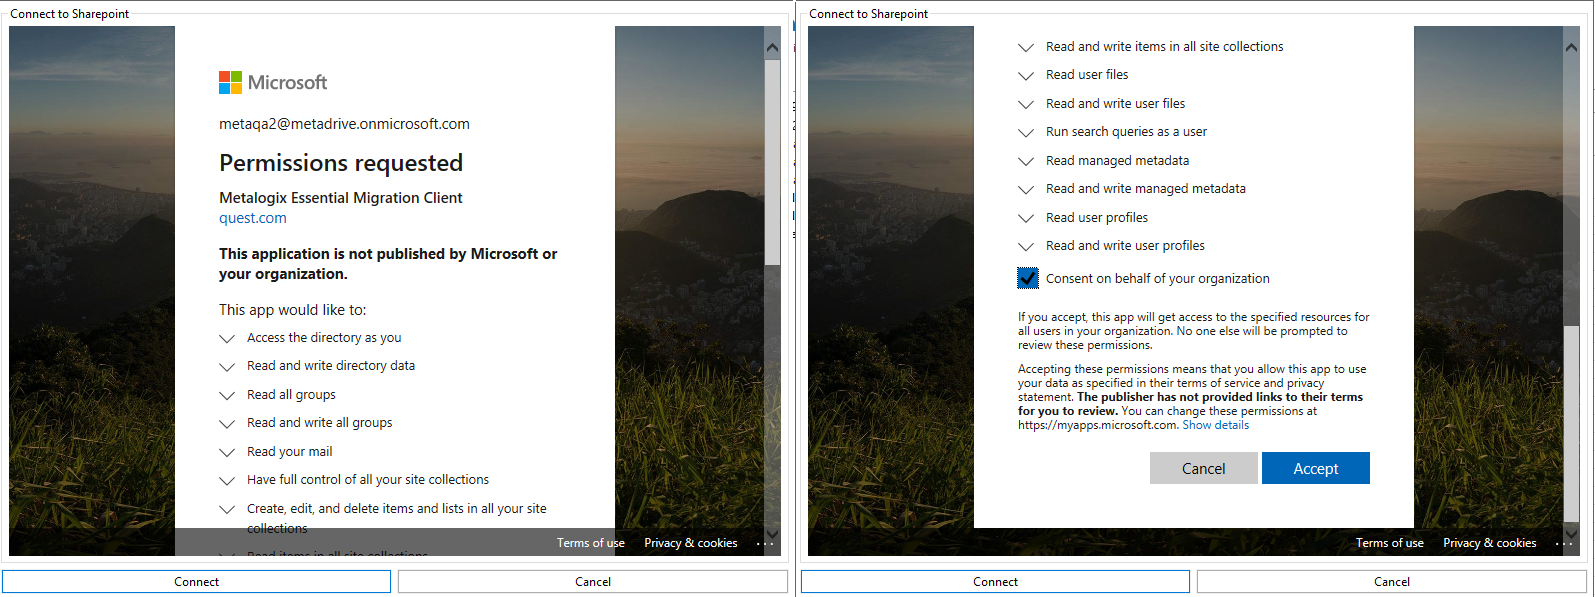
7.A dialogue box for the connection to the required services is opened. Login with your user information, click Connect.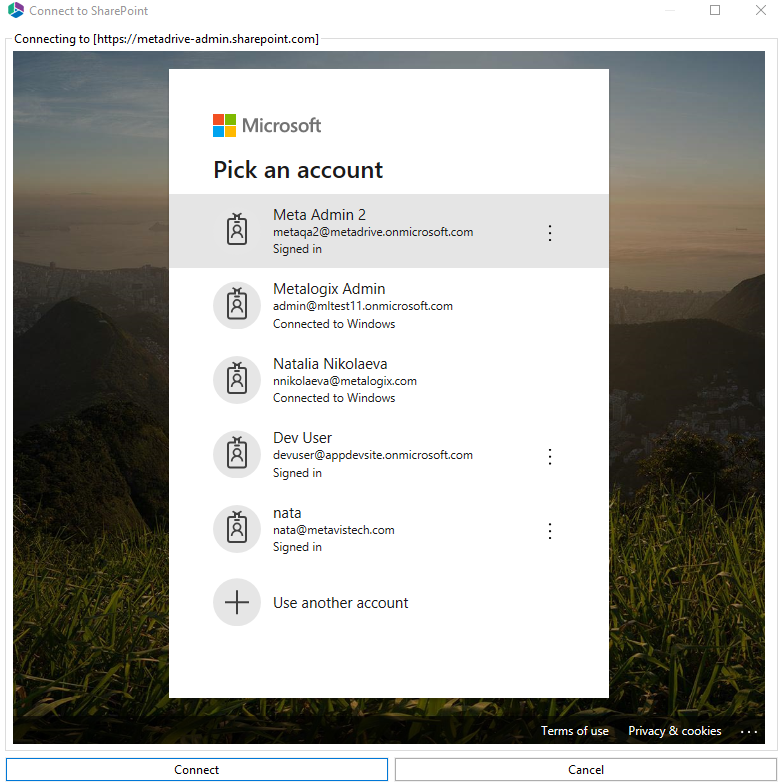
8.Complete your work within the Copy Tenant wizard and begin your migration.
|
|
NOTE: ·If you have already installed the Essentials application in the tenant, you will still get two connection dialogues. This will simply give the tool the ability to check all the settings. ·If you do not use OAuth but use Claims, you will still be asked to log in twice, because the tool uses various services and we require authentication for these services. |

OAuth Limits
|
|
NOTE: ·OAuth is only supported for Hyper Migration and Hyper Backup. ·OAuth doesnt work with SSO. ·"resume" will automatically use the original mechanism of authentication when resuming a job. |
Resume Jobs
Hyper Mode performs bulk migration from Non-SharePoint Locations to Office 365 Locations and between Office 365 locations. This feature is only available through the Drive's tab migration wizards not directly from the Navigator.
|
|
NOTE: Only one hyper migration/backup job can run at a time. |
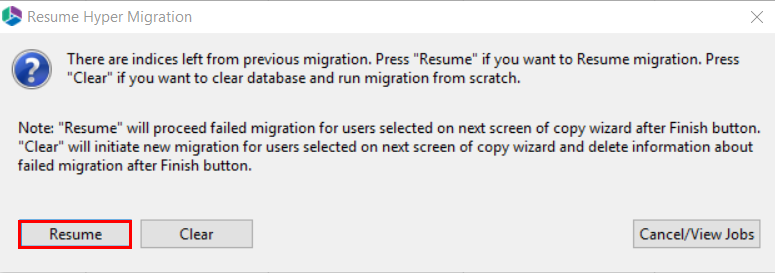
Resume Migration Job
Within the Hyper Migration tab, users can resume copy jobs. This will resume the copy job, finishing the migration of items that were not migrated, and skipping those that were.
To resume copy jobs do the following:
1.There are two ways to begin resuming a copy job:
·right click on the hyper migration you wish to Resume, select Resume Copy Job from the right click menu.

·Select the Pause icon from the top right hand toolbar of the Hyper Migration tab.

2.Selecting Resume Copy Job will cause the Resume Hyper Migration window to appear, click Resume to confirm that you would like to Resume the Copy job.
|
|
NOTE: Hyper Migration Jobs for versions of Essentials older than 2.3 can not be "resumed", they should be cleared and new migration jobs should be started. |