
How to Schedule Incremental Backups for SharePoint
Follow these steps to schedule incremental backups for SharePoint:
1.Go to the Backup tab in the Metalogix Essentials.

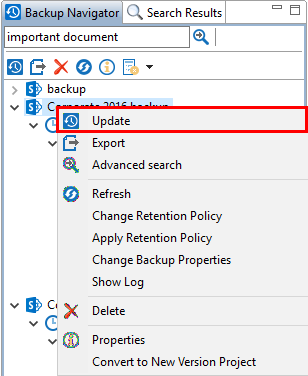
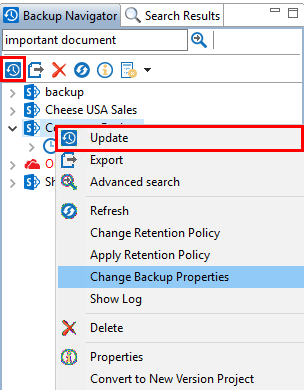
2.Select the Backup Project in the Backup Navigator, right click and choose Update.
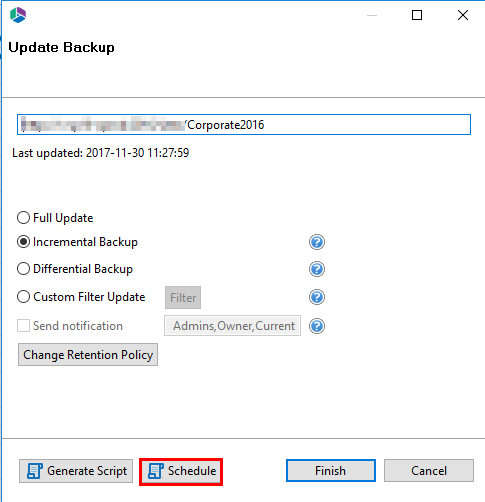
3.Select the type of update you wish to schedule (Full, Incremental or Differential) and then select Schedule this will open the scheduled task window.
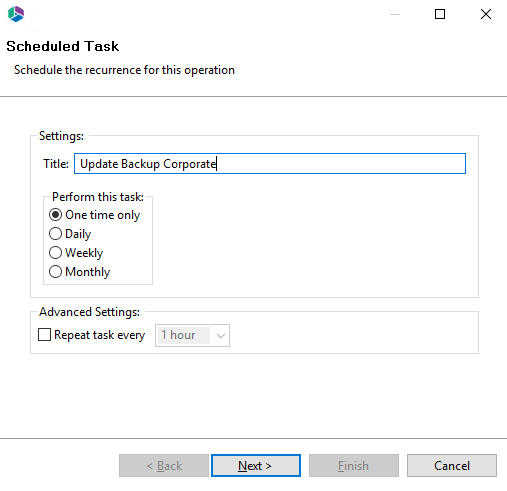
4.In the Scheduled Task window, enter a title for the Update Job and select when you would like the it to run. Under advanced settings you can choose to "repeat task every" and then specify the time frame (the time frame options will perform the scheduled task more often than daily with 10 hours as the largest time increment that can be selected). Click Next to proceed.
Note:
|
|
NOTE: Be cautious to not have the Updates overlap each other or a Full Backup. |

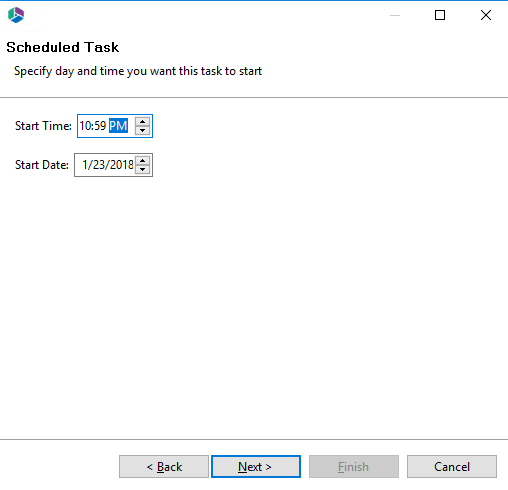
5.Set the start time and start date for the update job and click Next.
6.On the summary page review the details of your update job and click Finish to create the Backup job. You may be asked for your windows credentials, enter them and click Ok.

If the backup job is failing to start at the scheduled day and time, please try the following configuration.
1.In Windows Task Scheduler, right click on the Backup Job and choose Properties.
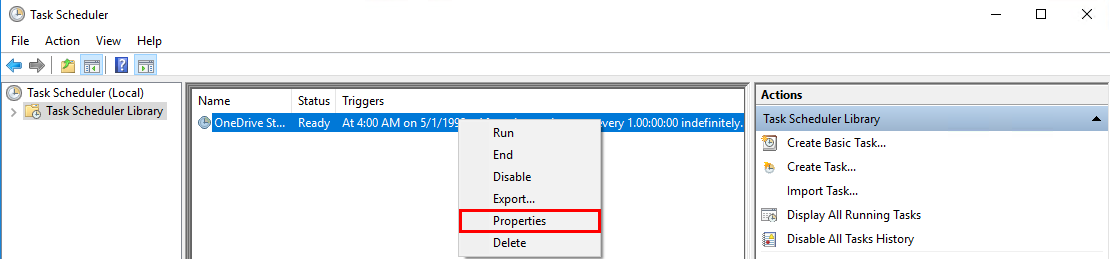
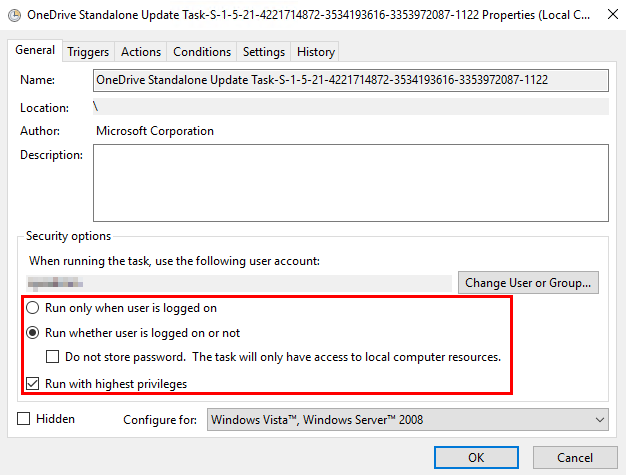
2.Uncheck the box for Do not store password and Check the box for Run with highest privileges.
|
|
NOTE: Be cautious to not have the Updates overlap each other or a Full Backup. |
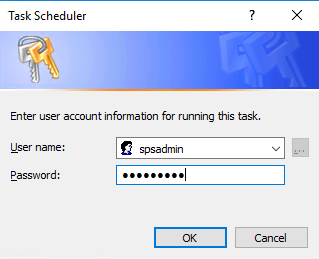
3.After clicking OK you will be prompted for the password of the Admin account you created the backup with and click Ok.
|
|
NOTE: The username and password will be a Domain or Local Username and Password that you are logged into the machine as. This will not be an O365 email and password even if that is what you are backing up. |
Using Integrated Scheduler to Run Backup Jobs
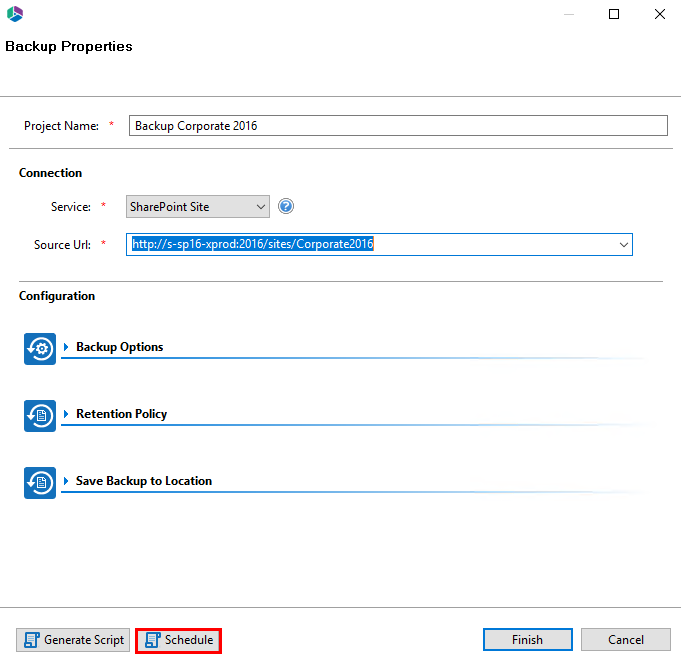
The Schedule button located at the bottom of the properties screen will walk the user through the Scheduler Wizard to create a backup job. To learn more about the scheduler, please refer to the Scheduler section in the Wizards section.
Backup Project Conversion
Due to a significant update made to improve performance, the format in which the backup projects are stored may need to be changed as well. Any Backup projects created prior to the December 21, 2015 version will have the option to be converted. This is an optional, one time, operation and any project already converted or any new project created after will be stored in the newer format and therefore the conversion will not be necessary.
The conversion process is fully automated and very simple to accomplish following the steps below. Please allow adequate time for the process to complete before you continue using the software. Depending on the size of the backup project, this process may take anywhere from several minutes to hours to conclude.
1.Update to the latest version of the software by going to the Help tab in Essentials, and selecting Check for Updates.

2.Determine which Backup projects need to be converted. You can simply select the Backup project from the Backup Navigator pane, right click and choose Update or select the update button from the Backup Navigator pane.
3.When the Update Backup wizard appears, a message will appear if a conversion is available.

4.(Optional but recommended) Before you convert the project, select your Backup project that you wish to convert from the Backup Navigator and choose the Export option. This will export your backup project in its current format to another location (for an overview on how to perform an export and import of a backup please see the Import/Export Backup Archives sections). If anything should happen during the conversion process you can Import your project back into the software and try again. If you receive any error messages during the Export process, please contact support before proceeding.
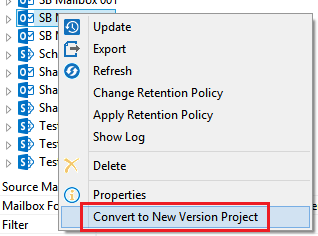
5.To convert your backup project, select the project in the Backup Navigator pane, right click and choose the option Convert to New Version Project. If the option is not present, then the project is already stored in the new format and therefore does not need conversion.
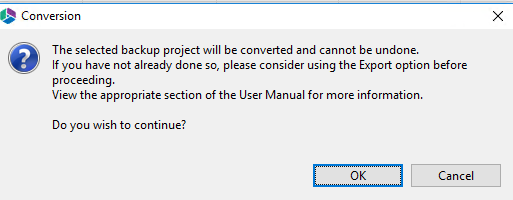
6.Click OK on the confirmation dialog pop-up in order to begin the conversion. Depending on the amount of content in the project, this process may take a few minutes to several hours to complete. During the conversion process, please do not create any new backups.
7.Once it is done, click OK on the confirmation dialog and restart the software to finish the procedure.
8.Repeat this process for each Backup Project that you would like to convert.
If you receive any error messages or would just like some assistance, please contact support.
Help Tab
The Help tab within Metalogix Essentials, is where users find activation information, product details, settings, and the log manager.
