The View Pane for each object within a profile contains a list of the elements configured for the object.
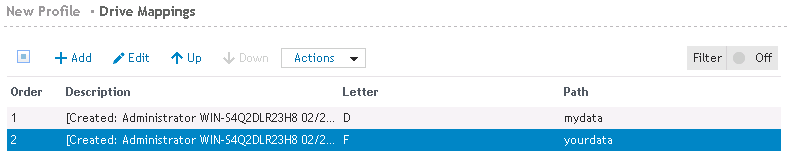
Figure 12: Configuring Profile elements
Click Read to see the settings configured for the selected element. Edit the current element by clicking the Edit button.
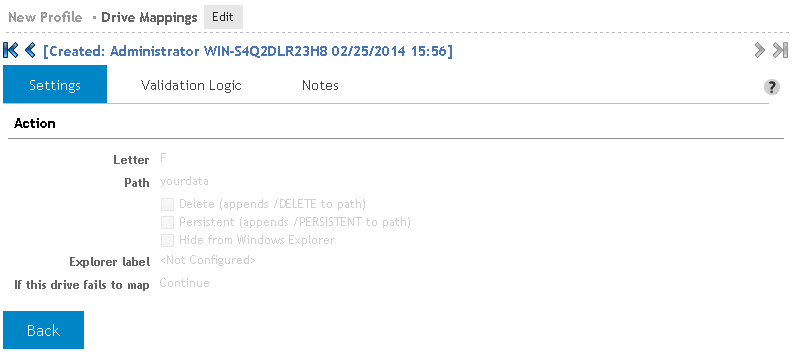
To the left and right of the element's description (above the tabs), click the arrow icons to move to the previous, next, first or last element configured for the profile object. Each element will be displayed in Read mode.
Figure 13: Profile element in read only mode
If multiple elements are selected, the fields that contain different data will display a red Merge Conflict warning. Click the Back button to return to the View pane.
Figure 14: Merge conflict warning

Click Add to add a new element to the list or select one or more elements in the list and click Edit to modify. The Settings tab for the element will be displayed. Fill in the settings for the element and click Save to complete the element configuration.
|
|
Note: Multiple elements may be modified at the same time. Any setting that appears in red denotes that the setting for that field differs among the selected elements. |
Click Delete to remove a previously configured element from the object list.
The filter can be used to reduce the number of elements being displayed in the configuration list. One can use this to find a specific element in a large list of elements, analogous to finding a needle in a haystack. Another use might be to use it as a check to make sure all of the elements for a specific operating system are configured.
Click Choose columns to configure the display and order of the columns that are displayed in the element list.
Select the columns that should display in the list. When highlighted, a column can be moved up or down in the list by clicking the up and down arrow icons.
Click Apply to save the changes. Click Default to set the element list display back to its default settings.
Elements in the configuration list can be copied and pasted for duplication, or cut for removal from the list. Use the toolbar buttons above the list for these actions. Select the elements in the list prior to clicking the appropriate toolbar action. Multiple elements may be selected for these actions.
As Desktop Authority processes the configuration elements defined by the list, Validation Logic is applied to each element, beginning at the top of the list. Prioritize the list entries by clicking the Up/Down toolbar buttons to reorganize the list.
The elements in the profile's list can be selected, edited and/or removed one at a time or several at one time. You can select more than one element in the list using the Shift or Ctrl key in combination with a mouse click. To select multiple elements, hold down the CTRL key while clicking the individual servers to select. Consecutive servers in the grid can be selected by clicking the first server to select and then, while holding down the SHIFT key, clicking the last server to select. To select the entire list of servers select the checkbox to the left of the column headers. This box will be empty if no elements are selected and will be filled with a square if some elements are selected. An element's selected status may be changed by clicking on it. If there is only one element in the list, it will always be selected.
Most often, the settings for an object consists of a Settings tab, Validation Logic tab, Description tab and a Notes tab.
The Settings tab contains the configurations options for the object. Some objects may contain other tabs which contain additional object settings.
The Validation Logic tab contains the Validation settings for a configuration element.
The Validation Logic Rules list is not required to contain any rules. If no rules are specified, the element is automatically validated on the client based on the specified Class, Operating System, Connection Type and Timing.
The Notes tab provides an area to add any additional notes needed to document the use of the profile element.
Console Access Settings implement the Desktop Authority's Role Based Administration (RBA) functionality which restricts access to profiles and the configuration elements contained within them. Access to profiles is limited to users and groups that have been granted specific permissions to them. Console Access settings can also limit Global System functionality to specific users.
Console Access Settings is comprised of maintaining System Roles, Super Users and Profile Roles.
A System Role is a container that defines permissions to specific parts of the Desktop Authority console.
A Profile Role is a container that defines the Permissions that are granted to any Member of that Role. A Role may be Global or Local. Global Roles are defined by the Super User and can be applied on any Profile in the system. Local Roles are defined per Profile and can be used to grant Permissions on a specific Profile and, optionally, its child Profiles. A Member is any user or group assigned to a Role. Members are assigned to Roles, Global and Local, at the Profile level. Even when a user or group is assigned to a Global Role, the membership applies at that Profile only. Resources are Profiles and Configuration Elements to which Permissions can be granted via Membership in a Role.
Figure 18: Example System roles

Permissions define the actions a member has to a specific resource. They are setup as part of the role creation process. Parent profiles define the base permissions and all child profiles inherit these permissions. Allowing for greater granularity, a child's inherited permissions may be altered at the child profile level.
The ACME.Domain.Admins group is configured as a member of the Branch Admin role. This group is given permission to the ACME parent profile. The ACME.Domain.Admins group is also defined as a Super User/Group. This means the group will have unlimited access to all profiles and configuration elements, as well as global options, within the system. It is important to note that since this group is assigned permissions to the Branch Admin role at the parent profile level, these permissions are inherited on all child profiles within ACME Corporation. ACME.Domain.Admins also have unrestricted system access due to their Super User/Group status.
The Profile Admin role is configured to have View, Change, Add/Delete permissions to all objects within a single branch of the profile tree. Child profiles are not included in the Profile Admin's permissions. The CHI.Site.Admins group are members of the Profile Admin role within the Chicago child profile only. The NYC.Site.Admins group are members of the Profile Admin role within the NYC child profile only. Note that user Ajones is assigned to the Profile Admin role within the CANADA profile.
The Security Admin role is assigned View, Change, Add/Delete permissions to several configuration objects within a profile. For instance, let's say the Security Admin is responsible for pushing out newly released service packs. The Security Admin role will be given permissions to the Registry, Application Launcher and Service Pack Deployment objects. They will be given Deny access to all other configuration objects. Note in the illustrations above that the USA.Security.Admin group is assigned membership at the USA profile level. These permissions are inherited down to both the Chicago and NYC child profiles. The CAN.Security.Admin group is assigned membership to the Canada profile.
The Read-Only Admin role is assigned View permissions only to all configuration objects within a profile. The Read-Only Admin role can be used for Users or Groups that will not have any ability to change elements within objects of a profile. In the illustration above, The NYC and CHI Helpdesk technicians are given the read-only permissions of the Read-Only Admin role. This way they can troubleshoot user issues and have an approved Administrator make the necessary changes to their profile. Note that the Canada profile does not have any User or Group assigned under the Read-Only Admin role. In this case, either the Branch Admin or Profile Admin have the necessary permissions to accomplish the same goal.
Console Access Settings implement the Desktop Authority's Role Based Administration (RBA) functionality which restricts access to profiles and the configuration elements contained within them. Access to profiles is limited to users and groups that have been granted specific permissions to them. Console Access settings can also limit Global System functionality to specific users.
Console Access Settings is comprised of maintaining System Roles, Super Users and Profile Roles.
A System Role is a container that defines permissions to specific parts of the Desktop Authority console.
A Profile Role is a container that defines the Permissions that are granted to any Member of that Role. A Role may be Global or Local. Global Roles are defined by the Super User and can be applied on any Profile in the system. Local Roles are defined per Profile and can be used to grant Permissions on a specific Profile and, optionally, its child Profiles. A Member is any user or group assigned to a Role. Members are assigned to Roles, Global and Local, at the Profile level. Even when a user or group is assigned to a Global Role, the membership applies at that Profile only. Resources are Profiles and Configuration Elements to which Permissions can be granted via Membership in a Role.
Figure 18: Example System roles
Permissions define the actions a member has to a specific resource. They are setup as part of the role creation process. Parent profiles define the base permissions and all child profiles inherit these permissions. Allowing for greater granularity, a child's inherited permissions may be altered at the child profile level.
The ACME.Domain.Admins group is configured as a member of the Branch Admin role. This group is given permission to the ACME parent profile. The ACME.Domain.Admins group is also defined as a Super User/Group. This means the group will have unlimited access to all profiles and configuration elements, as well as global options, within the system. It is important to note that since this group is assigned permissions to the Branch Admin role at the parent profile level, these permissions are inherited on all child profiles within ACME Corporation. ACME.Domain.Admins also have unrestricted system access due to their Super User/Group status.
The Profile Admin role is configured to have View, Change, Add/Delete permissions to all objects within a single branch of the profile tree. Child profiles are not included in the Profile Admin's permissions. The CHI.Site.Admins group are members of the Profile Admin role within the Chicago child profile only. The NYC.Site.Admins group are members of the Profile Admin role within the NYC child profile only. Note that user Ajones is assigned to the Profile Admin role within the CANADA profile.
The Security Admin role is assigned View, Change, Add/Delete permissions to several configuration objects within a profile. For instance, let's say the Security Admin is responsible for pushing out newly released service packs. The Security Admin role will be given permissions to the Registry, Application Launcher and Service Pack Deployment objects. They will be given Deny access to all other configuration objects. Note in the illustrations above that the USA.Security.Admin group is assigned membership at the USA profile level. These permissions are inherited down to both the Chicago and NYC child profiles. The CAN.Security.Admin group is assigned membership to the Canada profile.
The Read-Only Admin role is assigned View permissions only to all configuration objects within a profile. The Read-Only Admin role can be used for Users or Groups that will not have any ability to change elements within objects of a profile. In the illustration above, The NYC and CHI Helpdesk technicians are given the read-only permissions of the Read-Only Admin role. This way they can troubleshoot user issues and have an approved Administrator make the necessary changes to their profile. Note that the Canada profile does not have any User or Group assigned under the Read-Only Admin role. In this case, either the Branch Admin or Profile Admin have the necessary permissions to accomplish the same goal.
A System Role defines the areas of the Desktop Authority console that a member of the role will be able to access. Users are assigned to roles by selecting the Roles Assignment tab. The areas of the console that a System Role can include are:
Before assigning any users to a System Role, the system role must be created. System Roles are maintained in the Console Access Settings > System Roles tab.
Click the Add role button to create a new System Role. Enter the new role name in the entry below the Add role button. On the right side of the table, select the required areas of the console that the users of the role should have access to. Users assigned to this role will not be granted access to any unselected functions in this table.
Once you have selected permissions for the role, you need to assign one or more users to the System Role. Click on the Roles Assignment > Add user, or Remove user buttons to manage the users that are assigned to the System Role.
Be sure to click Save when the Role is finished being modified. To remove a role, click Remove role after selecting a single role in the table.
To edit an existing System Role, click the Edit button. This will put the currently selected System Role into edit mode. The currently selected System Role is the one with the yellow highlight.

