Copy-SharePointSiteWithConfigFile
|
Navigation: Using PowerShell with Content Matrix > Content Matrix PowerShell Commandlet List > Metalogix.SharePoint.Migration.Commands > Copy-SharePointSiteWithConfigFile |
Modifying Content Matrix Configuration and Settings
You can configure and customize a number of Metalogix Content Matrix settings, including:
·the use of encrypted SQL database connections
Using Encrypted SQL Database Connections
|
Navigation: Modifying Content Matrix Configuration and Settings > Using Encrypted SQL Database Connections |
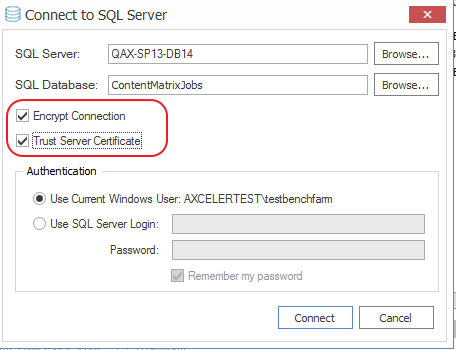
When connecting to a SQL database via Content Matrix, you are given the option to connect using TLS/SSL encryption.
NOTE: Content Matrix can use any version of TLS that is compatible with .NET Framework 4.7.2. The default version of TLS used by the operating system on the machine from which you are connecting will be used by Content Matrix.
The encrypted connection can use either:
·a self-signed certificate or a trusted certificate from the third party authority (refer to the Microsoft article https://docs.microsoft.c om/en-us/sql/database-engine/configure-windows/enable-encrypted-connections-to-the-database-engine?view=sql-server-ver15 for instructions on configuring an encrypted connection using a certificate)
OR
·a SQL-generated certificate, which does not require configuration.
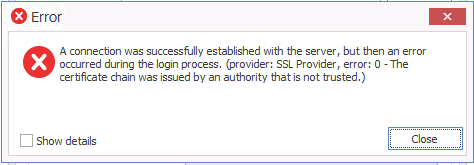
NOTE: If a trusted certificate is used, it is not necessary to check the Trust Server Certificate box. However, if the box is not checked and the certificate is not trusted, the following message will display:
In this case, the Trust Server Certificate box must be checked in order to continue the connection.
Configuring Proxy Settings
|
Navigation: Modifying Content Matrix Configuration and Settings > Configuring Proxy Settings |
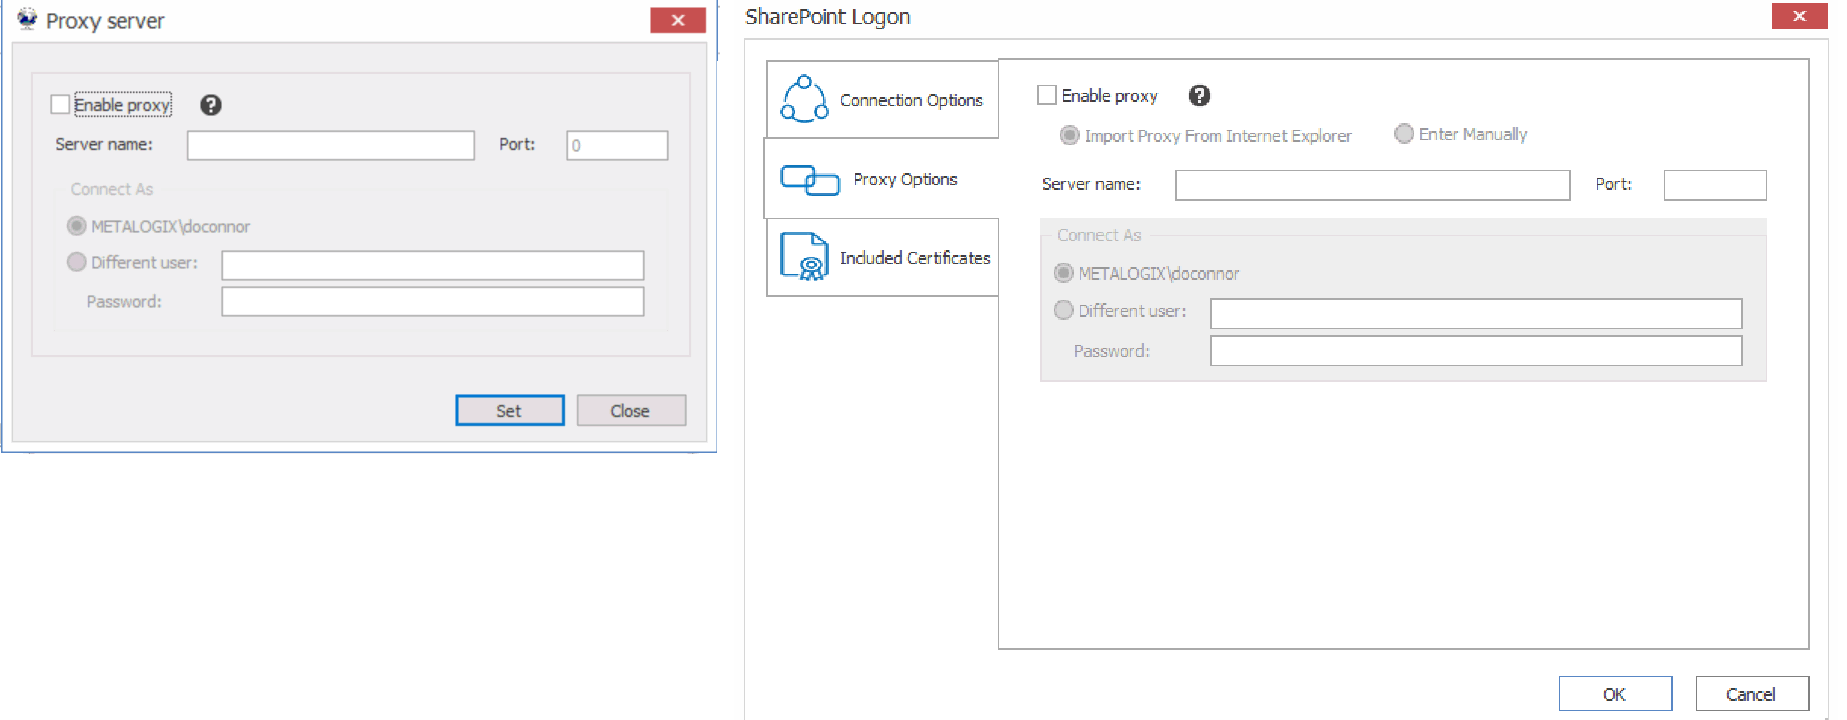
In most cases Metalogix Content Matrix can automatically connect to SharePoint and authenticate license keys, through an environment's proxy setting, However, in some cases the proxy may need to be configured within Metalogix Content Matrix. In these cases users can specify the proxy settings though the connecting dialog.
There are two basic places where this proxy setting can be configured. The first of these is when activating a license key, and the second when connecting to SharePoint. The dialogs for these options look slightly different, and the when you are using a proxy to connect to SharePoint, you have the additional option to Import Proxy from Internet Explorer.
To configure proxy settings:
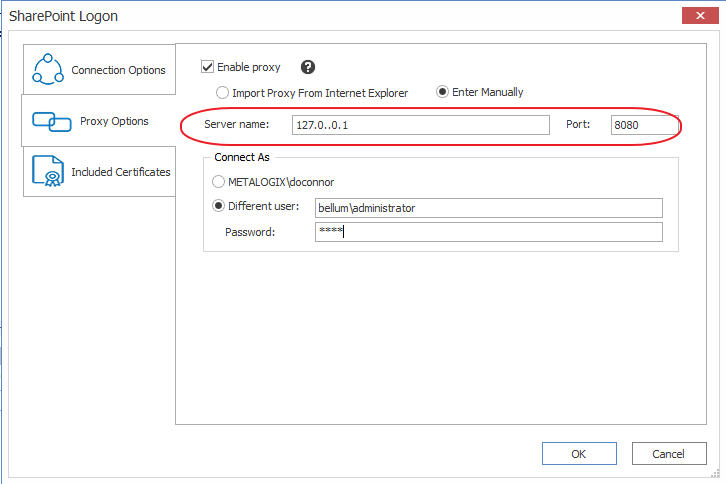
1.In the Proxy server dialog, check the Enable proxy box.
2.Use the information in the following table to determine the appropriate action to take.
|
If ... |
Then ... |
|---|---|
|
you want to manually enter proxy information |
A.Select Enter Manually. B.Enter the Server name (or IP) and Port for the proxy. C.Specify the credentials to be used when connecting to the target server. The Windows authenticated credentials of the current user will be selected by default. You can specify alternate SharePoint credentials by clicking the Different user radio button, and entering an alternate username and password. |
|
Internet Explorer has been configured to use a proxy server via a proxy auto-configuration (.PAC) file and you want to connect to SharePoint using this method |
select Import Proxy from Internet Explorer. NOTE: This option is currently available only when connecting to SharePoint. Refer to the Microsoft article Auto proxy configuration settings for Internet Explorer for more information. |
3.If you accessed the dialog from the License Activation dialog, click [Set].
NOTE: If this method does not seem to be working, you can manually configure Metalogix Content Matrix to use a proxy setting. See Manually Configuring Proxy Settings.


