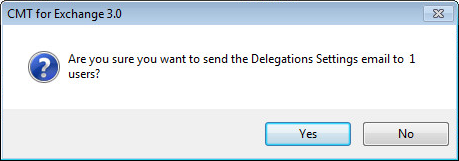
At this point, if you do not intend to migrate mailbox delegation, you can send the end users a report of their delegation settings; select the users from the view and click on the Optional Actions | Send Delegation Settings Email; you will be asked for confirmation before proceeding:

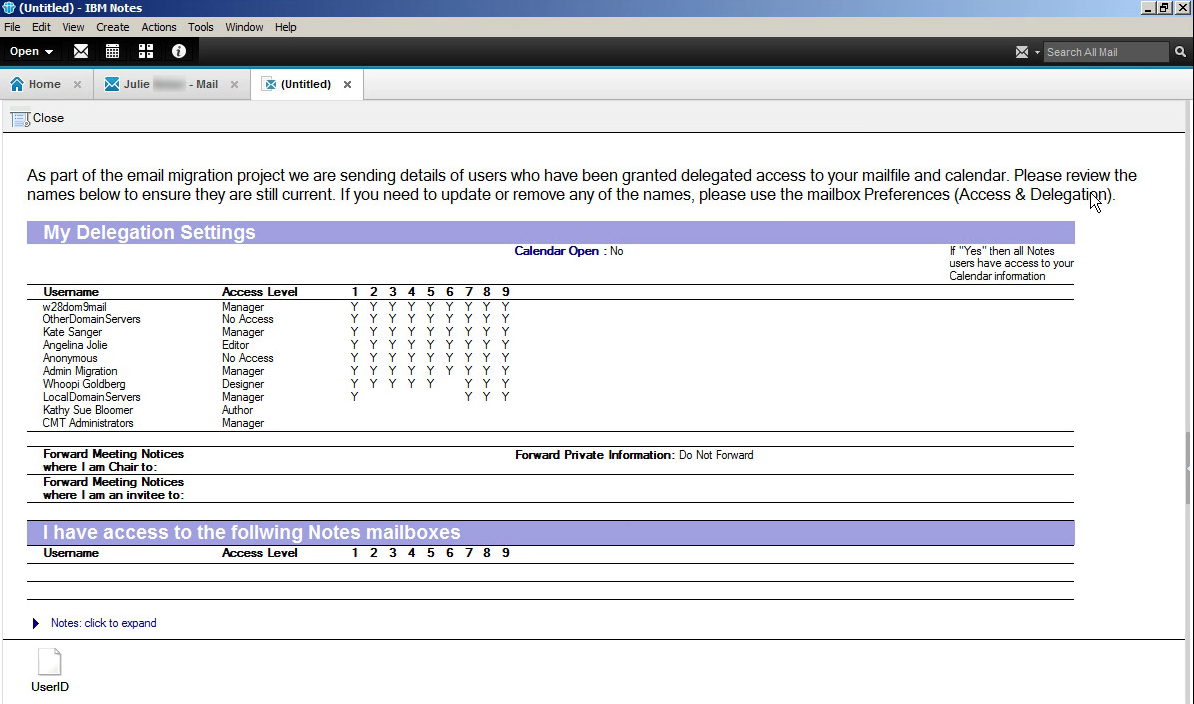
When you click Yes, the selected users receive an email message similar to the one shown below:

At this stage, you can work with your users to audit and tidy up delegation settings in Notes prior to migration. If users update their delegation settings, you need to rerun the audit agent and the Merge ACL Details agent to capture the most updated data.
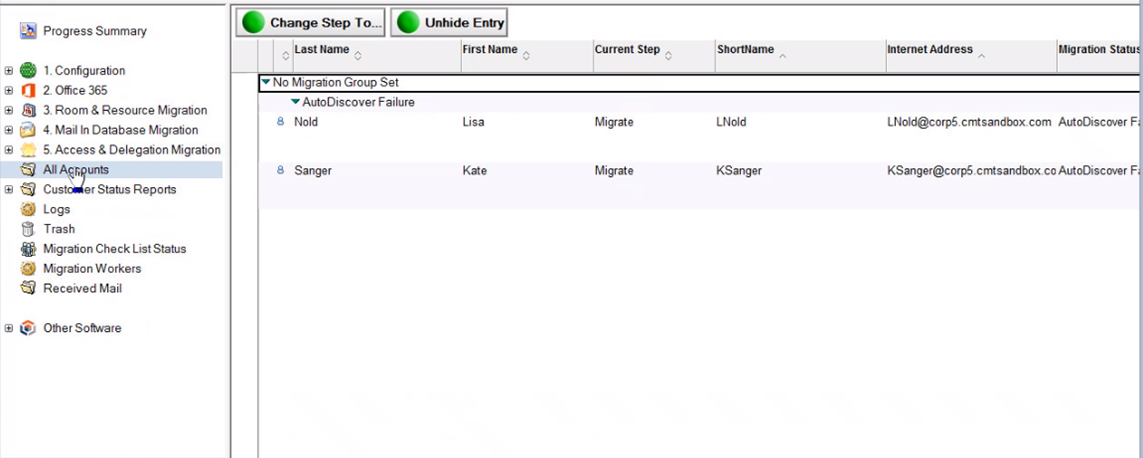
Summarizes all accounts including Rooms & Resources and Mail in Databases in the Migrator for Notes application.

Migration status reports can be manually run or scheduled. Manual reports require Microsoft Excel installed on any workstation when reports are run. Scheduled reports are CSV files and do not require Microsoft Excel. Please ensure that you have populated the Migration Status Report section of the Additional tab in the Required Settings document.
To manually run migration status reports:
Go to the Customer Status Reports view in the Navigation Pane; options to remove entries from the view, refresh the migration status of entries, and set/clear migration status, group, or workstation are available
Click the Customer Status Report button. The drop-down menu displays four options.

Customer Status Reports View
The following table describes each menu option.
|
Option |
Description |
|---|---|
|
Send All Migration Status Reports |
Sends both the customer and operator status reports in XLS format; This process is run from the local client |
|
Send Migration Status Report to Customer |
Sends the customer status reports (simplified) in XLS format; This process is run from the local client |
|
Send Migration Status Report to Operators |
Sends the operator status reports (detailed with errors) in XLS format; This process is run from the local client |
|
Compose Final Migration Status Report |
Exports all documents in the "Customer Status" view to a CSV file then composes a new memo with the migration summary in the body; Then, it opens the CSV file for any manual editing that maybe required; After which, the file can be saved and attached to the status report |
To schedule migration status reports:
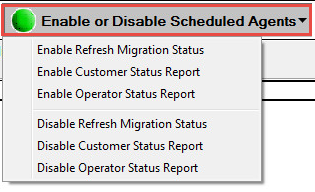
From the Customer Status Reports view, click the Enable Or Disable Scheduled Agents button; the drop-down menu displays four options:


The following table describes each menu option:
|
Option |
Description |
|---|---|
|
Enable Refresh Migration Status |
Runs on a local MCC server/workstation and retrieves the current status of the migrating accounts for the scheduled status reports to operate without requiring manual refreshes |
|
Enable Customer Status Report |
Runs on the Domino server and creates a CSV (text) file on the server, composes an email, populates the body with the migration summary totals designed for customers and then sends the message to the customer |
|
Enable Operator Status Report |
Runs on the Domino server and creates a CSV (text) file on the server, composes an email, populates the body with the migration summary totals with all errors for an operator to review in details and then sends the message to the operator |
|
Disable Refresh Migration Status |
The Refresh Migration Status process is disabled |
|
Disable Customer Status Report |
The Customer Status Report process is disabled |
|
Disable Operator Status Report |
The Operator Status Report process is disabled |
|
|
When selecting agents to run from the local workstation, background agents must be enabled. To enable this option in Notes:
|
To view status report logs:
Click Logs under Customer Status Reports in the Navigation Pane. Refer to the Logs section of this document for more information.
Logs are available from the Navigation Pane. The log record in the Data Pane below shows information about the last time the Custom Status Report agent was run.
Go to the Logs view in the Navigation Pane
If prompted, select a server to search and click OK:

Quest creates software solutions that make the benefits of new technology real in an increasingly complex IT landscape. From database and systems management, to Active Directory and Office 365 management, and cyber security resilience, Quest helps customers solve their next IT challenge now. Around the globe, more than 130,000 companies and 95% of the Fortune 500 count on Quest to deliver proactive management and monitoring for the next enterprise initiative, find the next solution for complex Microsoft challenges and stay ahead of the next threat. Quest Software. Where next meets now. For more information, visit www.quest.com.
Technical support is available to Quest customers with a valid maintenance contract and customers who have trial versions. You can access the Quest Support Portal at https://support.quest.com.
The Support Portal provides self-help tools you can use to solve problems quickly and independently, 24 hours a day, 365 days a year. The Support Portal enables you to:
Submit and manage a Service Request
View Knowledge Base articles
Sign up for product notifications
Download software and technical documentation
View how-to-videos
Engage in community discussions
Chat with support engineers online
View services to assist you with your product.