Tags are used to categorize your archived items. You can create as many categories as you want, assign them colors, and then apply them to your archived items. This make it easy to search through your tagged items and distinguish e.g. important emails, documents related a particular project, etc.
Tags are centrally managed in the Manage Settings > Tags tab.
In this topic:
Tags can be created in several ways.
Create a tab from the Tags tab
1.Log in to ArchiveWeb. Then click your user name and select Manage Settings.
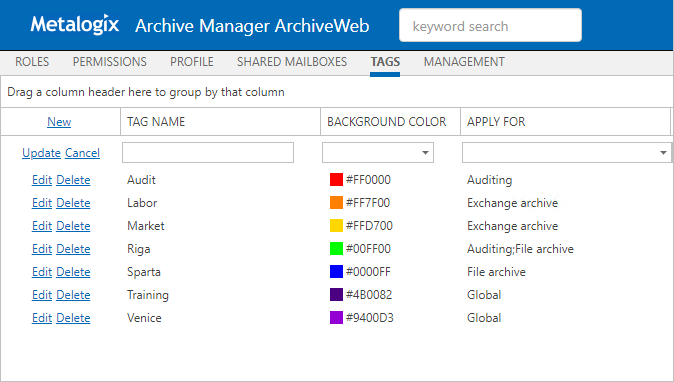
2.Click Tags from the local menu bar. All tags are listed, added, edited or deleted here.
|
|
NOTE: Managing Tags from the Settings view requires special permissions. For more information see Roles and Permissions. |
3.Click New in the list header. A new row will be added to the list view. Enter the tag properties as described below:
·Tag Name - enter descriptive name, e.g. Personal, Marketing or any other
·Background Color - click the dropdown and select the tag color or specify a custom color.
·Apply For - scope of the tag. Choose one or more from the following options
oGlobal - tags are available for Archive Manager for Exchange, Archive Manager for Files and Audit.
oExchange archive - tags are available for Exchange archive
oFiles archive - tags are available for File archive
oAuditing - tags are available for Archive
4.Click Update to save the changes. The new tab will be added to the tab list.
Create a Tag from the Archive > Exchange view or Report > Audit view
1.Log in to ArchiveWeb and open the Archive > Exchange view or Report > Audit view.
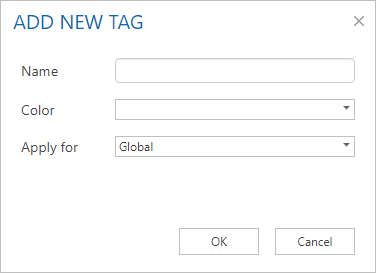
2.Click the + icon next to the Tags node in the navigation pane.
3.Enter the tag details in the Add New Tag dialog.
4.Click OK to save the tag.
1.Click your user name and select Manage Settings > Tags.
2.Click Edit for the tag that you want to change.
3.When you are done with your changes, click Update to save your changes.
4.Click your user name and select Manage Settings > Tags.
5.Click Delete for the tag that you want to remove.
6.Click Yes in the confirmation dialog.
Steps to add and remove tags from items
Tags can be added to:
·emails - if the tag is applicable to Global or Exchange archive
·documents - if the tag is applicable to Global or File archive
·auditing items - - if the tag is applicable to Global or Audit
1.Locate the item under Archive/Exchange or Archive/Files or Report/Auditing tab and select it.
2.Open the More actions link (MENU) from the right upper corner in the preview pane.
3.Click Add tag(s).
4.In the pop-up window select the tag(s) which you want to add to the item and click OK. Once the tag has been added to the items, it will be visible in the list view and preview. A tag can be removed from the preview by click X or from the MENU by clicking the Remove tag command.
Management section constitutes centralized dashboard where user with appropriate permissions can manage specific configuration settings in the following sections:
·File Management
Adding, editing and removing of Archive Manager for Files servers which together establish the file archive system. Additionally, with Scheduler capabilities, Archive Manager for Files jobs are easily managed in the same way as on the Scheduler tab of the Enterprise Manager (Archive Manager for Files).
·Search Management
Registering and managing search servers in the environment.
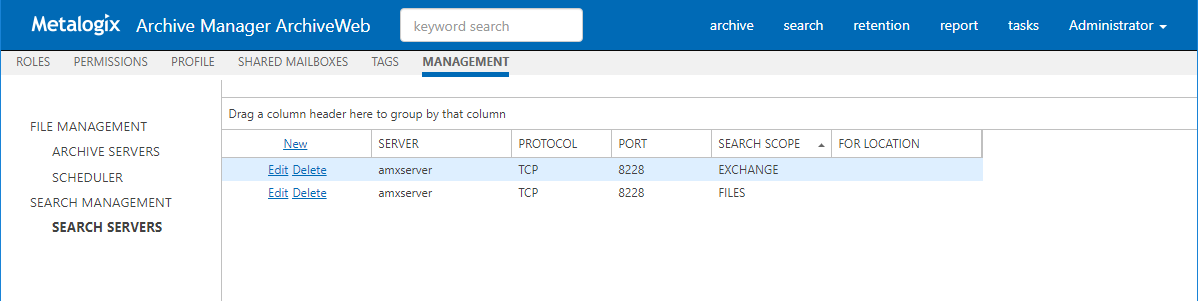
Search Management section is displayed only if appropriate permission is set for the user. This section allows managing of Search servers installed in the environment. Specifying search servers on this tab is prerequisite of search functionality. With no search server defined, search is not available.
After clicking on the Search servers menu, the available Search servers will be listed in the main pane.
NOTE: If web.config file contains information about Search server(s) (this is applicable if upgrading from previous versions of ArchiveWeb) the list will be automatically populated.
By clicking the Delete option the respective Search server will be removed, i.e. it will not be used for Searches.
To add a new Search server click New option in the list header. It will add a new row to the list where you can specify the Search server properties.
NOTE: Avoid using localhost as Server Name.
By clicking the Edit option next to the given server, you can change server properties. The Search Scope marks for which Archive Manager the given search server has been installed (Archive Manager for Files/Exchange).
For Location - this property is applicable only for Archive Manager for Exchange search servers.
For a Search server you can specify a location which the respective Search server "covers" by selecting a location from a "FOR LOCATION" dropdown. This dropdown lists all locations defined in Archive Manager for Exchange in a location where the logged in user has active mailbox. (For more information on locations see the Archive Manager for Exchange Administration Guide.)
Provided there are more Archive Manager for Exchange locations in the environment and each has it own search server, the given search servers must be listed with correct location.
|
|
NOTE: If there are more locations but only one search server for locations, leave the For Location property blank. |
Federated Search
If you're using more locations, you can setup a Search service for each location. Each Search service will index items on its location.
To setup Federated search (search over more search servers) in ArchiveWeb you have to modify the Search servers (Search Management) by specifying FOR LOCATION value.
Federated search allows you to collect results from more search servers in one search request.
You can perform federated search over all available (according to permissions) search areas:
·Exchange
·Files
·Common
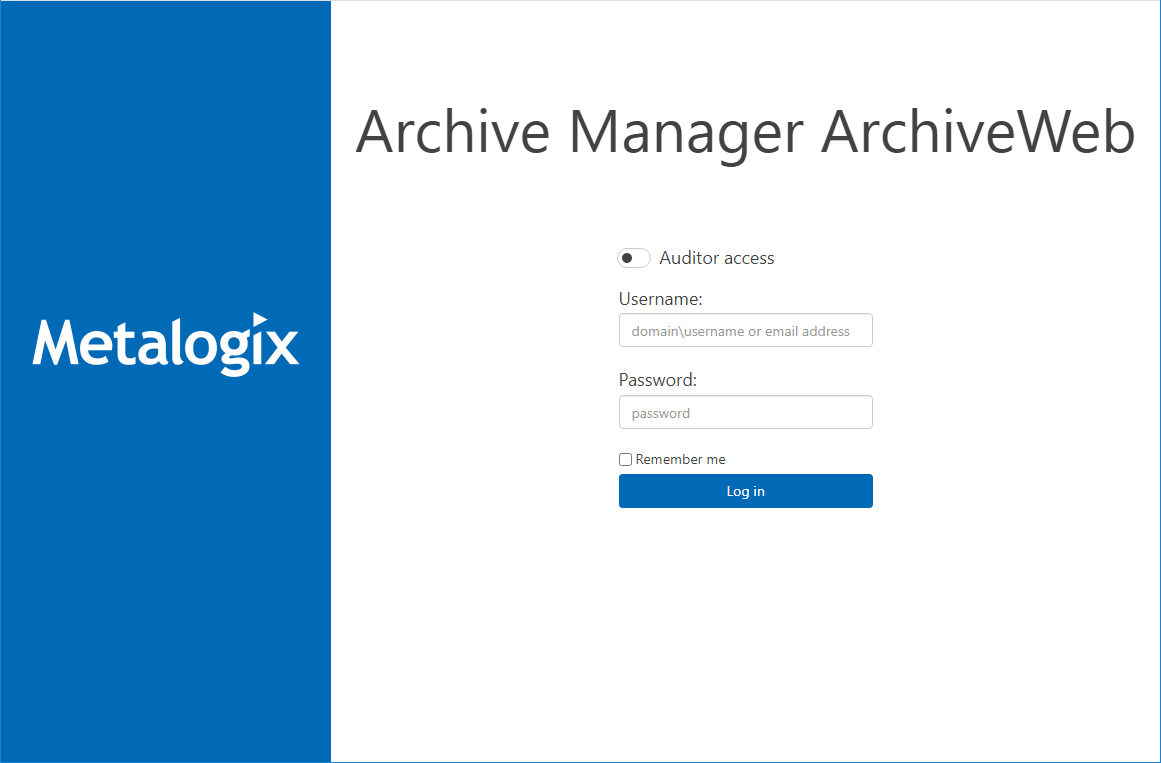
After browsing the ArchiveWeb URL (http://<ArchiveWebServerName>/archiveweb), the Login window gets displayed. Users are asked to enter their name (or domain name\user name or email address) and password. Email address should be:
·Office365 email address
·Active Directory Domain email address in format <name>@domain.com.
Please note: johnSmith@ateam.com is equivalent to ateam\johnSmith.
Default language depends on the Windows local setting of the Archive Manager server.
NOTE: When Integrated Windows authentication is turned on, the login page is skipped and the logged-in users credentials are used. This is set in C:\Program Files\ Common Files\ PAM \ Web \ ArchiveWeb \ Web.config where <authentication mode = "windows">.
After logging in correctly, the ArchiveWeb application opens. The top-page main bar contains search box (keyword searching in e-mail body, attachments, file content) and tabs archive, search, report representing the activated features of Archive Manager. Once you click one, the grey sub-bar under the main pane displays additional options.
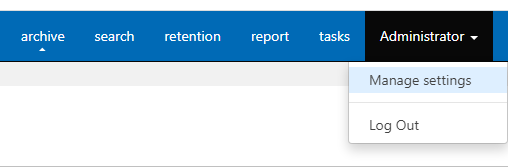
Further, in the right upper corner you may see the logged on user. Click it to unfold the dropdown menu offering the following options:
·Manage settings option provides access to further settings based on user permissions:
·Log out option is to be used when logging off
After clicking Manage Settings, the following menu options appear on the displayed menu bar:
The Roles option is available if the user has necessary permissions. Under this option you can manage user/ArchiveWeb roles assignment based on roles (see the Roles section).
The Permissions option is available if the user has necessary permissions. Under this option you can manage user/ArchiveWeb roles assignment based on users (see the Permissions section).
The Profile option allows you to adjust ArchiveWeb layout to your liking (see the Profile Settings section).
The Shared Mailboxes option is available only when Archive Manager for Exchange is installed and configured for ArchiveWeb.
When shared mailboxes are set for a currently logged user in Archive Manager for Exchange -> Tools -> Mailbox Rights Manager the grid will be populated and a user can select which mailbox(es) the user likes to be listed in Archives mailboxes tree and in searchable mailboxes.
Under the Tags option one can create tags for archive or auditing items (see the Tags section).
The File Management option is available if the user has necessary permissions. Under this option you can manage file servers and scheduled jobs (see the "File Management" section).
The Keyword search box in the upper part of the window was designed for fast and easy searching in archives - Archive Manager for Exchange archive as well as Archive Manager for Files archive. Enter the expression and click Enter.
NOTE: Email attachments, email bodies and file contents are searched through only if Keyword search is installed.