ArchiveWeb now supports option to manage the new General Data Protection Regulation (GDPR) regulations. User can create a retention change request (for Exchange and/or Files items) via context menu. When the request is created, approver(s) get email notification and can review the request. User who created a request is informed via email notification once approver has processed the request. User (who has appropriate permission) can follow the requests in ArchiveWeb by clicking on Retention tab. User can see open, approved and denied requests and also the history.
Approver(s) except of these read-only functions (opened, approved, denied requests and history) have ability to export all items from request to ZIP file, denied the entire request and approve (all or selected) items from request.
To use all features of new Retention functionality the working SMTP server is needed, however to use Retention functionality the SMTP is not mandatory. The SMTP service is used to send notification emails to approver(s) and/or retention requester(s).
If youd like to use SMTP service (set SMTP server to use with ArchiveWeb) see the next section: Setting SMTP server under Archive Manager Configuration (PamConfig).
Archive Manager Configuration (PamConfig)
·First, configuration has to be done outside of ArchiveWeb. Open Archive Manager Configuration Tool from <installdir>\ Program Files (x86) \ Common Files \ PAM \ PAMConfig \ PamConfig.exe.
1.Click on Users tab.
2.Make sure that database and scripts are up to date.
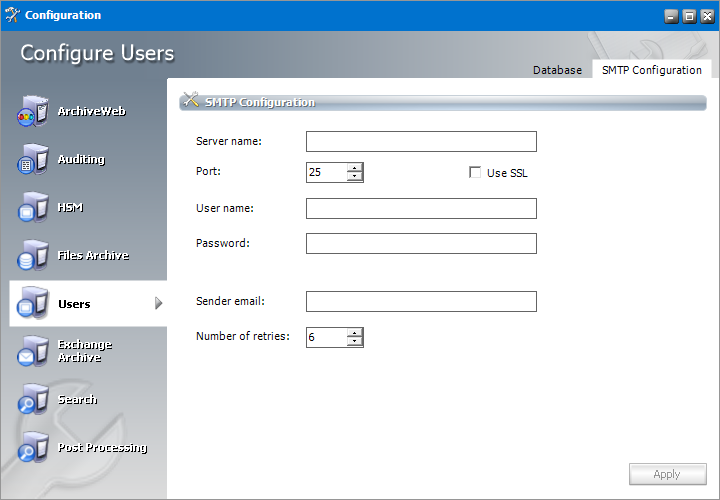
3.Click on Users tab / SMTP configuration tab and set the required settings
oServer name specify SMTP server name or IP address where the SMTP server is installed
oPort specify the SMTP port
oUse SSL check this button if the SMTP requires SSL connection
oUser name, Password specify SMTP credential
oSender email specify email address which will be used to hand-shake with the SMTP
oNumber of retries specify number of retries the SMTP will try to send the message
ArchiveWeb
Permissions
New Retention permissions have been added to ArchiveWeb:
|
Permission |
Default value |
Meaning |
|
Approve retention change requests |
Denied |
Allows to approve or denied the retention change request and export items |
|
Create retention change request |
Denied |
Allow to create a new retention change request and to display Retention tab at the top of the navigation bar with ability to list open, approved, denied requests and history. |
Archive tab Exchange
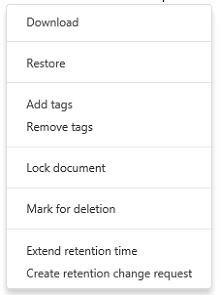
User who has at least Create retention change request permission will be able to create a retention change request from the context-menu for selected item(s).
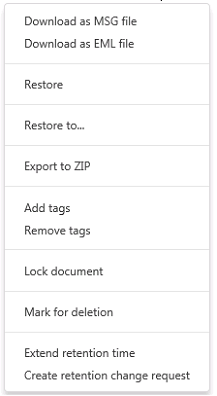
For single item in a preview pane, click on [ ] action menu and select Create retention change request option
For multi selected items from context-menu select Create retention change request option
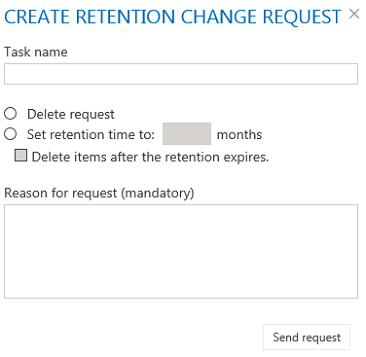
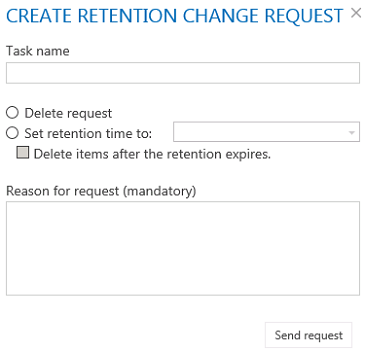
In both cases the following pop-up window will appear:
·Task name name for retention change request
·Delete request select to create a delete request
·Set retention time to select to set a new retention time in months. The purpose for this option is create a retention change request to decrease retention time
·Delete items after the retention expires by selecting this option the expired items will be automatically deleted
·Reason for request description of request
By clicking on Send request the retention change request will be submitted for approval. Newly created retention change request will appear in Open and History grids in Retention tab.
NOTE: Only items which have no Legal hold flag set will be added to retention change request.
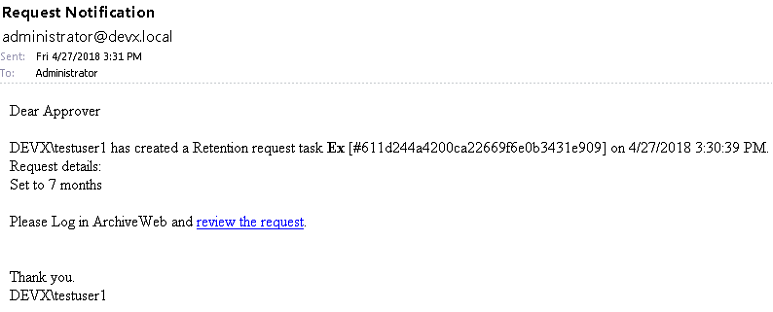
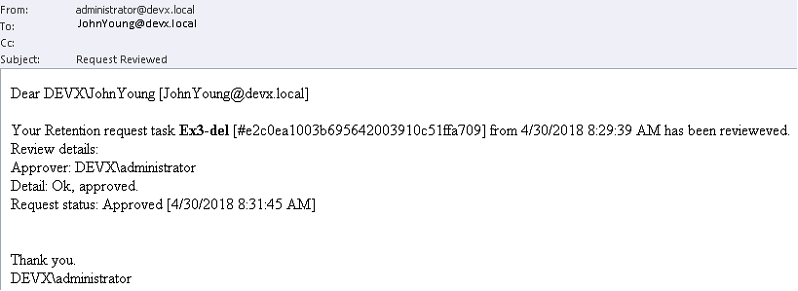
When the SMTP is correctly set, notification email will be send for user(s) who have Approve retention change requests permission set.
Example of notification email:
Archive tab Files
User who has at least Create retention change request permission will be able to create a retention change request from the context-menu for selected item(s).
For single item in a preview pane, click on [ ] action menu and select Create retention change request option.
For multi selected items from context-menu select Create retention change request option.
In both cases the following pop-up window will appear:
·Task name name for retention change request
·Delete request select to create a delete request
·Set retention time to select to set a new retention time via calendar. The purpose for this option is create a retention change request to decrease retention time
·Delete items after the retention expires by selecting this option the expired items will be automatically deleted
·Reason for request description of request
By clicking on Send request the retention change request will be submitted for approval. Newly created retention change request will appear in Open and History grids in Retention tab.
NOTE: Only items which have no Legal hold flag set will be added to retention change request.
When the SMTP is correctly set, notification email will be send for user(s) who have Approve retention change requests permission set.
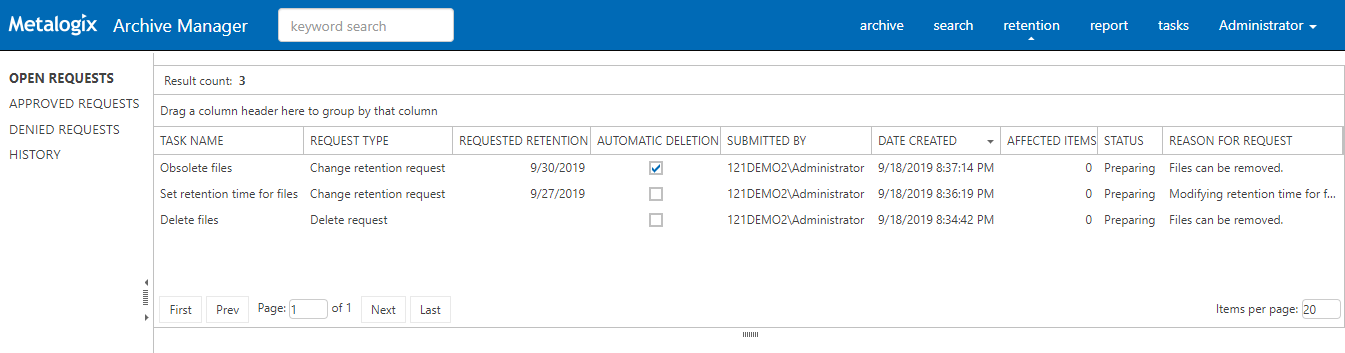
Retention tab
This menu option is available to user who has at least Create retention change request permission set. The user can see list of open, approved, denied requests and history.
|
Column |
Meaning |
|
Task name |
Retention change request task name |
|
Request type |
Request type: Change retention request request to decrease retention time Delete request request to delete item |
|
Requested retention |
Contains retention time requested in Change retention request task; for Delete request this column is empty |
|
Automatic Deletion |
Informs if the option "Delete items after the retention expires" is activated for the given item |
|
Submitted by |
Name of the user who submitted the request |
|
Date created |
Date-time when the request was submitted |
|
Processed by |
Name of the user who approved/denied the request |
|
Date processed |
Date-time when the request was approved/denied |
|
Submitted items |
Number of items in submitted request |
|
Status |
Request tasks status |
|
Reason |
Approve/Denied reason |
|
Reason for request |
Reason the submitter entered |
OPEN REQUESTS
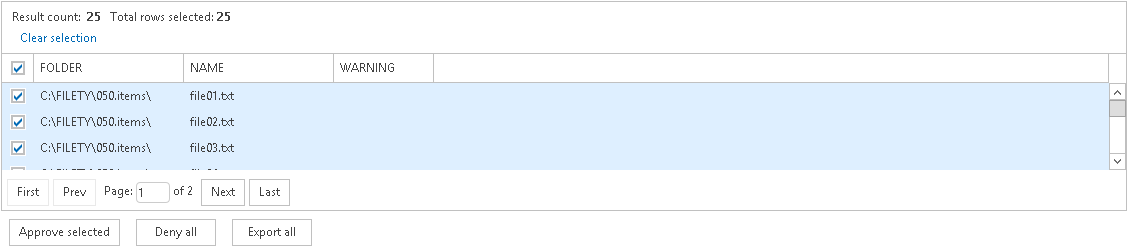
When a user has Approve retention change requests permission, it means the user is an approver and has permission to Approve, Denied or Export request items. In this case when the OPEN REQUESTS tab contains any request, after clicking on a request in a grid, the item list grid should look like (double-click on item in the list grid will invoke item preview in a pop-up window):
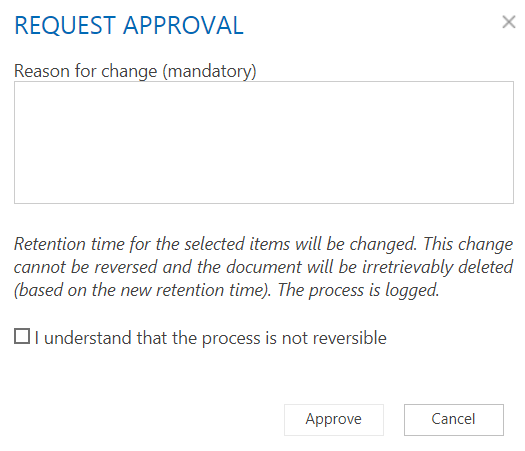
·Approve selected selected items will be prepared for approval process. After the approver confirms the following dialog, the items will be asynchronously processed
If the SMTP is correctly set the submitter will be informed via email, example of notification email
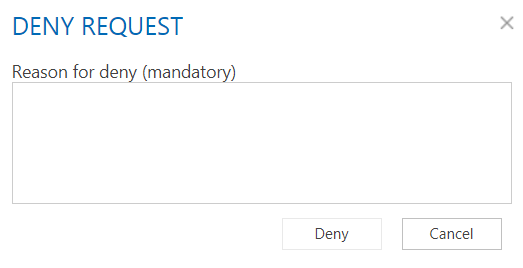
·Deny all all items (no selecting is required) will be prepared for deny process. After the approver confirms the following dialog, all items will be denied, no operation from retention change request will be processed and if the SMTP is correctly set the submitter will be informed via email
·Export all all items will be exported to ZIP file. There is option to encrypt the output ZIP file with a password
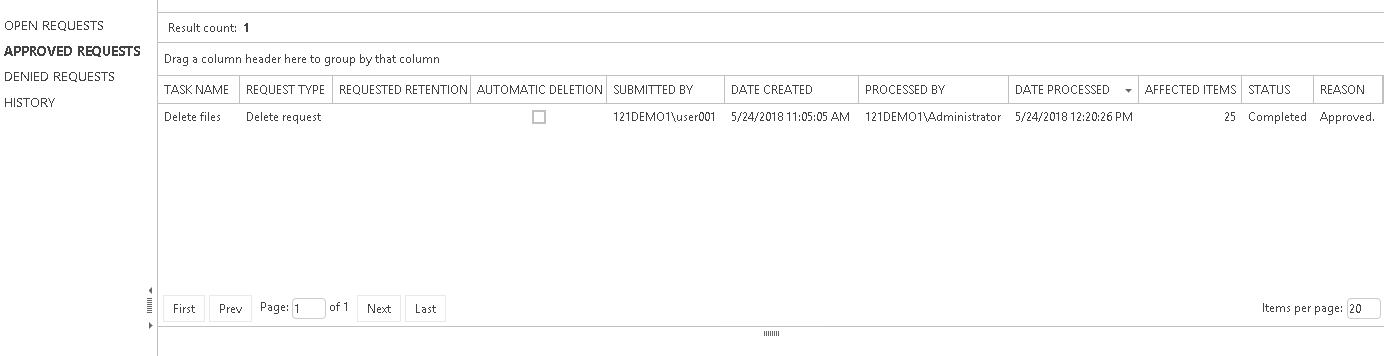
APPROVED REQUESTS
Grid contains list of approved requests
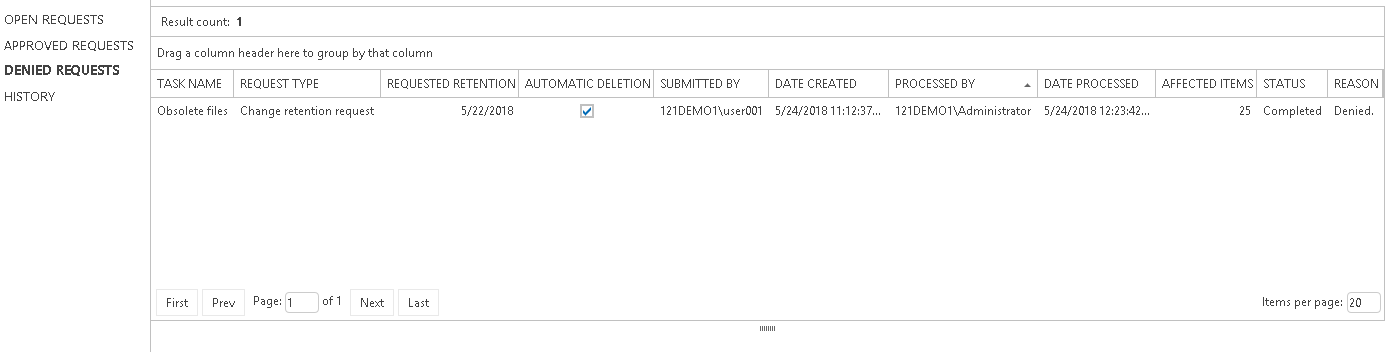
DENIED REQUESTS
Grid contains list of denied requests
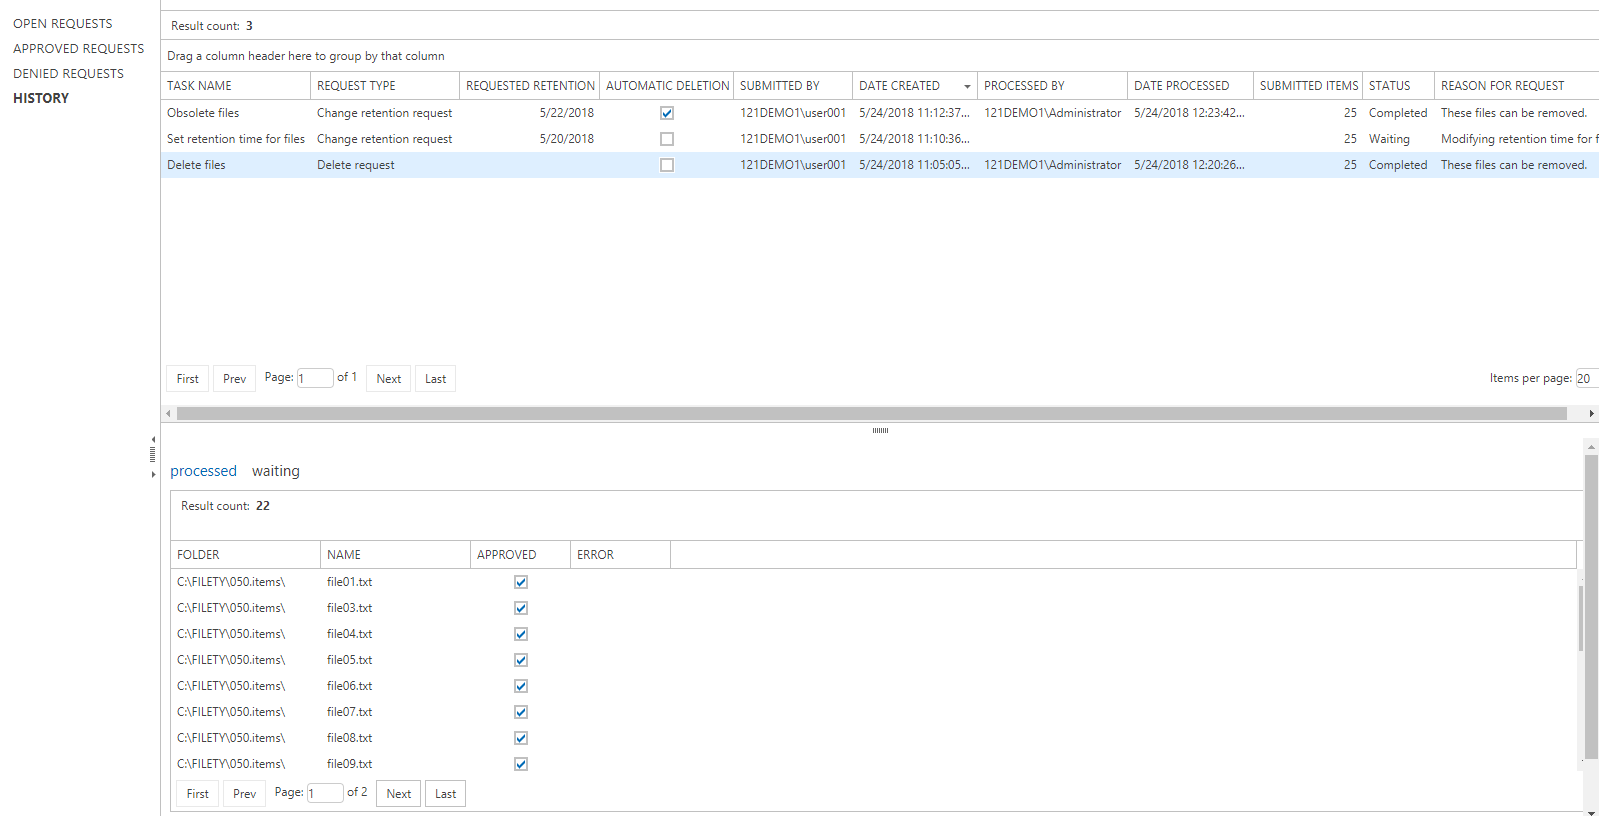
HISTORY
Grid contains list of requests (open, approved and denied). For approved and denied requests after clicking on a request in a grid, items grid will contain list of items (double-click on item in the list grid will invoke item preview in a pop-up window)
The list grid contains processed and waiting filters.
|
Column |
Meaning |
|
From |
For Exchange items senders name |
|
To |
For Exchange items recipient(s) names |
|
Subject |
For Exchange items items subject |
|
Folder |
For Files items folders name |
|
Name |
For Files items files name |
|
Approved |
Indicates whether the item was approved |
|
Error |
Contains error message, if any |
|
Warning |
Contains warning messages, if any |
·Processed contains list of processed items.
oFor Change retention request items with selected Approved column have been processed, retention time have been changed; if error occurred the Error column will contain a message
oFor Delete request items with selected Approved column have been processed by Delete job, item has been deleted; if error occurred the Error column will contain a message
·Waiting contains list of items waiting for processing.
oFor Delete request items with selected Approved column waiting for Delete job to process the items
As default, only the super-user specified in Archive Manager for Exchange or Archive Manager for Files (see note below) can access ArchiveWeb and all its functions. If another user/group should be able to manage roles, super-user can allow access for them in the following ways:
·in ArchiveWeb under logged on user / Manage settings / Permissions
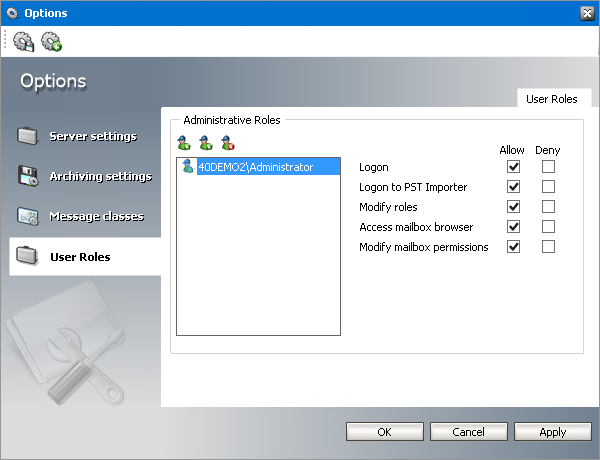
·in Archive Manager for Exchange Administration Center on the Tools / Options / User Roles the given user has to be added with Modify roles option checked
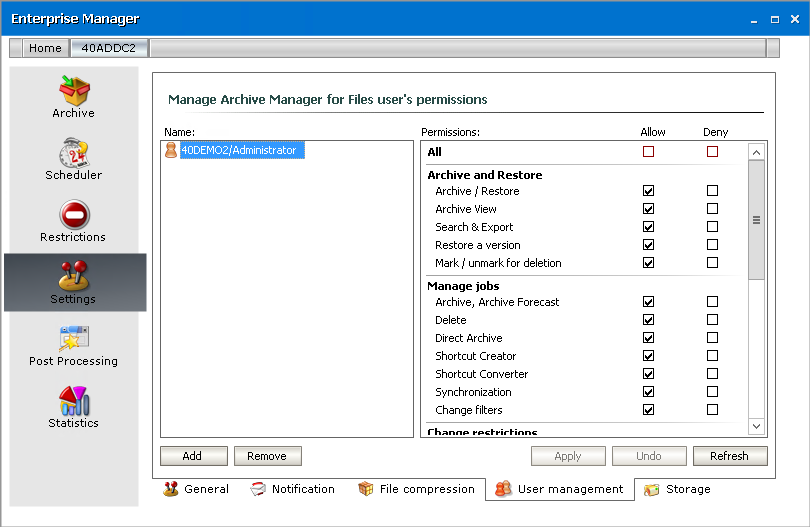
·in the Archive Manager for Files Administration Center on the Settings / User management tab the given user must have the User management permission allowed
Please note: Super-user is specified in:
·Archive Manager for Exchange Administration Center / Tools / Options / User Roles)
or
·Archive Manager for Files (Enterprise Manager / Settings / User management)
Roles and Permissions pages allow permission management on user/group level. Individual users can inherit permission or can be granted direct permissions. The priority of permissions follows this order:
1.Direct permission defined for a user (blue highlight under Permissions) on a server
2.Global direct permission defined for a user (blue highlight under Permissions)
3.Inherited permission (yellow highlight under Permissions) on a server
4.Global inherited permission (yellow highlight under Permissions)
5.Default settings (no highlight under Permissions)
All defined permissions apply only for the given instance of ArchiveWeb.
On these pages you can allow or deny access to ArchiveWeb features and menu options for individual users or groups, i.e. allow or deny roles. Under Roles, users are assigned to roles. Under Permissions, roles are assigned to users.
The Roles page displays permissions categorized by roles. These permission sets can be granted to users and groups either globally or by server and location. The Roles page helps you revoke or grant a specific permission to one or more users and groups. See the Permissions page to revoke or grant one or more permissions to a specific user or group.
Steps to access the Permissions page
1.Log in to ArchiveWeb.
2.From the main menu, click the username dropdown and then select Manage settings.
3.From the local toolbar, click Roles.
Steps to grant a permission to users or groups:
|
|
NOTE: If the UseGlobalPermissionsForAllServers key is set to true or this key does not exist in the web.config file, the Roles page lists Global settings. In this case permissions for users and groups are set globally and are applicable to all servers. If the UseGlobalPermissionsForAllServers is set to false in the web.config file, all available servers will be listed and permissions can be set for users or groups for a selected server or location. Using this option can slow down the login process because all accessible servers and locations must be searched for role assignments. |
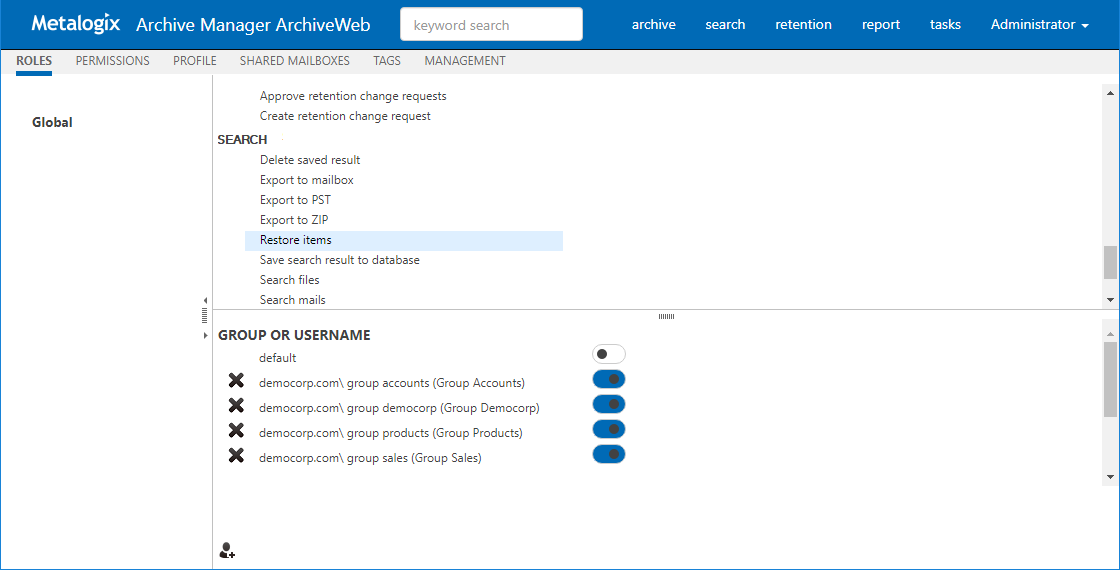
1.Either click Global or select a server to display the permissions in the right-hand pane.
2.Select a permission from the right-hand pane. In the Group and Username section, Default indicates the default settings for this permission. Specific users and groups can be added to this section to change their default permissions setting.
3.To add a user or group:
a.Click 
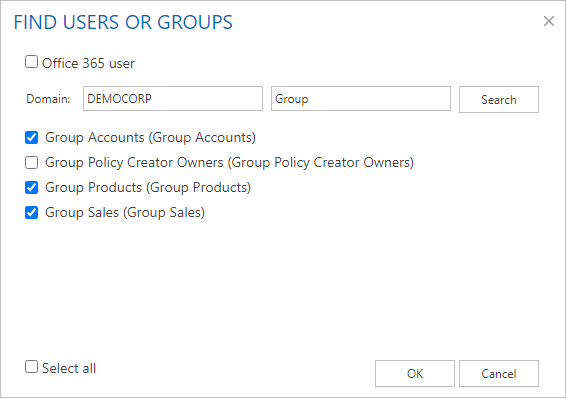
b.In the Find Users or Groups window, enter the Domain name and specify a search expression. User can be searched by user-name, logon-name or display-name. You can use the asterisk (*) as a wildcard in the search criteria. To search for Microsoft 365 users, select Office 365 user and then search for the user.
c.Select the users or groups to add. You can use Select all to add all users and groups in the search result.
d.Click OK to add the selected users and groups to the permission.
4.Set the toggle switch to 

5.To remove a user or group, click 
The Permissions page helps you to revoke or grant one or more permissions to a specific user or group.
Steps to access the Permissions page
1.Log in to ArchiveWeb.
2.From the main menu, click the username dropdown and then select Manage settings.
3.From the local toolbar, click Permissions.
Steps to add users or groups:
1.Click
2.In the Find Users or Groups window, enter the Domain name and specify a search expression. User can be searched by user-name, logon-name or display-name. You can use the asterisk (*) as a wildcard in the search criteria. To search for Microsoft 365 users, select Office 365 user and then search for the user.
|
|
NOTE: Microsoft 365 users must be imported into Archive Manager for Exchange. |
3.Select the users or groups to add. You can use Select all to add all users or groups in the search result.
4.Click OK to add the selected users and groups to the Permissions page.
To remove users or groups:
1.Click 
2.In the Remove users or groups window, select the users or groups to remove. You can remove only users or groups that have been modified. If you want to remove all user or groups that were not modified after being added, you must log out and log in again.
3.Click OK.
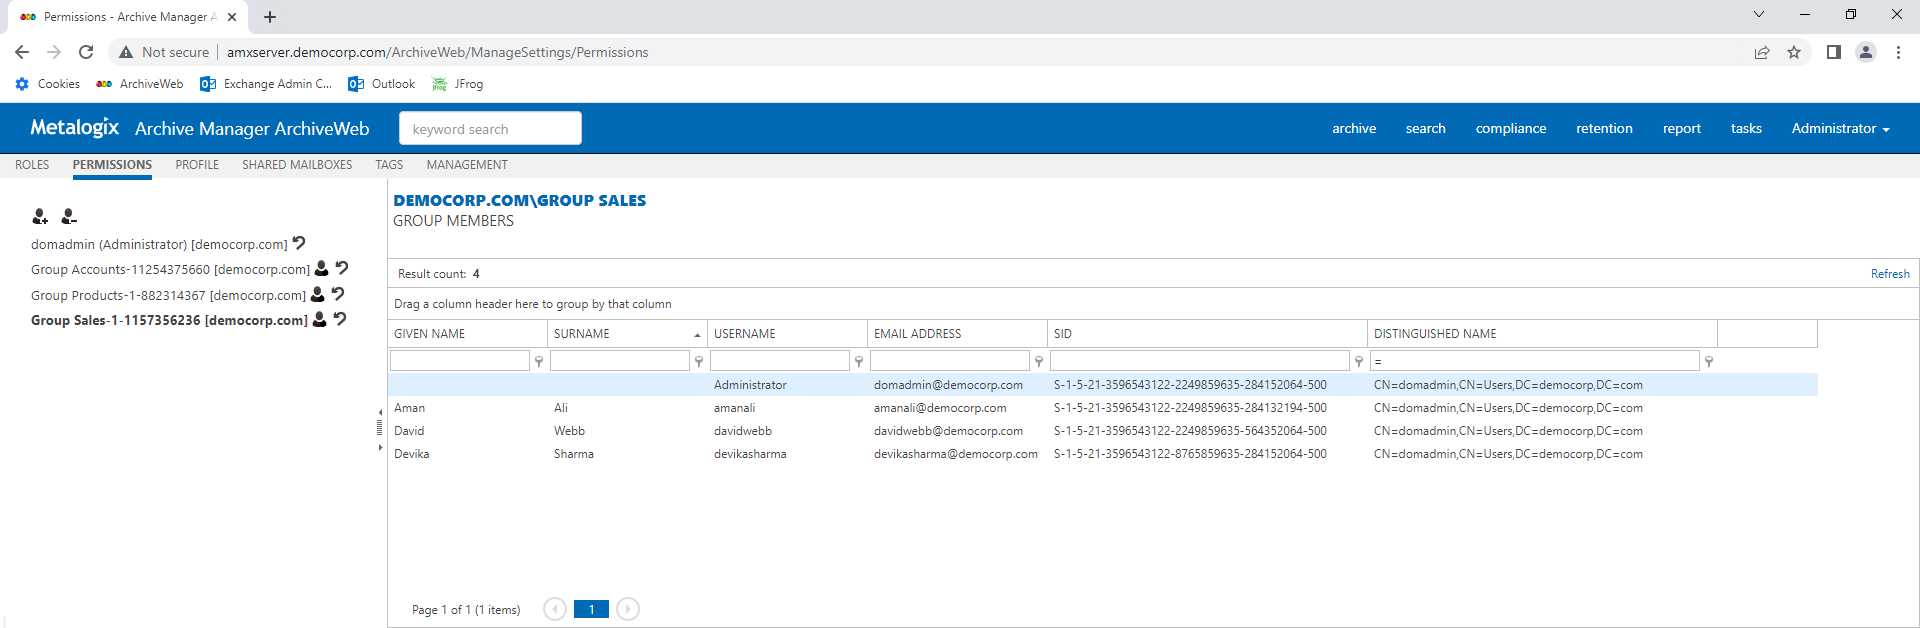
To view group members:
1.Click 
2.Enter a search criteria for any of the columns and click the search filter 
3.Click Refresh to get the latest list of members if users are added or removed from the group in active directory while you are logged in to ArchiveWeb.
4.If groups have more members than can be displayed on the page, they are presented in multiple pages. You can use the scroll buttons at the bottom of the right-hand pane to scroll through multiple pages.
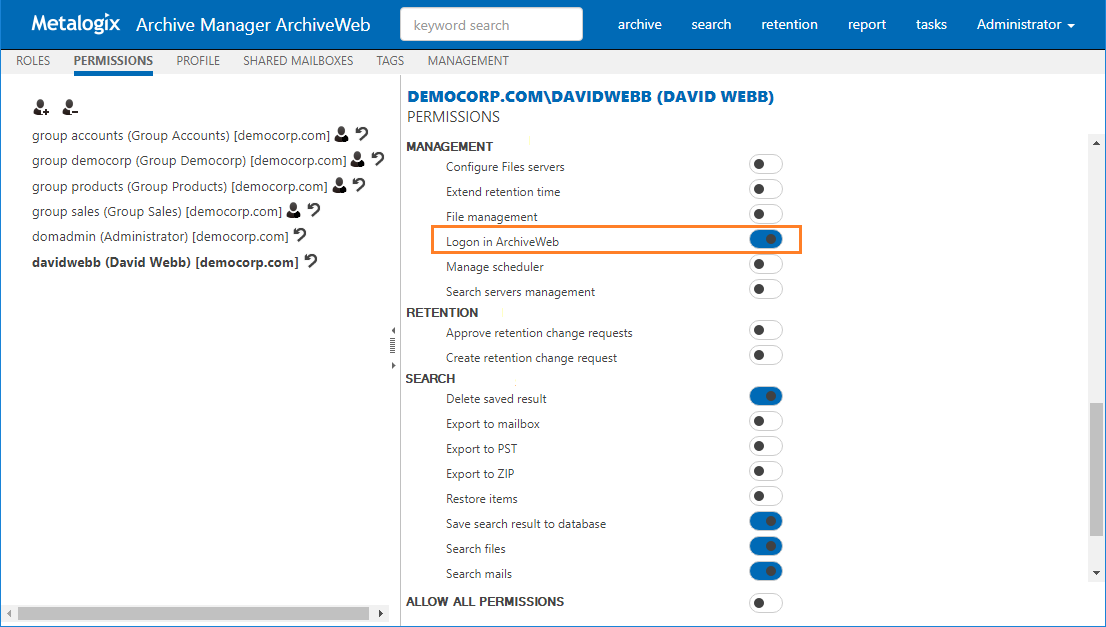
To grant permissions to users and groups:
1.Select the user or group from the left-hand pane. If the user or group is not listed, click
2.The permissions available for the user or group are listed in the right-hand pane. They are categorized for ease of use.
3.Locate the permission that you want to grant or revoke. Set the toggle switch to
4.You can grant or revoke all permissions for a user or group by setting the Allow all permissions toggle switch at the bottom of the right-hand pane.
5.You can reset the permissions to default settings when you click