Zendesk – Get Tickets
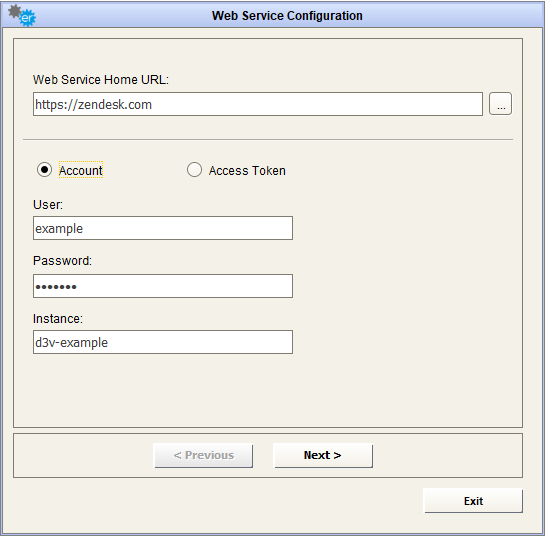
To use the adapter for Zendesk to get tickets, select the authorization method (Account / Access Token) and enter the relevant credentials.
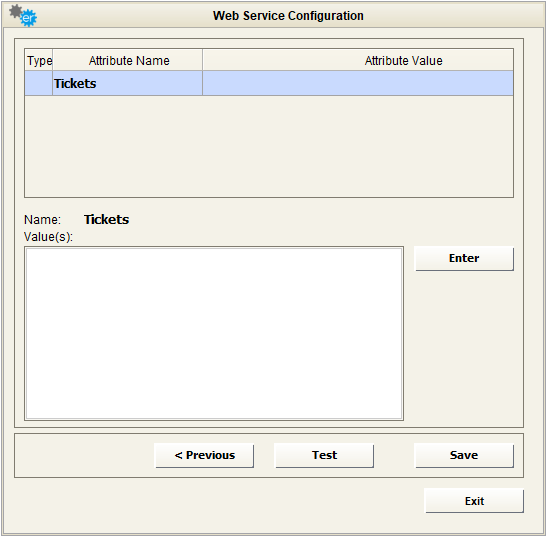
Click the 
Click the
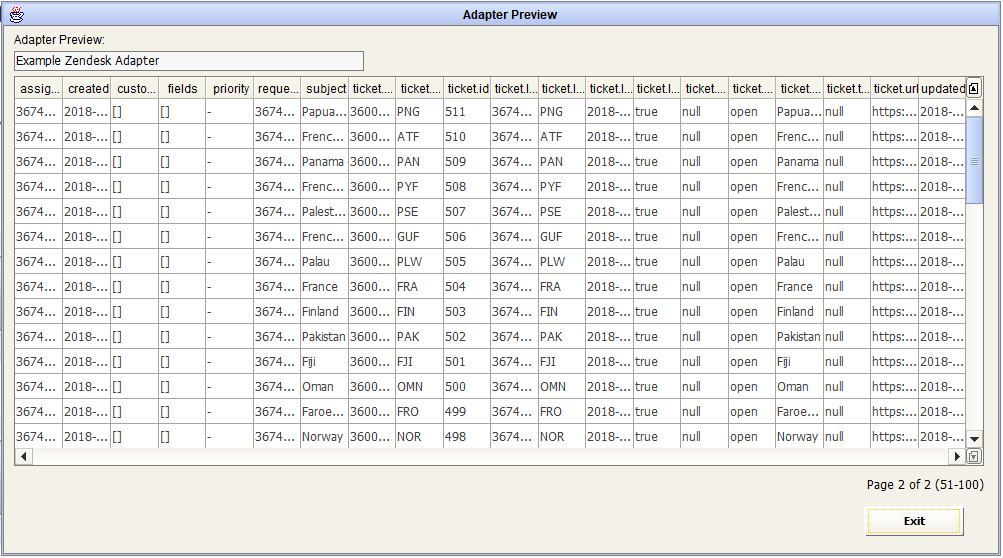
To preview a sample of the first 50 results, click the 
To save the adapter to the DT database, click the 
Zendesk – Create Tickets
To use the adapter for Zendesk to create new tickets, select the authorization method (Account / Access Token) and enter the relevant credentials.
Click the
Click the
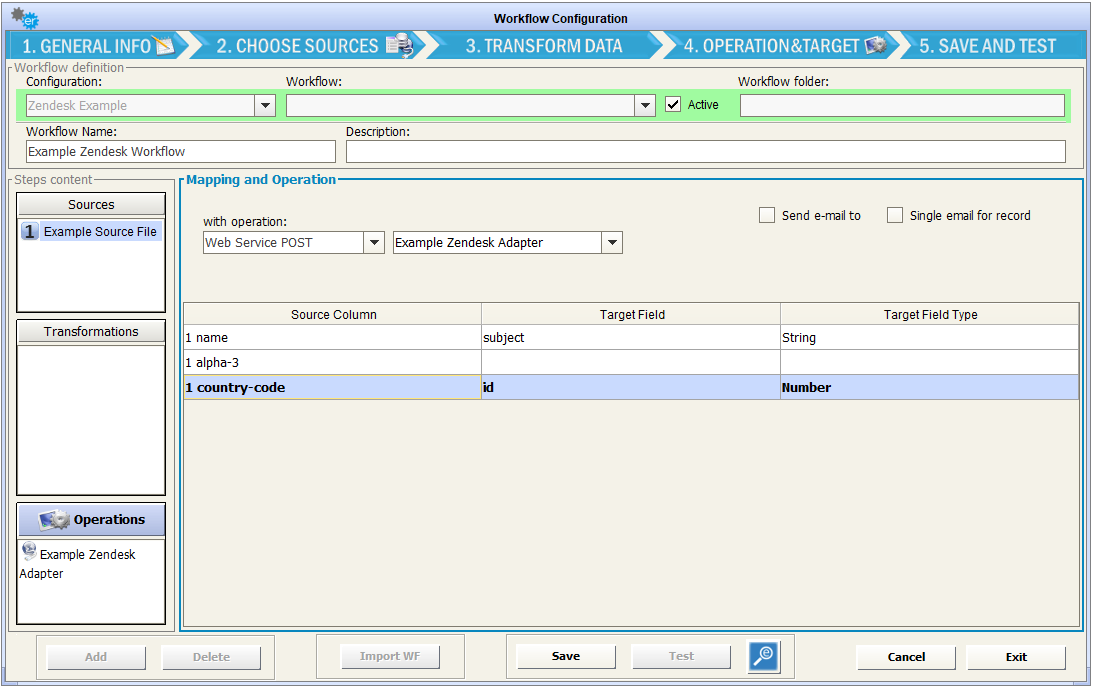
The adapter can now be used as a target endpoint when mapping data in a workflow. To select the adapter as a target, select “Web Service POST” as the operation and select your Zendesk adapter. A mapping table will appear, allowing the source fields to be mapped to relevant target fields for creating Zendesk tickets.
Zendesk – Update Tickets
To use the adapter for Zendesk to update existing tickets, select the authorization method (Account / Access Token) and enter the relevant credentials.
Click the
Click the
The adapter can now be used as a target endpoint when mapping data in a workflow. To select the adapter as a target, select “Web Service POST” as the operation and select your Zendesk adapter. A mapping table will appear, allowing the source fields to be mapped to relevant target fields for updating Zendesk tickets (using the id as a key).
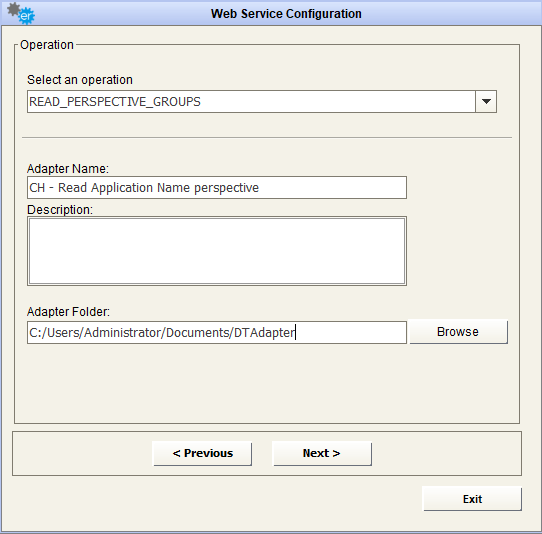
CloudHealth – READ PERSPECTIVE GROUPS
To use the adapter for CloudHealth, to read perspective groups, fill the field “Web Service Home URL” with the CloudHealth URL you want to connect to. Then, provide a valid username/password to connect, or the API credentials (API Key), that can be generated by a valid account.
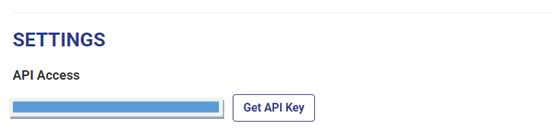
Please, make sure that the account has the correct permissions to use CloudHealth API: http://apidocs.cloudhealthtech.com/#documentation_getting-your-api-key
The
After selecting the desired operation, it is required to enter a name and a description for the adapter into the appropriate fields; the user must browse the file system for the adapter folder (used to save intermediate and result file for adapter execution).
The next button 
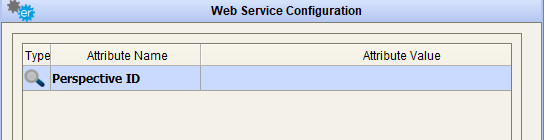
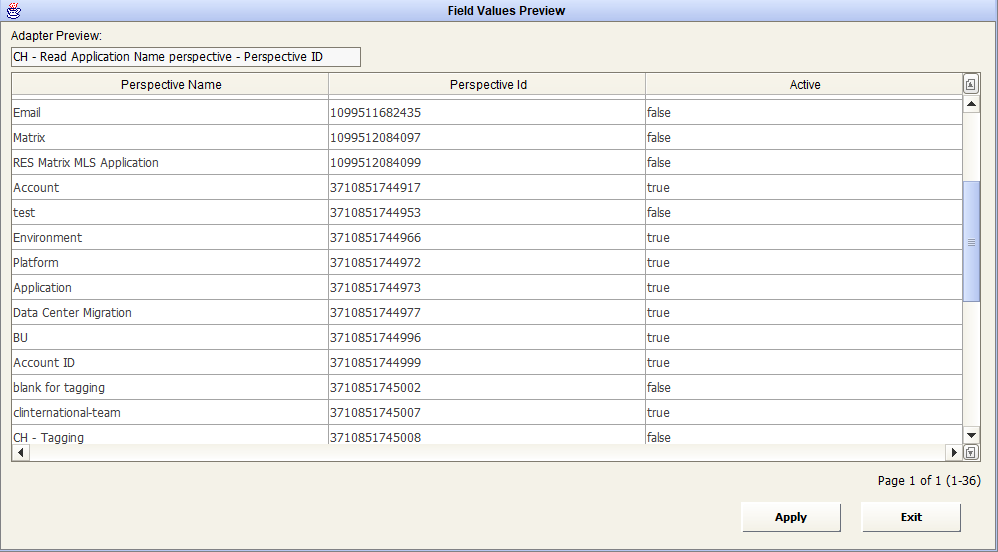
When a lens icon shows beside the parameter name:
this means that user may choose the parameter value from a list of available items. In case of this example, with the double-click on the lens icon, a table appears, with the available perspectives:
Select and apply the selection:
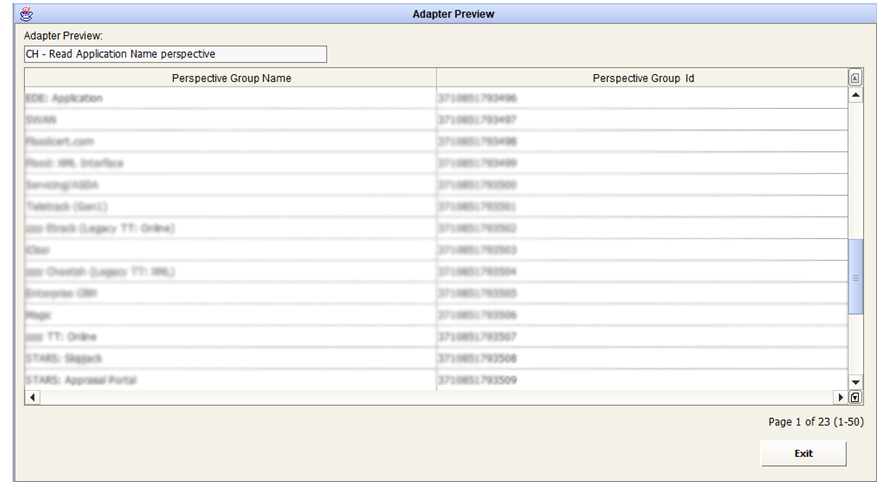
Pressing the button opens a new pop-up window and the response resulting from the Web Service call is displayed, with the name and ref_id of existing groups. These values can be stored in EA model object to manage groups creation and update, based on CH identifier (see after).
Pressing the button will store all the entered parameters for the web service adapter in the DT database.
The button closes the data preview window and goes back to the Web Service configuration form.