Transformation Library Configuration
In the Transformation Library there are some pre-built parsers (based onto XSLT) to apply transformations to the data managed through the workflow (see after):
Data cleanse (like Data Type Check,Not Allowed Text Check)
Data format (like Format Date - Format Number - Capital/Small letter - Suffix/Prefix - Replace Text)
Data structure change (like Combine Field - Split Field - Add Fixed value field)
Data filter (like Fixed values, Interval Value)
Data Derivation (like Sum values in rows/columns, counting values in rows/columns, Match keys and pick values)
These kinds of XSLT files can’t be modified or deleted by the user.
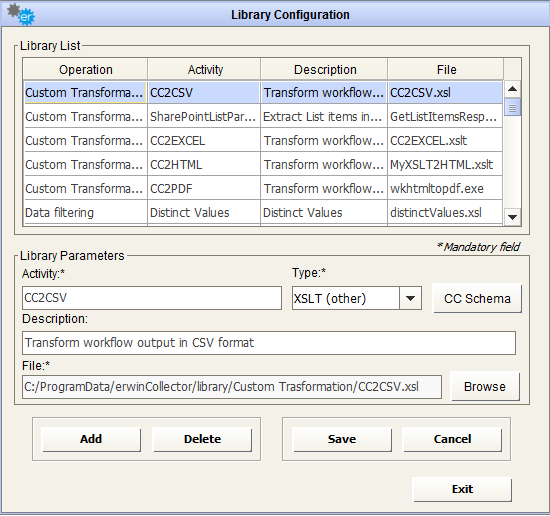
The top field of the window shows the contents of the XSLT library, with a short description and the relative XSL file.
Selecting an activity from the list automatically completes the Library Parameters fields with the parameters of the library.
Optionally, it’s also possible here to define custom XSLT library elements to be used in the workflow configuration for input or output data formatting (see later). The custom parsers must have been developed in advance, with a proper XML/XSLT editor.
To add a new custom XSLT to the library, press the 
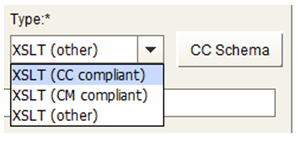
A custom transformation could be alternatively defined as:
CC compliant – output is XML, compliant with the CC internal XML schema
CC uncompliant – output is XML, with a different schema, or HTML, or TXT, or MS Excel
CM compliant – output is XML, compliant with CM operation schema (only to be used to load in CM models multiple intersection object type at once)
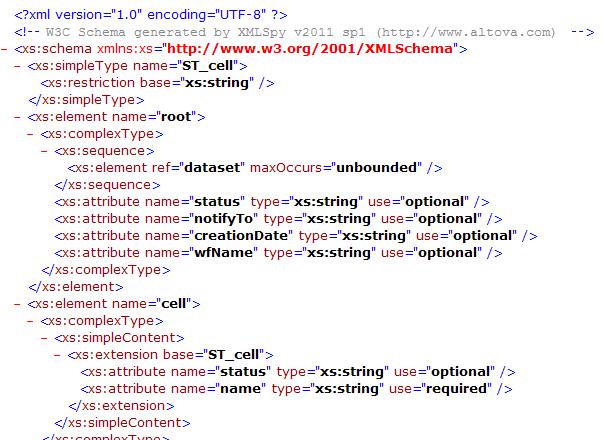
It’s possible to have a preview of the CC internal Schema / CM operation Schema pressing the 
The 
The 
The 
The 
Configurations
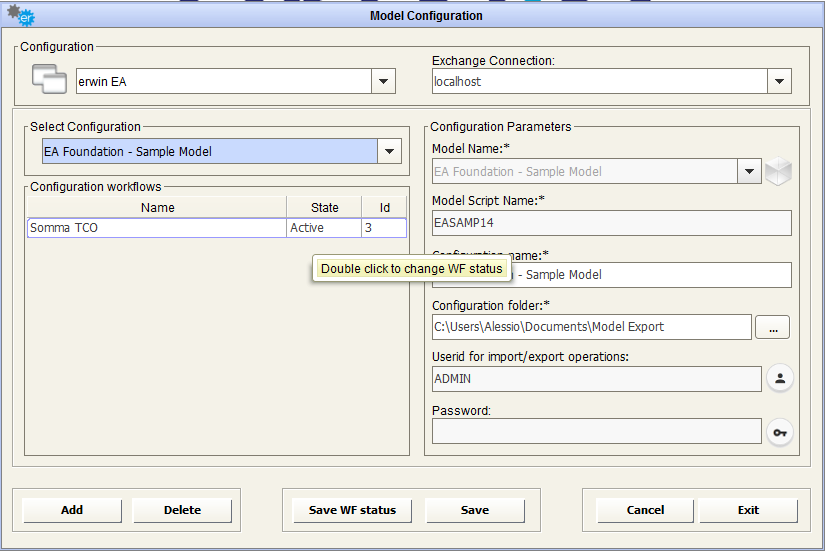
Model Configuration
If logged to a CE Repository, this window can add, delete or modify a model configuration. A model configuration is a group of parameters that:
Allows DT to connect to models in CE repository
Allows the user to configure preferences (publication sets, export folder, etc.)
In order to prevent inconsistency that may arise if two or more configurations address the same data, one model can be associated to only one configuration.
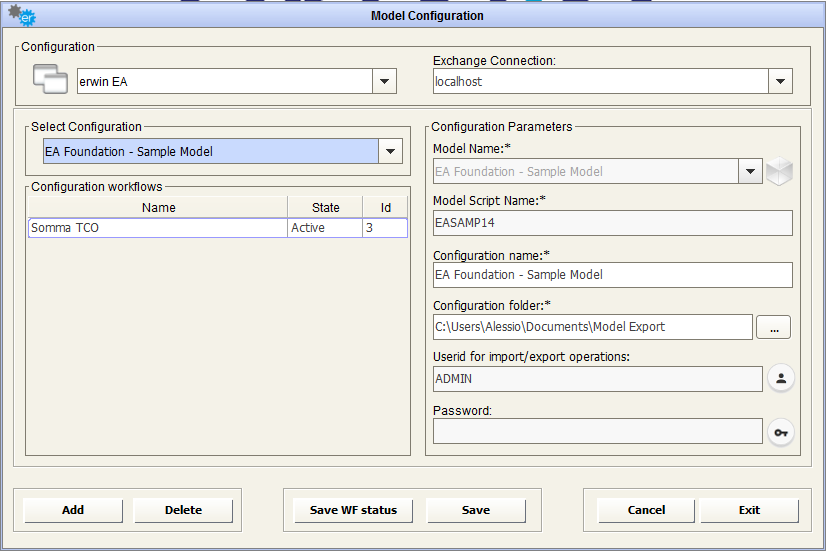
The first step is to select a configuration from the pick list, or add a new one by clicking the 
Selecting an existing configuration fills all fields in the form automatically.
On pressing the “Add” button, the user is required to set the configuration name, to select a model name and an export folder, which will be also the working folder for automatically created adapters to import/export data from workspace.
In particular, the user should select model name and preferences in the section “Model parameters”. All fields are mandatory.
In detail, the following parameters have to be defined:
Model name – select the name of the model you want to work with.
Configuration Folder – browse to a path where you wish the model backups and exports to be saved
At the left side of model configuration window, is a list of the existing workflows created to manage information flows in and out of that model. In particular, you can see the name, the activation status and ID of each (useful for troubleshooting purposes, see later).
You can change “Active/Not Active” status of the single workflow by double-clicking on status cell, and then simultaneously saving the current set with the button.
To save the Model Configuration use the 
Pressing the 
To delete an existing configuration just select it from the configurations list and press the 
|
|
If a configuration is deleted, all the adapters, jobs and workflows associated to the configuration will be deleted. |
The
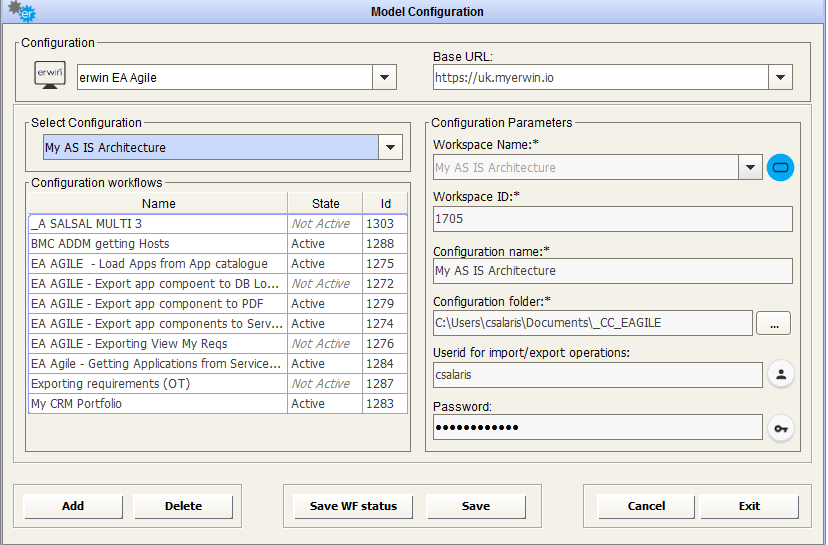
Workspace Configuration
If logged in to EA Agile or EA Agile V3, this window is to add, delete or modify a workspace configuration. A workspace configuration, in a similar way to CM model configuration, from the tool perspective, is a group of parameters that:
Allows DT to connect to an EA Agile workspace
Allows the user to configure preferences for export folder
In order to prevent inconsistency that can arise if two or more configurations address the same data, one workspace can be associated to only one configuration.
The first step is to select a configuration from the pick list, or add a new one by clicking the
Selecting an existing configuration fills in all fields on the form automatically.
On pressing the “Add” button, the user is required to set the configuration name, to select a workspace name and the export folder, which will be also the working folder for automatically created adapters to import/export data from workspace.
In particular, the user should select model name and preferences in the section “Model parameters”. All fields are mandatory.
In detail, the following parameters have to be defined:
Workspace name – select the name of the workspace you want to work with.
Configuration Folder – browse to a path where you wish the exports to be saved
At the left side of model configuration window, is a list of the existing workflows created to manage information flows in and out of that model. In particular, you can see the name, the activation status and ID of each (useful for troubleshooting purposes, see later).
You can change “Active/Not Active” status of the single workflow by double-clicking on status cell, and then simultaneously saving the current set with the button.
To save all the Model Configuration use the
Pressing the
To delete an existing configuration just select it from the configurations list and press the
|
|
If a configuration is deleted, all the adapters, jobs and workflows associated to the configuration will be deleted. |
The