|
Navigation: Saving or Running a Migration Job > Exporting Jobs to an Excel File |
You can export a selected job or multiple jobs from the Job List section into a Microsoft Excel file. The export will include all of the operations within each job (whether it is a migration action or some other action), and their details. This is to help users better understand their migration data and results, and provides another way to review the resulting logs.
In addition to the log details that are provided, there are also a number of tables and charts that can be accessed in different tabs within the Excel file. These tables and charts will help breakdown the information in a more visible manner.
To export one or more jobs to an Excel file:
1.In the Job List, select the job(s) you want to export.
2.Use one of the following options:
§From the Job List menu, select Export Excel
OR
§Right-click and choose Export selected job to Excel.
3.Save the file to the desired location.
By default the Excel file will open after it has been created. This process may take a few minutes depending on the size of the selected job(s) and the number of actions in the log(s).
|
Navigation: Saving or Running a Migration Job > Exporting Jobs to an Excel File > Information in Exported Excel Files |
When an Excel file is exported from the Metalogix Content Matrix Job List there are a number of page tabs that can be viewed. Each page tab will display a different set of data, and some of these tabs will also display pivot graphs (with pivot tables behind them).
NOTE: The data within all of these Excel tabs (both the tables and the graphs) should only be considered a starting point when looking at your migration data. You can modify the existing graphs through various methods, such as applying filters, changing the data values, etc. You can also take the "raw" data from the LogItems tab and use it to create your own graphs or sets of data as required.
The exported file contains the following tabs:
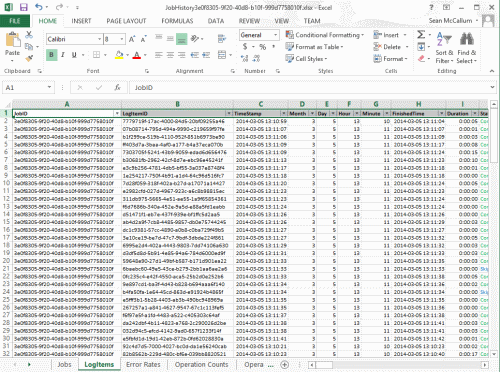
·Jobs - All of the specific jobs that are included in the export. This includes migration jobs as well as other actions.
·LogItems - All of the operations that have been run by Metalogix Content Matrix and provide all of the logging details that are available in the Log Viewer and Log Item Details windows. Some examples of these operations are: adding lists, adding content types, copying documents, adding users, updating lists, etc.
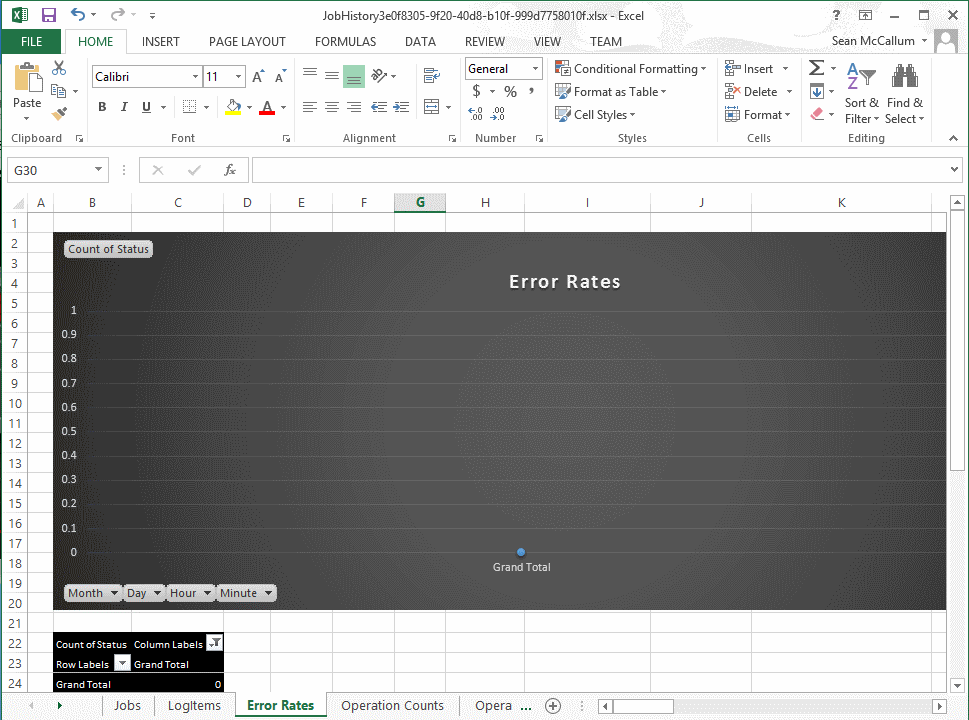
·Error Rates - A a graph that represents the number of errors and warnings that Metalogix Content Matrix encounters during a migration on a "per minute" basis. The vertical axis will list the number of errors/warnings that are encountered (at the specified time), and the horizontal axis lists the amount of time (displayed in a "per minute" value). The horizontal axis can also be changed to display in month, day, or hour time values as well. Below the graph is a table that provides a different view of the same error/warning breakdown.
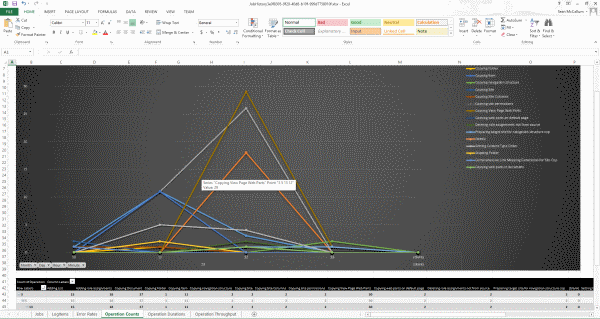
·Operation Counts - The number of operations/actions that are run over a period of time. Some examples are: copying sites, copying lists, copying documents, adding SharePoint groups, adding users, copying permissions, etc., and each operation has its own line representation on the graph. The vertical axis lists the number of operations that are running (at the specified time), and the horizontal axis lists the amount of time (this is displayed in a "per minute" value). The horizontal axis can also be changed to display in month, day, or hour time values as well. Below the graph there is a table that provides a different view of the same migration operation data.
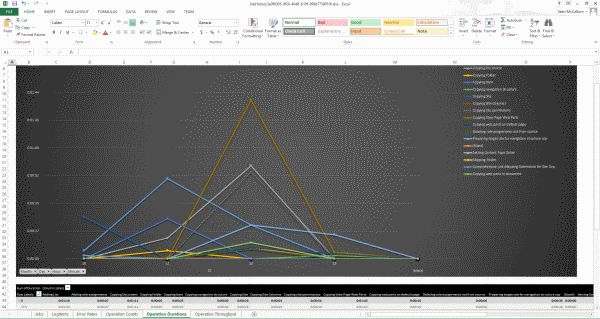
·Operation Duration - The total duration of time for each operation/action type against the total migration time. This is potentially the most confusing graph to read in the exported Excel file. The vertical axis lists the total duration time for each action. This is determined by finding the difference between each operation/actions Time Started and Time Finished values, and then adding the totals together for all of that operation/actions of that type that are running. This is then displayed against the horizontal axis which lists the time (displayed in a "per minute" value) for the migration. The horizontal axis can also be changed to display in month, day, or hour time values as well. Below the graph there is a table that will provide a different view of the same migration data.
An example of how to read this graph is: if at minute 25 (of the hour, not the 25 minute of the migration) a large number of small documents are copied and completed (all in the 25th minute), then at minute 25 in the graph there will likely be a spike in the "duration time" for the "Copying Document" operation/action. If each document was copied in 2 seconds, and there were 41 small documents, then the Sum of Duration value would be listed as 82 seconds (or 0:01:22). So the results in the graph would show a spike for the Copying Document operation/action and minute 25, with a value of 0:01:22.
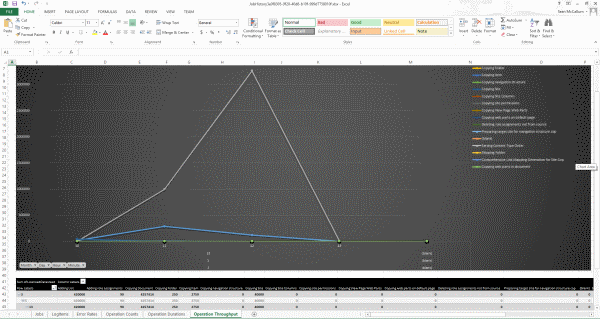
·Operation Throughput The amount of data/throughput (in MB) that is migrated on a "per minute" basis. The vertical axis lists the amount of data that is being pushed through Metalogix Content Matrix for a given operation (at the specified time), and the horizontal axis lists the time (displayed in a "per minute" value) at which that the action was performed. The horizontal axis can also be changed to display in month, day, or hour time values. Below the graph there is a table that will provide a different view of the same throughput data.
|
Navigation: Saving or Running a Migration Job > Monitoring and Managing SPO Migration Jobs that Use the Import Pipeline |
For migrations to SharePoint Online that use the Import Pipeline, you can monitor the progress of the job, including Microsoft-side processing, via the SharePoint Online Migration Jobs window.
NOTE: This window is used to monitor Objects and Actions Supported Using the Import Pipeline only. Any components of a migration that use CSOM can be monitored via Log Item Details.
To launch the SharePoint Online Migration Jobs window:
1.In the Job List, select the migration job you want to monitor/manage.
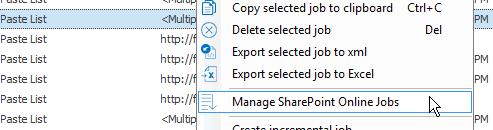
2.Right-click and choose Manage SharePoint Online Jobs.
NOTE: This option is available only if the Use Import Pipeline option was selected on the Configure Copy Options - List Content tab, and the window can be open for only one job at a time.
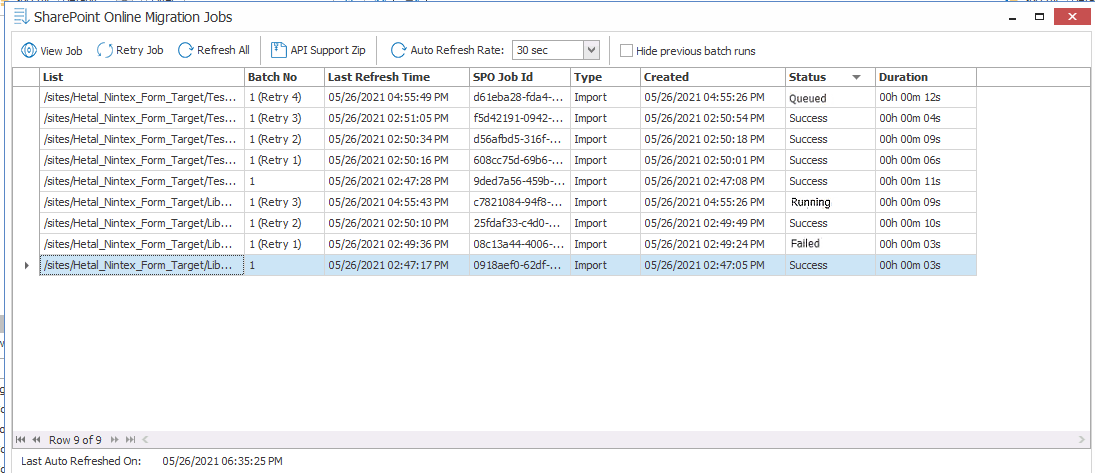
Status Messages
The following are the status messages that display in the SharePoint Online Migration Jobs window.
NOTE: By default, every run of each batch displays in the SharePoint Online Migration Jobs window. If you want to show only the latest status of each batch, check the Hide previous batch runs box.
·Processing - Content Matrix is preparing batches for upload to the Import Pipeline.
·Queued - The batch is awaiting upload to the Import Pipeline.
·Running - The batch has been uploaded to the Import Pipeline and is being processed by Microsoft.
·Success - The batch has been processed successfully.
·Warning - The batch has been processed with one or more issues.
·Failed - Microsoft-side batch processing has failed.
To view batch details:
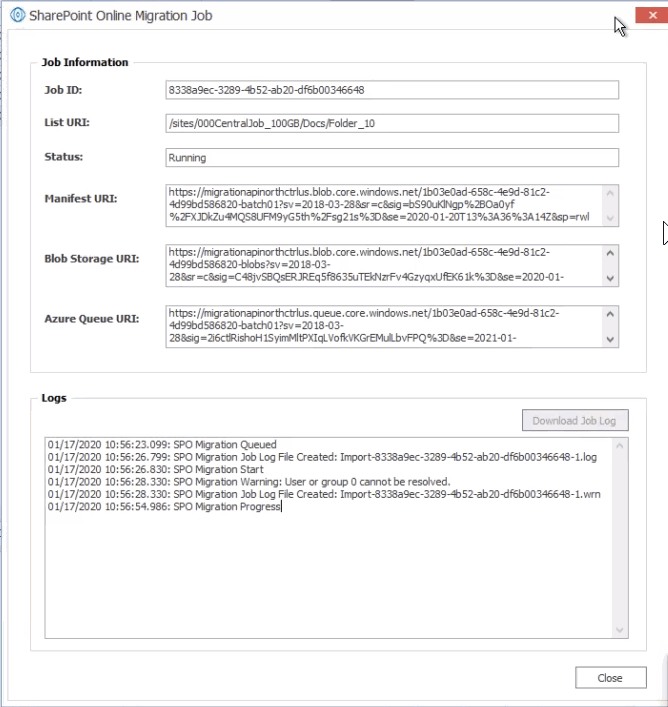
1.Select the batch whose detail you want to view.
2.In the ribbon menu, click View Job.
NOTE: The identifying URIs (Manifest, Blob Storage, and Azure Queue) are generated by Microsoft and can be used by Support for troubleshooting purposes.
While the job is running, you can view the progress in the Logs section of the window.
EXCEPTION: The progress of a running job cannot be viewed if it was configured using PowerShell.
Once the job has finished processing (or if the job was configured using PowerShell), the [Download Job Log] button becomes enabled, and you can view complete job details.
Job List Upload Duration Column
The column Upload Duration in the Job List displays the time it took for the job to upload via the Import Pipeline. If the migration was done with CSOM only, or the target was SharePoint on premises, the field will be blank.
Retrying Failed Batches
Content Matrix automatically retries a failed batch up to five times by default. (This can be changed via the EnvironmentSettings.xml MaxAzureBatchRetryCount key.) You can also manually retry batches directly from the SharePoint Online Migration Jobs window. Highlight each batch you want to retry and click Retry Job in the ribbon menu.
TIP: You can filter the Status column to display only failed batches.
Note About Expired Azure SAS URLs
You can retry job batches any time before the Azure SAS URL for the job expires (which is 30 days for private containers and a number of days determined by Microsoft for SharePoint Online provided Azure containers). If you want to resubmit a job after this time period, you will need to re-create the migration job.
Creating an API Support Zip File to Send to Quest Support for Troubleshooting
To assist Quest Support with troubleshooting, you can generate a zip file, which includes several xml files, a log file and a Summary file, for all batches that used the Import Pipeline.
NOTE: A standard Support zip file includes the same content, but only for batches with a status of Failed or Warning so that Quest Support may provide more efficient troubleshooting.
1.Select the batch(es) for which you want to create the zip file. (Note that you can multi-select to create a separate zip file for each batch.)
2.In the ribbon menu, click API Support Zip.
3.Save the zip file(s), and send to Quest Support for troubleshooting.
By default, a zip file's name is its SPO Job ID. You can, however, rename it.
NOTE: If the Azure SAS URL has expired, only the log file and Summary file will be included in the zip file. (A full API Support zip file may be generated between the time that the Azure SAS URL expires and Microsoft destroys a container.)
Many migration actions can be performed as a separate action after the initial migration is performed.
The following objects and settings can only be copied as a separate, post-migration task:
·SharePoint Email Notification Settings
The following objects and settings can be copied both as part of a full migration or as a separate action: