|
Navigation: Saving or Running a Migration Job > Creating and Running a PowerShell Script from the Jobs List > Running a PowerShell Script |
Once a PowerShell script has been created, you can run it from the PowerShell console.
To run the PowerShell script:
NOTES:
· If you have more than one edition of Content Matrix, only one edition can be run per PowerShell session.
·If Content Matrix settings or a connection to a Distributed Database is changed, in order to apply new settings all PowerShell sessions must be restarted.
To add the PowerShell cmdlets for the application framework:
1.Open a Powershell ISE or PowerShell console session.
2.Add the PowerShell snap-ins by pasting in the following text:
if ( $PsVersionTable.PSVersion.Major -lt 3 ) { Write-Host "Windows PowerShell Version 3.0 or later needs to be installed in order to run Content Matrix PowerShell scripts."; exit; }
if ( (Get-PSSnapin -Name Metalogix.System.Commands -ErrorAction SilentlyContinue) -eq $null ) { add-pssnapin Metalogix.System.Commands | out-null }
if ( (Get-PSSnapin -Name Metalogix.SharePoint.Commands -ErrorAction SilentlyContinue) -eq $null ) { add-pssnapin Metalogix.SharePoint.Commands | out-null }
if (Get-Command Set-MetalogixJobPrerequisites -ErrorAction SilentlyContinue){ Set-MetalogixJobPrerequisites -Value "Content Matrix Console - SharePoint Edition" }
2.Set the directory to the location where the PowerShell script is located.
3.Enter the name and extension of the PowerShell Script (at its specified location), and the script will run.
In the case that you are running a script from the same directory you would use the format: .\[ScriptName].ps1. So if your PowerShell scrip was named "ResourceScript.ps1" then you would enter: .\ResourceScript.ps1 into the window, and the script would run.
If the script is in a different directory, you would enter the location of that directory relative to your current location, followed by the script name. For example, if your prompt is at the "C:\" drive and your PowerShell script, named "ResourceScript.ps1" is on the desktop you would enter: C:\Users\[User]\Desktop\ResourceScript.ps1, and the script would run.
NOTE: In some cases the Execution Policy may prevent you from running a PowerShell script. In this case you will likely see the message: [Script].ps1 cannot be loaded because the execution of scripts is disabled on this system. Please see "get-help about_signing" for more details. In this case, running the command: set-executionpolicy RemoteSigned should change the existing script policy to allow you to run these scripts for your location. It is advised that you check with your System Administrators before doing this to ensure that no Company Policies are being broken by this action. If this is an action you need to take, you should only need to run this command once.
The migration will begin, and any warnings and/or errors that are encountered in running the script will be displayed in the PowerShell window.
|
Navigation: Saving or Running a Migration Job > Creating and Running a PowerShell Script from the Jobs List > Scheduling a PowerShell Script to Run as a Windows Scheduled Task |
Once a PowerShell script has been created, you can run any migration job as a scheduled task on the system that the client application is installed on. This can be any migration action that exists in the Job List section, whether it's a migration job that was saved or a job that was previously run.
The Generate PowerShell Script option saves configurations for the selected job(s) as a PowerShell script. After the script has been saved, you must create a Windows Scheduled task directly in the Windows Task Scheduler.
Once these jobs have been created as scheduled tasks they can no longer be viewed (as scheduled tasks) in Metalogix Content Matrix. If you want to make any other modifications or remove the task you can do so directly in the Windows Task Scheduler. If a task has been scheduled, the system will be able to run the task at the appointed time(s), regardless of whether Metalogix Content Matrix client application is open.
To schedule a PowerShell script to run via the Windows Task Scheduler:
1.On the system where the scheduled task will run, open the Windows Task Scheduler.
2.Choose Actions > Create Task.
3.Enter a task Name and Description.
4.In the General tab, go to Security options and specify the user account that the task should be run under. Change the settings so the task will run regardless of whether the user is logged in.
5.Select the Triggers tab, and click [New] to add a new trigger for the scheduled task. This new task should use the On a schedule option. The start date can be set to a desired time, and the frequency and duration of the task can be set based on your specific needs. Click [OK] when your desired settings are entered.
6.Select the Actions tab and click [New] to set the action for this task to run. Set the Action to Start a program.
7.In the Program/script box enter "PowerShell."
8.In the Add arguments (optional) box enter the value ".\[Your PowerShell Script Name]." For example, if your PowerShell Script is named "Migration1.ps1" then you would enter ".\Migration1.ps1" as the value.
9.In the Start in (optional) box, add the location of the folder that contains your PowerShell script.
NOTE: The location used in the Start in box will also be used for storing the scheduled task run times, the job history for the copies, and any additional logging that may occur.
10.When all the desired settings are made, click [OK].
11.Set any other desired settings in the Conditions and Settings tabs.
12.Once all the desired actions have been made (or added), click [OK].
The task will be immediately set, and is ready to run.
After the scheduled task has run, a new entry will be added to Metalogix Content Matrix's Job List section.
|
Navigation: Saving or Running a Migration Job > Triggering a Job in the Content Matrix Console to Run Using PowerShell |
As an alternative to generating a PowerShell script, you can use PowerShell to trigger jobs that have been created in the Content Matrix Console.
To access the PowerShell cmdlets for triggering jobs to run:
Open a PowerShell or PowerShell ISE session and add the PowerShell snap-ins for the application framework.
The following cmdlets for running jobs are now available:
·Get-MLJobs
·Invoke-MLJob
To retrieve information about jobs in the Console:
1.Select (from the PowerShell ISE Command Window) or enter Get-MLJobs.
2.(Optional) Enter one or more of the following parameters if you want to filter jobs:
·JobNameOrTitle
·Source
·Target
NOTE: If you do not apply filters, all jobs in the Console will be retrieved.
3.Run the cmdlet.
Example scripts:
Get-MLJobs
Get-MLJobs -Source http://win-pvf4cd21m55/HR -Target https://metalogixsoftware.sharepoint.com/sites/HR -JobStatus Failed -JobNameOrTitle "Paste List"
To run one or more jobs:
1.Select (from the PowerShell ISE Command Window) or enter Invoke-MLJob.
2.Select or enter additional parameters. Use the information in the following table for guidance.
|
Parameter |
Notes | ||
|---|---|---|---|
|
JobID |
·You can obtain the JobId by running the Get-MLJobs cmdlet. ·You can run multiple jobs using the PowerShell Pipeline variable. | ||
|
JobStatus |
Valid statuses are:
| ||
|
Quiet |
Use this parameter if you do not want to display a status of the job as it is running. | ||
|
RunRemotely |
Use this parameter if you want to submit the job for Distributed Migration. NOTE: This option is valid for SharePoint Edition only. |
3.Run the cmdlet.
Example Scripts
Invoke-MLJob -JobId '92416012-4b69-4d4e-b3c2-984cde279909'
Invoke-MLJob -JobStatus Failed
Run multiple jobs using the PowerShell pipeline variable:
Invoke-MLJob -JobID 'c8176dd1-f1fd-484c-bc66-c002f5406f05' -RunRemotely
'5ca0d97f-4d1d-445f-a6d9-3292abe89a6f', '0a2e0874-a759-46f4-b459-bb98ec2991ad' | Invoke-MLJob '30bf6d71-0a28-4012-b612-2d22562b5b46', '0b094765-46e0-4919-8922-cc5fe841e1f5' | Invoke-MLJob -Quiet
|
Navigation: Saving or Running a Migration Job > Job Log Files |
You can view the progress of a migration tab in real-time via interactive log files. The logs are fully searchable.
To view an interactive log:
After starting an action, click Details>> in the progress dialog box.
NOTE: All logging in Metalogix Content Matrix is done through jobs. If a job list is deleted from the Job List, all logging for those actions will also be deleted. There is no backup for the job lists, unless the job is manually saved to another location. Once a job list is deleted, all logging for the actions within that job list are gone. Metalogix Content Matrix will automatically hold any job lists created through any copy or compare actions, in the Job Lists section, and these job lists can only be deleted through the appropriate Delete commands. The job lists can also be manually selected and saved through the Job list section.
There are two types of jobs in Metalogix Content Matrix:
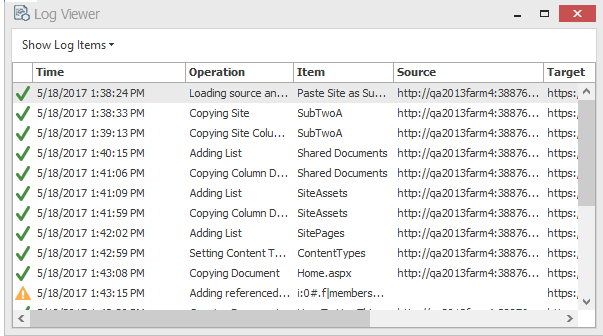
A job list is a collection of job items. A Job list is created for each copy or compare action that is made. Any "Copy" action/job that is in the Job List section can be used as the base of an incremental copy job. Job items can be viewed in the Log Viewer, by opening a job list. There are three basic ways to open a job list to access the Log Viewer:
·Double-click on a job list.
·Select a job list, then in the Job List section of the toolbar click View Log.
·Select a job, right-click, and choose View log.
Job items are job files, or logging, for individual items within the scope of an action. For example, if a SharePoint site is copied, there would be a job item for adding each list and each item in that list, and one job item for adding or creating each site or sub-site. If a SharePoint list with five documents is copied, then there would be a job item for adding/creating the list, and then one job item for adding each of the documents.
Job items are job files, or logging, for individual items within the scope of an action. For example, if a SharePoint site is copied, there would be a job item for adding each list and each item in that list, and one job item for adding or creating each site or sub-site. If a SharePoint list with fie documents is copied, then there would be a job item for adding/creating the list, and then one job item for adding each of the documents.
From the Log Viewer you can select and view any job items that exists within that job list.
NOTE: Some actions in Metalogix Content Matrix have the ability to run with Verbose Logging. This option will increase the size of the log file.