Companies usually define within their IT department rules regarding storage space mailboxes or groups may occupy on the MS Microsoft Exchange server, to avoid mail server overloading. The Threshold job is used specifically for that purpose.
By defining the maximal size of a mailbox on the Threshold tab (see the section "Threshold tab) you may actually specify space having been reserved for it on the MS Microsoft Exchange server. Other specifications (Upper and Lower values) are defined there as well.
When the Threshold job starts running, all mailboxes listed on the Threshold tab whose size has reached their respective Upper value will be archived until their respective Lower value has been reached (for each mailbox there can be assigned different threshold values). This way you can easily arrange enough space on your MS Microsoft Exchange server, so that CPU efficiency is preserved at a desirable level.
Example: The mailbox has a limit of 100 MB (defined in MS Microsoft Exchange Server). The administrator defines the threshold values 50/90. If the mailbox size reaches 90% of the limit (90 MB), the Threshold job will archive the mailbox until the size of the mailbox drops under 50% of the limit (50 MB). The threshold job archives the oldest messages first (default settings). The order of the messages can be modified using the scheduler service config keys (ThresholdSortBy) in <installdir>\ Metalogix\MAM4Exchange\ Services\ PamExSchedulerSv\ PamSchedulerSv.exe.config. The following values can be used:
·Order by last modification date (ascending, i.e. oldest first) [0]
·Order by received date (ascending) [1]
·Order by size (descending, i.e. biggest first) [2]
|
|
NOTE: After config file modification the services must be restarted. |
Further, it is possible to exclude specific messages from threshold processing. The Threshold job will archive the mailboxes but it will filter out specific messages based on your configuration. Available filtering for Threshold job:
·Filtering by message size
·Filtering by age
·Filtering by folder
·Filtering by message class
This filtering can be also configured using the scheduler service config keys in <installdir>\ Metalogix\MAM4Exchange\ Services\ PamExSchedulerSv\ PamSchedulerSv.exe.config. For more information see the following table:
|
Filtering |
Config key |
Value/default |
Description |
|
By message size |
ThresholdMinimumSize |
4 |
Minimum size (in KB) of the email which can be included in the threshold processing. All emails smaller than the defined size are not archived. |
|
By age |
ThresholdMinDate |
0 |
If value > 0, messages which are younger than x days are excluded from processing. |
|
By folder |
ThresholdExcludeFolders |
- |
Semicolon separated list of exclude folders defined for the threshold job. The syntax is the same as in case of group exclude folders. |
|
By message class |
ThresholdMessageClasses |
- |
Semicolon separated list of include message classes for the threshold job. |
The Threshold job runs in the background with pre-defined settings. Archived emails are replaced with a shortcut and the space is released for further usage.
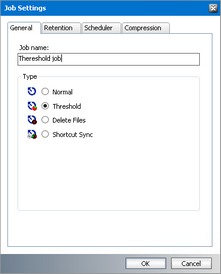
To define a Threshold job:
1.In Manager view, click on the Jobs tab.
2.Click with your right mouse button inside the left pane. A context menu appears. In the context menu select New job.
3.In the Job Settings window that appears, select Threshold on the General tab. Enter a name in the Job name text box. Then specify your scheduling criteria on the Scheduler tab and other settings on the remaining tabs.
|
|
NOTE: There can be only one Threshold job defined.. |
The purpose of the Delete Files job is to purge the following items from the archive:
·Items marked for deletion upon expiration of their Retention + Keep alive time
·Items whose Delete time (the maximum time that the items can reside in the archive), if such was defined, has elapsed.
There can be only one Delete Files job defined. As with other scheduled jobs, the Delete Files job runs in the background with predefined settings.
|
|
CAUTION: This job permanently deletes files from the archive. |
|
|
TIP: Undelete feature of Archive Manager for Exchange allows users to list archived items that are marked for deletion in Outlook folder. If the Undelete feature is implemented, user can perform Undelete operation on such items marked for deletion. After the undelete operation the item(s) will have the same status as regular archived items. Upon expiration of their retention time they will still reside in the archive. |
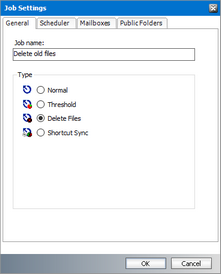
To define a Delete Files job:
1.In Manager view, click on the Jobs tab.
2.Click with your right mouse button inside the left pane. A context menu appears. In the context menu select New job.
3.In the Job Settings window that appears, select Delete Files on the General tab.
4.Enter a name in the Job name text box.
5.Click the Scheduler tab and set the scheduler properties as described below:
a.Scheduling starts at - enter the date manually or by clicking the upward or downward arrows, and time (directly by overwriting the time).
b.Scheduling ends on - select this option to specify a date when the scheduling ends. Click the date picker icon to open the calendar and select the month and date. The default is Never when the option is not selected.
c.Schedule interval - specify a period following which the job restarts itself. Click the upward or downward arrow. The period can be set in minutes or days.
d.Allowed time [hours] - enter the archiving period by clicking the upward or downward arrow. The minimum allowed time is 1 hour.
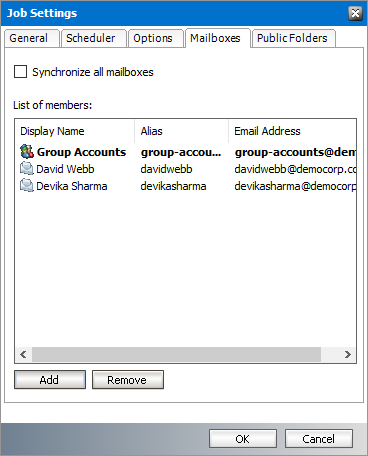
6.Click the Mailboxes tab and select the mailboxes as described below:
a.Include all mailboxes - select this option to include all mailboxes for the Delete Files job. When this option is selected the List of Members and the Add and Remove buttons are deactivated.
b.To add members:
i.Click Add. The Select Mailbox dialog appears.
ii.Select one or more groups or mailboxes. You can hold down the Ctrl or Shift keys to select multiple mailboxes and groups.
iii.Click 

iv.Click OK to add the selected members to the group or click Cancel to discard the changes.
c.To remove members:
i.Select one or more members to remove. You can hold down the Ctrl or Shift keys to select multiple members.
ii.Click Remove. A confirmation dialog appears.
iii.Click Yes in the confirmation dialog to remove the member. Click No to retain the member.
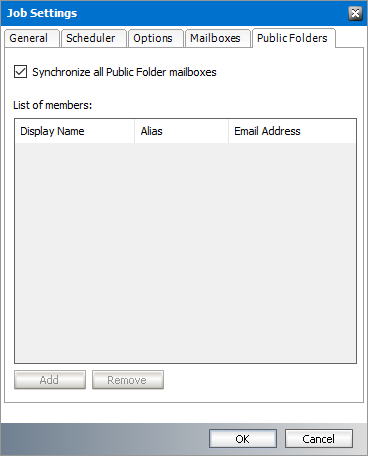
2.Click the Public Folders tab and select the public folders as described below:
a.Include all Public Folder mailboxes - select this option to include all Public Folder mailboxes for the Delete Files job. When this option is selected the List of Members and the Add and Remove buttons are deactivated.
b.To add Public Folders:
v.Click Add. The Select Mailbox dialog appears.
vi.Select one or more Public Folder mailboxes. You can hold down the Ctrl or Shift keys to select multiple mailboxes.
vii.Click
viii.Click OK to add the selected Public Folder mailboxes or click Cancel to discard the changes.
c.To remove Public Folders:
iv.Select one or more Public Folder(s) to remove. You can hold down the Ctrl or Shift keys to select multiple folders.
v.Click Remove. A confirmation dialog appears.
vi.Click Yes in the confirmation dialog to remove the folder(s). Click No to retain the folder(s).
3.Click OK to save the job setting and close the window.
The Shortcut Sync job keeps the shortcut information in the Archive Manager database consistent with the shortcuts in the Microsoft Exchange Server. The Shortcut Sync job searches through synchronized mailboxes for shortcuts to items that are archived in the HSM store. Archived items in the HSM store without shortcuts in the Microsoft Exchange server are marked for deletion or purged if their retention time has expired. The retention category used for archiving these items must be configured to allow the Shortcut Sync job to operate.
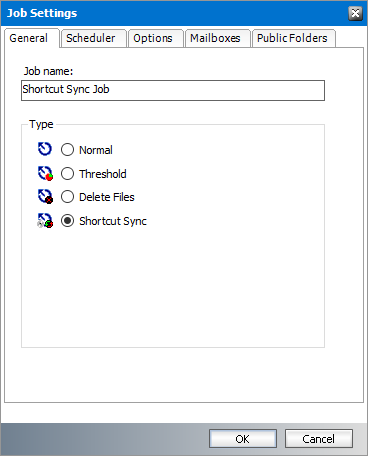
To define a Shortcut Sync job:
1.From the Manager view, click the Jobs tab.
2.Right-click inside the left pane. Select New job from the context menu. The Job Settings window opens.
3.From the General tab select Shortcut Sync. Enter a name in the Job name text box.
4.Click the Scheduler tab and set the scheduler properties as described below:
a.Scheduling starts at - enter the date manually or by clicking the upward or downward arrows, and time (directly by overwriting the time).
b.Scheduling ends on - select this option to specify a date when the scheduling ends. Click the date picker icon to open the calendar and select the month and date. The default is Never when the option is not selected.
c.Schedule interval - specify a period following which the job restarts itself. Click the upward or downward arrow. The period can be set in minutes or days.
d.Allowed time [hours] - enter the archiving period by clicking the upward or downward arrow. The minimum allowed time is 1 hour.
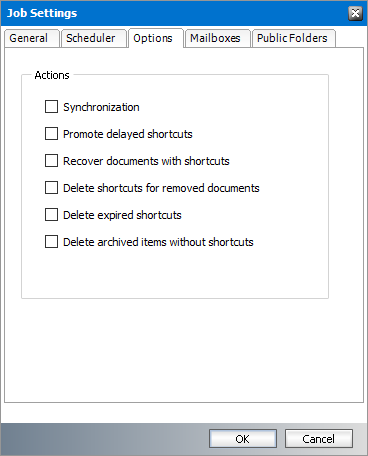
5.Click the Options tab and select the options as described below:
a.Synchronization - select this option to perform a standard shortcut synchronization of mailboxes or public folders. If mail items are moved to another mailbox or location, then duplicate mail items are archived.
|
|
NOTE: Standard shortcut synchronization is included in all the other options even if this option is not selected. |
b.Promote delayed shortcuts - select this option to create a normal shortcut for email items that are bound to a retention category configured to delay shortcut creation for a specified period. If the Shortcut Sync job discovers email items for which the shortcut creation delay period has expired, a normal shortcut will be created for the archived email item.
c.Recover documents with shortcuts - select this option to recover documents marked for deletion. If the Shortcut Sync job discovers a shortcut which has an archived document marked for deletion, then the document is recovered.
d.Delete shortcuts for removed documents - select this option to allow the Shortcut Sync job to delete shortcuts from the Microsoft Exchange Server when the job discovers archived documents that are purged by the Delete Files job.
A user could have decided to delete a shortcut to an archived item from Microsoft Outlook if it is no loner required or could have moved the shortcut from one folder to another. If the user clicks the Delete archived messages icon on the toolbar or Delete selected messages from the Archive Manager for Exchange menu of the Archive Manager Outlook AddIn, then such items are marked for deletion in the HSM store. These items are kept in the HSM store during their retention period. When the retention period and keep-alive time expires for items marked for deletion, they can be purged by a scheduled Delete Files job. If the job is not scheduled, emails remain in the archive.
If the user selects archived items and clicks the Delete icon on the Outlook toolbar or clicks SHIFT + Delete on the keyboard then the corresponding shortcut is deleted since these are Microsoft Outlook commands and not Archive Manager Outlook AddIn commands. Shortcuts that are deleted with Microsoft Outlook commands will lose their reference to the corresponding archived item in the HSM store and will not be marked for deletion in the Archive Manager database. These are considered as lost items.
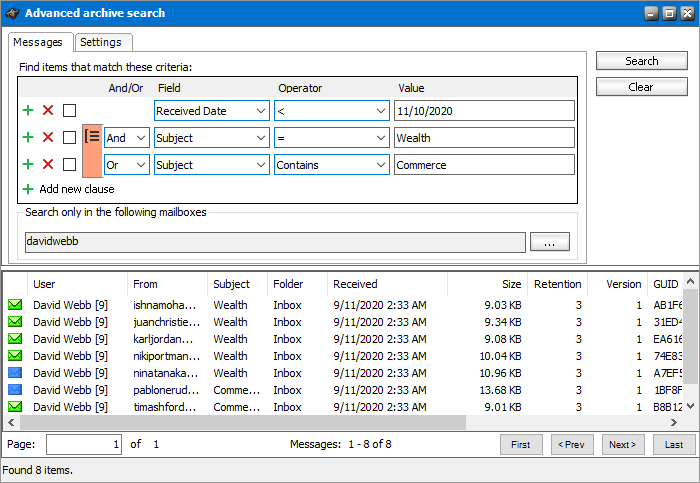
Any lost item can be restored by the administrator during its retention period until you run the Shortcut Sync job. When the job runs, all lost items are marked for deletion. They cannot be restored from the Archive tab in the Archive Manager for Exchange Administration Center. Use this job when you are sure that no more lost items must be restored and that the space they occupy could eventually be released for use when the retention period expires. Even though items marked for deletion cannot be easily restored they can still be discovered during their retention period using the advanced search because they are retained in the HSM store. To find the documents marked for deletion, use the Advanced Search icon on the toolbar (
e.Delete expired shortcuts - select this option to delete shortcuts for email items that are bound to a retention category configured to delete a shortcut after a specified time. If the Shortcut Sync job discovers shortcuts with expired time, then the shortcut is removed from the Microsoft Exchange server.
f.Delete archived items without shortcuts - select this option to mark archived documents for deletion when the corresponding shortcut is removed from the Microsoft Exchange server.
|
|
IMPORTANT: You must select all mailboxes and public folders when you select this option. Shortcuts can be inadvertently moved to another mailbox or location manually. Without synchronizing all mailboxes and public folders, the Shortcut Sync job may not find the shortcut for an archived item and could remove the item. |
6.Click the Mailboxes tab and select the mailboxes as described below:
a.Synchronize all mailboxes - select this option to include all mailboxes for the Shortcut Sync job. When this option is selected the List of Members and the Add and Remove buttons are deactivated. You must select this option if you select the Delete archived items without shortcuts option from the Options tab.
b.To add members:
i.Click Add. The Select Mailbox dialog appears.
ii.Select one or more groups or mailboxes. You can hold down the Ctrl or Shift keys to select multiple mailboxes and groups.
iii.Click
iv.Click OK to add the selected members to the group or click Cancel to discard the changes.
c.To remove members:
i.Select one or more members to remove. You can hold down the Ctrl or Shift keys to select multiple members.
ii.Click Remove. A confirmation dialog appears.
iii.Click Yes in the confirmation dialog to remove the member. Click No to retain the member.
7.Click the Public Folders tab and select the public folders as described below:
a.Synchronize all Public Folder mailboxes - select this option to include all Public Folder mailboxes for the Shortcut Sync job. When this option is selected the List of Members and the Add and Remove buttons are deactivated. You must select this option if you select the Delete archived items without shortcuts option from the Options tab.
b.To add Public Folders:
v.Click Add. The Select Mailbox dialog appears.
vi.Select one or more Public Folder mailboxes. You can hold down the Ctrl or Shift keys to select multiple mailboxes.
vii.Click
viii.Click OK to add the selected Public Folder mailboxes or click Cancel to discard the changes.
c.To remove Public Folders:
iv.Select one or more Public Folder mailboxes to remove. You can hold down the Ctrl or Shift keys to select multiple folder mailboxes.
v.Click Remove. A confirmation dialog appears.
vi.Click Yes in the confirmation dialog to remove the mailboxes. Click No to retain the mailboxes.
8.Click OK to save the job setting and close the window.
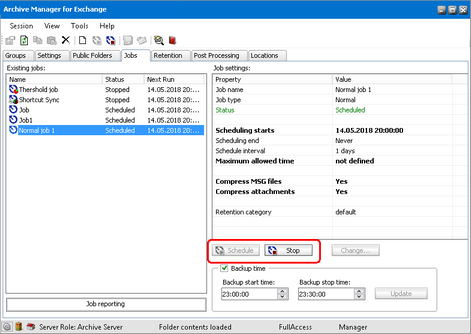
Job settings cannot be changed while the job is scheduled or running. You must stop it first.
To change job settings:
1.In Manager view, click on the Jobs tab.
2.Select the job. Then click on the Stop button in the right pane. (Or you may right-click the respective job and in its context menu click Stop.)
3.Then click on the Change button (
4.In the Job Settings window specify your new settings on the respective tabs.
5.When it is done, do not forget to click on the Schedule button (