By default Run an integrity check after creating a backup is enabled on new computer collections, with Check the Integrity of previously created backups after a scheduled backup is disabled.
Disabling Run an integrity check after creating a backup disables the Integrity check performed on manual backups.
Scheduled Computer Collections with Run an integrity check after creating a backup enabled and Check the Integrity of previously created backups after a scheduled backup disabled, will perform integrity checks only on new backups but not on previous backups.
Scheduled Computer Collections with Check the Integrity of previously created backups after a scheduled backup enabled, and Run an integrity check after creating a backup disabled, then only previous backups will have an integrity checked performed, based on the last backup session(s) as defined by the user (default 1).
Registry settings
For Backups manually registered in the RMAD, or Forest Recovery console, the integrity check after backup registration is controlled by the following registry settings on the RMAD console machine:
\HKEY_LOCAL_MACHINE\SOFTWARE\WOW6432Node\Quest\Recovery Manager for Active Directory\Options
DWORD Value: 1 enabled or 0 disabledIntegrityCheckOnBkfRegistration (enabled by default)IntegrityCheckOnBmrRegistration (disabled by default)
FR console register backup
In Forest Recovery, when backups are imported, an integrity check is performed.
Results of integrity check on import of backup in Forest Recovery.
RMAD Console register backup
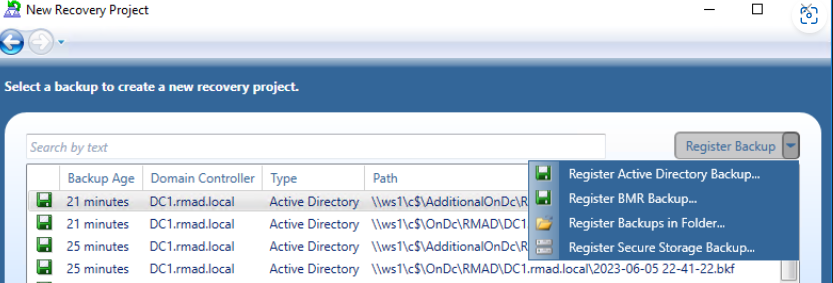
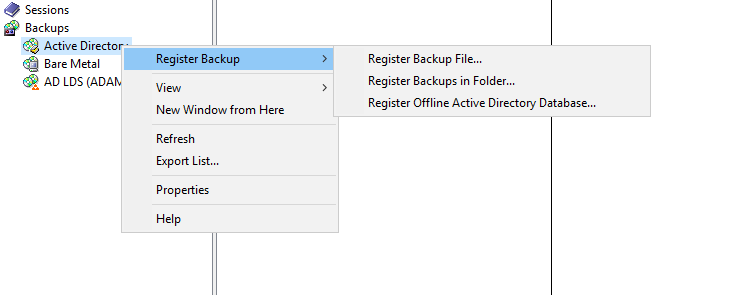
In this example we will register a backup for Active Directory. To register a backup in the RMAD console select Backups | Active Directory then right click and select Register Backup. There are three options, Register Backup File…, Register Backups in Folder…, and Register Offline Active Directory Database… for you to choose. Select the Register Backup File… to open the browser.
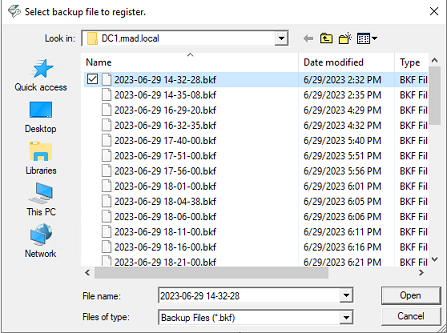
In the browser window browse to the location of the backup files and select the files to import.
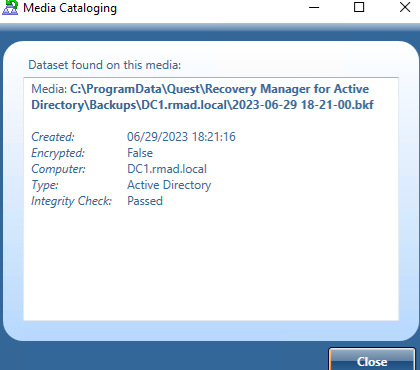
The selected backup file will automatically have an integrity check performed on import.

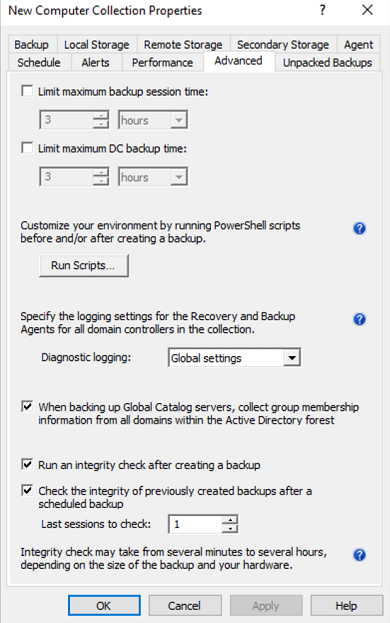
Default Computer collection advanced settings
The default for Run an integrity check after creating a backup enabled is enabled and Check the Integrity of previously created backups after a scheduled backup is disabled.
With both options enabled, Integrity check is done for all backups including backups from previous sessions.
After an Integrity check is performed the timestamp for Last Integrity Check column is updated and found in the Console for each backup, including backups on Secure Storage.

Disabling Run an integrity check after creating a backup disables the Integrity check performed for manual backups, including backups sent to Secure Storage.
| NOTE |
Integrity check can be time-consuming for backups given the amount or size of backups. Integrity checks may take from several minutes to several hours, depending on the size of the backup(s) and your hardware. For performance, If required to run Integrity check on previous backups, Integrity Check can be enabled to run during scheduled Computer Collections for backups based on the Last sessions to check value supplied by the user using the checkbox: |
Check the Integrity of previously created backups after a scheduled backup
Scheduled Computer Collections with Check the Integrity of previously created backups after a scheduled backup runs and Integrity check on schedule for backups on Local, Remote and Secure Storage locations.
Scheduled Computer Collections with Run an integrity check after creating a backup enabled, and Check the Integrity of previously created backups after a scheduled backup disabled, will have new backups created with their integrity checked
With Run an integrity check after creating a backup disabled and Check the Integrity of previously created backups after a scheduled backup is enabled, integrity is not checked for backups created within the current session. However backups created from a previous backup session(s) will have their Integrity checked.

Example shows backups from the most recent session created without integrity checked.

The backups from time 6:11:15 are checked on the next session. Since Run an integrity check after creating a backup is disabled, Newer backups are also then checked during the following backup session

This tab allows you to override the global (or default) settings used to automatically unpack backups for all Computer Collections.
On this tab, you can use the following elements:
Use global settings - Specifies to use the global settings to automatically unpack each backup upon its creation.
Unpack each backup upon its creation - Allows you to configure settings specific to the Computer Collection to automatically unpack each backup upon its creation. Other backups created for the Computer Collection will be automatically deleted.
Keep unpacked backups only from the last: - Specify the number of recent backup creation sessions to keep unpacked backups for each domain in the Computer Collection. The choices are from All sessions or number of session (in steps) from 1 through 100. Default is 3 sessions.
Select domain controllers: - Click the Select button and in the Select computers dialog, select the domain controllers to unpack.
Do not unpack backups - Specifies not to unpack backups created for the Computer Collection.
For more information on managing unpacked backups, see Unpacking backups.
For a container such as an Active Directory domain, organizational unit, or site added to a Computer Collection, the properties are used to specify an explicit list of the domain controllers or AD LDS (ADAM) instances for which backups are not to be created.
In the Recovery Manager Console tree, select the Computer Collection that holds the container or site.
In the details pane, click the container or site, and then click Properties on the Action menu.
The next subsections provide descriptions for the following:
The Properties dialog box for a domain or organizational unit added to a Computer Collection includes the following elements:
Exclusion list - Lists domain controllers that reside in the selected container for which backups are not to be created when backing up the Computer Collection. In the list, each entry includes the following fields:
Name - Displays the name of domain controller.
Site - Displays the name of the site in which domain controller is located.
Modify - Opens a dialog box that allows you to modify the Exclusion list. The dialog box includes the following elements:
Available domain controllers - Lists domain controllers to be backed up when backing up Computer Collection. To exclude domain controllers from backup, select them in the list, and then click Add.
Domain controllers excluded from backup - Lists domain controllers excluded from backup when backing up Computer Collection. To have Recovery Manager for Active Directory back up domain controllers, select them in the list, and then click Remove.
Add - Adds domain controllers selected in Available domain controllers to the Domain controllers excluded from backup list.
Add All - Adds all domain controllers from Available domain controllers to the Domain controllers excluded from backup list.
Remove - Moves the domain controllers selected in Domain controllers excluded from backup to the Available domain controllers list.
Remove All - Clears the Domain controllers excluded from backup list. After you click this button, the list Available domain controllers will include all domain controllers that are located in the selected OU or domain.
