The Set Migration Status options are available in the following views:
Mail File Migration > Preparation > Import Users
Mail File Migration > Preparation > Advanced
Mail File Migration > Provisioning > Advanced
Rooms & Resource Migration > Preparation > Import and Copy
Rooms & Resource Migration > Preparation > By Group
Rooms & Resource Migration > Migration > Advanced
Mail In Migration > Preparation > Import
Mail In Migration > Preparation > By Group
Mail In Migration > Migration > Advanced
To set the migration status:
Select items in the Data Pane, and then click the Set Migration Status button:
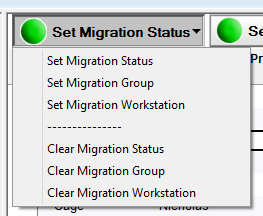
The following table describes the function of each menu option:
|
Option |
Description |
|---|---|
|
Set Migration Status |
Allows you to set the item’s migration status, such as Schedule Pending, Migration Scheduled, Pending Migration, or Migration Completed Successfully based on the options included in the Settings document |
|
Set Migration Group |
Allows you to assign a group to item(s) to create logical batches for display in Migrator for Notes; This will enable you to manage a group of entries instead of individually migrating items |
|
Set Migration Workstation |
Allows you to manually assign a migration workstation from the farm to process an item’s data; This will enable you to distribute the workload across multiple migration workstations during migration;
If you do not set a migration workstation, then the farm will distribute the work automatically |
|
Clear Migration Status |
Allows you to clear the migration status of item(s) |
|
Clear Migration Group |
Allows you to clear a migration group assigned to item(s) |
|
Clear Migration Workstation |
Allows you to clear the migration workstation assigned to item(s) |
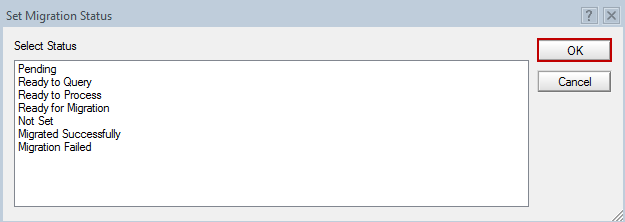
From the Set Migration Status drop-down menu, select the Set Migration Status menu option; a dialog box appears with a list of status codes you specified in the Required Settings tab:
Select a status code, and then click OK:
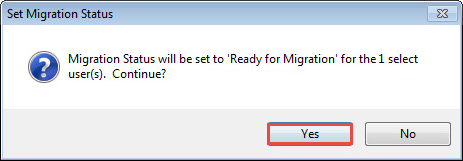
A confirmation box appears; click Yes to confirm that you want the migration status to be set to the selected status for the selected items:
To set the migration group:
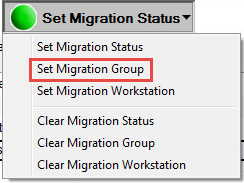
Select users. Click the Set Migration Status button; select the Set Migration Group drop-down menu option:
Specify a name for the migration group in the Migration Group dialog box and click OK:

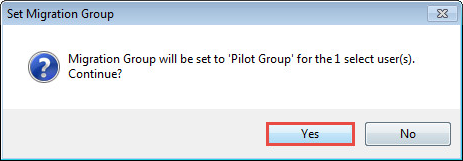
A confirmation box appears. Click Yes. The selected items are in the specified migration group:
If you want items to be migrated on a specific Migration Workstation, you can set it here. Otherwise, they will be distributed across all available workstations.
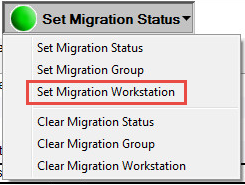
Select items, then select Set Migration Status > Set Migration Workstation:
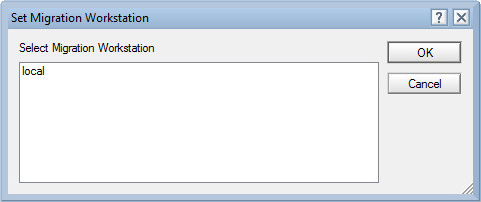
The Set Migration Workstation dialog box appears; select a workstation for the selected items where their migration will be carried out, and then click OK:
A confirmation box appears; click Yes to confirm that you want the selected migration workstation to be set for selected items
You can clear set migration status, migration group, and migration workstation by selecting appropriate options.
Delegation migration migrates access to Exchange mailboxes, such as Send As/Manager access and access to specific folders like Calendars and Contacts. Delegation migration attempts to set access control on objects in Exchange based on the Access Control List (ACL) in Notes which dictates overall access to the Exchange mailbox. The delegation migration can be run by a scheduled process or manually on selected documents.
The following is required for delegation migration:
Address translation must be fully populated when migrating Access and Delegation. The SMTP address must match the primary SMTP in Exchange
PowerShell 4 must be installed on the workstation/server that the migration process is to run from
The Administration account for the CAS Server has the ApplicationImpersonation role in the domain
Exchange delegates must have domain accounts and be mailbox-enabled
|
|
|
Delegation also allows you to audit the user's mail files for database ACL and delegation data and send an email containing the user's current delegation settings, so the user can determine if the settings are valid for migration to Outlook.
The scheduled delegation migration and the scheduled delegation migration agent must be enabled in the Delegation settings. When enabled, the agent will attempt to migrate delegation data for all mailboxes that have been successfully migrated to an Exchange Server since the last delegation migration.
Scheduled delegation migration runs in the background locally in HCL Notes on a workstation. ,This requires a local replica of the Notes Migrator.nsf from the Domino server on the workstation and Notes must be running and background agents must be enabled on the client and background replication for the local replica.
When enabled the scheduled delegation migration agent runs once a day at 3:00 AM. Note that if the agent is changed to run at a time interval that is too short, the PowerShell tasks may not have time to complete.
The status of the delegation migration can be viewed on the Delegation Migration view:
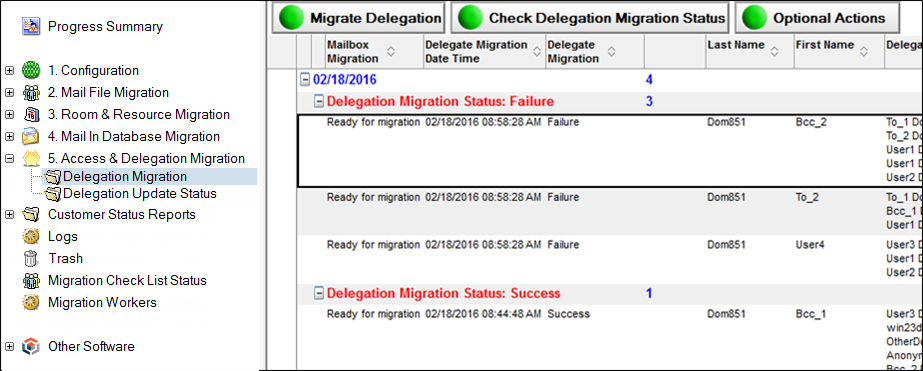
Delegation Migration View
The status for delegation migration can be successful, incomplete (partially migrated), or a failure. If the status is either incomplete or failed, the delegation migration will be retried until it reaches the successful status, or until the retry limit is exceeded. If the retry limit is exceeded, it will go in to suspended status, where it can be reset and re-queued for background processing.
The failure or incomplete status will occur if one or more delegates does not exist, because either the delegate does not exist as a mailbox-enabled AD account or security enabled group in the target domain.
|
|
Failed scheduled delegation migrations will continue to be retried until successful or until the schedule migration is suspended. For user delegation this will only be applied once the account that is a delegate has a mailbox. Not all delegation is expected to complete successfully until all Notes accounts are migrated. It is recommended to schedule migrations for users and delegates who require access to email or calendar data in the same migration batch. |