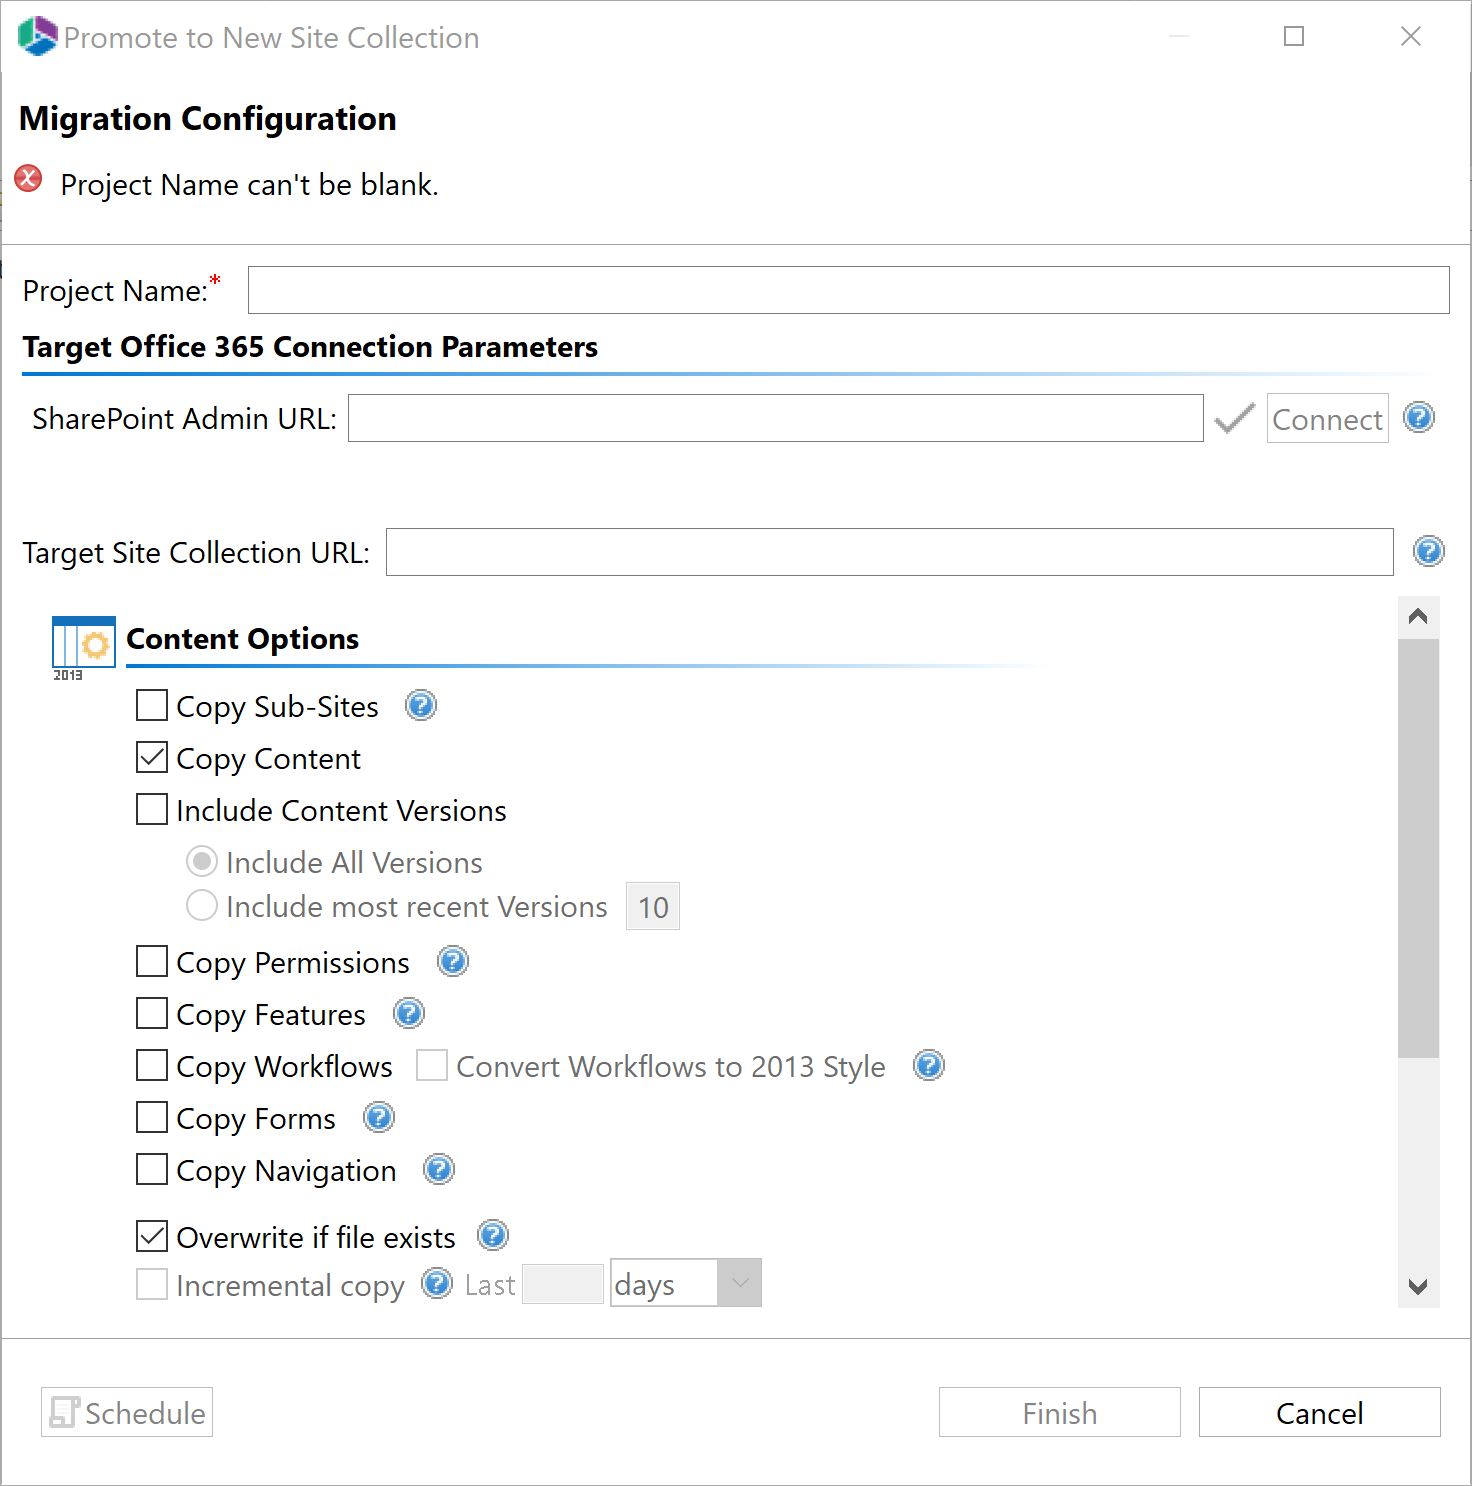
Upon selecting to Promote to Site Collection, the Migration Configuration Wizard will be generated. The following are the steps required to copy/promote a site or site collection to a new site collection. (If you would like to copy a site that was not previously loaded in the Navigator pane, then first follow the steps in the Copy Sites Without Loading The Source or Target Site in the Navigator pane section, if you would like to promote a site collection or my sites that were not previously loaded in the Navigator pane, then first follow the steps in the Copy Site collections and My Sites Without Loading into the Navigator Pane section):
1.Select the "Promote to Site Collection" button in the Sites section of the Migrator tab. Note: this option will only be available for site and site collections that have already been loaded into the Navigator pane. 
2.Give the Project a name.
3.Specify the Target Central Admin URL. Click Connect.
4.Enter the Target Site collection URL.
5.Select the options you would like applied to the copy/promote of your site/sitecollection/mysites and click Finish.
Entire lists or libraries may be copied from one site to another. In order to copy a list or library from a site that has already been loaded into the Navigator pane follow these instructions:
1.In the navigator pane, locate the lists you wish to copy. Hold down the CTRL key to select multiple individual items or SHIFT key to select multiple consecutive items.
2.After you have selected the source lists there are several ways to identify the destination location you can either drag and drop the items in the source destination, or you can use one of the following copy and paste methods:
·Right Click Menu
·Copy and Paste buttons in the Migrator Ribbon
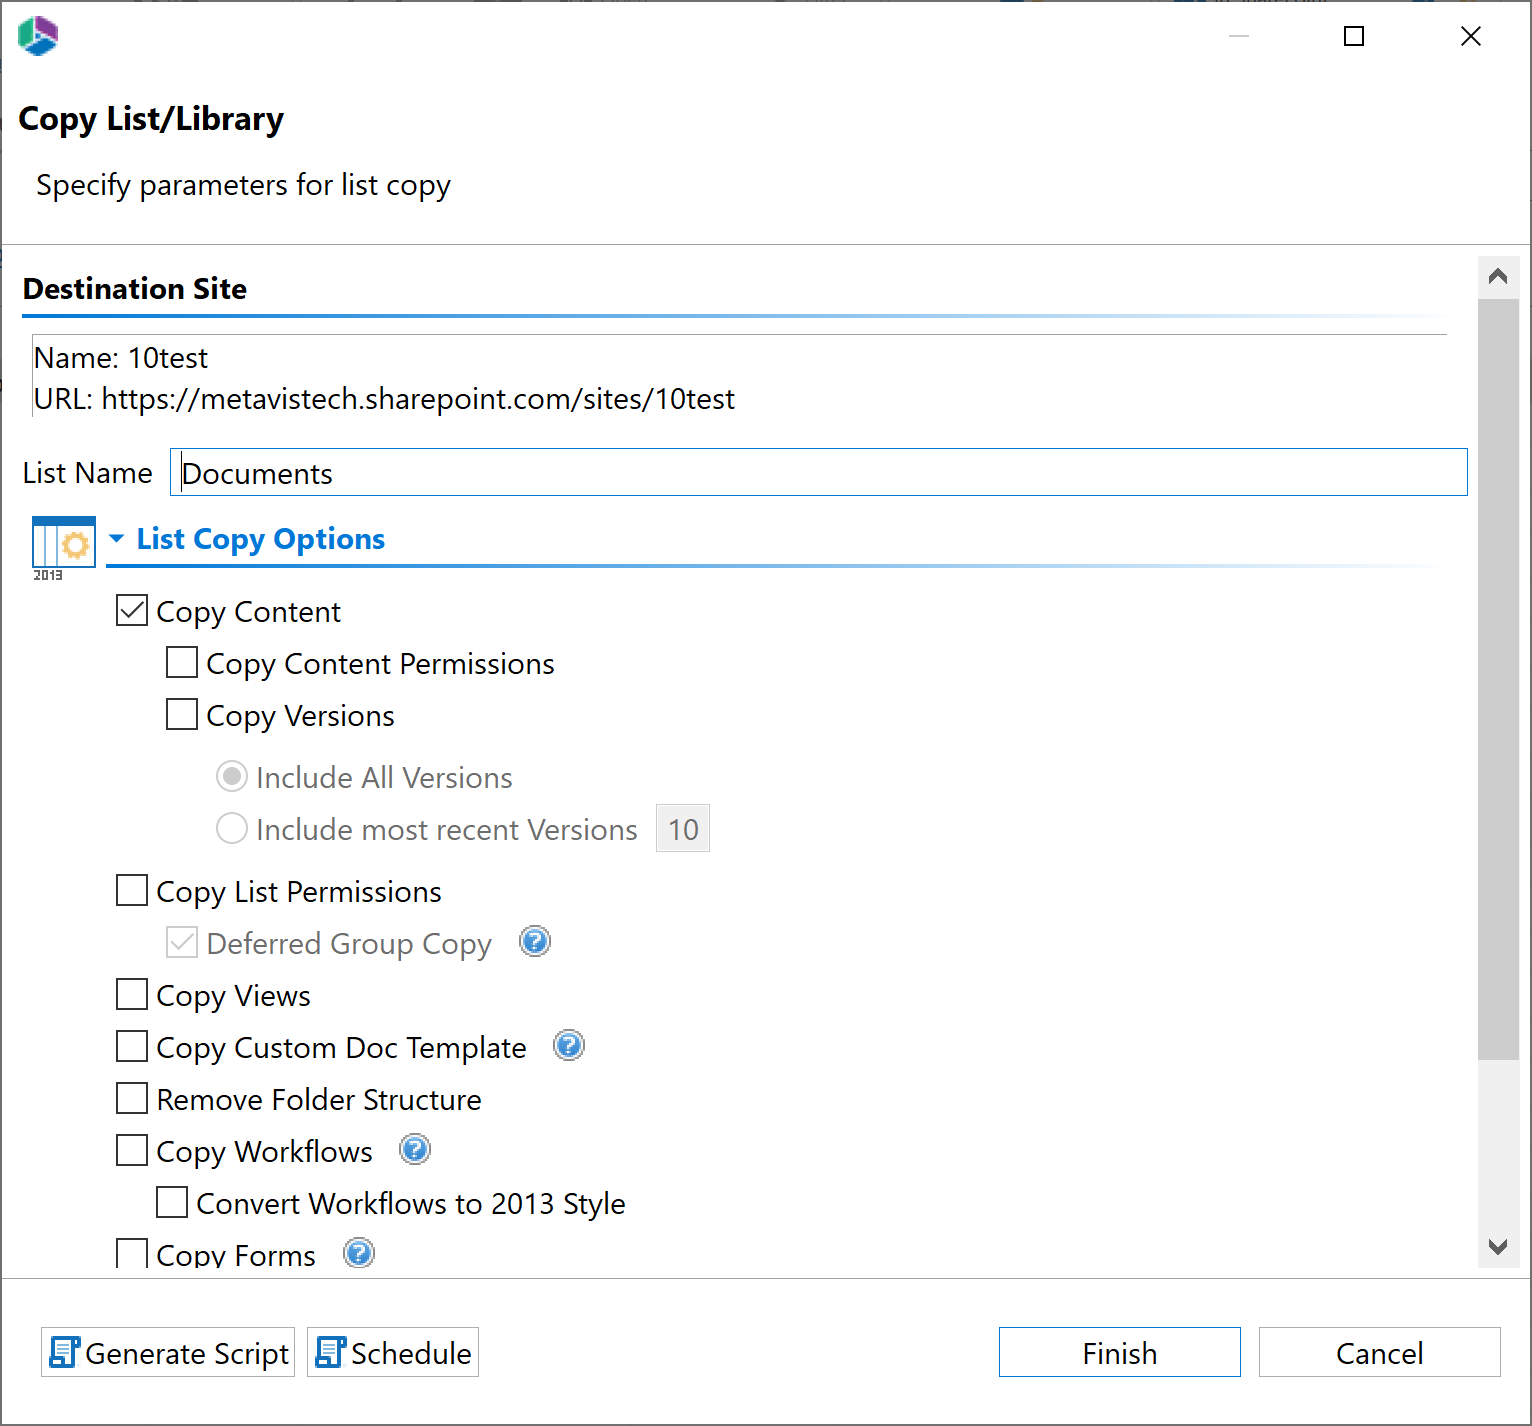
3.The application will bring up the Copy List/Library Migration Wizard. Specify any options you wish to include as part of your migration. Once you are satisfied with the settings, click Finish.
|
|
NOTE: In order for Nintex Forms to be copied over successfully, you must first preconfigure Nintex forms on both the source and target, and must select Copy Forms in the Copy List/Library wizard, or the copy forms portion of the migration will not work. |
4.Migrator will begin the process of copying the selected content and provide feedback via a status window. In the event that some type of error occurs during the operation, a report will be provided with a detailed description.
SharePoint uses three primary methods for categorizing content:
·The hierarchy of sites, lists and folders (which is similar to how file systems store files in folders) and;
·Metadata (via content types and fields) to tag or classify content for find-ability and filtering.
·AutoTagging (via fields) to automatically 'tag' or classify documents by their contents. For more information about AutoTag see Field Value Selection Screen.
|
|
NOTE: Auto Tagging is not available to Power User products. |
Essentials has been designed to categorize content in bulk by leveraging one or all of the above mentioned methods. This section will walk you through the process of re-locating content to specific site collections, sites, lists and folders. You may also re-classify your content during the copy/move process. In combination, both processes significantly reduce the burden of organizing your content and making it easier to locate within the SharePoint environment.
1.In the navigator pane, locate the lists containing the content you wish to move or copy. Double-click on the list to load its contents into the Contents pane. If the site containing your content is not available in the navigator pane, follow the instructions for Connect to SharePoint.
2.From the list of items in the List/Library Contents pane, select all the items that you wish to transfer to a different location. Hold down the CTRL key to select multiple individual items or SHIFT key to select multiple consecutive items.
3.After you have selected the source list of items, there are several ways to copy and paste the items:
·You may simply Drag-and-Drop the items to the target.
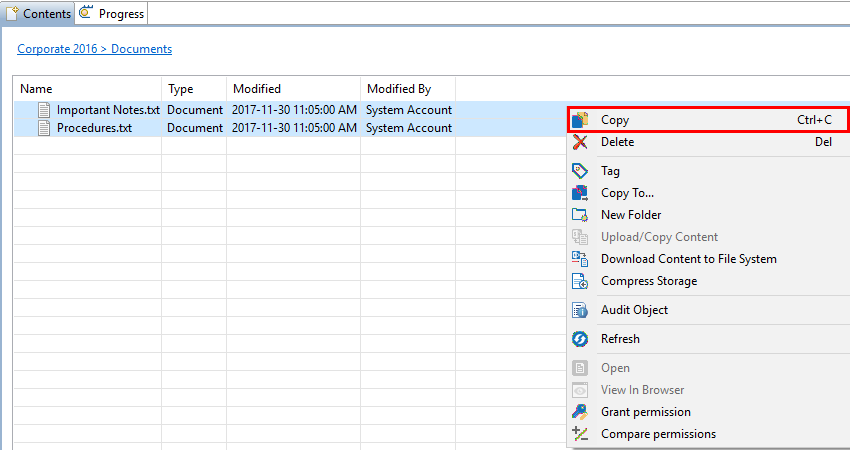
·You can use the Copy option in the right click menu.
This option would require you to right click on the destination folder within the Navigator, and select Paste from its right click menu.
·You can use the Copy and Paste buttons in the Clipboard section of the Migrator tab.
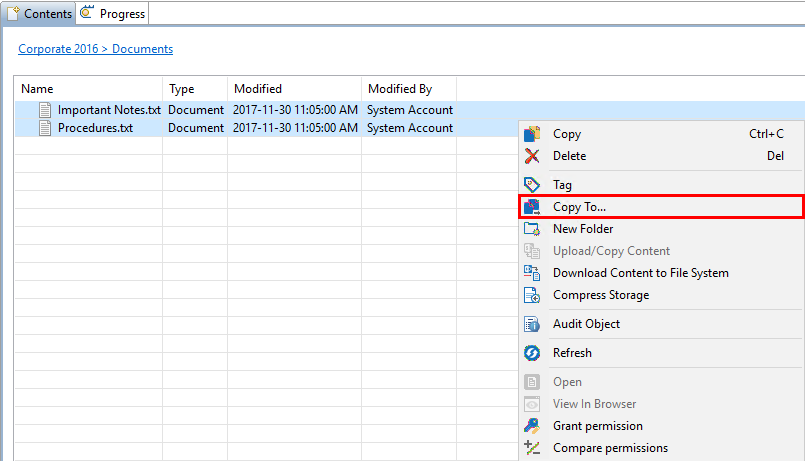
·You can use the Copy To... option in the upper right hand tab of the Content's pane.
·You can use the Copy To... option in the right click menu.
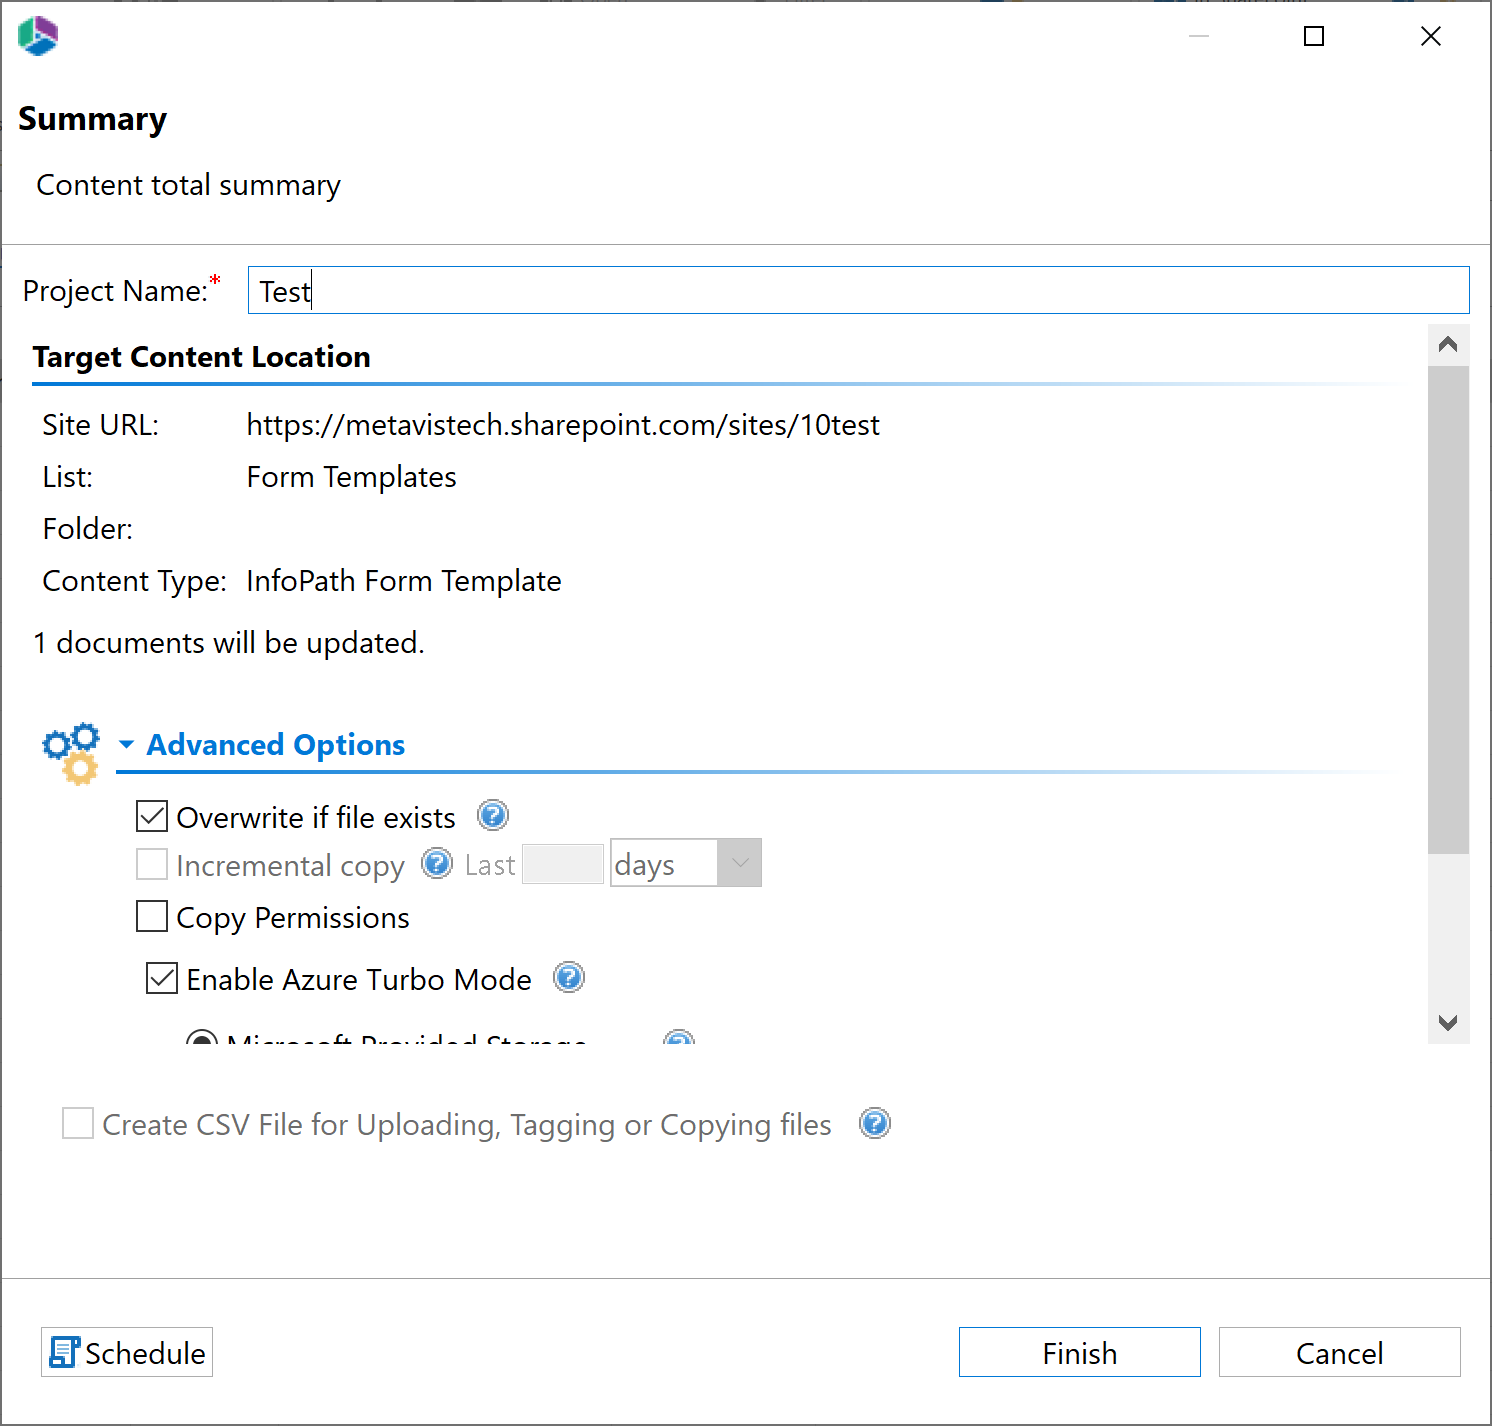
4.Once a user has copy and pasted an item to a destination, or selected the "Copy To..." option, the Summary page of the copy wizard appears. Give your project a name.
5.This summary page provides you with an overview of where the item is being copied to, as well as advanced options to choose from. To complete the copy click Finish.
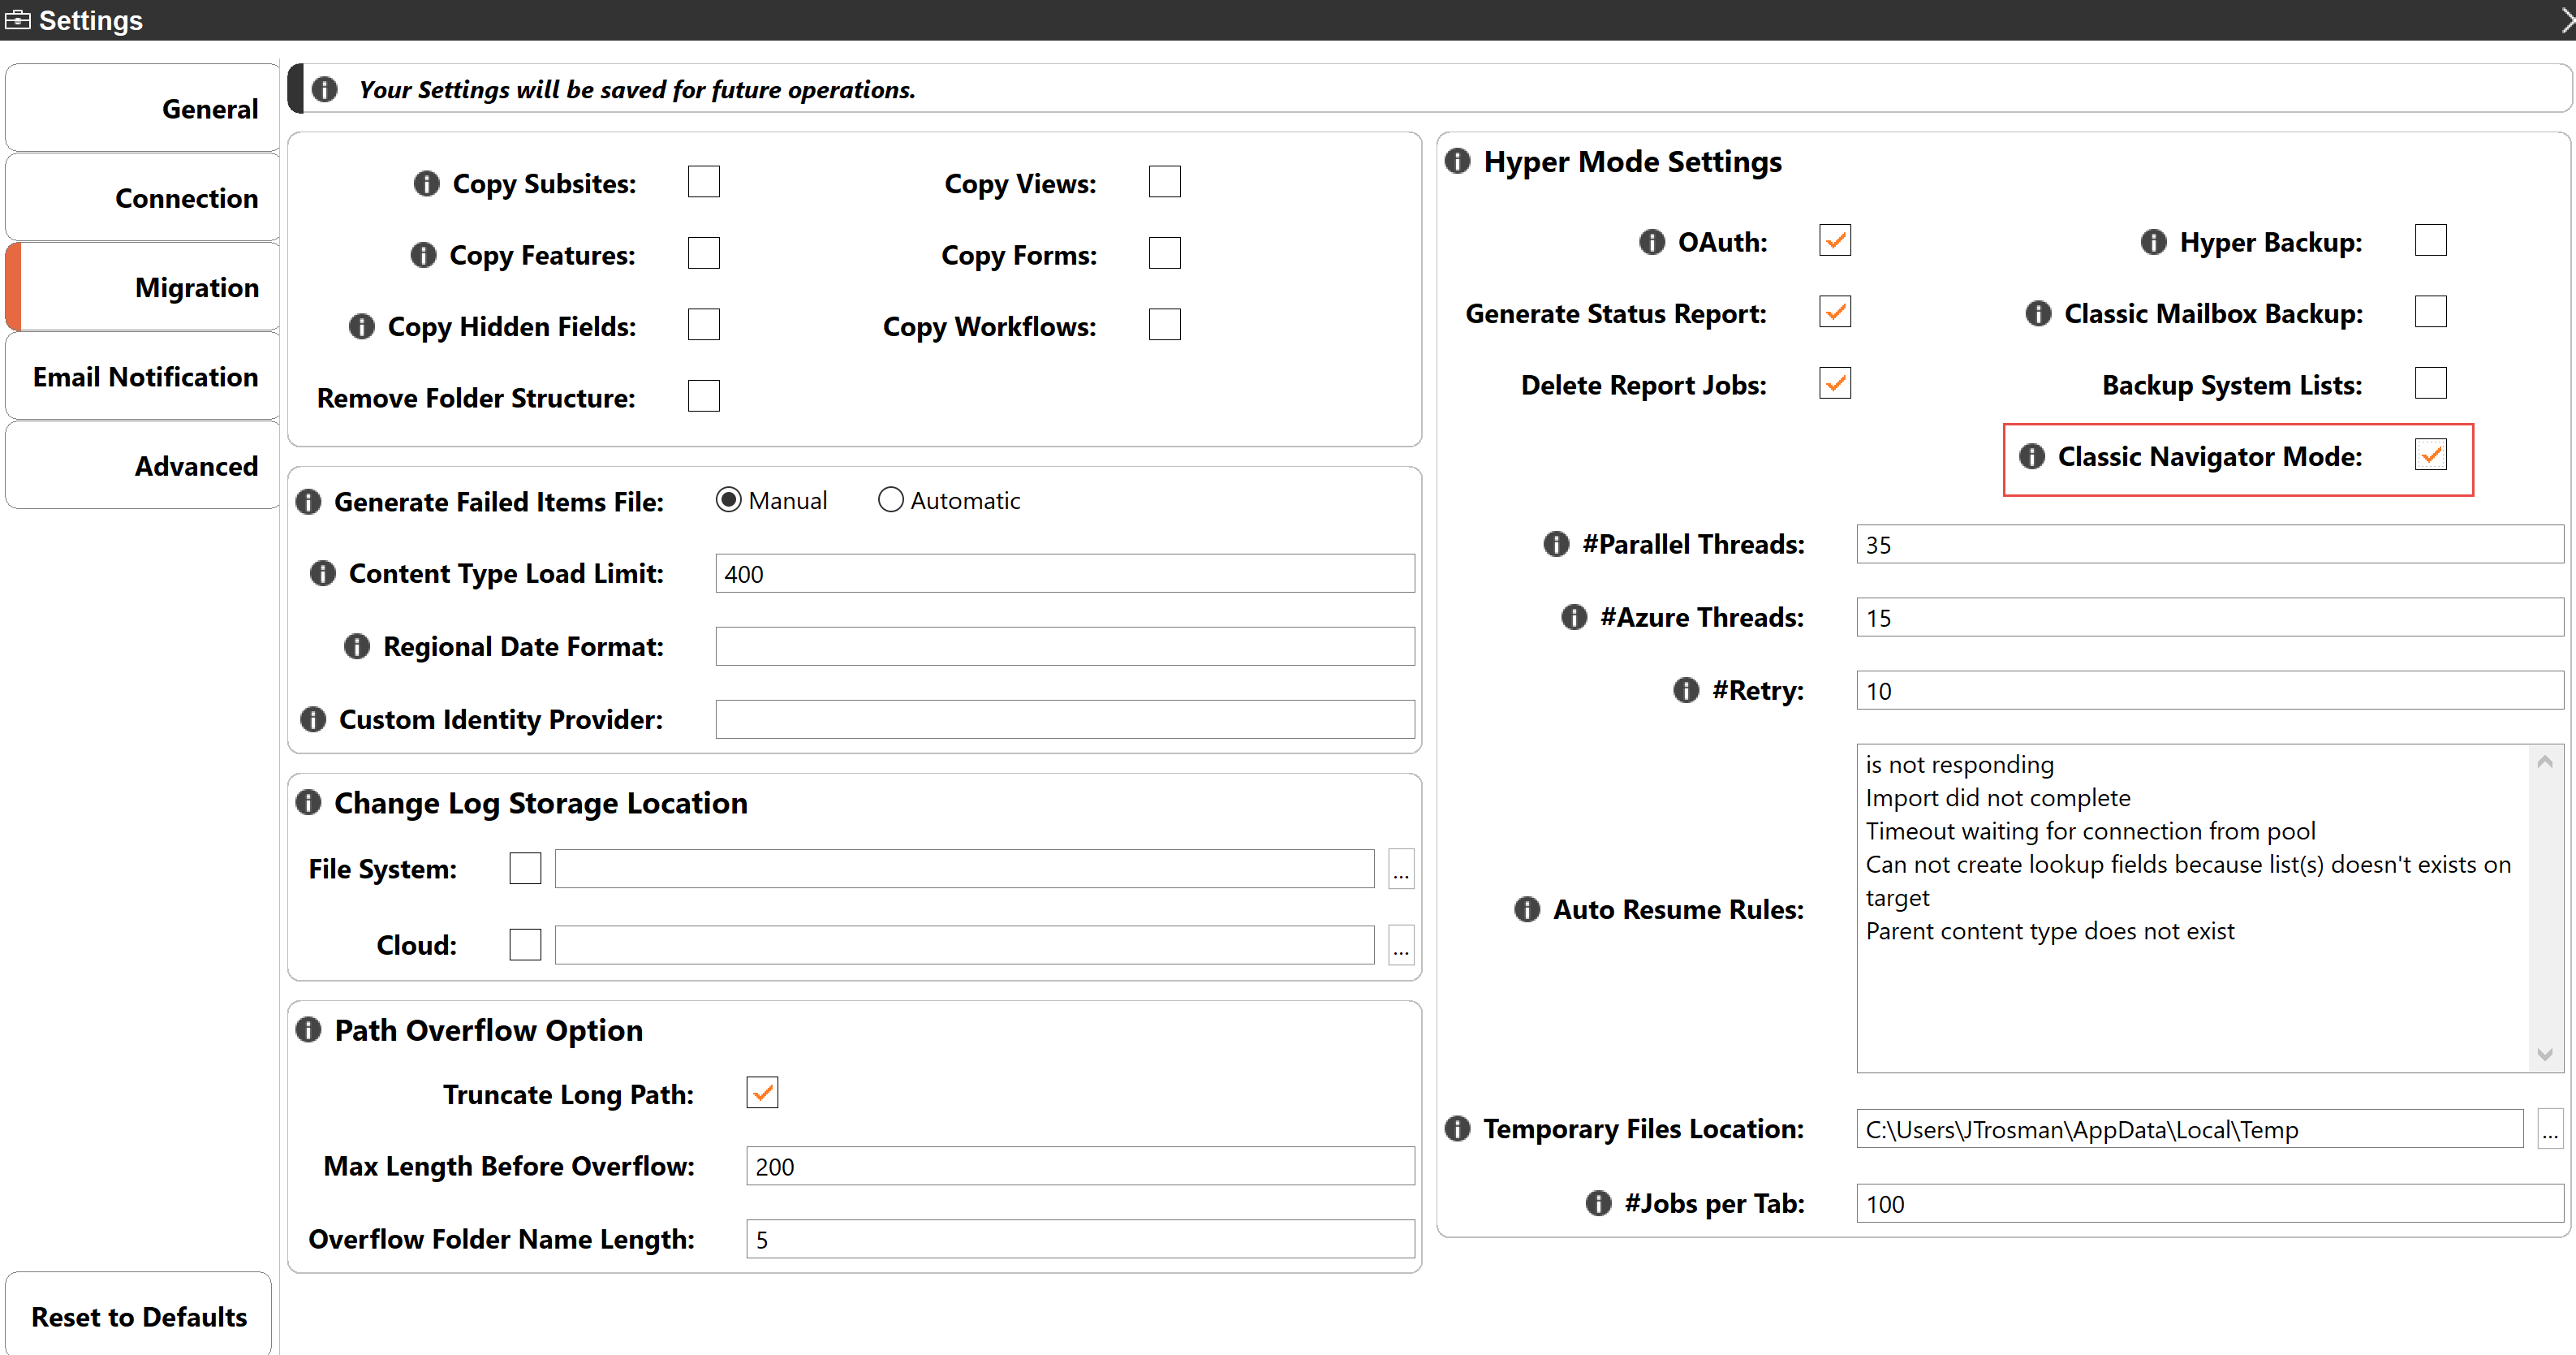
When the Classic Navigator Mode setting, found in the Profile Manager's Migration tab, is enabled, Essentials will perform the actions in this section using the classic copy-paste mode of migration.