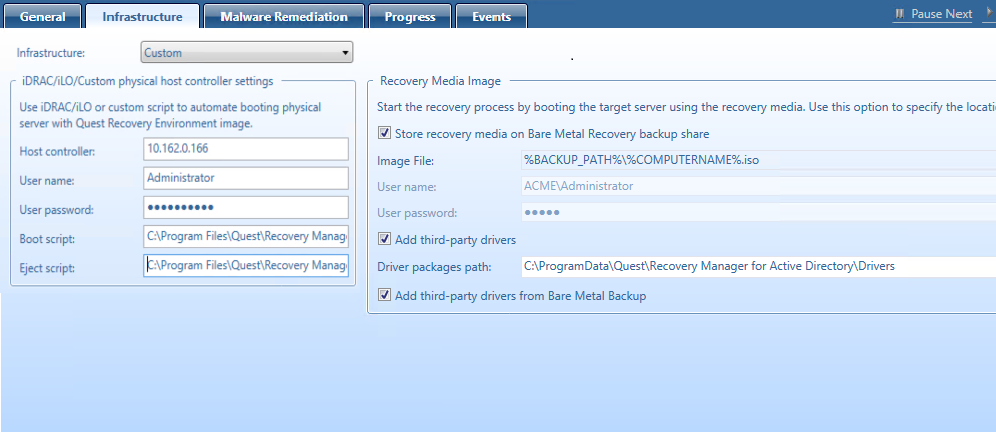
The process of booting the custom server with the Quest® Recovery Environment image can be automated by a custom management system.
Select Custom from the Infrastructure drop-down list.
Specify the IP address of the custom controller.
Specify the user name and password of the account that will be used to access the controller.
Configure and specify the Eject script and the Boot script for the ISO image.
To edit the custom SSH script or PowerShell script manually, go to the following location: %ProgramFiles%\Quest\Recovery Manager for Active Directory <Edition Name>\Management. The SSH script will be run on the remote server during the SSH session.
Make sure that Recovery Media Image settings are properly specified in the Recovery Media Image section of the Infrastructure tab.
Recovery Manager for Active Directory Disaster Recovery Edition allows you to create a virtual test environment from an Active Directory forest. You can use the created test environments to design and evaluate Active Directory disaster recovery scenarios, test planned Active Directory® changes before deploying them to production, train your staff to perform Active Directory-related tasks, and more.
| NOTE |
Never restore or copy any data from your virtual test environments to the production Active Directory. |
Possible scenarios:
Create a virtual test environment using BMR backups with or without Active Directory® backups and the Bare Metal for Active Directory® Recovery method
Create a virtual test environment using Active Directory® backups and the Restore on Clean OS recovery method
Or combine both approaches
The main advantage of these approaches is that you do not need to have a working production environment to create a test lab. Only BMR and/or Active Directory® backups are required.
| IMPORTANT |
To ensure that the target virtual machine in the virtual lab does not affect the source environment, a customer must guarantee the isolation of the target lab. Otherwise, the source forest may be seriously damaged. To get more information about the isolation of the virtual network, see Isolated virtual network and DNS. If you create a lab with an isolated virtual switch, you need to ensure that the Forest Recovery Console and BMR backup storage are connected to the isolated network. You can achieve this by adding virtual network adapters to these machines or by creating a designated VM with Forest Recovery installed and required BMR backups copied to it. Backups should be accessible from the Console machine and from the created target virtual machines. Please note, that initially you won't have a working DNS server in the isolated network. So, ensure that the Forest Recovery Console is able to resolve the BMR backup path to IP address in the isolated network. |
To create a virtual test environment from an Active Directory® forest, you need to select the source domain controllers you want to include in the test environment. Standalone servers are not supported yet in this scenario.
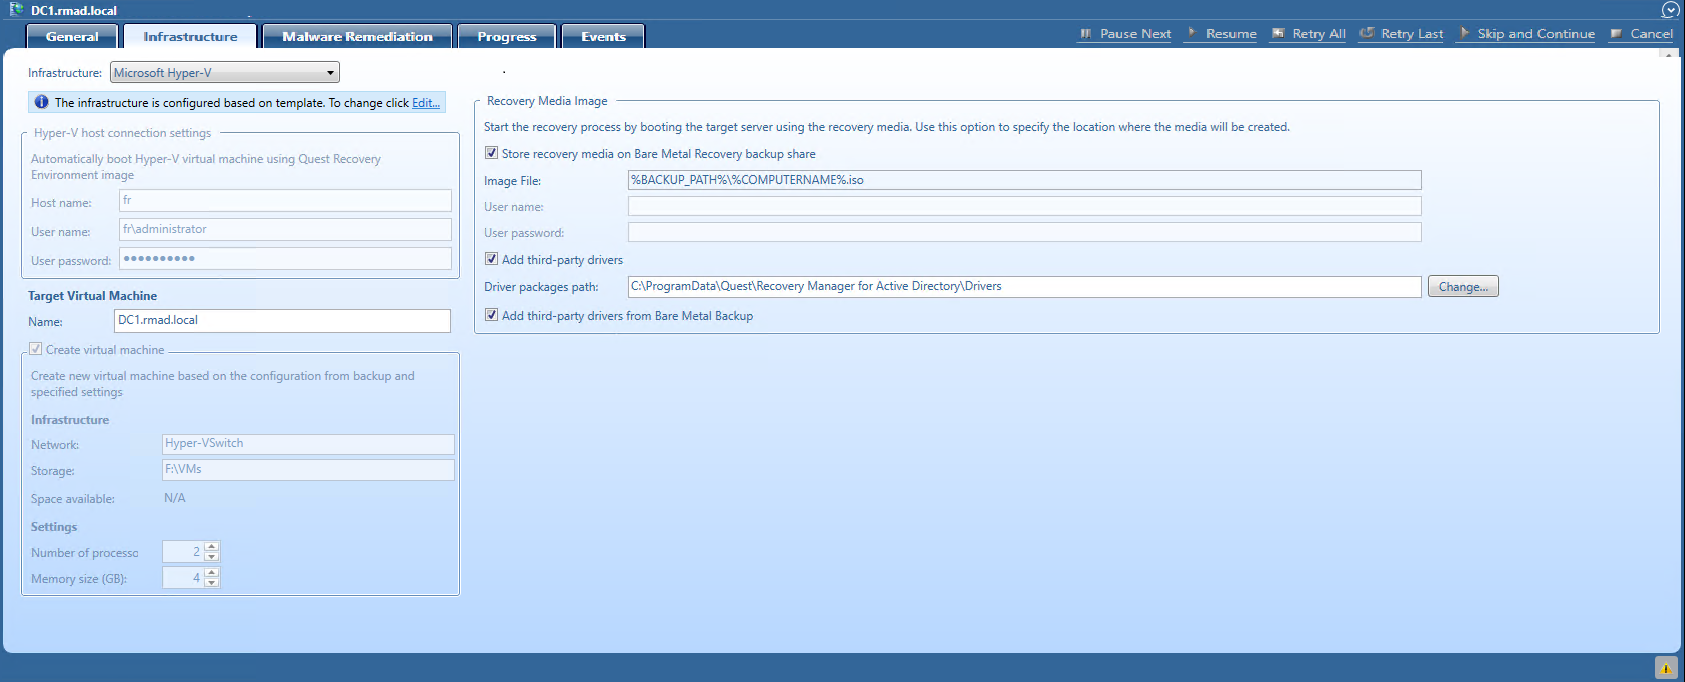
When creating virtual machines from the source computers, Recovery Manager for Active Directory uses third-party virtualization software, such as VMware™ ESXi™/vCenter™ or Microsoft Hyper-V®. For details, see VMware ESXi or Microsoft Hyper-V.
You can create virtual machines that maintain all the data available on the source computers, included in BMR and Active Directory® backups. To manage the created virtual test environment, you need to use the tools provided by the virtualization software with which the virtual machines were created in the test environment.
You can create the target lab with one virtual machine using the selected virtualization software and install Recovery Manager for Active Directory Disaster Recovery Edition on this virtual machine or use the instance of Forest Recovery Console from the production environment. If you use the single instance of Forest Recovery Console, make sure that your recovery project is configured properly and source domain controllers will not be affected by the test lab.
Backups can be stored on the backup shared storage that is available for both production and test lab networks. Otherwise, you need to copy backups to the test lab environment. Register required production BMR backups in this instance of Recovery Manager for Active Directory. If you use the single instance of Forest Recovery Console, all backups have already registered.
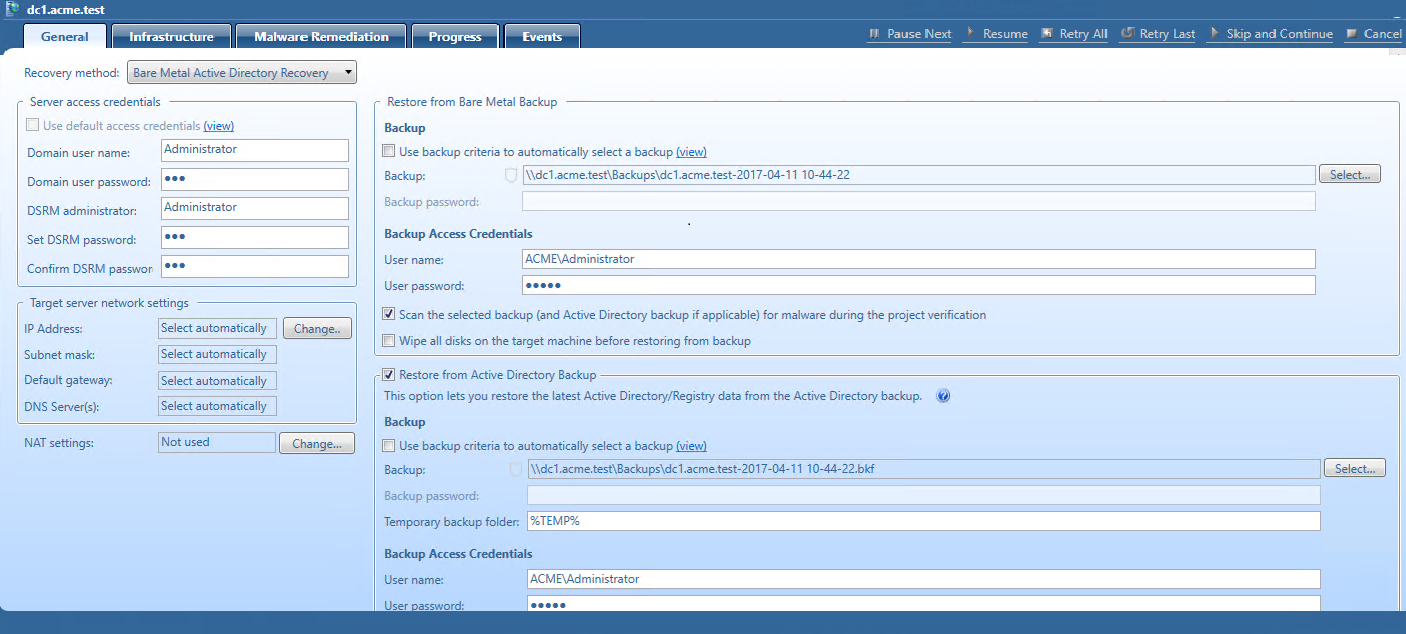
Create a recovery project. For domain controllers that will not be included in the target lab, select the Do not recover method.
Select the Bare Metal for Active Directory Recovery method and set up all other recovery settings on the General tab for each domain controller that you want to recover.
Configure all required settings on the Infrastructure tab depending on your virtualization software. For details and requirements, see VMware ESXi or Microsoft Hyper-V.
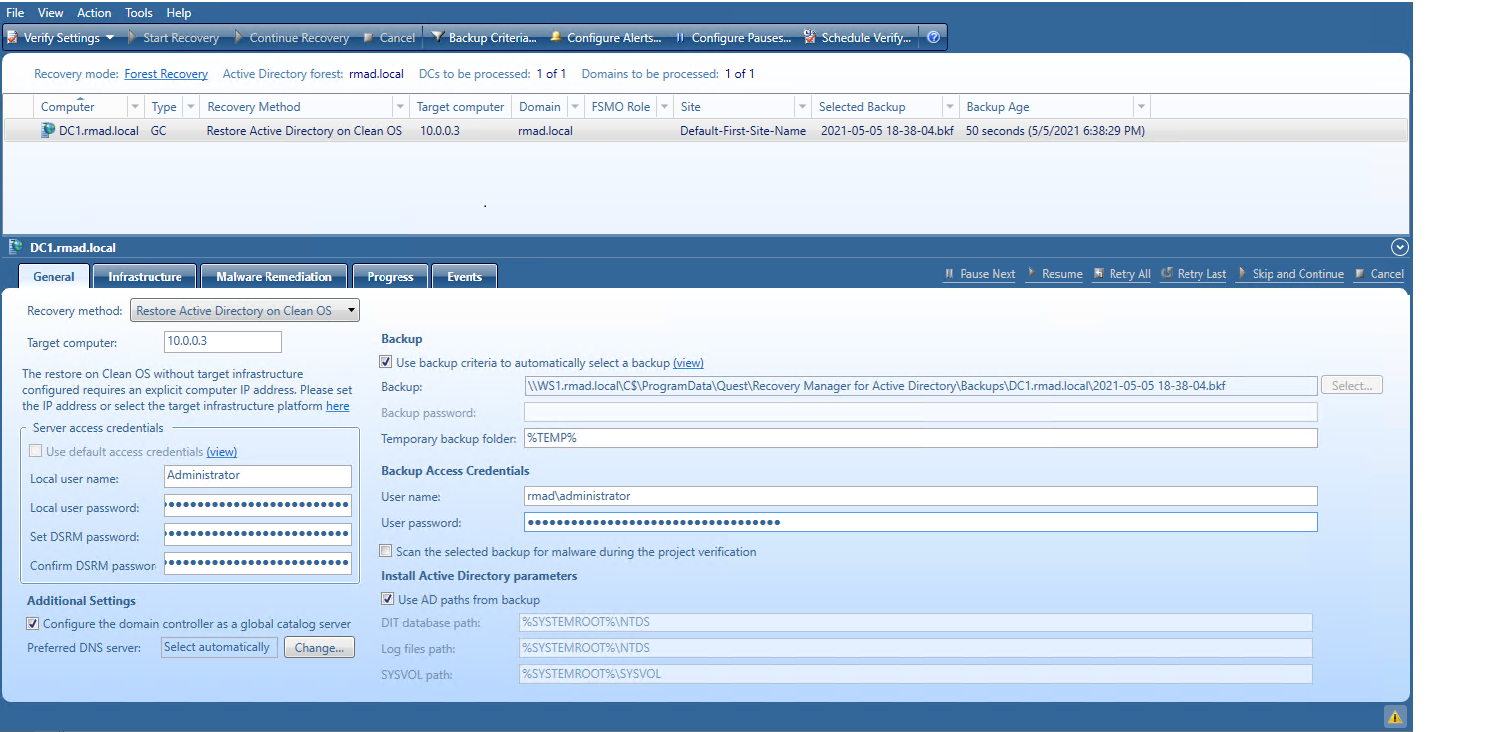
Alternatively, you can use Active Directory® backups with the Restore Active Directory on Clean OS method instead of restore from BMR backups. In this case, you should provide running Windows-based machines (virtual or physical) with the corresponding Windows version. Do not forget that these machines must be isolated from accessing the production network.
Start the forest recovery operation.
The Recovery Manager for Active Directory Management Shell, built on Microsoft Windows® PowerShell® technology, provides a command-line interface that enables automation of backup/recovery-related administrative tasks. With this Management Shell, administrators can manage Computer Collections, backup/recovery sessions, compare and start backup/recovery jobs.
The Management Shell command-line tools (cmdlets), like all the Windows® PowerShell® cmdlets, are designed to deal with objects—structured information that is more than just a string of characters appearing on the screen. The cmdlets do not use text as the basis for interaction with the system, but use an object model that is based on the Microsoft .NET platform. In contrast to traditional, text-based commands, the cmdlets do not require the use of text-processing tools to extract specific information. Rather, you can access portions of the data directly by using standard Windows® PowerShell® object manipulation commands.
For a list of all available PowerShell® commands, see the Management Shell Guide supplied with this release of the product.