Queries
|
|
Queries are an advanced data source that can be used within Table Views. Unlike the 'Journey' data source they allow users to configure a journey through the metamodel and add properties for each Element of the journey. They also benefit from being more performant than the other data sources and allow for users to sort and filter by column. |
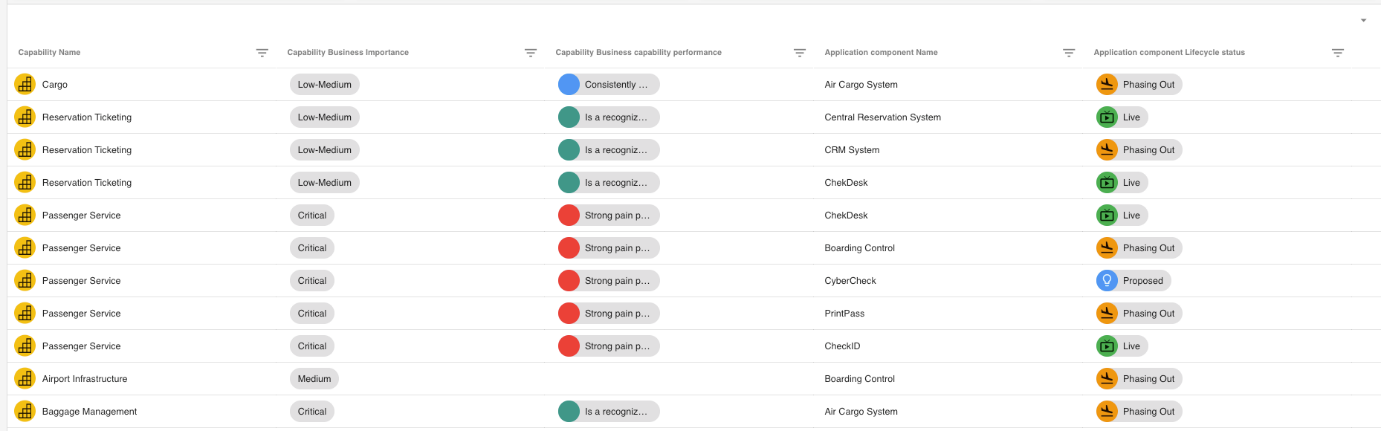
An example of a Table View using a Query data source to display a journey from Capability to Application Component whilst display properties of each element
1. Select 'Query' from Data Source
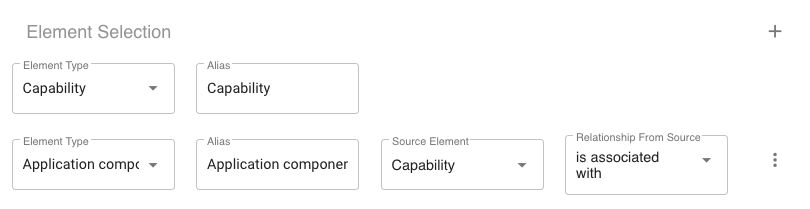
2. Select the Elements you wish to display in your table
a.You can give them Alias if you wish although these are automatically generated
b.If selecting multiple elements you will be required to select a source element and relationship
c.If you wish to display elements even if the returned relationship is empty (e.g. a capability with no application components). Users must make sure 'Optional' is checked for that step in the journey, see figure c
figure b
figure c
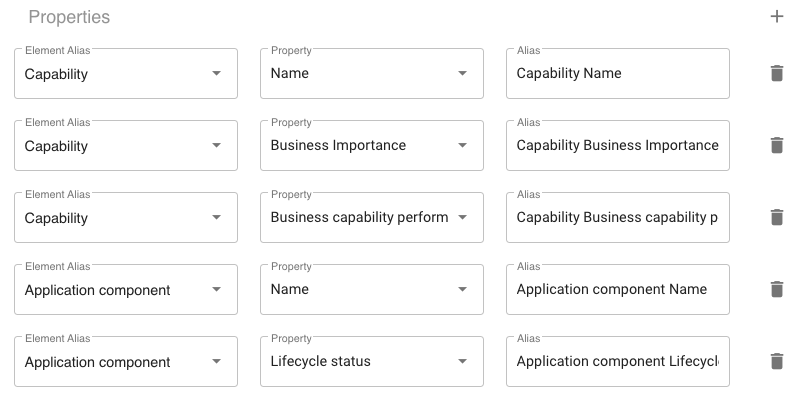
3. Next, select the properties of the objects you wish to display (these will be used as columns within your table)
a.If you wish your Table to take context you must include the ID as a property of the element e.g. A table displaying all application components from a context Capability would require a property of ID from Capability.
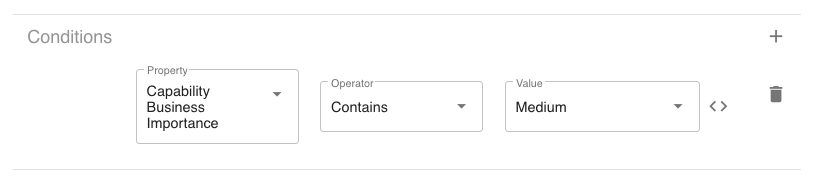
4. If you wish, you can also set Conditions on your properties. For example for Capability: Business Importance, only return those that are Medium
5. Only if you are taking context from another object must you select an Attribute to Apply Context To. If you don't require context skip to step 6.
6. Finally, users can configure their Display Attributes. Users can:
a.Re-arrange
b.Remove (perhaps if an ID is used for context purposes)
c.Set read-write permissions
d.Set tooltip attribute
e.Configure Click Behaviour
7. Once complete, click Save.
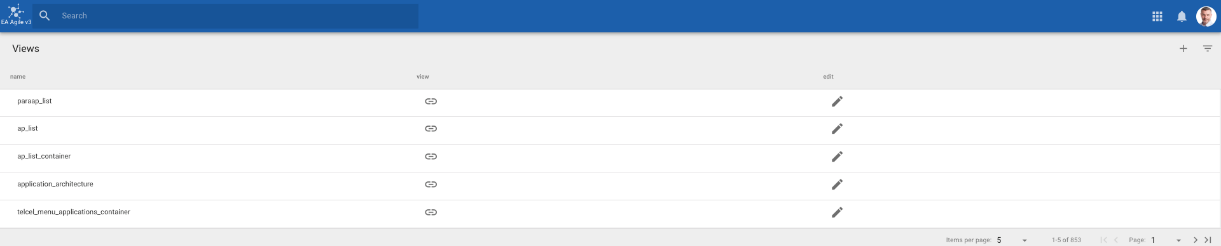
Views
How Do I Create a New View
|
|
There are two main ways to create a new view in the erwin EDGE Platform: Through the System menu or when in Configuration Mode, through the blue + button found in view selection lists. |
The following instructions explain how to create a View on the erwin EDGE Platform. Every View involves the same basic steps found below. Once you have followed these intial steps you will need to configure the type of view you have selected.
Through the system menu
1. Go to System > Views
2. Click on the + button in the top right corner
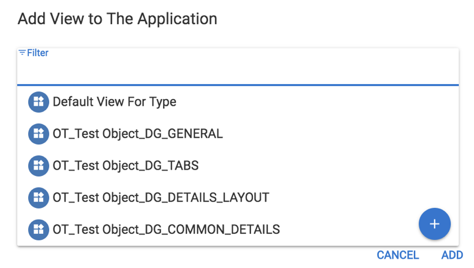
3. Click ‘+ Add View to The Application’
4. The following box will appear on the screen
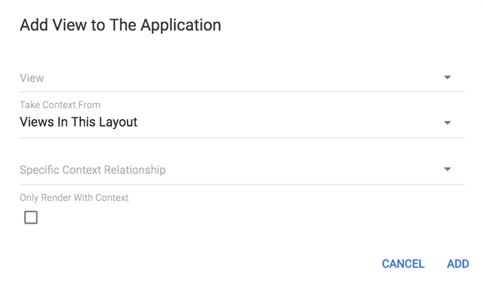
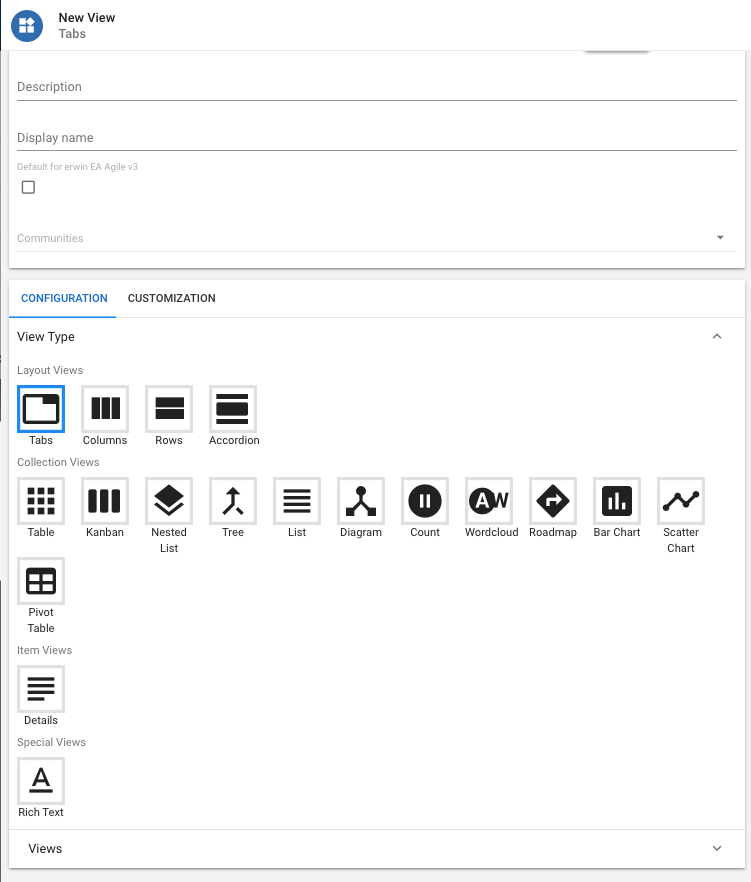
5. Click on the View field and click the blue + button to open a New View panel
Through a view selection list
1. Click on the blue + button at the bottom of the list when you click on a View field
2. This will open up a New View panel.
Configuring the New View
|
|
There are two types of Views on the erwin EDGE Platform: UX Views & Object Type Views. UX Views are used to provide a value-driven workflow for different roles. Object Type Views provide a view of an Object Instance in the model that answer specific questions about that Instance. |
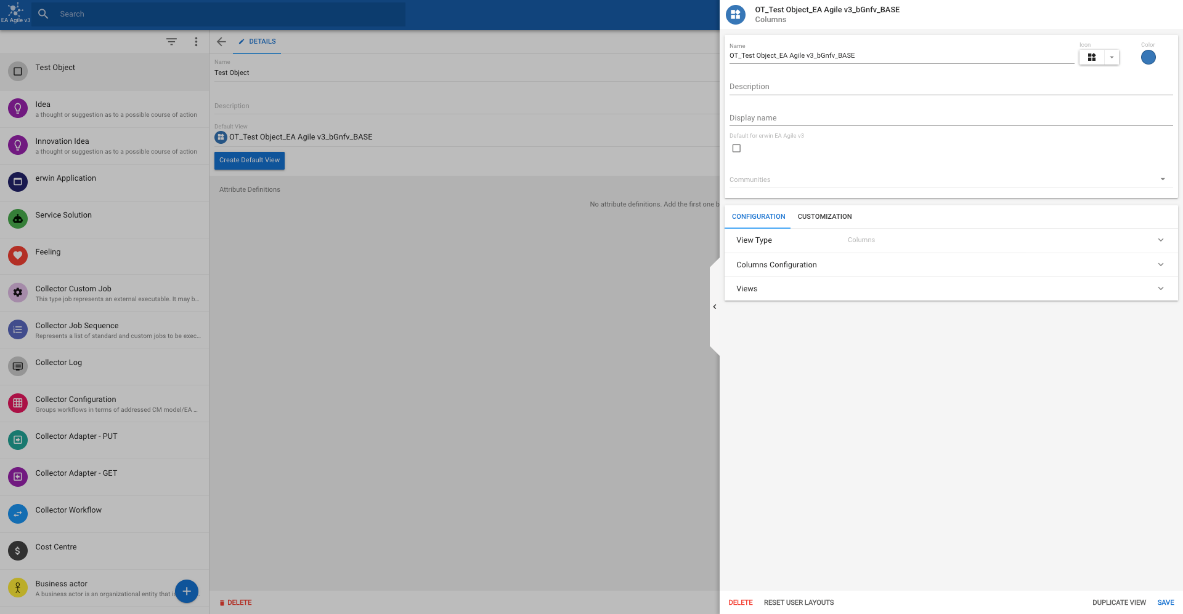
1. In your new View you will need to name the New View (this will be the name you use when you wish to create a path to your view), create a Description and give it a Display name. You can also give the view an Icon and Color
a. If you wish the View to only be seen by certain communities, you are able to select those in the ‘Communities’ field. If you wish the View to be seen by all leave this field blank
2. You will now need to choose what type of View you wish to have. We will go through in more detail the different types and how to set them up below.
Default View
How Do I Create a Default View for an Object Type?
|
|
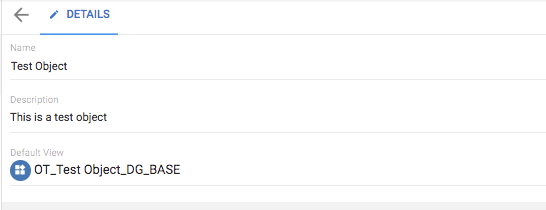
Default views are a set of standard view configurations created by the erwin EDGE Platform These views will allow you to see object instances e.g. when clicked on in a list. The Default Views consist of a base view displaying Object Type icon, a ‘Details’ tab with Object instance Name & Description and an accordion view with panels; ‘General’ & ‘Audit’ |
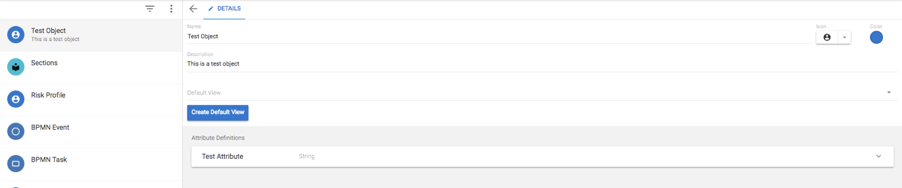
1. Select an Object Type from the list view in Settings > Object Types
2. Click ‘Create Default View’ and then OK to confirm
3. Once you have finished click ‘Save’ in the details pane.
|
|
The erwin EDGE Platform has now created a default view for your Object Type, so you are able to view it and its Attributes throughout the system. Each default view consists of a ‘Details Tab’ which will include basic information about your Object and an Accordion view of General Attributes and Audit Attributes. You are able to configure and add to these views, this is covered in ‘How Do I Edit Object Type Default Views’ below |
How Do I Edit a Default View for an Object Type?
|
|
The default view on the erwin EDGE Platform provides a basic set of views displaying basic Attributes. In order for a default view to provide value you will need to configure it to display information relevant and important to you. |
Display additional Attributes in the Accordion
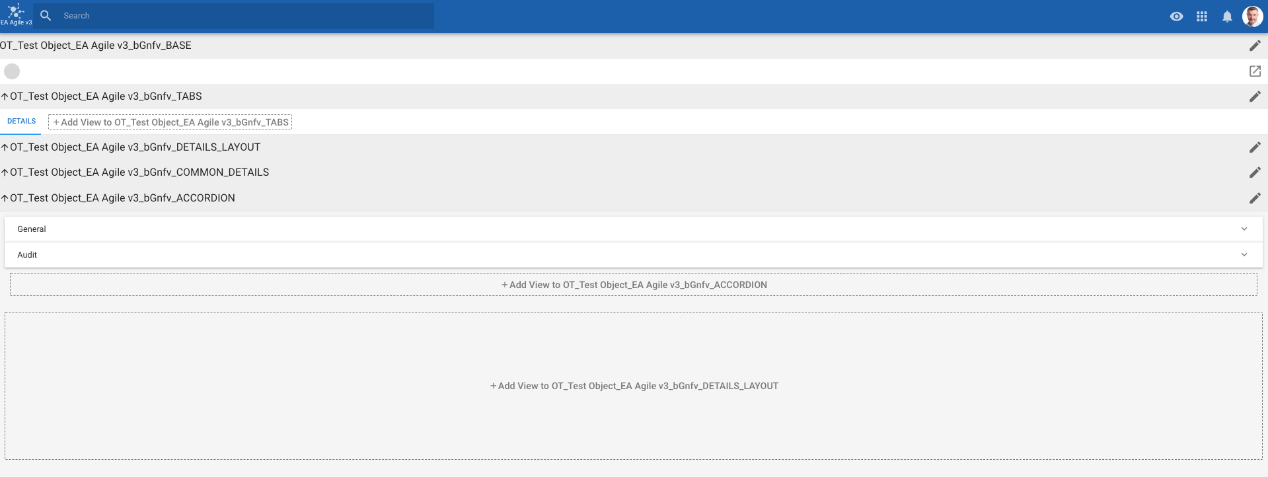
1. Through either the System Menu or clicking the Configuration Mode button find the view you wish to edit
2. Continue through Views by clicking on the Configuration Icon until you reach the Accordion View
|
|
The Accordion View is made up of Details Views which display Object Type Attributes. To display the Properties you want in a new Accordion panel you will need to create a Details View. |
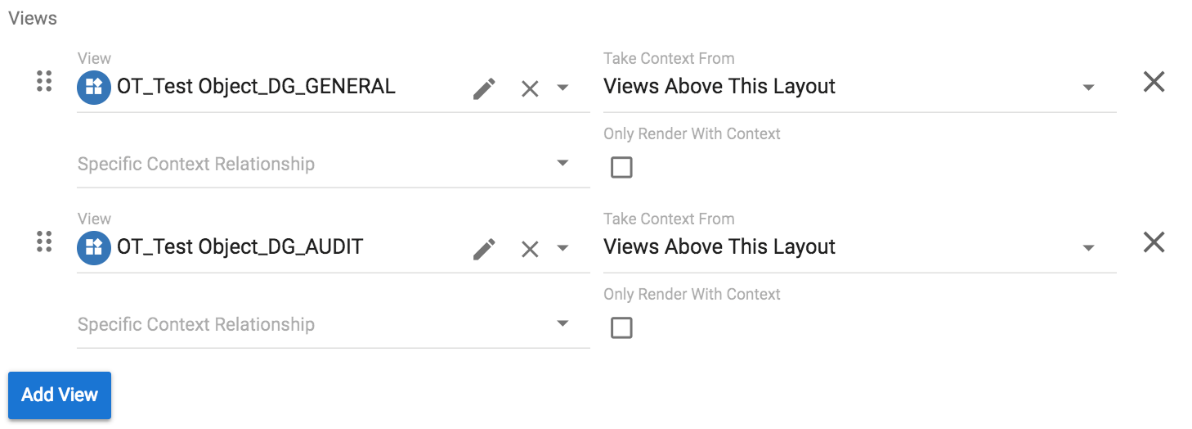
3. Click 'Add View' to bring up a blank View form
4. Set Context to 'Views Above This Layout'
5. Following the New View help file, create a new Details View.
|
|
Note, as you're in configuration mode you will need to follow the instructions found at the bottom of the New View guide. |