Chat now with support
Chat with Support

On Demand Migration Current - Active Directory Domain Move Quick Start Guide

Step 4: Move Domain

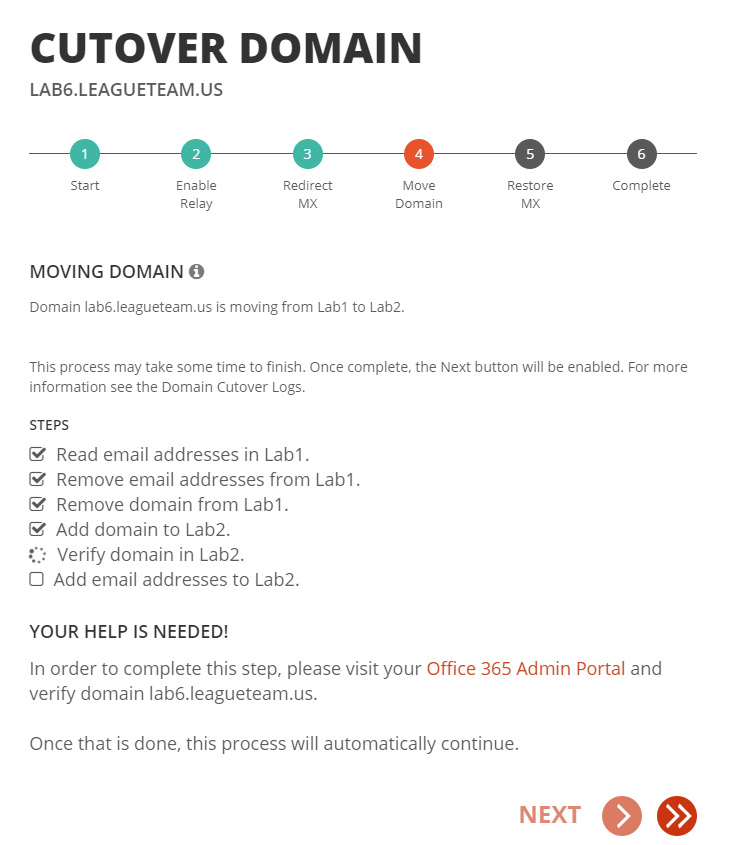
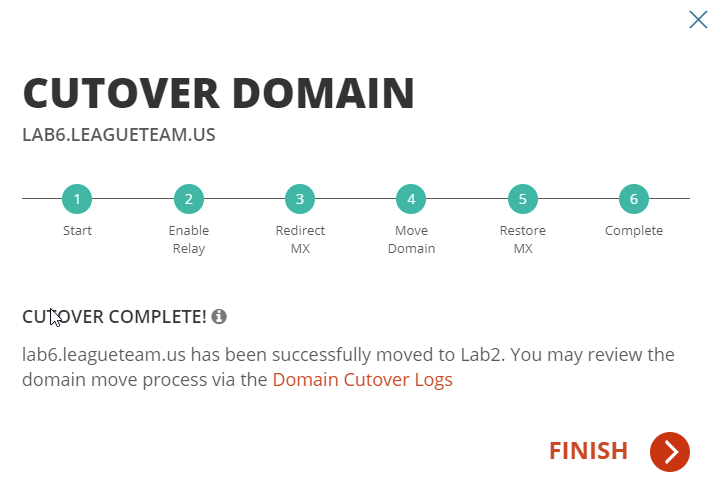
Steps 1 - 4 and 6 are done automatically by On Demand Migration for Active Directory. Step 5 is a manual procedure that you must complete.

  1. Read the email addresses from the source tenant.
  2. Remove the email addresses from the source tenant for all objects.
  3. Remove the domain from the source tenant.
  4. Add the domain to the target tenant.

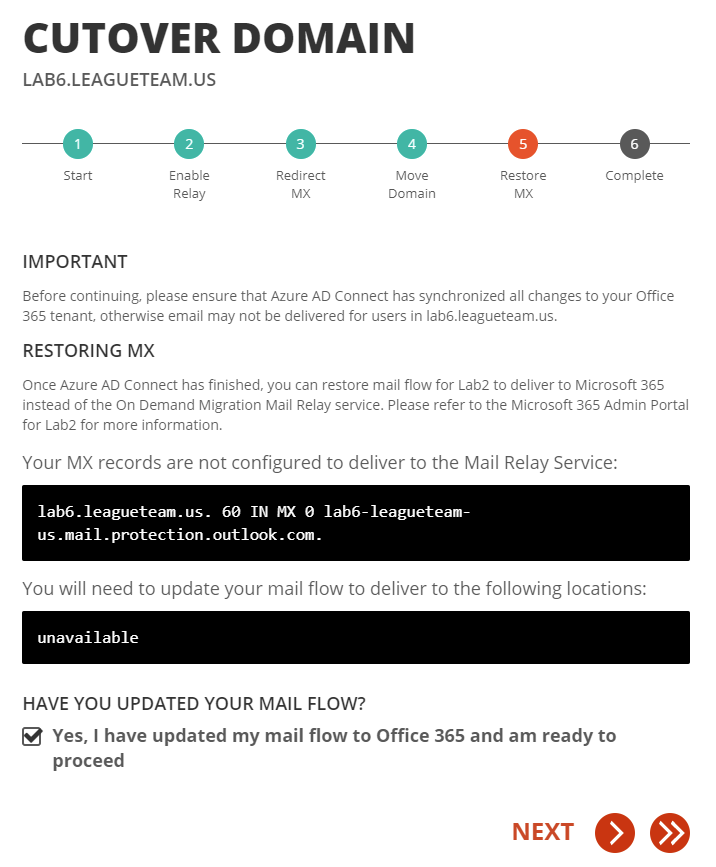
    NOTE Any errors encountered during these steps will be shown on-screen and with an automated email notification. Migration administrators will need to remediate these errors before the domain move can continue.  Email delivery will not be interrupted however, if the Advanced Mode was selected.  Be sure to review the frequently asked questions in the FAQ & Known Limitations section.

  5. Log into the Microsoft 365 admin portal for the target tenant and verify the newly added domain.

  6. On Demand Migration for Active Directory automatically adds the email addresses to matched objects in the target tenant using the target address setting previously selected. 

Step 5: Restoring MX

  1. Restore the domain MX record now that email addresses have been added to the matching target objects.  Select Yes, I have updated my mail flow to Office 365 and am ready to proceed and click Next

    NOTE After the MX record is updated to point back to Microsoft 365, all external incoming email messages will be delivered directly to the target tenant and the Email Relay Service (ERS) will stop processing any new incoming emails.

Step 6: Completing Domain Move(Step 6)

NOTE This process can take up to 48 hours to complete.  This will not affect mail delivery as all email is sent directly to the target tenant.

  1. The Domain Move has completed successfully at this point, click Finish.

  2. On Demand Migration for Active Directory will now remove the Email Relay created at the start of the domain move.

Validating the Result

This section provides a step-by-step guide on how validate the domain in the target tenant.

  1. Validate that the domain is added as an accepted domain in the target tenant.  Connect to the target tenant with an Exchange Online PowerShell session and run “Get-AcceptedDomain”.  Confirm that the domain has been added as an Authoritative domain in the tenant.

  2. Validate the domain was added as the Primary Email address by checking On-Premise and Cloud objects.

    On-Prem Objects

  • Open Active Directory User and Computer in the target Active Directory

  • Select an object that has the domain moved and open the properties window.

  • Select Attribute Editor and navigate to the ProxyAddresses attribute. Confirm the domain is listed as the primary SMTP address for this object.


    Cloud Objects

  • Open a remote PowerShell session to the target tenant.

  • Run the following PowerShell script and verify the domain is added as the Primary SMTP Address for the object.

    Get-Mailbox Lab1JuneMail10 | Select-Object -ExpandProperty Emailaddresses


Related Documents

The document was helpful.

Select Rating

I easily found the information I needed.

Select Rating