Creating a Basic Report Page
|
2 |
|
3 |
|
4 |
|
5 |
Click OK. |
|
6 |
|
7 |
|
8 |
|
9 |
|
10 |
On the right of Purpose, click Edit |
|
11 |
|
12 |
This context is useful if you embed the report in a container, such as a Grid Layout, and then choose Show Title in the layout configuration for the report, which in this case must be purposed as a Pagelet as well as a Report.
|
1 |
Open the Context tab. |
|
2 |
|
• |
Key: title |
|
• |
Name: unchanged |
|
• |
Usage: Optional |
|
• |
List: False |
|
• |
Data Type: Common:String |
|
3 |
|
4 |
In the Edit - Context Input Entry “title” dialog box that appears, in the String value box, type Utilization Report - Hosts, and then click Set. |
|
1 |
Under Additional, click the Add Context Entry |
|
• |
Key: hostmodel |
|
• |
Name: unchanged |
|
• |
Evaluate Once: Selected |
|
2 |
|
3 |
In the Edit - Context Entry “hostmodel” dialog box that appears, click the Query box, and choose My Queries > Host Model T5. |
|
4 |
Select the Return First Object in List check box. |
|
5 |
Click Set. |
You are about to use this context input to the table of hosts that we construct shortly.
|
1 |
Under Additional, click the Add Context Entry |
|
• |
Key: hosts |
|
• |
Name: unchanged |
|
• |
Evaluate Once: Cleared |
|
2 |
|
3 |
In the Edit - Context Entry “hosts” dialog box that appears, click the Input Key box, and choose hostmodel (Host Model) from the list that appears. |
|
4 |
|
5 |
Click Set. |
|
6 |
Optional. There are two other internally-generated contexts associated with the component: Page Number and Current Time, both of which are optionally available for use in header and footer views. To use these, create context input keys in the child views with the following values: |
|
• |
Key: pageNumber |
|
• |
Data Type: Common:Page Number |
|
• |
Key: currentTime |
|
• |
Data Type: Common:Date |
|
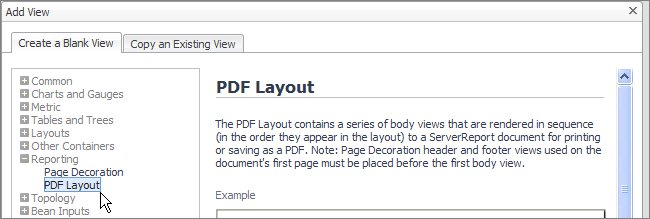
TIP: The PDF Layout component provides two additional special contexts: pageCount and reportTitle. For more information, see the Web Component Reference. |
Define a page orientation and title for the report
|
1 |
Open the Configuration tab. |
|
2 |
In the Page Orientation row, in the Value column, click Edit ( |
|
3 |
In the Title row, in the Value column, click Edit ( |
|
4 |
In the Edit - Title dialog box that appears, click the Input Key box, and select title (String) from the list that appears. |
Adding a sample view to the report
You create pages for the report later on in this tutorial. For now we just want to test basic report construction. There is an existing table in Foglight® that has the same context as needed later on in this tutorial, so we will use it for now.
Next, we add this table to the report.
|
1 |
Open the Views tab. |
|
2 |
|
3 |
In the Select a View to add to the Report dialog box that appears, choose an appropriate view under Hosts > Host. For example, Hosts > Host > Host Summary. |
|
4 |
Click Save. |
|
5 |
On the Views tab, in the row containing the newly-added view, ensure the Function column is set to Body. |
|
TIP: The other possible choices in this column are Header and Footer. You add a header and a footer to your report later on in this tutorial. |
|
6 |
|
TIP: The other possible choices in this column are Before, After, or Both. The settings control the placement of page breaks. You can choose to have a page break before, after or both before and after this view. We choose None because this is a single page report. There are no other views. |
|
10 |
In the Input Values dialog box that appears, change the values for the time range and title. Choose a range during which you know some activity has occurred and then click the Results button. |
Creating a More Elaborate Hosts Table
A view like the one you just used serves as a useful introductory item to Foglight® reporting features. This report can be refined to show numerical data supplemented by time plots. This time you build it yourself.
|
2 |
|
3 |
|
4 |
|
5 |
Click OK. |
|
6 |
Populate the values on the view’s General tab as follows: |