Chat now with support
Chat with Support

Migrator for Notes to SharePoint 6.15 - User Guide

Migrator for Notes to SharePoint Migrator for Notes to SharePoint Console
Overview Console configuration using the setup wizard Advanced configuration options Database discovery QuickPlace/Quickr discovery Domino.Doc discovery Discover directory entries Import database records Notes databases Applications Classification Rules Classification Rule Properties SharePoint Targets Scheduled tasks Reports Task history Link Analyzer/Updater/Finalizer License
Migrator for Notes to SharePoint Designer Migration jobs Appendix: Reference information

Reports

All reports are found under the Reports node. Each report is represented by a tree node. A number of standard reports are provided that summarize or detail the data collected by the user. The standard reports are found directly under the Reports node. They cannot be edited or customized within the console.

Microsoft Report Viewer 2012 is used by the console for viewing all reports. If this component is not installed, the reporting functionality will be not enabled. Report Viewer 2012 may be downloaded from the following location: http://www.microsoft.com/en-us/download/confirmation.aspx?id=35747.
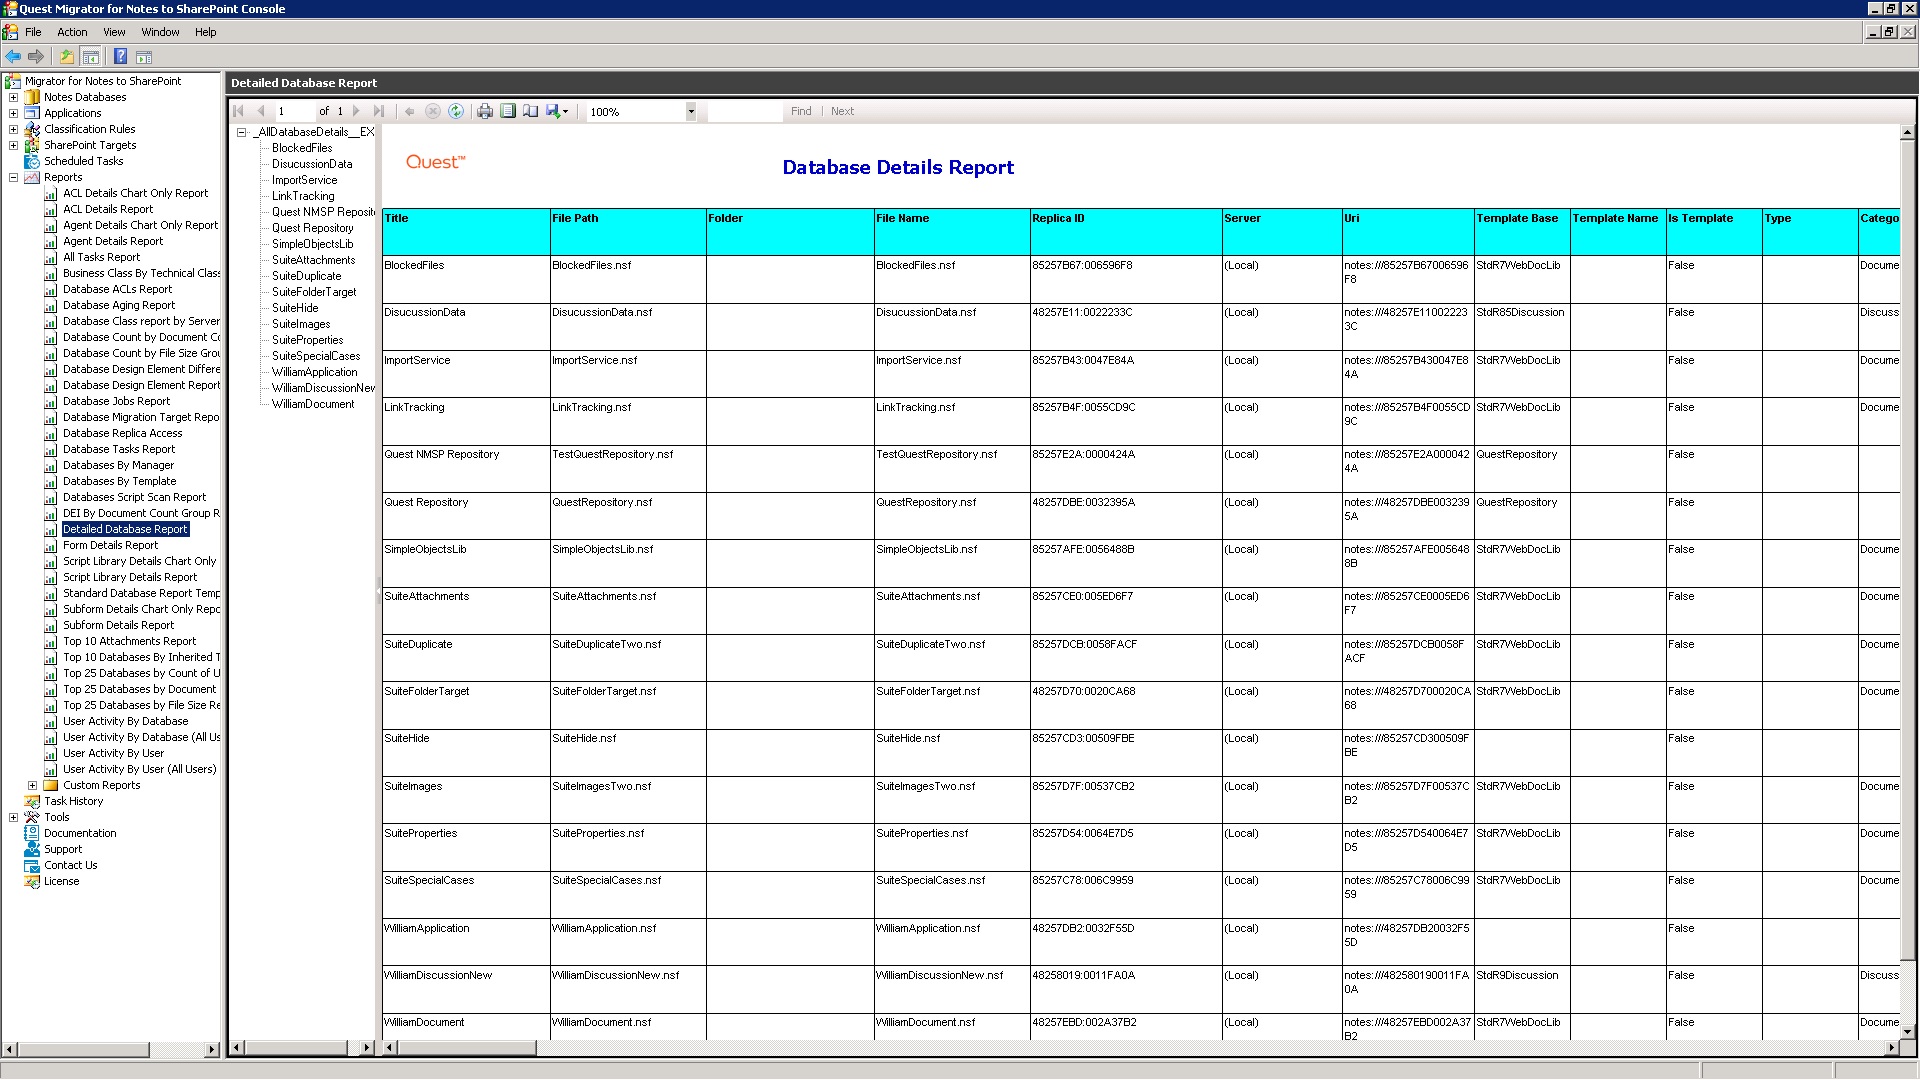
To view a report, select the corresponding report node. The resulting report can be viewed in the Results View. From the Results View, you can navigate through the pages of the report, print the report or export the report using the report toolbar on the top of the Results View.

For more information on the Report Viewer capabilities, go to http://msdn.microsoft.com/en-us/library/ms251671(VS.100).aspx.

Standard and advanced reports

The installation adds several report XML and RDLC files in the Standard Reports folder. Reports shipped with the console are listed as children of the Reports node and cannot be edited or customized within the console.

Each report consists of:

The following is a list of Standard Reports:

The following is a list of Advanced Reports:

Report dataset supports the following tables:

The RDLC report files contain the dataset schema needed to design reports. There is no external XSD schema file provided containing this information. When using the Create New Custom Report feature described below, a starter RDLC is created containing the dataset schema ready for designing the report in a suitable 3rd party tool such as Visual Studio Professional.

Custom reports

In addition to the standard reports that are provided, users can design their own.

All custom reports appear under the Custom Reports scope node under the Reports node. The Custom Reports node has actions to add, edit or delete Reports.

2
Select Create new custom report from the Actions pane or context menu.
Table 48. Custom reports

Report Title

The name of the report

Description

The description of the report

RDLC Template

The report definition file the custom report will be based on. Click the Browse button to search on all available templates. You can use an existing template from any place on the network. The default location is the Standard Report folder since this is where the Migrator for Notes to SharePoint standard report templates are located.

Edit

Click the Edit button to launch the currently installed report editor to design the report. If the template that you have chosen is sufficient, there is no need to use the Edit button

If you do not have a supported report designer installed, clicking Edit will generate an error message indicating this.

For detailed information on the available reporting dataset columns that you can use in your custom reports, see Migrator for Notes to SharePoint reporting data tables .

Database Scope

The database scope node that the custom report will be based on. The custom report will be a filter of this scope node’s result set

Filters

Select one or more check boxes for the data types you want to filter the result set on. The data type button on the right of the check box will activate. Select the button to specify the filter. Check one or more of the check boxes that correlate to the data you want displayed in your report. You can deselect a check box by selecting it again

2
Select Customize Report in the Action pane or context menu.
2
Select Delete Report from the Action pane or context menu.
2
Select Copy Report from the Action pane or context menu.

The Copy Report function performs the following actions:

Other view properties such as column selection, column ordering and sorting are defined using the View menu item of the Actions pane. Select the submenu item Add/Remove Columns to change the report’s column selection as well as to reorder the columns. The Sort By menu items allow you to change the field that the report is sorted on.

Another way to add a new custom report to the Console is to simply add the report’s RDLC and XML files to the Custom Reports folder. The next time the Console restarts or refreshes, the new report nodes will appear under the Custom Reports node.

To share a report, you can copy the .XML and .RDLC files from your Custom Reports folder to another user’s Custom Reports folder.

With new releases of the Migrator for Notes to SharePoint Console, additional reporting fields and tables may be provided, or existing ones renamed. Older custom reports may need to be updated in order to be compatible with the newer dataset schema.

To support this, the Update Report Definition action is available when a custom report is selected. This action will create a time-stamped backup of the current report RDLC file prior to performing the required upgrade of the report’s dataset definitions. Once the report is updated, new tables and data columns are available for customizing the report.

The Update Report Definition action is only available for reports within the Custom Reports folder and is usually only necessary in the following cases:

Task history

All long running tasks are managed using a common task management facility found in the Task History node. When a process is run in the Console, Task Records are created and either dispatched to worker threads that perform the actual work or added to a task management queue, in which case they are performed serially in a predetermined order.

When the Task History node is selected, the Results View of the console shows a list of all tasks (pending + running + recently completed). This view is automatically updated in real time.

The view displays the following information for each task listed:

Each task record and its details are viewable in the task property sheet. If a running task is being viewed in a property sheet, the information on the property sheet updates as the task status changes.

Certain tasks such as migration jobs, will generate a log file. The log files are saved as part of the Task Record in the Repository. When a log file becomes available, additional tabs are displayed in the task property sheet. These tabs are the summary and detailed versions of the log file similar to the Migrator for Notes to SharePoint Designer log viewer. For more information, see Migration job logging. Log files can be exported to the file system by selecting the Export Log task action once the task is selected in the results view. To migrate the failed items for a task, right click on the task, and click Migrate Failed Items. For more information, see Migrating failed items.

Additionally, the Task Records that relate to a particular database should be displayed in that database's Migration History tab of the database property sheet.

Any tasks that are tied together to run sequentially, like running multiple migration jobs for a single database, are displayed as separate tasks with a wrapper task, for example "Content Migration Sequence".

One or more tasks can be purged from the Repository by selecting the tasks in the results view and the selecting the Delete action from the Action view.

Related Documents

The document was helpful.

Select Rating

I easily found the information I needed.

Select Rating