What is a Workflow?
A workflow is a configurable series of steps that provides an easy automation framework to connect and manage Directory object synchronization. Activities such as creating, updating and deleting objects along with property/attribute synchronization and transformation. In addition, workflows may also include a PowerShell script to be executed based on the workflow rules. Providing greater flexibility and extensibility to the workflow automation.
Where do I manage Workflows?
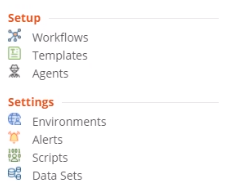
To manage workflows, simply open the left navigation menu and click Workflows, located under Setup, see figure 1.
Figure 1: Directory Sync Setup and Settings Menu
What should be entered as the Workflow Name?
You can name your workflow anything you'd like but remember that you may be referencing the same environment in multiple workflows. We suggest a name that generally describes the flow of objects. Then use the description field for the distinguishing characteristics. After this step, the wizard will guide you through all the necessary components that will make up your workflow.
What should be selected for Workflow Type?
The workflow type choice determines which default set of workflow steps that the wizard will guide you through. No matter what choice you make here, you can always customize your workflow steps at any time, so if you aren't sure, start with a one-way sync. Once you have learned what settings work best for a particular project, you may want to enter those settings in an XML file and import it here so that you can easily recreate the steps for similar workflows. You can download the sample file and then customize to your needs, then import it.
What are the steps to create a Workflow?
When you create a new workflow, the wizard will ask you to choose a type of workflow. It will then prepopulate a workflow for you with the appropriate steps. You can modify this, or, start from scratch. We will start from scratch, to examine the possible steps that you will need for any workflow.
- First is Read From. Here is where you will choose the environments that have the objects that you would like to use for matching and mapping, and ultimately for possible migration to a target environment. If you plan a many to one migration, you would choose several sources here. You have to have at least one environment to read from in any workflow. One Read From step can include several sources, so you don’t need a separate read from step for each one.
- Match objects is next. Here is where you choose the environments to compare, AND, the criteria that Directory Sync will use to decide if an object in one environment is the same object as found in another environment, which we call a match. If you don’t read from an environment, you cant choose it here.
- It is very important that the matching attribute selected is a unique value for that attribute in source. Selecting an attribute that is not unique could result in multiple source objects matched to a single target object. If UserprincipalName is selected as a matching attribute for both Source and Target, only the prefix data will be used for matching, however the mail attribute will require an entire string match including the prefix and domain suffix.
NOTE: Objects created by Directory Sync will not be matched until they are read and matched by running the Read and Match workflow task.
- The Stage Data step is required next. Stage Data is where you customize your workflow action. You will be asked to choose a template. A template contains specifc preferences that you can reuse, such as password options, and attribute mappings. You will choose your source and target environment pairs here. And again, you will only be able to choose those environments that you have read from. You will be able to choose your source OUs and even set up some OU filters if you want to narrow your scope.
- And finally, you need to include at least one Write To environment. After data has been matched, mapped and filtered, what is your target, where do you want to place the new objects, and/or sync objects that were considered a match?
How is a Workflow scheduled?
You can run your workflow manually or choose to run at specific time intervals. Or choose a time of day. The minimum time interval is 15 minutes. No matter what you choose as part of the wizard, you can always trigger a manual run of a workflow from the welcome screen. You can access the welcome screen at any time by clicking the Directory Sync logo at the top left.
The set interval can be changed on the Discover tab of the Local Environment settings.
Can objects be deleted?
A Delete Objects step is also available. If an object is removed from scope and/or deleted from the Source, any matching object on the Target will be deleted. To configure this step, you must enter Source/Target endpoint pairs and a threshold (the max number of objects to delete per pair).
Can a PowerShell script be run?
An optional additional step would be the run PowerShell script step, in which you can choose a PowerShell script that will run each time the workflow is run.


