Prior to Evolve 2018, diagram hierarchy navigation was performed purely through the diagram drill downs, and an in-page bread crumb trail. This trail was only integrated into the page, and could cause a little confusion with regards to the outer page content. Since the 2018 release a new diagram navigation has been added, that offers a much more visual experience.
As with Smart Crumbs, the Diagram Navigator feature is always enabled, and available to all users.
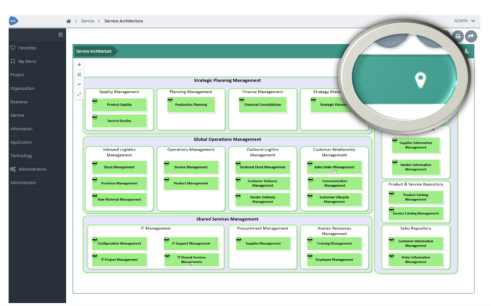
You will see this new feature as a simple icon above any diagram in your site. See below:
•When viewing a diagram, pressing the new icon will launch the Diagram Navigator
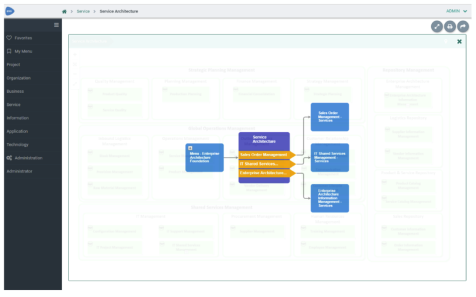
•The navigator will show the current diagram at the centre, with arrow-nodes representing each shape on the diagram, that drills down to child diagrams.
•Selecting one of these arrow-nodes will highlight the single/multiple child diagrams that 'explode' from this shape.
•Selecting the child diagram shapes, will display a diagram preview at the top left of the Navigator
•Double-clicking on a child shape will drill down and re-center the Navigator around that diagram.
•Clicking on the "open" icon on any of the diagram shapes, will open the diagram fully.
|
|
Both Smart crumbs and Diagram navigator are available, provided you are running version 2018 or above. |
Related Topics
The Share Diagram feature enables you to share a diagram's link with your collaborators in multiple ways.
To share diagram links via erwin Evolve Designer:
1.Open the browser and login to erwin Evolve Web Platform.
2.Click a model.
For example, EA Foundation – Sample Model.
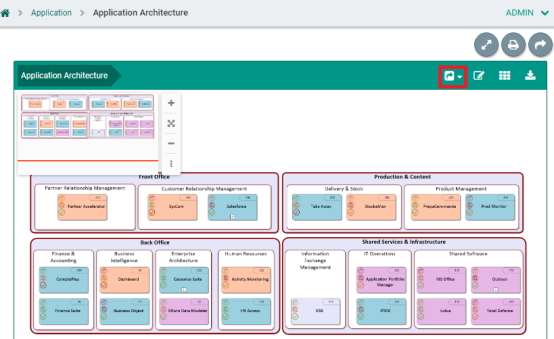
3.Click Application.
4.Drill down to any application diagram.
For example, click Application > Application Architecture.
5.Click 
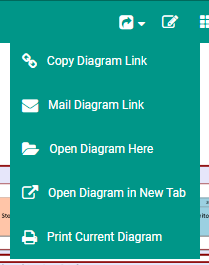
The available options to share diagram link appear.
6.Select the appropriate option. Refer to the following table for option descriptions.
|
Field |
Description |
Additional Information |
|
Copy Diagram Link |
Copies the current diagram's link |
Even in case of drilled-down diagrams, this option copies the link to the current drilled-down diagram. |
|
Mail Diagram Link |
Opens a draft email with the current diagram's link |
|
Apart from sharing diagram links, you can also open or print the diagram. Refer to the following table for option descriptions.
|
Field |
Description |
|
Open Diagram Here |
In case of drilled-down diagrams, this option opens the drilled-down diagram in the same window as the root diagram |
|
Open Diagram in New Tab |
Opens the current diagram in a new tab in the web browser |
|
Print Current Diagram |
Open the Print options for the current diagram |
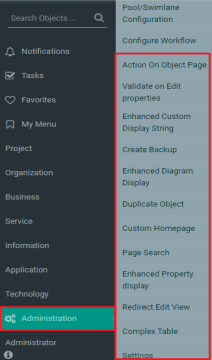
A new module, Administration, has been is added to erwin Evolve site, where you can configure new options for object pages.
|
|
To be able to use the enhanced plugins, ensure that you have applied upgrade instructions. For upgrade instructions, refer to the Upgrading to Evolve Suite 2024.0 topic in the erwin Evolve Web Platform Installation Guide. |
What do you want to do?
Enable Validate on Edit properties
Enable Enhanced Custom Display String
Enable Enhanced Diagram Display
Enable Enhanced Property Display
The Action On Object Page feature enables condition-based messaging, hiding, or highlighting of object pages.
Hover over 
To configure the Action on Object Page feature, follow these steps:
1.Open the browser and login to erwin Evolve Web Platform.
2.Click a model. For example, EA Foundation – Sample Model.
3.Click Administration.
4.Click Action On Object Page.
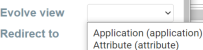
5.Click the Evolve view drop-down list box and select the required option.
6.To create an operation, click the Add New icon.
7.Enter appropriate values in the fields. Refer to the following table for field descriptions.
|
Field |
Description |
Additional Information |
|
Name |
Specifies the operation name |
|
|
Description |
Specifies the description of the operation |
|
|
Don’t Apply to these Roles |
Specifies Evolve roles that do not apply to this operation |
|
|
Order |
Specifies the order of operation Note: Use up or down arrow to change the order of operation |
|
|
Filter |
Specifies the filter option to filter the values for operation |
To add a filter, click 1.Click the Property drop-down list box, and select the required option. 2.Click the Operator drop-down list box and select the required option. 3.Use Value or drop-down list to specify the property value. |
|
Action |
Specifies the types of action. For more information, refer to the Types of Action. Note: The action you select applies to the Filter you select. |
|
|
Element affected |
Specifies the affected elements |
Available when Action is set to Hide or Highlight |
|
Select Tabs |
Specifies the selected tabs |
Available when Action is set to Hide or Highlight and Element affected is set to Tabs |
|
Selected Property Groups |
Specifies selected property groups |
Available when Action is set to Hide or Highlight and Element affected is set to Property Groups |
|
Selected View |
Specifies selected views |
Available when Action is set to Hide or Highlight and Element affected is set to Views |
|
Class HTML |
Specifies an HTML class |
Available when Action is set to Hide or Highlight and Element affected is set to Css Class |
|
ID HTML |
Specifies HTML Id |
Available when Action is set to Hide or Highlight and Element affected is set to Html Id |
|
jQuery Selector |
Specifies the jQuery Selector |
Available when Action is set to Hide or Highlight and Element affected is set to jQuery Selector. |
8.Click 
You will be notified that "Configuration draft has been saved".
9.Click 
You will be notified that "Configuration published successfully".
Now, on the object page, you can perform the following actions:
Hide
Use this option to hide Tabs, Views and Property Groups.
You can also hide the following information if you are more experienced with web development:
oCss Class
oHtml Id
ojQuery Selector
Highlight
Use this option to highlight Tabs, Property Groups, Views, Css Class, Html Id, or jQuery Selector.
|
|
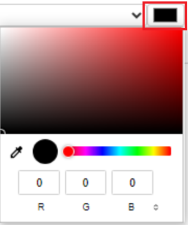
Highlight works like Hide but adds a color border to the selected element. You can choose what color to use. |
You can change the color of the affected elements. Click 
Display Message
Use this option to display a message on the object page. Use the following options:
oSelect Tabs
Use this option to select a tab on which you want to display a message. To select a tab, click the Select Tabs drop-down list box and select the required option.
oSelect Picture.
Use this option to upload a picture to display on the object page.
To upload a picture, click 
|
|
You can only upload pictures up to 2 MB. |
oWidth
Use this option to set a picture's width.
For example, 200.
oHeight
Use this option to set a picture's height.
For example, 200
oIcon
Use this option to select an icon. You can also change the color of an icon. To change the color, click
oText
Use this option to enter a text to display on the object page.
oPreview
Use this option to preview the picture, icon with color, and text.
Word Template
Use this option to add Word document on the object page.
|
|
It only supports .docx file type. |
|
|
Ensure that you have the word Templar at the following location before adding a url link:http://localhost/evolve/data/easamp14/live. |
In the Url Template box, enter the word file url.
For example, http://localhost/evolve/data/easamp14/live/generated/wordfile.docx
You can now see the 
Double-click